Table of Contents
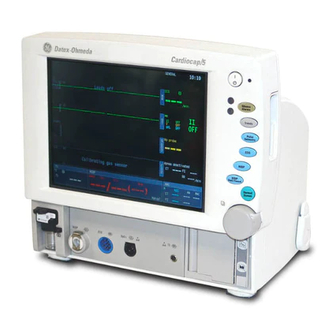
GE Datex-Ohmeda Cardiocap
/5 for Anesthesia
™
Related to software S-XANE 01
User's Guide
053 7
Conformity according to the Council Directive 93/42/EEC concerning Medical Devices
CAUTION: U.S. Federal law restricts this device to sale by or on the order of a licensed medical practitioner.
Outside the USA, check local laws for any restriction that may apply.
All specifications are subject to change without notice.
Document no. M1031869-01
August 2004
Datex-Ohmeda Inc.
Datex-Ohmeda Division,
P.O. Box 7550
Instrumentarium Corporation
Madison, WI 53707-7550, USA
P.O. Box 900
Tel: +1-608-221 1551
FI-00031 DATEX-OHMEDA, FINLAND
Fax: +1-608-222 9147
Tel: +358 10 39411
Fax: +358 9 1463310
www.us.datex-ohmeda.com
www.datex-ohmeda.com
Table of Contents

Related Manuals for Datex-Ohmeda Cardiocap/5


Summary of Contents for Datex-Ohmeda Cardiocap/5
- Page 1 GE Datex-Ohmeda Cardiocap /5 for Anesthesia ™ Related to software S-XANE 01 User’s Guide 053 7 Conformity according to the Council Directive 93/42/EEC concerning Medical Devices CAUTION: U.S. Federal law restricts this device to sale by or on the order of a licensed medical practitioner.
- Page 2 • The equipment is used in accordance with this guide includes monitoring during conditions of clinical patient motion. Cardiocap/5 is indicated for patients weighing 5 kg (11 lb.) or more. Trademarks Impedance respiration measurement is indicated for patients ages Datex®, Ohmeda®, and other trademarks S/5, D-lite, D-lite+, Pedi-lite, 3 years and older.
- Page 3 Later in this manual the following acronyms will be used for clarity to refer the monitor options. Note that depending on the monitor configuration you may not have all of the options or functionalities. Abbreviation Description Order code F-MX Cardiocap/5 Hemodynamic Frame 6050-0005-614 F-MXG Cardiocap/5 Hemodynamic Frame 6050-0005-617 with gas measurement S-XANE01...
- Page 4 SAFETY PRECAUTIONS These precautions refer to the entire system. Precautions specific to parts of the system can be found in the relevant section. may cause a risk of contamination and affect the Warnings measurement accuracy. A WARNING indicates a situation in which the user or the patient •...
- Page 5 • Service and reparations are allowed for authorized service Cautions personnel only. • CISPR classifications: A CAUTION indicates a situation in which the unit or devices connected to it may be damaged. Group 1 contains all ISM (industrial, scientific and medical) equipment in which there is intentionally generated and/or •...
-
Page 7: Table Of Contents
CONTENTS Monitor Introduction..............1 Pulse Oximetry ................25 Performance................1 Non-Invasive Blood Pressure (NIBP) ...........29 Symbols ..................5 Invasive Blood Pressure .............31 Monitoring Basics............... 7 Temperature ................33 Monitor Keys and Menus ............. 9 Airway Gases................35 Display Setup ................11 Patient Spirometry ..............37 Alarms .................. -
Page 8: Monitor Introduction
(F-MXG). You can enhance the functions of the monitor with different factory-configured options. Due to these different factory configurations, some menus, displays, and functions described in this manual may not be available in your monitor. You can use the Cardiocap/5 monitor as a stand-alone monitor or connect it to the network. See “Data Management”. - Page 9 Rear panel Built-in lifting slot Gas outlet, X6 Remote Control connector, X5 Ethernet connector, X4 Network connection LEDs Network identification plug connector, X3 Serial communication interface / local printer connector, X2 Analog / digital output connector, X1 (includes nurse call and defibrillator synchronization signals) Mounting attachment (10) Dust filter...
-
Page 10: Performance
WARNING: Operation of the monitor outside the specified values may cause inaccurate results. comply with the NIBP (IEC 60601-2-30) and Frequency of respiration sensing current: 31.25 kHz GE Datex-Ohmeda Cardiocap/5 invasive pressure (IEC 60601-2-34) standard Maximum Tall T wave amplitude that does not disturb the requirements. - Page 11 -15 to +350 mmHg NOTE: SpO 2 measurement accuracy is based QRS minimum detection level: on deep hypoxia studies using Datex-Ohmeda NOTE: The cuff pressure measurement range is Minimum level 0.5 mV with duration between Sat Sensors on volunteers. Arterial blood...
- Page 12 Calibrated against functional saturation FiEnf high 5.1%, low Off of approved sensors and accuracy details. Measurement range: 1 to 100% EtHal high 1.5%, low Off NOTE: SpO 2 measurement accuracy is based Measurement accuracy (± 1 SD): FiHal high 2.2%, low Off on testing healthy adult volunteers in induced 70 to 100% ±...
- Page 13 Measurement rise time: < 450 ms typical Airway pressure (D-lite) Stimulus current range (supramax and manual): Accuracy: +/-(2 vol% + 2% of reading) 10 to 70 mA with 5 mA steps Measurement range: –20 to +100 cmH Gas cross effects: < 2 vol% anesthetic agents Stimulus current accuracy: 10% or ±...
-
Page 14: Symbols
SYMBOLS Attention, consult accompanying documents. Type CF (IEC-60601-1) defibrillator-proof protection against electric shock. When displayed beside the O value, indicates that FiO low alarm limit is set below 21%. Indicates the beats detected. When displayed next to the HR value, indicates that there is a risk that the monitor counts Respiration rate is measured using impedance pacemaker spikes because the pacer is set on R,... - Page 15 Ethernet connectors Equipotentiality. Monitor can be connected to potential equalization conductor. Alternating current Fuse Symbol for non-ionizing electromagnetic radiation. Interference may occur in the vicinity of equipment marked with the symbol. Date of manufacturing ESD warning symbol for electrostatic sensitive devices.
-
Page 16: Monitoring Basics
MONITORING BASICS • Check that you have the desired waveforms and digits in the Preparation fields. See “Display Setup”. • Turn on the monitor. See Monitor Keys and Menus. • Carry out measurement-specific startup. See the • Tilt the monitor to the optimal viewing angle: corresponding measurement section in this guide. - Page 17 – 9 –...
-
Page 18: Monitor Keys And Menus
MONITOR KEYS AND MENUS You can control monitoring with the ComWheel, direct access keys, or the Remote Control. The ComWheel, the main navigating tool, provides access to all menu functions. With the direct access keys, you can control most frequently-used functions. (1) Power On/Standby key NOTE: The monitor will start only when connected to mains power. - Page 19 Menu Screen Press the ComWheel to confirm a selection. 4. Press the Normal Screen key to return to the Normal normal monitoring display. NOTE: The Special and Start C.O. keys are not in use with Screen Cardiocap/5 – 10 –...
-
Page 20: Display Setup
DISPLAY SETUP Setting up the display Modes determine how the information is presented (what is Monitor Setup displayed on the screen and trends, etc.) and what the alarm Screen Setup limits are. Modes are preconfigured. The monitor starts in startup mode, which is one of your monitor modes chosen during configuration. - Page 21 Setting the time and date You can display data in up to four digit fields. The clock format is 24 hours. A Cardiocap/5 monitor that is 1. Press the ComWheel and select Monitor Setup. connected to the monitor network follows the time and date settings of the network.
-
Page 22: Alarms
ALARMS After the monitor is turned on or after the case is reset, the alarm limits are activated only when the physiological signals have been inside the alarm limits for 15 seconds. To enable the alarms, connect the patient cables. Alarms are operative even when the measurement is not selected on the screen (except for the respiration measurement), unless the source is selected OFF. - Page 23 Suppressing audible alarms temporarily Adjusting limits For two minutes: Press the Silence Alarms key. 1. Press the ComWheel and select Alarms Setup. For five minutes: Press the Silence Alarms key for more than three 2. Select Adjust Limits and highlight the measurement. seconds.
-
Page 24: Trends
TRENDS Trends view Graphical trend view (1) Trends menu (2) Measurement trend field (3) Real time ECG or measurement trend field (4) Numeric value of a measurement at the trend cursor point Trends Pacer (5) Trend page number hidden Take Snapshot (6) Time and marker field SpO2 Next Page... - Page 25 Creating snapshots and placing markers in trends Automatic and manual information gathering Snapshot is a frozen frame containing 15 seconds of real-time The monitor displays two types of trend information: graphical waveforms (preconfigured waveforms and trends) that are saved and numerical. You can also create snapshots of the to the monitor memory.
-
Page 26: Data Management
DATA MANAGEMENT Collecting and saving information The Cardiocap/5 monitor continuously collects and saves patient data such as trends. Saving is activated when the monitor receives vital signs. Information is saved to: • Monitor memory The most recent case is saved to the monitor memory if neither the network or memory card is in use. - Page 27 Viewing other site alarms (with N-XNET or N-XDNET option) Retrieving information With a networked Cardiocap/5, you can view the alarms of 1. Press the ComWheel and select Patient Data. another monitor on the same Central Network. 2. Select one of the following: To do this: •...
-
Page 28: Recording And Printing
RECORDING AND PRINTING You need Recording waveforms • Built-in recorder for recordings To record waveforms, press the Record Waveform/Stop • Thermal paper for the recorder key. • Laser printer for printouts To stop recording, press Record Waveform/Stop again. NOTE: Recordings on thermal paper may be destroyed when To configure the waveform recording: exposed to light, heat, alcohol, etc. - Page 29 Recording trends Printing Selecting a printer Trends are recorded from the time period that corresponds to the Time Scale setting (20 minutes to 24 hours) in the Trends menu. 1. Press the ComWheel to open Main Menu and select Record/Print. To record the default trend (numerical or graphical), 2.
-
Page 30: Ecg
You need (1) ECG electrodes (pre-gelled electrodes are recommended) Standard electrode positioning with Modified positioning with a a 5-lead set. (2) Trunk cable Standard electrode positioning with 3-lead set (when a CB 5 lead is Place the fifth electrode in one of (3) 3-lead set or 5-lead set a 3-lead set. - Page 31 3. Select Waveform Fields and select the fields (up to three) for Selecting a lead ECG measurement. With a 3-lead set you can monitor one lead at a time. With a Viewing a cascaded ECG 5-lead set you can monitor three different leads at a time. With both types of lead sets, you can display one lead in •...
- Page 32 NOTE: A clinician must analyze the ST segment changes in WARNING: The impedance respiration measurement may cause rate conjunction with other clinical findings. changes in Minute Ventilation Rate Responsive Pacemakers. Set the pacemaker rate responsive mode off or turn off the impedance Monitoring Pacemaker Patients respiration measurement on the monitor.
-
Page 33: Impedance Respiration
IMPEDANCE RESPIRATION NOTE: The respiration measurement is recommended only for patients over three years old. You need Correcting respiration number • The same setup as in ECG measurement. You can use 3-lead When respirations are weak or affected by artifacts, they may or 5-lead ECG sets. -
Page 34: Pulse Oximetry
PULSE OXIMETRY You need • Reusable or adhesive SpO sensor (examples shown below). • A separate cable is required for some sensors. Refer to Sensor Instructions for Use for details on sensor site selections and cleaning instructions. Reusable Sensors Description OxyTip+Finger Sensor. - Page 35 Ideal for infection control. Designed for use on all patient weight ranges. Ideal for patients with arthritic fingers, long or acrylic finger nails. NOTE: Datex-Ohmeda OxyTip+ sensors are latex-free, PVC free and Cadmium free. Applying sensors WARNING: Discard a damaged sensor or cable immediately. Never repair a damaged sensor or cable; never use a sensor or cable repaired by others.
- Page 36 Cable connections Monitor connections Datex-Ohmeda standard pulse oximetry Datex-Ohmeda enhanced pulse oximetry (N-XOSAT option) Nellcor pulse oximetry (N-XNSAT option) To disconnect, grasp the connector. If applicable, press the buttons on the connector to release the connector. WARNING: Patient safety. Patient conditions (such as reddening,...
- Page 37 2. Select HR Source. the sensor on the patient. 3. Select Pleth. • Use Cardiocap/5 pulse oximetry only for patients weighing 5 kg (11 lb.) or more, even if the SpO 2 sensor can be used for Adjusting SpO settings patients weighing less than 5 kg.
-
Page 38: Non-Invasive Blood Pressure (Nibp)
NON-INVASIVE BLOOD PRESSURE (NIBP) You need Cuff size Color Limb circumference Hose (1) Cuff hose Child Green 12-19 cm Adult - Black (2) Cuff of correct size Small adult Royal Blue 17-25 cm Adult - Black Adult Navy Blue 23-33 cm Adult - Black Adult Long Navy White... - Page 39 Stopping Starting To release the cuff pressure before the measurement is finished: The monitor sets inflation limits automatically for adults and • Press the NIBP Start/Cancel key. infants according to the hose used and inflation limit selected from the menu. Setting cycling intervals NOTE: When using infant cuffs the white infant cuff hose must 1.
-
Page 40: Invasive Blood Pressure
INVASIVE BLOOD PRESSURE You need Starting (1) Heparinized fluid bag with pressure infuser • When doing the setup, prepare the transducer kit according (2) Flushing set to the manufacturer’s instructions. (3) Transducer • Ensure there is no air in the line. Refer to transducer (4) Adapter cable for using disposable transducers manufacturer’s instructions on how to remove trapped air from the transducer. - Page 41 Starting PCWP Labeling channels • Position the Swan-Ganz catheter in pulmonary artery. The label of the pressure channel sets its display scale, color, Continuous monitoring of the pressures along the route of filter, alarm source, and alarm limits. The labels’ descriptions the catheter tip will help to identify the location of the tip.
-
Page 42: Temperature
TEMPERATURE You need (1) Temperature probe WARNING: Patient safety. To prevent patient injury, use Datex-Ohmeda temperature probes only. – 33 –... - Page 43 Changing temperature label Starting 1. Press the ComWheel and select Parameters. • Use Datex-Ohmeda temperature probes only. 2. Select Temp Setup. • Select temperature in a digit field to include the 3. Select T1 Label or T2 Label. temperature information in the trends and to activate alarms.
-
Page 44: Airway Gases
AIRWAY GASES You can monitor, for example, end-tidal CO , inspiratory O O, and anesthetic agents. You need (1) Gas sampling line (2) Y-piece (3) Airway adapter with sampling line connector (4) Heat and moisture exchanger including filter (HMEF) CAUTION: Do not connect anything to the reference gas inlet. –... - Page 45 Preventing operating room pollution Using D-fend When N O or volatile anesthetics are used, prevent operating • Use the black D-fend for most cases. room pollution by doing one of the following: • Use the green D-fend+ with patients who have increased •...
-
Page 46: Patient Spirometry
PATIENT SPIROMETRY In addition to airway gases, you can monitor patient lung mechanics and volumes. You need (1) Y-piece (2) Spirometry tube (3) D-lite sensor (4) Bacterial filter (5) Gas sampling line Patient tubes Sampling line connector Spirometry connectors – 37 –... - Page 47 Saving reference loops Displaying loops You can save up to six pairs (flow/volume and pressure/volume) The loops allow you to visually detect changes in the patient’s of reference loops. Both loops are saved at the same time. When respiratory status. more loops are saved, the most recent one is erased from memory.
-
Page 48: Neuromuscular Transmission (Nmt)
NEUROMUSCULAR TRANSMISSION (NMT) You need White White (1) NMT sensor cable Brown (2) MechanoSensor Brown Black (grounding (3) ElectroSensor electrode Green WARNING: Make sure the lead set clips do not touch electrically Preparation conductive material, including earth. • Clean grease and dirt from the application area. Make sure the area is free of excessive hair or lesions. - Page 49 Suspend/resume monitoring Measuring deep relaxation If you temporarily stop monitoring a patient, you can preserve When the neuromuscular block deepens, you receive no the current and reference values. stimulation response. TOF% is not calculated when the count is less than four. 1.
-
Page 50: Abbreviations
ABBREVIATIONS /min beats per minute, breaths per ATPS ambient temperature and C.I. cardiac index minute pressure, saturated gas C.O. cardiac output °C Celsius degree airway cal. calibration °F Fahrenheit degree atrioventricular Calc calculated/derived value µg microgram left foot augmented lead Calcs calculations alveolar... - Page 51 (mixed) venous oxygen content ET, Et end-tidal concentration hemoglobin central venous pressure EtAA end-tidal anesthetic agent Hbtot total hemoglobin EtBal end-tidal balance gas Hemo Calcshemodynamic calculations delete EtCO end-tidal carbon dioxide Hemo hemodynamic depr. depression end-tidal nitrous oxide reduced hemoglobin desflurane end-tidal oxygen heat and moisture exchanger...
- Page 52 International Standards MetHb methemoglobin Ni-MH nickel-metal hydride Organisation milligram neuromuscular transmission isoflurane minimum nitric oxide idioventricular rhythm minute NTPD normal temperature and pressure, joule dry gas milliliter MLAEP middle-latency auditory evoked Num. numerical kelvin potential kcal kilocalorie mmHg millimeters of mercury oxygen kilojoule mole...
- Page 53 PaCO partial pressure of carbon dioxide PM non-funct. right ventricular ejection fraction in the arteries pacemaker non-functioning ref. reference partial pressure of oxygen in the pacemaker Resp Rate respiration rate (total) (measured) alveoli Pmax maximum pressure Resp respiration rate (total) (set) partial pressure of oxygen in the Pmean mean pressure...
- Page 54 * with Fick equation STAT continuous NIBP cuff inflation for temperature label, x being 1, 2, 3, five minutes r 4 or one of the other label stat static choices Tymp tympanic temperature STBY standby STfilt ST filter (ECG) STPD standard temperature and V Fib ventricular fibrillation...
- Page 55 – 46 –...
-
Page 56: Messages
MESSAGES If any problem or message persists, contact qualified service personnel. Message Explanation Acknowledged alarms are silenced. (Silence Alarms key pressed during silencing period). Alarms acknowledged NIBP: Air leakage in NIBP cuff or hose. Check connections. Air leakage No breath detected for 20 seconds (respiration or CO 2 measurement). Apnea Apnea alarm is silenced until alarm is reactivated after five breaths. - Page 57 Message Explanation NMT stimulus current could not be delivered due to poor stimulus electrode connection or damaged Check stim. electrodes cable. NIBP: Cuff loose • Cuff is not attached to patient. Cuff occlusion • Cuff is too loose or hose is not connected. Cuff overpressure •...
- Page 58 Message Explanation Printer is not responding, not turned on, not connected, or not on-line. Printer failure Memory checking failed. Contact authorized service personnel. RAM error The deviation between the four NMT reference stimulation responses is too big, causing reference setting Reference not stable to fail.
- Page 59 Message Explanation NIBP: Systolic pressure probably higher than maximum inflation pressure or artifacts interfere in the Unable to measure Sys systolic area. NIBP: Pressure is unstable at start of the measurement. Calm the patient and retry. Unstable zero pressure NIBP measuring problem: Weak pulsation •...
-
Page 60: Troubleshooting
TROUBLESHOOTING What if … Try this … • Check that you have selected the parameter in the digit or waveform field. Press the The desired measured values do ComWheel to open Main Menu. Select Monitor Setup and Screen Setup. not appear on the screen? •... - Page 61 What if … Try this … • Check that cuff tubings are not bent, stretched, compressed or loose. NIBP measuring does not work or values are unreliable? • Prevent motion artifacts. • Use cuffs of correct size. • Check that you have the correct kind of probe. Temperature measuring fails? •...
-
Page 62: Cleaning And Care
• Wipe ECG trunk cable, NIBP cuff and cables, and SpO sensors. 1. Pull out the filter. Use only Datex-Ohmeda calibration gases. 2. Wash in detergent solution. NOTE: If gas measurement is used extensively, • Change or sterilize all airway and invasive patient accessories. - Page 63 Reusable D-lite sensor Backup battery check The reusable D-lite sensor can be washed in the washing 1. Turn on the monitor. When the battery is fully charged, the machine and steam autoclaved. After washing: no charging symbol should appear on the screen. •...
- Page 64 Check that the pressure values are displayed. Calibration check of temperature, NIBP and invasive blood Start the Venous Stasis mode and check that the pump is not pressures restarting during the measurement. If it does, the cuff may be Calibration check of temperature, NIBP and invasive blood leaking.
- Page 65 – 56 –...
-
Page 66: Supplies And Accessories
SUPPLIES AND ACCESSORIES Approved and specified for the GE Datex-Ohmeda Cardiocap/5. 572683 Solid gel, Ag/AgCl, 50/pkg 8002908 Esophageal stetoscope with 572684 Safety pin for infant, 60 cm, temperature probe 18 F Trunk cables, IEC color coding 15/pkg 8002909 Esophageal stetoscope with 545305 3-lead cable, 1.2 m m/4 ft. - Page 67 OXY-SE-3 OxyTip+ Sensitive Skin, SensoNor 844 transducer Pulse Oximetry, Nellcor (N-XNSAT) 1 m/3.3 ft., 3/pkg 16577 Disposable flushing kit for See the “User’s Reference Manual” for a Adhesive sensors (OXY-SL3 cable SensoNor 840 transducer list of approved sensors. required) 16579 Holder for 2x SensoNor 840 or OXY-AP-10 OxyTip+ Adult/Pediatric, 844 transducers...
- Page 68 Disposable airway adapters Hemo start up kit for Cardiocap 5 Order Code: 897608 73385 Straight T-adapter, 10/pkg Order Code: 73386 Elbow adapter, 10/pkg Specification: 8000087 Filtration - 5 disposable CO2 sampling lines Specification: (733163) 70605 Bacterial/viral removal - 1 five-lead ECG trunk cable, IEC color Y-filter/S, 35/pkg - 1 D-fend+ water trap, green (881319) coding (545301)
- Page 69 Network upgrade, German Mounting Solution for Excel 210 and U-XNET U-XNET Network upgrade Other Monitor Supplies Modulus I M1022178 Dust filter for Cardiocap/5 For more information, see the Supplies 1001-3482-000 Dovetail 38 cm/15 in. arm 74205 Thermal recorder paper, and Accessories Catalog.