Lenovo ideapad D330-10IGM User Manual
Hide thumbs
Also See for ideapad D330-10IGM:
- Hardware maintenance manual (64 pages) ,
- User manual (44 pages)

Related Manuals for Lenovo ideapad D330-10IGM


Summary of Contents for Lenovo ideapad D330-10IGM
- Page 1 Lenovo ideapad D330-10IGM User Guide Read the safety notices and important tips in the included manuals before using your computer.
- Page 2 Notes • Before using the product, be sure to read Lenovo Safety and General Information Guide first. • The latest electronic compliance and environmental information are available from the Lenovo compliance information Web sites. - To view compliance information go to: ...
-
Page 3: Table Of Contents
Keyboard dock left-side view (Optional) ............14 Keyboard dock right-side view (Optional) ............14 To use the Lenovo Active Pen (on select models)..........18 To use the Lenovo Active Pen2 (on select models)..........20 Chapter 2. Starting to use Windows 10 ..........22 Configuring the operating system for the first time .......... -
Page 5: Chapter 1. Getting To Know Your Computer
Chapter 1. Getting to know your computer Top view - - - - - - - - - - - - - - - - - - - - - - - - - - - - - - - - - - - - - - - - - - - - - - - - - - - - - - - - - - - - - - - - - - - - - - - - - Note: The dashed areas indicate parts that are not visible externally. - Page 6 Chapter 1. Getting to know your computer Screen orientation You can rotate the display panel to your preferred orientation. The orientation of the display automatically changes (alternating between portrait and landscape modes) depending on how you hold it.
-
Page 7: Left-Side View
Chapter 1. Getting to know your computer Left-side view - - - - - - - - - - - - - - - - - - - - - - - - - - - - - - - - - - - - - - - - - - - - - - - - - - - - - - - - - - - - - - - a Combo audio Connects to headsets. - Page 8 Chapter 1. Getting to know your computer Connecting USB devices You can connect a USB device to your computer by inserting its USB plug (Type A) into the USB port on your computer. The first time you plug a USB device into a particular USB port on your computer, Windows automatically installs a driver for that device.
-
Page 9: Right-Side View
Chapter 1. Getting to know your computer Right-side view - - - - - - - - - - - - - - - - - - - - - - - - - - - - - - - - - - - - - - - - - - - - - - - - - - - - - - - - - - - - - a Power button Press this button to turn on/off the computer. -
Page 10: Bottom View
Chapter 1. Getting to know your computer Bottom view - - - - - - - - - - - - - - - - - - - - - - - - - - - - - - - - - - - - - - - - - - - - - - - - - - - - - - - - - - - - - - - - - - a Tablet-keyboard Attaches the tablet to the dock keeping the tablet secured in place. - Page 11 Chapter 1. Getting to know your computer Inserting card(s) 1 Turn off the tablet, and disconnect the AC adapter and any cable(s) from the tablet. 2 Insert a prying pin (not supplied) into the tiny hole on the card tray. Press firmly and push it straight in until the card tray pops out.
- Page 12 Chapter 1. Getting to know your computer 3 Gently pull the card tray out of the card reader. 4 Put card(s) in the corresponding slot on the card tray. 5 Reinsert the card tray.
- Page 13 Chapter 1. Getting to know your computer Removing card(s) 1 Turn off the tablet, and disconnect the AC adapter and any cable(s) from the tablet. 2 Insert a prying pin into the tiny hole on the card tray. Press firmly and push it straight in until the card tray pops out.
-
Page 14: Rear View
Chapter 1. Getting to know your computer Rear View - - - - - - - - - - - - - - - - - - - - - - - - - - - - - - - - - - - - - - - - - - - - - - - - - - - - - - - - - - - - - - - - - - - - - - - a Rear camera (on Use the camera for video communication or taking photos. -
Page 15: Keyboard Dock Top View (Optional)
Chapter 1. Getting to know your computer Keyboard dock top view (Optional) - - - - - - - - - - - - - - - - - - - - - - - - - a Tablet-keyboard Attaches the tablet to the dock keeping the tablet secured in place. - Page 16 Chapter 1. Getting to know your computer Function key combinations Through the use of the function keys, you can change operational features instantly. To use this function, press and hold Fn a; then press one of the function keys b. The following describes the features of each function key.
- Page 17 Chapter 1. Getting to know your computer Enables/Disables the scroll lock. Fn + K: Fn + I: Activates the insert function. Fn + T: Activates the print screen function. Activates the sleep mode. Fn + 4: Fn + Tab: Activates the Magnifier Utility. Note: Hidden Functions applied only on systems where applicable.
-
Page 18: Keyboard Dock Left-Side View (Optional)
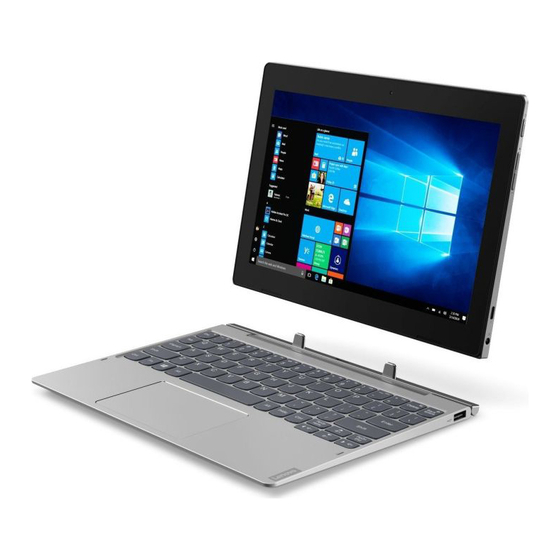
Chapter 1. Getting to know your computer Keyboard dock left-side view (Optional) - - - - - - - - - - - - - - - a USB 2.0 port Connects to USB devices. Keyboard dock right-side view (Optional) - - - - - - - - - - - - - a USB 2.0 port Connects to USB devices. - Page 19 Chapter 1. Getting to know your computer Combination of tablet and keyboard dock The Lenovo ideapad D330-10IGM is not only a tablet. It can be combined with a keyboard dock and used as a notebook computer. Attaching the tablet Align the connector of the keyboard dock with the tablet and then attach the tablet in the direction shown by the arrow.
- Page 20 Chapter 1. Getting to know your computer Attention: • Do not open the display panel beyond 135 degrees. When closing the display panel, be careful not to leave pens or any other objects in between the display panel and the keyboard.
- Page 21 Chapter 1. Getting to know your computer Detaching the tablet Carefully detaching the tablet in the direction shown by the arrow. Notes: • Be careful not to damage the connector when attaching or detaching the tablet. • The illustrations above are for reference only, please refer to the actual product.
-
Page 22: To Use The Lenovo Active Pen (On Select Models)
- - - - - - - - - - - - - - - - - - - - - - - - - - - - - - - - - - - - - - - - - - - - - - - - - - - - - - - - Select model is equipped with the Lenovo Active Pen, to use it, refer to the following illustrations. - Page 23 Chapter 1. Getting to know your computer Functions To replace the battery Note: Insert the battery by matching the + and – terminals on the battery to the + and – terminals in the battery compartment.
-
Page 24: To Use The Lenovo Active Pen2 (On Select Models)
- - - - - - - - - - - - - - - - - - - - - - - - - - - - - - - - - - - - - - - - - - - - - - - - - - - - - - - - Select model is equipped with the Lenovo Active Pen2, it can be used as a Lenovo Active Pen. - Page 25 Chapter 1. Getting to know your computer To replace the battery Note: Insert the battery by matching the + and – terminals on the battery to the + and – terminals in the battery compartment. To replace the rear Bluetooth module battery When the battery is low, the red LED indicator will flash.
-
Page 26: Chapter 2. Starting To Use Windows 10
Chapter 2. Starting to use Windows 10 Configuring the operating system for the first time - - - - - - - - - - - - - - - - - - - - - - - - - - - - - - - - - - - - - - - - - - - - - - - - - - - - - - - - - - - - - - - - - - - - - - - - - You may need to configure the operating system when it is first used. - Page 27 Chapter 2. Starting to use Windows 10 The power button is on the Start menu, click it you can choose to shut down or restart the computer, or put the computer into sleep mode. Through the Start menu, you can locate all the installed apps or view the frequently used apps.
- Page 28 Chapter 2. Starting to use Windows 10 Task View in taskbar In Windows 10, you can add a new desktop and switch between different desktops. To add a new desktop, do the following: • Click the Task View icon in the taskbar area. •...
-
Page 29: Putting The Computer To Sleep Or Shutting It Down
Chapter 2. Starting to use Windows 10 Putting the computer to sleep or shutting it down - - - - - - - - - - - - - - - - - - - - - - - - - - - - - - - - - - - - - - - - - - - - - - - - - - - - - - - - - - - - - - - - - - - - - - - - - - - - When you have finished working with your computer, you can put it to sleep or shut it down. - Page 30 Chapter 2. Starting to use Windows 10 Shutting down the computer If you are not going to use your computer for a long time, shut it down. To shut down your computer, do one of the following: • Move the cursor to the lower-left corner, and then select the Start button. ...
-
Page 31: Touch Screen Operation
Chapter 2. Starting to use Windows 10 Touch screen operation - - - - - - - - - - - - - - - - - - - - - - - - - - - - - - - - - - - - - - - - - - - - - - The display panel can accept inputs like a tablet, using the multi-touch screen, or like a traditional notebook computer, using the keyboard and touch pad. - Page 32 Chapter 2. Starting to use Windows 10 Frequently used gestures Tasks performed Zoom Zooms in and out on visual apps, Move two fingers together or apart while such as pictures and maps. Can also touching the screen. jump to the beginning or end of a list. Rotate Rotates an object (Note: Not all items Place two or more fingers on an item and...
- Page 33 Chapter 2. Starting to use Windows 10 Frequently used gestures Tasks performed Swipe Swiping in from the left edge can: Start from any edge of the screen, then • Bring in and open an app currently swipe inwards toward the center. running in the background.
-
Page 34: Connecting To A Wireless Network
Chapter 2. Starting to use Windows 10 Connecting to a wireless network - - - - - - - - - - - - - - - - - - - - - - - - - - - Enabling wireless connection To enable wireless functions, do one of the following: •... -
Page 35: Get Help From Windows
Chapter 2. Starting to use Windows 10 Get help from Windows - - - - - - - - - - - - - - - - - - - - - - - - - - - - - - - - - - - - - - - - - - - - - - If you have a problem with the operating system, see the Windows Get Started app. -
Page 36: Chapter 3. Recovery System
Chapter 3. Recovery system Introduction Reset this PC is a built-in recovery tool that enables users to restore their operating system to its original state. This preserves their data and important customizations, without the need to back up their data in advance. The following Reset this PC features are available to users from multiple locations within Windows: Keep my files... - Page 37 Recovery Partition. This partition contains the image file of the preinstalled Windows operating system. In cases of system failure, you can use the Lenovo OneKey Recovery system or the Windows Reset feature to restore the operating system to its factory status.
- Page 38 Chapter 3. Recovery system 1 Right-click the Start button in the lower-left corner and select Disk Management. 2 The Disk Management program starts. If Wim Boot is labeled on the Windows partition (as illustrated), Compact technology is enabled on your copy of Windows.
-
Page 39: Chapter 4. Troubleshooting
Where can I find warranty information? For the warranty applicable to your computer, including the warranty period and type of warranty service, see the Lenovo limited warranty flyer that came with your computer. ... -
Page 40: Troubleshooting
- The operating temperature is within the acceptable range. See “Chapter 2. Use and care Information” in the Lenovo Safety and General Information Guide. Note: If the battery is charged and the temperature is within range, have the computer serviced. - Page 41 Chapter 4. Troubleshooting The computer does not • If your computer is in sleep mode, connect the AC power adapter to the computer, then press the return from sleep mode and the computer does not Windows button or the Power button. work.
- Page 42 Chapter 4. Troubleshooting Battery problems • Recharge the battery. Your computer shuts down before the battery status indicator shows empty. -or- Your computer operates after the battery status indicator shows empty. Other problems • To turn off your computer, press and hold the Power Your computer does not respond.
-
Page 43: Trademarks
Trademarks The following terms are trademarks or registered trademarks of Lenovo in the United States, other countries, or both. Lenovo Microsoft and Windows are trademarks of Microsoft Corporation in the United States, other countries, or both. Other company, products, or service names may be trademarks or service marks... - Page 44 en-US Rev. AA00...