Table of Contents
Quick Links
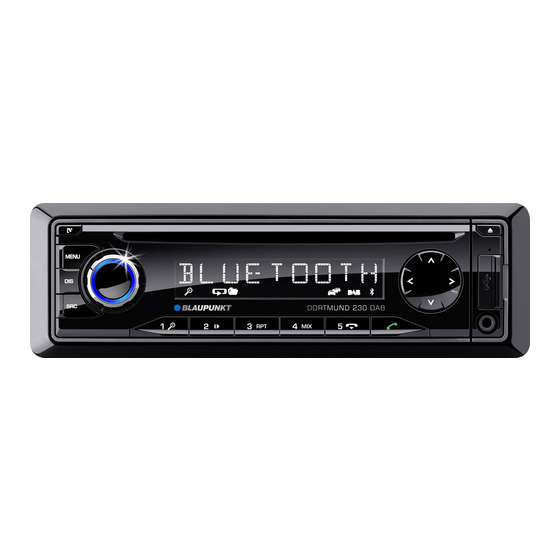
CAR RADIO
STOCKHOLM 230 DAB
Bedienungsanleitung
Operating instructions
Notice d'utilisation
Istruzioni d'uso
Bedieningshandleiding
Bruksanvisning
Instrucciones de manejo
Instruções de serviço
Owner's Manual
Enjoy it.
Betjeningsvejledning
Käyttöohje
Οδηγίες χειρισμού
Instrukcja obsługi
Használati útmutató
Instrucţiuni de utilizare
Ръководство за работа
Table of Contents

Related Manuals for Blaupunkt STOCKHOLM 230 DAB


Summary of Contents for Blaupunkt STOCKHOLM 230 DAB
- Page 1 CAR RADIO STOCKHOLM 230 DAB Enjoy it. Bedienungsanleitung Betjeningsvejledning Operating instructions Käyttöohje Notice d'utilisation Οδηγίες χειρισμού Istruzioni d'uso Instrukcja obsługi Használati útmutató Bedieningshandleiding Bruksanvisning Instrucţiuni de utilizare Instrucciones de manejo Ръководство за работа Instruções de serviço Owner’s Manual...
-
Page 2: Controls
Controls USB port button Unlock the detachable control panel Front AUX-IN socket MENU button button Short press: Call up/close menu Short press: Answering a call, speed dial Long press: Start scan function Long press: Open the phone book of the cell phone or activate voice dialing On/Of button Short press: Switch on car sound system... -
Page 3: Symbols Used
Safety notes Safety notes Road safety Observe the following notes about road safety: The car sound system was manufactured accord- ing to the state of the art and established safety • Use your device in such a way that you can guidelines. -
Page 4: Cleaning Notes
Safety notes | Cleaning notes | Disposal notes | Scope of delivery | Placing the device in operation Declaration of conformity Optional equipment (not part of the scope of delivery) The Blaupunkt AudioVision GmbH & Co. KG de- clares that the car sound system Use only accessories approved by Blaupunkt. complies with the basic requirements and... -
Page 5: Display Language
Placing the device in operation Attaching the control panel Switching on/of Push the control panel into the bracket at the Switching on/of with the On/Of button right edge of the device. For switch-on, press the On/Of button Push the control panel carefully into the left The car sound system switches on. -
Page 6: Display Brightness
Placing the device in operation | Traf c information | Radio mode for traf c announcements (see the chapter Display brightness "User settings", section "Making settings in You can manually switch the display brightness the "VOLUME" menu", menu item "TRAFFIC between daytime mode and night-time mode or VOL"). -
Page 7: Scanning Stations
Radio mode Changing to radio mode or selecting Tuning into stations manually a memory bank Press the rotary button once to activate manual station tuning. The following memory banks are available in the The display brief y shows "SEARCH MANUAL". dif erent reception areas: Turn the rotary control to change the fre-... -
Page 8: Pty
Radio mode Scanning all stored stations of the waveband Press the rotary control for approx. 2 sec- In the reception areas "EUROPE" and "USA", an FM onds to start the scanning. station can transmit its current programme type, During the scan, the display alternately dis- e.g. -
Page 9: Cd/Mp3/Wma/Ipod Mode
Notes: Notes: • To ensure proper functioning, use only CDs • Blaupunkt cannot guarantee the f lawless with the Compact-Disc logo. function of all iPod and iPhone models. • Blaupunkt cannot guarantee the f lawless • If an iPhone and iPod are connected at the... -
Page 10: Changing To Cd/Mp3/Wma/Ipod Mode
CD/MP3/WMA/iPod mode Changing to CD/MP3/WMA/iPod Note: You must not hinder or assist the drive as it mode automatically draws in the CD. Press the SRC button 16 repeatedly until the Insert the CD with its printed side up into the desired audio source is displayed: CD tray5 until you feel a slight resistance. -
Page 11: Inserting/Removing The Memory Card
CD/MP3/WMA/iPod mode If the USB data carrier is initially selected as Selecting tracks audio source, the data are read f irst. Turn rotary control one notch counter- Notes: clockwise or clockwise to change to the pre- vious/next track. • If the connected USB data carrier cannot be seen, "USB ERROR"... -
Page 12: Repeatedly Playing Individual Tracks Or Directories
CD/MP3/WMA/iPod mode Playing tracks in random order Conf guring the display Press the 5 MIX button to change among Press the DIS button once or several times the playback modes: to toggle between these displays: Display / icon Opera- Display Meaning Opera- Meaning... -
Page 13: Browse Mode
CD/MP3/WMA/iPod mode Browse mode Browse mode in iPod mode In iPod mode, you can select and play the tracks In Browse mode, you can directly search for and via the categories "ARTISTS", "ALBUMS", "GENRES" select a certain track on the MP3/WMA data carrier or "PLAYLISTS". -
Page 14: Bluetooth Menu
CD/MP3/WMA/iPod mode | Bluetooth® Press the rotary control to play the track. Bluetooth® The playback starts. You are exiting the browse mode. You can connect the car sound systerm via Bluetooth® with other Bluetooth®-ready devices, such as cell Searching by track names phones or MP3 players. -
Page 15: Pairing And Connecting A Cell Phone
Bluetooth® Calling the Bluetooth® menu Pairing and connecting a cell phone Brief y press the MENU 2 button to open Note: the user menu. If a connection with a cell phone currently ex- Turn the rotary control until the "BLUE- ists, this connection is automatically discon- TOOTH"... -
Page 16: Telephone Functions
Bluetooth® In the Bluetooth® menu, select the "PAIRING" Notes: menu item. • If no connection can be established, the display brief y shows "CONNECT FAILED". Press the rotary control to open the menu. • After switch-on, the car sound system The "MOBILE PHONE"... - Page 17 Bluetooth® Making a call Turn the rotary control to select a dif er- ent entry. In the Bluetooth® menu, select the "DIAL NEW NUMBER" menu item. Press the rotary control or the but- to call the number. Press the rotary control to open the entry menu.
- Page 18 Bluetooth® Storing a phone number in the car sound Speed dial for any phone number or for the system number dialed last or a stored number You can store phone numbers in the car sound With speed dial, you can make a call without f rst system and make calls using the speed dial (see having to select the corresponding function in the the following section).
-
Page 19: Bluetooth® Streaming Mode
Bluetooth® Speed dial for phone book entries Bluetooth® streaming mode Note: Starting the Bluetooth® streaming mode This function is only available Press the SRC 16 button repeatedly until • if the phone book of the connected cell "BT-STREAM" appears on the display. phone was transferred to the car sound system (see the chapter "Phone book func- The playback starts. -
Page 20: Additional Functions In The Bluetooth® Menu
Bluetooth® Each entry consists of a name and a number, each • If you insert a CD during an ongoing trans- up to 20 characters on digits. fer, the playback does not start until the transfer is completed. Note: Do not switch of the car sound system while Deleting the phone book of the cell phone transferring the phone book. - Page 21 Bluetooth® Managing paired devices To unpair the displayed device, press the button for approx. 2 sec- In the Bluetooth® menu, you can manage the onds. paired Bluetooth® devices (cell phones and streaming devices such as MP3 player). The display brief ly shows "DELETED" and you In the device lists for cell phones and streaming are returned to the Bluetooth®...
- Page 22 7^/ to choose the channels. Blaupunkt-specific Android Application. The Android App will be distributed by Note: Blaupunkt via Android PlayStore. If Stations must be created on your installed on Android phone, music files account prior to connecting your stored on the phone can be conrolled by iPone/ipod device to the head unit.
- Page 23 Selecting tracks Browse in android phone Turn rotary control one notch counter- You can directly search for and select a certain select a certain trac t rack on the android phone data carrier without clockwise or clockwise to change to the pre- vious/next track.
- Page 24 DAB Tuner Scanning all receivable stations of the waveband Tuning into a station Press the MENU button for approx. 2 sec- onds to start scanning. Starting station seek tuning During the scan, the display alternately dis- Turn rotary control one notch counter- plays "SCAN"...
-
Page 25: External Audio Sources
(Sub-Out) For this reason, we recommend using angled • Setting the 3-band equaliser jack plugs, e.g. the Blaupunkt accessories cable • Adjusting the time delay for switching in an (7 607 001 535). external amplif er As soon as an external audio source, such as a Calling and exiting the "AUDIO"... - Page 26 Sound settings Making settings in the "AUDIO" menu LOUDNESS Increase of bass at low volume. Settings: ON, OFF. BASS Press the rotary control to change the Bass level. Settings: –7 to +7. setting. Press the rotary control to change the Turn the rotary control to change be- setting.
- Page 27 Sound settings AMP DELAY EQUALIZER Switching the equalizer on or of . Settings: ON, Setting the delay with which a connect amplif er is switched in. Settings: 0.5/1.0/1.5/2.0/2.5 seconds OFF. and OFF (no delay) . Press the rotary control to change the Press the rotary control to change the setting.
-
Page 28: User Settings
Sound settings | User settings Turn the rotary control to set the level, User settings frequency or Q-factor. Calling the user menu and selecting Press the rotary control to conf rm the setting. a menu Brief y press the MENU 2 button to open EQ BASS the user menu. -
Page 29: Making Settings In The "Tuner" Menu
User settings Making settings in the "TUNER" Notes: • In the factory default, all AM memory menu banks are deactivated. TRAFFICINFO (traf c information) • If a memory bank is deactivated, the sta- (only for reception area EUROPE) tions stored in this memory bank are re- Only possible in FM radio mode: Switching prior- tained. -
Page 30: Making Settings In The "Display" Menu
User settings TUNER AREA (reception area) Switching the PTY function on or of . Settings: ON, Select the reception area for the radio reception. OFF. Settings: EUROPE, USA, SOUTH AMERICA, THAI- LAND. Press the rotary control to change the setting. Press the rotary control to open the menu. -
Page 31: Making Settings In The "Volume" Menu
User settings TRAFFIC VOL (traf ic information volume) LANGUAGE (reception area EUROPE only) Select the language for the display. Settings: Setting the minimum volume for traf c announce- ENGLISH, DEUTSCH (German). ments. Settings: 1 – 50. Press the rotary control to change the Press the rotary control to change the... -
Page 32: Making Settings In The "Clock" Menu
User settings Making settings in the "CLOCK" menu Making settings in the "VARIOUS" menu PERM CLOCK Switch the permanent display of the time on or of . DEMO MODE Settings: ON, OFF. Switching the demo mode on or of . Settings: ON, OFF. -
Page 33: Factory Settings
User settings | Factory settings AUX EDIT The car sound system switches of and is reset to the factory settings. If a CD has been Entry of an individual 15-digit name for the AUX inserted in the CD drive, the car sound system source. -
Page 34: Useful Information
Frequency range: can be called up from www.blaupunkt.com. Pre-amp out Service 4 channels: In some countries, Blaupunkt of ers a repair and Input sensitivity pick-up service. 300 mV / 10 kΩ Front AUX-IN: Information about the availability of this service in your country can be found at www.blaupunkt.com. - Page 35 FCC WARNING This device complies with Part 15 of the FCC Rules. Operation is subject to the following two conditions: (1) This device may not cause harmful interference, and (2) this device must accept any interference received, including interference that may cause undesired operation.