Table of Contents
Table of Contents

Related Manuals for Siemens ACUSON NX3 series


Summary of Contents for Siemens ACUSON NX3 series
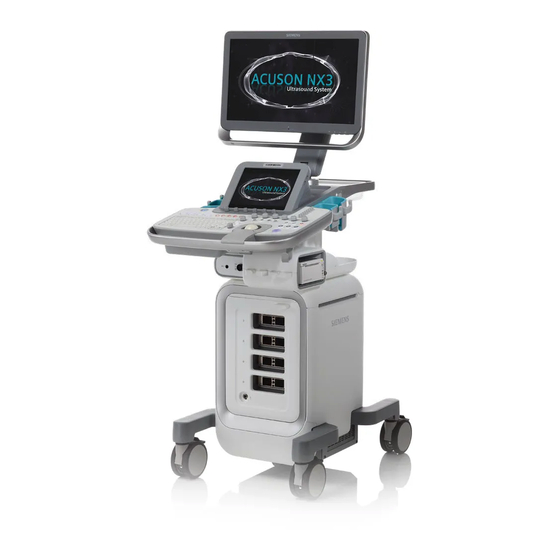
- Page 1 Quick Reference Guide ACUSON NX3™ Series...
-
Page 2: Table Of Contents
Contents System Overview Getting Started 2D Mode and M-mode Color and Spectral Doppler Measurements and Calculations Text, Arrows and Pictograms Data and Image Management... -
Page 3: System Overview
System Overview Control Panel 1. Power ON / OFF (QuikStart Standby Mode) 2. Patient Study Controls 3. User-defined Keys 4. Soft Key Rotary Controls 5. Alphanumeric Keyboard 6. Text, Arrows and Pictograms 7. Major Modes 8. Angle, Steer, Select 9. TGO Image Optimization 10. - Page 4 System Overview Home Base Area 1. Left Set 2. Right Set 3. Update / View 4. Escape 5. Caliper 6. Trackball (CINE review) 7. Wrist Support...
- Page 5 Status Icons 1. Select Key 2. Update Key 3. Trackball 4. Escape Key 5. Caps Lock 6. Wireless Connection 7. Insert / Overwrite System Getting 2D Mode Color and Measurements Text, Arrows Data and Image Overview Started and M-mode Spectral Doppler and Calculations and Pictograms Management...
- Page 6 System Overview Connecting Transducer In the unlocked position, insert the transducer Turn the lock clockwise until it locks into place. into the port located on the front of the system.
- Page 7 Wheel Locks Unlocked (wheels can swivel and roll). Locked (wheels cannot swivel and roll). System Getting 2D Mode Color and Measurements Text, Arrows Data and Image Overview Started and M-mode Spectral Doppler and Calculations and Pictograms Management...
-
Page 8: Getting Started
Getting Started Patient Registration New Patient Transducer can also be selected from the Touch Screen (if 3 or more New Patient 1. Press transducers are connected to the system) after patient registration or 2. Enter patient information. by selecting Exam on the Control Panel. - Page 9 Edit Study 1. Press Patient Registration – Worklist New Patient 2. Use the keyboard to edit patient information. 1. Press 3. Select to save. 2. Enter patient information to search. 3. Select Worklist at the upper left side of the form Select US (Ultrasound) Search Select the study and press Select...
- Page 10 Getting Started Transducer / Study Control Panel and Touch Screen Exam 1. Select 4. Select the transducer on the Touch Screen. 2. Select a transducer from the upper left menu on the image screen. 3. To change transducers during an exam, press Exam or the user-defined key assigned Selection of transducers via the to the transducer.
- Page 11 Store, Print, Review and End Exam Review Select 1. Press to acquire and save the clip. 4. Press , then Press to view 1x1 format 2. Press to freeze the clip / image frame. Select Freeze Rotate to move between images. 3.
-
Page 12: D Mode And M-Mode
2D Mode and M-mode 2D Control Panel Control Panel Controls Function Brightness Mode Press to enter / exit 2D mode. Rotate to adjust overall 2D gain / brightness. One-button image optimization Press to optimize the overall image displayed. (TGO™ Tissue Grayscale Press twice to deactivate. - Page 13 Adjusts the scanning depth and magnifies the image Rotate clockwise / counter-clockwise to increase / decrease depth. Press to activate zoom. Depth / Zoom Rotate to change region of interest (ROI) size and press to activate. Press again to exit zoom. Note: Zoom available in live or frozen images.
- Page 14 2D Mode and M-mode 2D Touch Screen Touch Screen Controls Function Controls the TGO gain offset TGO Gain* Select to adjust up / down. Note: TGO must be active to adjust. Displays linear or trapezoid image format Select to activate / deactivate. Trapezoid Note: Available on live image only.
- Page 15 SieClear (SieClear™ Enhances contrast resolution and boundary detection Multi-view Spatial Increase for more compounding. Compounding)* and Decrease for less compounding. AdvSieClear (Advanced Note: Available on live image only. Settings are transducer and mode SieClear™ Spatial dependent. Compounding)* Sharpens the contours of a structure Increase for more sharpness.
- Page 16 2D Mode and M-mode 2D Touch Screen Touch Screen Controls Function Activates two simultaneous images in dual format Split Select to activate / deactivate. Activates level of gain compensations. Reduces bright whites. (DTO™ Dynamic Tissue Increase to reduce whites. Optimization Technology) ClarifyVE Decreases artifacts, increases contrast resolution and boundary (Clarify™...
- Page 17 Frame averaging – determines the number of frames combined into the final image Increase for more frame averaging. Persist (Persistence)* Decrease to demonstrate motion. To deactivate, select 0. Note: Available only on live image when SieClear is set to Off. Adjusts orientation on image screen U/D Flip (Up / Down flip) Select to switch between orientations [up(U) or down(D) and right(R)
- Page 18 2D Mode and M-mode 2D Soft Keys Soft Key Controls Function Adjusts acoustic energy delivered to the patient Rotate clockwise to increase power. P (Transmit Power) Rotate counterclockwise to decrease power. Note: Available on live image only. Changes Mechanical (MI) and Thermal (TIS, TIB) Indices.
- Page 19 Processing curves that assign echo amplitudes to gray shades Maps A – I are from low to high contrast. Maps 1– 3 are customizable maps (Modify Map). Note: Available on live or frozen images. Colorizes the grayscale image Tint Press and rotate for tints from 0 –15. Note: Available on live or frozen images.
- Page 20 2D Mode and M-mode M-mode Control Panel Control Panel Controls Function Enters / exits M-mode and adjusts overall M-mode gain Press to activate / deactivate. M (M-mode) Roll the trackball to position the M-mode cursor. Rotate to adjust overall M-mode gain. Note: Available on live image only.
- Page 21 M-mode Touch Screen Touch Screen Controls Function Changes the display format to full M-Mode Full M Press to activate / deactivate. Note: Available on live or frozen image. Adjusts the scrolling speed of the M-mode sweep Increase to display less cardiac cycles. Sweep Speed* Decrease to display more cardiac cycles.
- Page 22 2D Mode and M-mode M-mode Soft Keys Soft Key Controls Function Adjusts Frequency for 2D image and M-mode strip Rotate clockwise to increase resolution. MultiHertz (frequency) Rotate counterclockwise to increase penetration. Note: Available on live image only. Processing curves that assign echo amplitudes to gray shades in the M-mode sweep Maps Map choice is displayed from low to high contrast.
- Page 23 System Getting 2D Mode Color and Measurements Text, Arrows Data and Image Overview Started and M-mode Spectral Doppler and Calculations and Pictograms Management...
-
Page 24: Color And Spectral Doppler
Color and Spectral Doppler Color Doppler Control Panel Control Panel Controls Function Enters / exits color Doppler or adjusts overall color Doppler gain Press to activate / deactivate color Doppler mode. C (Color Doppler) Rotate to increase / decrease color Doppler gain. Note: Available on live image only. - Page 25 Color Doppler Touch Screen Touch Screen Controls Function Flow state optimization presets Choices are Low, Medium, High. Flow* Select desired preset to optimize flow state. Note: Available on live image only. Reverses the colors depicting forward and reverses flow in the color ROI and the color bar Invert Select to activate / deactivate.
- Page 26 Color and Spectral Doppler Color Doppler Touch Screen Touch Screen Controls Function Adjusts spatial averaging (smoothing) for color flow Increase for flow sensitivity. Smooth* Decrease for color spatial resolution. Note: Available on live image only. Adjusts the time that the color flow data remains in the ROI before being replaced by another color Persistence* Increase for greater vessel color fill.
- Page 27 Prioritizes the display of grayscale or color flow data Increase for greater vessel color fill. Priority* Decrease to prioritize grayscale and less vessel color fill. Note: Available on live image only. Turns color display off image when in Color Doppler Display Select to activate / deactivate.
- Page 28 Color and Spectral Doppler Color Doppler Soft Keys Soft Key Controls Function Adjusts the color Doppler frequency independent of the 2D frequency MultiHertz (frequency) Rotate to increase / decrease. Note: Available on live image only. Selects a processing curve that assigns the velocity / velocity variance (for Color) or flow amplitudes (for Power) to a range of colors Maps Maps choices are A –...
- Page 29 Adjusts the pulse repetition frequency (PRF) Scale Increase / decrease to adjust the PRF. Note: Available on live image only. Adjusts the range of flow velocities displayed above and below the baseline Baseline Move up / down to adjust the baseline of the active mode. Note: Available on live image only.
- Page 30 Color and Spectral Doppler Spectral Doppler Control Panel Control Panel Controls Function Enters / exits spectral Doppler or adjusts overall spectral Doppler gain Press to activate / deactivate. D (pulsed wave) Doppler Roll trackball to position Doppler gate. and CW (continuous Press D or CW to activate the strip.
- Page 31 Adjusts the PW Doppler angle Toggle left / right to reverse the steering angle. Steer Note: Available on live image only. Available only on linear transducers. Adjusts angle correction Press to cycle through 60 / 0 / 60° angle selections. Angle Rotate to adjust values in 1°...
- Page 32 Color and Spectral Doppler Spectral Doppler Touch Screen Touch Screen Controls Function Enters / exits Duplex or Triplex mode Triplex Select to activate / deactivate Duplex / Triplex. Note: Available on live image only. Adjusts sample volume size Gate* Increase / decrease to adjust size. Note: Available on live image only.
- Page 33 Mutes the Doppler audio Mute Select to activate / deactivate. Note: Available on live image only. Displays Full Screen Doppler Full D Select to activate / deactivate. Note: Available on live or frozen image. Adjusts the wall filter Filter* Rotate to adjust rejection of low frequency signals. Note: Available on live image only.
- Page 34 Color and Spectral Doppler Spectral Doppler Touch Screen Touch Screen Controls Function Automatic trace and display of PW Doppler measurements Select to activate / deactivate. Auto Stats* Select settings for data above, below or on both sides of the baseline. Note: Available on live or frozen image.
- Page 35 System Getting 2D Mode Color and Measurements Text, Arrows Data and Image Overview Started and M-mode Spectral Doppler and Calculations and Pictograms Management...
- Page 36 Color and Spectral Doppler Spectral Doppler Soft Keys Soft Key Controls Function Adjusts the range of velocities displayed Baseline Increase / decrease to adjust the baseline. Note: Available on live or frozen image. Adjusts the pulse repetition frequency (PRF) Scale Increase / decrease to adjust the PRF.
- Page 37 Selects a processing curve that assigns echo amplitudes to gray shades in the Doppler spectrum Select desired Map from A – H. Note: Available on live or frozen image. Colorizes the Doppler spectrum Tint Select desired Tint from 0 – 11. Note: Available on live or frozen image.
-
Page 38: Measurements And Calculations
Measurements and Calculations Unlabeled Measurements Perform Measurement 5. Roll the trackball to position the second caliper. 1. Press 6. Press to complete the measurement. 2. Select the desired measurement type and Press Caliper. Unlabeled measurements do not enter into the exam report. 3. - Page 39 Labeled Measurements 1. Press 3. Roll the trackball to position the first caliper. 4. Press to anchor 2. Roll the Trackball to select the desired Exam type and measurement label and press Set. 5. Roll the trackball to position the second caliper.
- Page 40 Measurements and Calculations Edit Measurements (Labeled and Unlabeled) Edit Completed Measurement 1. Press to activate calipers and cycle between active calipers. 2. Press on the Touch Screen to cycle between calipers sets. 3. Press on the Touch Screen or press the key to remove active measurement.
- Page 41 Reposition Measurement Results 1. Press 2. Rotate to cycle through the available size and positions. System Getting 2D Mode Color and Measurements Text, Arrows Data and Image Overview Started and M-mode Spectral Doppler and Calculations and Pictograms Management...
- Page 42 Measurements and Calculations Report Review the Report Report 6. Select Return to exit the Report. 1. Press on the Image screen to enter / exit report page. 7. To edit the report, roll the trackball to 2. Select a report heading for Data or Description. the desired measurement and edit.
- Page 43 Touch Screen Image Screen System Getting 2D Mode Color and Measurements Text, Arrows Data and Image Overview Started and M-mode Spectral Doppler and Calculations and Pictograms Management...
- Page 44 Measurements and Calculations Summary Review the Summary 1. Press to activate the measurement package. Report 2. Press to enter / exit report page. 3. Select on the Touch or Imaging Screen. 4. Select to send to USB as a pdf file. Export to USB 5.
- Page 45 Touch Screen Image Screen System Getting 2D Mode Color and Measurements Text, Arrows Data and Image Overview Started and M-mode Spectral Doppler and Calculations and Pictograms Management...
- Page 46 Measurements and Calculations Summary Import Images into the Summary 1. Press to activate the measurement package. 6. Roll the trackball to the desired image location in the Image section and press the Report 2. Press to enter / exit report page. to drop the image in report.
- Page 47 System Getting 2D Mode Color and Measurements Text, Arrows Data and Image Overview Started and M-mode Spectral Doppler and Calculations and Pictograms Management...
-
Page 48: Text, Arrows And Pictograms
Text, Arrows and Pictograms Text Icons Control Function Activates / deactivates text cursor and text Touch Screen menu. Sets default position for text cursor. Positions the cursor at the home location. Temporarily hides text. Deletes all text, pictograms or arrows. Deletes one line of text at the cursor. - Page 49 Deletes the last word. Inserts or overwrites text when text cursor is active. Displays the next or previous page, when available. Caps Lock System Getting 2D Mode Color and Measurements Text, Arrows Data and Image Overview Started and M-mode Spectral Doppler and Calculations and Pictograms Management...
- Page 50 Text, Arrows and Pictograms Arrows 1. Press the Arrow or Text key on the keyboard. Unlimited arrows can be added. 2. Select the Arrow tab on the Touch Screen. 3. Roll the trackball to position. 4. Turn Rotate or turn Select to change arrow direction.
- Page 51 System Getting 2D Mode Color and Measurements Text, Arrows Data and Image Overview Started and M-mode Spectral Doppler and Calculations and Pictograms Management...
- Page 52 Text, Arrows and Pictograms Pictograms 1. Select from the keyboard. Pictograms are customized in the Presets Menu by selecting Presets / Pictogram List. 2. Select the desired pictogram from the Touch Screen. 3. Roll the trackball to position the transducer Pressing Clear Screen also deletes any icon.
- Page 53 System Getting 2D Mode Color and Measurements Text, Arrows Data and Image Overview Started and M-mode Spectral Doppler and Calculations and Pictograms Management...
-
Page 54: Data And Image Management
Data and Image Management Review Images Review Images on Current Study Review Images from a Closed Study 1. Press and press 1. Select Select double-click a thumbnail. 2. Select a patient and press the key twice 2. Select or press to change the to open. - Page 55 Delete Images Restart an Exam Delete Images from a Current Study 1. Select or in Review 2. Select exam from Local Disk. 1. Press to activate cursor. 3. Select located below the list of exams Select 2. Select an image on the thumbnail panel to on the right to restart exam.
- Page 56 Data and Image Management Teaching File 1. Select 7. To add images from multiple studies, follow steps 1– 4, then select the desired teaching 2. Select the exam from Local Disk. file. 3. Roll the trackball, highlight an image or clip 8.
- Page 57 Export Studies Export Study to DICOM Network Export Study to CD-R / DVD in DICOM 1. Select the patient name in the Patient 1. Insert CD-R / DVD. Browser. 2. Select the patient name in the Patient Browser. 2. Under Network, select the desired Destination.
- Page 58 Data and Image Management Import / Export Studies Export Study to USB in PC Format (TIFF or AVI) Import Study from CD-R / DVD to Local Database 1. Insert USB. 1. Insert CD-R / DVD. 2. Select the patient name in the Patient 2.
- Page 59 Import Study from USB to Local Database 1. Insert USB. 2. Select USB from Export / Import in the Patient Browser. 3. Select patient name on the USB. 4. Select Import. System Getting 2D Mode Color and Measurements Text, Arrows Data and Image Overview Started...
- Page 60 The products / features mentioned in this document may not be ACUSON NX3, Advanced SieClear, Clarify VE, DTI, DTO, Dynamic commercially available in all countries. Due to regulatory reasons TCE, MultiHertz, SieClear and TGO are trademarks of Siemens their future availability cannot be guaranteed. Please contact Medical Solutions USA, Inc.