
Related Manuals for Siemens ADVIA 1800


Summary of Contents for Siemens ADVIA 1800
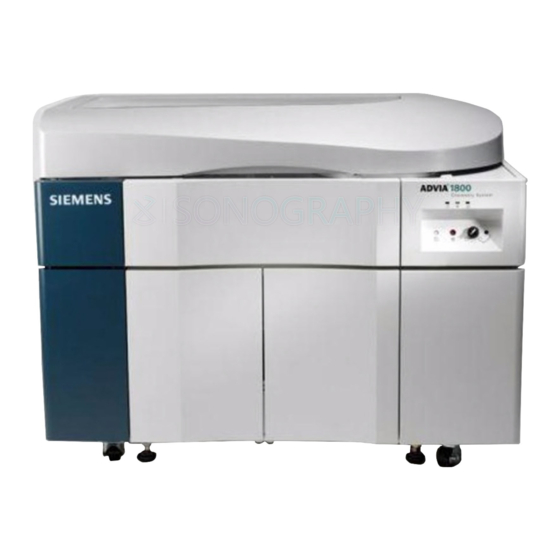
- Page 1 ADVIA 1800 ® C h e m i s t r y S y s t e m ® ADVIA 1800 Chemistry System Operator’s Guide 11221680 Rev. A, 2015-12...
- Page 2 If the system is used in a manner not specified by Siemens, the protection provided by the equipment may be impaired. Observe all warning and hazard statements. The ADVIA Chemistry system is manufactured in Japan for Siemens.
-
Page 3: Table Of Contents
Table of Contents Table of Contents ............................3 1 System Overview ........................... 13 Operating principle ........................... 13 Hardware Overview ........................... 14 Display and power panel ............................15 Analyzer back view ..............................15 External Circuit Ratings ............................16 External Circuits ..............................16 Connected Equipment ............................ - Page 4 Lab Results Converter (LRC) ........................46 Setup to Use LRC ............................... 46 Printing and/or Generating a PDF from the LRC ....................46 Statistics window*..............................46 Correlation window* ............................46 Data Transmit window ............................47 Calibration windows ..............................47 ADVIA 1800 Operator’s Guide...
- Page 5 View Calibration Curve window ........................... 47 Calibration/RBL History window .......................... 47 Sample Select window* ............................48 Calibration Setup window* ..........................48 Maintenance windows.............................. 49 System Startup/Shutdown Setting window ......................49 User Maintenance window ..........................49 System Monitor window ............................49 System Maintenance Monitor window .........................
- Page 6 Viewing the content ............................. 70 2 Operating the System ..........................71 Start the System ............................71 Logging on ................................71 Starting the system ..............................71 Performing a system-assisted startup (Start set) ..................... 72 Checking the analyzer ............................. 73 ADVIA 1800 Operator’s Guide...
- Page 7 Set up of daily washes ............................. 77 Times required to perform prime, washes, and cell blank ................... 78 Daily Operation ............................78 Using workorders ..............................78 Using host computer workorders ......................... 78 Creating workorders at the analyzer........................79 Creating multiple workorders ..........................79 Deleting or changing test selectivity for multiple workorders ................
- Page 8 When to run control samples ..........................109 Setting up quality control ........................... 109 Running the control samples ..........................109 ADVIA QC window ..............................110 Reviewing the control results at different windows ....................110 5 Maintenance ............................111 Maintenance schedule ..........................111 ADVIA 1800 Operator’s Guide...
- Page 9 Analytical Parameter Audit Trail ......................114 Daily maintenance ........................... 115 Inspecting and cleaning the probes ........................115 The probe cleaning tool kit ............................. 117 Kit contents ............................... 117 Procedure ................................118 Inspecting and cleaning the mixing rods and mixer wash cups ................119 Checking reagents and system solutions .......................
- Page 10 Saving the error log to a test file ......................183 Capturing the error report: ..........................183 Saving the test data from the User Maintenance window ..................184 Saving test data ..............................184 Saving reaction data in CSV format ........................185 ADVIA 1800 Operator’s Guide...
- Page 11 Saving a data archive from User Maintenance window ..................186 Viewing data that was previously archived ......................187 8 System Setup ............................189 Connecting the ADVIA Chemistry System and your host computer ..........189 Setting the System Monitor........................189 During operation system settings area ......................190 Pre-operation settings ............................
- Page 12 Appendix D – Specifications ........................207 Specifications – all ..............................207 Appendix E – Symbols ........................... 213 Explanations of symbols associated with the ADVIA 1800 system ..........213 Warning and caution symbols ..........................213 System operation symbols ............................. 214 System rating label symbols ..........................215 Hardware component symbols ..........................
-
Page 13: System Overview
(interrupt) modes at a throughput rate of 1200 photometric tests per hour and 600 electrolyte tests per hour. The ADVIA 1800 Chemistry System is for in vitro diagnostic use. Operating principle This sequence summarizes a photometric analysis on the Chemistry System: 1. -
Page 14: Hardware Overview
Isotonic Saline Diluent Cuvette Wash Solution Cuvette Conditioner Pure-water Bottle Reaction Bath Oil Pump LWP Pressure Meter Power and Display Panel LWP Inline Filter Level Sensor Connectors Pumps (behind reagent bottles) Figure 1-2. Analyzer front view ADVIA 1800 Operator’s Guide... -
Page 15: Display And Power Panel
Display and power panel READY lamp lights when the instrument is ready. START lamp lights when analysis is being performed. ALARM lamp lights when a problem occurs. SYSTEM RESET button resets the computer controlling the instrument (not normally used). EMERGENCY STOP button is pressed to stop the instrument in an emergency. -
Page 16: External Circuit Ratings
Dilution Washer (DWUD) Reagent Tray 1 (RTT1) Sample Probe (SPP) Reaction Mixer 1 (MIXR1) Reaction Tray washer (WUD) Spectrophotometer Compartment (lid off) Reaction Tray (RRV) Sample Rotate and Sample Pause Buttons Figure 1-5. Analyzer top view ADVIA 1800 Operator’s Guide... -
Page 17: Stt Rotate And Smp Pause Buttons
STT rotate and SMP pause buttons STT Rotation Button SMP Pause Button Figure 1-6. Location of STT rotate and SMP Pause buttons Pumps Sampling Pump (SP) Dilution Aspiration Pump (DIP) Dilution Discharge Pump (DOP) Dilution Wash Pump (DCP) Sampling and reagent wash pump (SRWP) Reagent Dispensing Pump 1 (RP1) Reagent Dispensing Pump 2 (RP2) -
Page 18: Workstation (Front View)
CD. PC power lamp. Lights when the power for the personal computer is ON. Hard-drive access lamp. Lights when reading or writing to the hard disk. Reset Switch Access Door Figure 1-9. PC front view ADVIA 1800 Operator’s Guide... -
Page 19: Pc (Back View)
PC (back view) Modem connectors Sleep ITF board potentiometer Analyzer connector CRT connector Printer connector Serial connector (COM1) LIS Keyboard connector Mouse connector PC power connector Serial connector (COM2) URH Figure 1-10. PC back view Opening the Top Cover WARNING The instrument's top cover must be placed in the full open position for it to stay open. -
Page 20: Reagent Trays
(whichever results in a smaller rotation) to move reagents to the aspiration position. The number of trays and reagents used depends on the specified assay conditions. To check the reagent volume and number of tests remaining in a container, use the Reagent Inventory window. ADVIA 1800 Operator’s Guide... -
Page 21: Rgt Pause Button
Reagent Tray 1 (RTT1) Reagent Tray 2 (RTT2) Figure 1-12. Reagent trays RGT Pause button Use the RGT Pause button to temporarily stop testing, on the analyzer or from a lab automation system, so that reagents can be added or removed at the reagent trays. WARNING To avoid injury, heed all pause status messages. -
Page 22: Reagent Container Types
39, Interleaved 2 of 5, Codabar, Code 128, and NW7. • CTT (inner section): Used for calibrators, controls, and special purpose diluents. It has two rows. The outer row has 34 positions and the inner row has 27 positions (total 61). The CTT is water-cooled. ADVIA 1800 Operator’s Guide... -
Page 23: Smp Pause
Sample Barcode Reader Sample Tray (STT) Sample Tray (CTT) Figure 1-14. Sample tray SMP Pause Use the SMP Pause button at the Operation Panel or on the analyzer to temporarily stop sampling so you can add samples to or replace the STT/CTT tray. STT Rotation Button STT Rotation LED SMP Pause Button... -
Page 24: Sample Aspiration And Dilution Mechanisms
After the sample is dispensed, the DPP moves back to the wash port, where the inside is washed. Dilution probe valve 1 (DPEV1) opens, allowing the DCP to send standard diluent (saline 0.9%) through the inside of the DPP. After the wash, the saline solution drains down the wash port. ADVIA 1800 Operator’s Guide... -
Page 25: Sample Pumps
Sample pumps Sampling Pump (SP) Sampling and Reagent Wash Pump (SRWP) Figure 1-17. Sample pumps The sampling pump (SP) aspirates and dispenses samples through the SPP. The solenoid valves SPEV1 and SPEV2 facilitate sampling. After the sample is aspirated, the SPP moves to the wash port, where it’s outside is washed. -
Page 26: Dilution Tray Mixer
The DWUD has three nozzles, each performing a stage of the wash. Each nozzle works on a different cuvette, so the DWUD washes three cuvettes simultaneously. The cuvettes are being washed in different stages at the same time. ADVIA 1800 Operator’s Guide... -
Page 27: Dpp Probe Features
After a cuvette is washed by one nozzle, it moves to the next until washing is complete. While the DTT rotates, the DWUD is in the up position. Dilution Washer (DWUD) Figure 1-19. Dilution tray wash mechanism DPP probe features Clot detection operation The clot detection system utilizes a pressure transducer to monitor the pressure in the sample dilution probe line (DPP) for a complete obstruction during the sample aspiration... -
Page 28: Sample Delivery To Reaction Tray
Sampling mechanisms The sample probe (SPP) aspirates sample from the dilution tray (DTT) and dispenses it into reaction tray (RRV) cuvettes for analysis, according to specified conditions. The sampling pump (SP) handles the aspiration and dispensing functions. ADVIA 1800 Operator’s Guide... -
Page 29: Sample Probe
Sample probe Sample Probe (SPP) Wash Port Figure 1-20. Sample probe After aspiration, the SPP is lowered into an RRV cuvette, where it dispenses the sample. The tip of the probe is 2 mm deep into the solution, ensuring that no droplets remains on the tip after withdrawal. -
Page 30: Reaction Tray Operation
During each half-turn, unused cuvettes are washed with cell conditioner. Then a cell blank measurement is performed. You can view cell blank results in the Reaction Monitor window. If an assay is not running, you can operate the unit manually at the Manual Operation window. ADVIA 1800 Operator’s Guide... -
Page 31: Reaction Tray Mixers
Reaction tray mixers The reaction tray (RRV) mixers (MIXR1 and MIXR2) stir the contents (sample and reagent) of RRV cuvettes brought to their respective mixer positions. Mixing is performed using a using a paddle that spins and reciprocates. Strong and weak stirring options are available. -
Page 32: Reaction Tray Wash Mechanisms
: After washing by nozzle 4, the tray makes 10 half-turns to move the cuvette Exception with cell conditioner to nozzle 5 position. This is because 12 cuvette positions separate nozzles 4 and 5. During these additional half-turns, two cell blank measurements are performed. ADVIA 1800 Operator’s Guide... - Page 33 During each half-turn (3-second cycle), the nozzles operate as follows: Nozzle Probe Description Aspirates reaction liquid. Dispenses wash water. Absorbs overflow liquid (in abnormal conditions). Aspirates wash water. Dispenses detergent. Absorbs overflow liquid (in abnormal conditions). Aspirates detergent. Dispenses wash water. Absorbs overflow liquid (in abnormal conditions).
-
Page 34: Reaction Tank
The photometer then measures the absorbance based on the lamp energy and the optical density of the cuvettes. This process is repeated for as many times and wavelengths as required by the assay conditions. A cooling tank maintains the lamp temperature. ADVIA 1800 Operator’s Guide... - Page 35 The system monitors the output energy of the halogen lamp during the cell blank check and after each assay. The operator is alerted if the lamp performance is abnormal. Use the Lamp Energy Monitor window to ensure that the halogen lamp is functioning normally.
-
Page 36: Universal Rack Handler - Functional Description (Optional)
(LAS). Use the universal rack handler for routine patient sample analysis only. Process calibrators, controls, special diluents, reruns, and STAT samples with the onboard sample tray (STT). ADVIA 1800 Operator’s Guide... - Page 37 Laser Station 1 (LS1) Outfeed Pusher Conveyor 1 READY/STANDBY Switch Conveyor 2 Infeed Pusher Arm Main PCB Chassis Infeed Tray Cross Drive Display Panel Conveyor 3 Rack-load Status Indicator Sampling Station (LS2) Outfeed Tray Outfeed Buffer Figure 1-28. Universal rack handler components System Overview...
-
Page 38: Software Overview
Software Overview CAUTION Load only Siemens-specified software onto your ADVIA Chemistry system PC to avoid loss of data. This section of the manual describes the software windows available to configure and run your chemistry system. It does not explain how to use these windows. For detailed information on the use of the windows, refer to the online Operator’s Guide. -
Page 39: Operation Panel
Operating modes Alarm message box Load status indicator Time remaining indicator Siemens Remote Services (SRS) indicator Other tasks accessed from System(s) on the Operation Panel Use the System(s) list to perform these tasks. To open the menu, select at the System(s) top left of the panel. -
Page 40: Menu Panel
If you are setting the password for the first time, leave the Old password box blank. 4. To change the password, select Change The next time someone logs in with this ID, the new password will be required. ADVIA 1800 Operator’s Guide... -
Page 41: Description Of Software Windows
Displaying version information and reading or writing a memo Use this procedure to get information about the files currently in the system software. 1. At the System menu, select Version info The Version Information window displays the system version number and other information. -
Page 42: Sample Log Window
As the run continues, the circles containing samples change color. The colors indicate the current status of each sample. The color codes are displayed at the lower left of the window. When running controls, please wait, there is a delay before the color coding NOTE: updates. ADVIA 1800 Operator’s Guide... -
Page 43: Sample Test Status Color Codes
Sample test status color codes The Test Result Monitor window uses seven color codes to represent sample status, and the seven codes are displayed on the window. The Review/Edit window uses these seven plus an eighth to indicate that a test for the sample was ordered but not completed. -
Page 44: Review/Edit Window
Perform any of the following tasks at this window: • review sample results • configure reruns • print selected patient results • transmit selected patient results ADVIA 1800 Operator’s Guide... -
Page 45: Reaction Monitor Window
Reaction Monitor window Use this window to observe changes in reaction data. The changes are depicted as a function of time, or of the 98 detection points in an analysis. In the window, you choose a test and a sample for which you want to display a reaction over time. -
Page 46: Lab Results Converter (Lrc)
Lab Results Converter (LRC) The LRC module is included with the ADVIA 1800 Chemistry software, and must be installed by Siemens authorized personnel. The LRC converts Patient, Controls, and QC Results reports into 5-column format. -
Page 47: Data Transmit Window
When needed, use the correlation data to create a real time correction formula in the Analytical Parameters (Chemistry) window (or ISE Parameters of Setting window). Perform any of the following tasks at this window: • display charts • display chart data •... -
Page 48: Sample Select Window
Perform any of the following tasks at this window: • enter absolute or single-point (STD) calibration methods • enter multi-standard calibration methods • print the calibration setup information • delete the calibration setup information • configure the automatic calibration feature ADVIA 1800 Operator’s Guide... -
Page 49: Maintenance Windows
Maintenance windows Select to display the following Maintenance menu. Maint. System Startup/Shutdown Setting window Perform any of the following tasks at this window: • perform a system-assisted startup (Start set) • perform a system-assisted shutdown (Shutdown set) • perform an automatic startup (Auto start set) User Maintenance window Perform any of the following tasks at this window: •... -
Page 50: Ise Operation Window
• print the results • delete calibration trace data • change y-axis scale * The selectivity check must be performed under the supervision of authorized Siemens service personnel. Please call your local technical support provider or distributor. Manual Operation window Perform any of the following tasks at this window: •... -
Page 51: On-Line Monitor Window
IMPORTANT The operating mode must be READY or WAIT for you to run manual operations. Also, if you cannot perform an operation due to system restrictions, a buzzer goes off and a message displays at the Alarm message box (in the Operation Panel). Select ALARM the Operation Panel for more information and instructions regarding the buzzer. -
Page 52: Viewing Message Details
If you select Specified no, type in the number of messages you want printed beginning with the most current one. 3. Select Execute. Deleting the messages Select Safety clear. JEOL Maintenance window* Use this window to perform testing of the tubing connections. ADVIA 1800 Operator’s Guide... -
Page 53: Liquid Level Sensor Monitor Window
Liquid Level Sensor Monitor window** Use this window to check the detection waveform of the liquid level sensors for the sample-dilution (SPP) and reagent (RPP1 and RPP2) probes. In the window, the waveforms are plotted (over time) on three graphs (one for each probe). Monitoring the waveforms NOTE: Access to this window is through a tech_manager logon level only. -
Page 54: Monitoring Reagent Positions, Number Of Tests, Volumes, And Days Remaining
The calibration interval information for a method is preset in the Reagent Information window based on Siemens guidelines. If the Cal Interval Days field is not active, or a C is not displayed when you put a reagent with a new lot number on the system, check that the calibration interval number in the Reagent Information window is defined. -
Page 55: Executing A Barcode Scan
• Do not enter identical lot numbers for R1 and R2 user-defined reagent wedges. • Cal Status is the status of the calibration. The calibration can pass, fail, or be restored. • QC status is the status of the QC. The QC status can display as OK (green), warning (yellow), or error (red). -
Page 56: Printing A Reagent Summary Report
Use the Cal Interval Review list to review daily which methods you should calibrate. NOTE For barcoded reagents, this information is preset to Siemens guidelines. If this field displays a 0, no Cal Interval Days value shows in the Reagent Inventory window. The operator has an option to modify this field. -
Page 57: Reagent Container Settings Window
Reagent Container Settings window Use this window to enter and display information for non-barcoded reagent containers and start their Days Remaining counter. This window is updated automatically for barcoded reagents. This information is used by the Reagent Inventory window. Perform any of the following tasks at this window: •... -
Page 58: Qc Windows
• create printed reports • identify and report events such as lot changes and calibration dates Real-time QC window Use this window to review the performance for two controls simultaneously using a Levey-Jennings chart (x-chart) or a twin chart. ADVIA 1800 Operator’s Guide... -
Page 59: Daily Precision Control Window
NOTE: This window is intended to be used when two controls are run for each test. However, you can still use this window if you are running only one control. Daily Precision Control window Use this window to view daily control results. CAUTION Tests on the Daily Precision Control window must be in the same order as they display at the System Test List window to avoid incorrect positioning of results. -
Page 60: Control Data Setup Window
• requesting an automatic run of control(s) after a user-specified number of samples are processed Perform any of the following tasks at this window: • enter the sample information for a control • configure the automatic control feature • print the control sample information ADVIA 1800 Operator’s Guide... -
Page 61: Setup Windows
Setup windows NOTE: You must log on as a supervisor, tech_manager, or service to access window under the Setup button. System Specification Settings window* Use this window to enter settings related to the system configuration. You can enter or change settings for the areas listed below: •... -
Page 62: System Test List Window
Perform any of the following tasks at this window: • define up to five different flagging levels of concern for each serum indices NOTE: Operation of the serum indices feature is controlled in the Serum set area of the System Specifications Set window. ADVIA 1800 Operator’s Guide... -
Page 63: Ise Parameter Settings Window
ISE Parameter Settings window** Use this window to set the analysis parameters for ISE measurement of Na, Cl, and K electrolytes. Perform any of the following tasks at this window: • enter settings for individual electrolytes (Na, Cl, and K) •... -
Page 64: Setting System Parameters Window
Analytical Parameters (Chemistry) window Use this window to set up chemistry methods. Siemens methods are predefined when the system is received. For predefined methods, only expected values, rerun conditions, and correction formulas should be modified. You can define new methods. The system can store up to 200 chemistry methods in this window (including predefined methods). - Page 65 M-DET.P.n M-DET.P.p M-DET.P.r IMA setting (all parameters) These are Siemens defined methods, only edit user-defined parameters. NOTE: Methods 151–200 are reserved for user-defined methods. When you change and save your settings in the analytical parameter fields, the NOTE: version number in the upper-right corner of the window moves up one numerical increment and the date is updated to the current date, for example, from Ver.
-
Page 66: Process Sequence Window
Perform any of the following tasks at this window: • set conditions for avoiding reagent probe contamination • set conditions for avoiding RRV cuvette contamination • set conditions for anti-contamination detergent • print the conditions • clear the conditions ADVIA 1800 Operator’s Guide... -
Page 67: Online Settings Window
Online Settings window** Use this window to setup the communications between the system and a host computer. Refer to the publication titled LIS Interface Guide for detailed information about NOTE: this communications protocol. Perform any of the following tasks at this window: •... -
Page 68: Version Information Window
The version of the program that is being used in this version of the software (does not have to match). Explanation Brief description of the file. Safety Message This option displays information on safety message files in the system. ADVIA 1800 Operator’s Guide... -
Page 69: Etc
Column Description File name The name of the file. A .MSG extension indicates the file is a message. File date/time The date the file was created or last modified. Size The size (in bytes) of the file. Explanation Brief description of the file’s function. Version The version of the file being used in this version of the information... -
Page 70: Viewing The Content
• Select the viewer back arrow to return to the main content area from a reference document (such as PDF files). Your help viewer can resize, but it is recommended that the viewer stay in its NOTE: default size. ADVIA 1800 Operator’s Guide... -
Page 71: Operating The System
Access for Siemens service personnel You are automatically logged on at the user level during startup. No operator is required. If you log on at the supervisor or tech_manager levels, when done, you should log on to the user level (no password required). -
Page 72: Performing A System-Assisted Startup (Start Set)
Performing a system-assisted startup (Start set) 1. Verify that sufficient system reagents and wash solutions are available for the startup you want to run. 2. At the Menu Panel, select . then select Maint System Startup/Shutdown Settings ADVIA 1800 Operator’s Guide... -
Page 73: Checking The Analyzer
3. In the Mode set list, select Start set 4. Verify the selections for the startup you want to run. If no startup is defined or you want to change an existing one, proceed as follows: a. For each of the Proc. set, Set1, Set2, or Set3, you can select one of the following: (1) In the PRIME list, select the prime you want run or select NONE A Prime is required only if you replenish a system reagent or replace a... - Page 74 If the temperature is lower than normal, a supply problem may exist. Also, check your exterior water supply to confirm that it is adequately supplying the internal water bottle. ADVIA 1800 Operator’s Guide...
- Page 75 Using alcohol preps or lint-free towels moistened with 5% bleach solution, clean the surfaces and trays (see Maintenance section for detailed procedures). If any liquids spilled inside the analyzer, contact your local technical support provider or distributor. • Use only Siemens-recommended ancillary reagents to avoid erroneous test results. System Overview...
- Page 76 2. For multiple reagent methods, place R1 on reagent tray 1, and place R2 on reagent tray. You can load more than one container for each reagent. You must specify the reagent at the System Test List window. ADVIA 1800 Operator’s Guide...
-
Page 77: Set Up Of Daily Washes
3. After replacing the reagent(s), you must establish the correct on-system stability. a. Minimize the Reagent Inventory window. b. At the Menu Panel, select , then select Reagent Reagent Container Settings c. At the Reagent Container Settings window, locate the replaced nonbarcoded reagent. -
Page 78: Times Required To Perform Prime, Washes, And Cell Blank
In the Entry format area, select the means for identifying the first workorder in step 2e. d. In the Last no. entry format area, select the means for identifying the last workorder in step 2f. e. In the Start no. box, identify the first workorder you want downloaded. ADVIA 1800 Operator’s Guide... -
Page 79: Creating Workorders At The Analyzer
f. In the Last no. box, identify the last workorder you want downloaded or enter the number of workorders you want downloaded. g. Select Execute After the workorders are downloaded, you can manage them in the same way as the system workorders. -
Page 80: Deleting Or Changing Test Selectivity For Multiple Workorders
8. If Testcorrect was selected in step 3, select Test Table • To add a test, select it. The check mark must appear bold. • To delete a test, double-select it. The check mark must appear dim. 9. Select Return 10. Select Execute ADVIA 1800 Operator’s Guide... -
Page 81: Creating A Profile
Creating a profile 1. At the Menu Panel, select then select Request, Order Entry 2. Select Create Profile 3. In the Profile set no. box, enter the profile number (1 to 150). 4. In the Comment box, enter appropriate text. Because the first 8 characters are used to identify the profile on the Order Entry window, you can use these characters for the profile name, and the remaining space for any additional information. -
Page 82: Loading Patient Samples
Using barcode labels with a sample cup, insert the sample cup into a sample tube that has the correct label. • You can use Ezee Nest cups in primary sample tubes. ADVIA 1800 Operator’s Guide... -
Page 83: Methods Introduction
Methods Introduction Siemens Healthcare Diagnostics provides the procedures necessary for the preparation, use, and storage of the ADVIA Chemistry reagents in the specific method sheet. Calibrator information is provided in their respective package inserts. - Page 84 200 μL minimum for sample cups: 50 μL minimum IMPORTANT To avoid having insufficient sample when using sample cups, carefully dispense the specimen so no air bubbles are entrapped in bottom of the sample cup. ADVIA 1800 Operator’s Guide...
-
Page 85: Loading Patient Samples On The Optional Universal Rack Handler
Loading patient samples on the optional universal rack handler LASER WARNING BIOHAZARD Wear personal protective equipment. Only field personnel trained by Siemens should Use universal precautions. access laser assemblies. IMPORTANT Define container types for use on either the universal rack handler (LAS) or the onboard sample tray (STT). - Page 86 When the barcode reads a label, the corresponding sample indicator turns green. The sample indicator turns red if the sample tube is detected, but the barcode label cannot be read. If the sample tube is not detected, the sample indicator will not glow green or red. ADVIA 1800 Operator’s Guide...
-
Page 87: Urgent Samples And Manual Reruns Are Run From The Onboard Sampler (Stt)
Urgent samples and manual reruns are run from the onboard sampler (STT) 1. Verify that a workorder or rerun request exists for each STT sample. 2. At the Operation Panel, select Pause The operation mode changes to Pause Shift, then to Pause. A short delay may occur while the analyzer changes operational states. -
Page 88: Running Control Samples
From the optional universal rack handler or external transport 1. Select the second box (below Out side analyze). General smp. Analyze 2. To begin the run, select Start 3. Load the racks on the rack handler or the universal rack handler. ADVIA 1800 Operator’s Guide... -
Page 89: Monitoring Samples Loaded On The Optional Universal Rack Handler
Monitoring samples loaded on the optional universal rack handler 1. At the universal rack handler Operation Panel window, select on the menu bar, View then select or press Rack Handler Operation Monitor Perform any of the following tasks at the Rack Handler Operation Monitor window: •... -
Page 90: Monitoring An Analysis While It Is Running
STT/CTT graphic. If this is a barcode analysis, the barcode number displays, and the position number is 0-00. • The code panel shows the color codes used in the STT/CTT graphic to represent sample status. ADVIA 1800 Operator’s Guide... -
Page 91: Result Data Information
In the middle of the sample tray display, the tray (TT) number for the current run displays in the TT No. list box. If this is a barcode analysis, the TT number is 0. To view the status of prior tray samples that are still in process, select the down arrow of the TT No. -
Page 92: Searching The Sample Log
(2006), MM is the month (01 to 12), and DD is the day (01 to 31). Change an aspiration time using the format HH:MM:SS where HH is the hour (00 to 24), MM are the minutes (00 to 60), and SS are the seconds (00 to 60). 5. Select Print ADVIA 1800 Operator’s Guide... -
Page 93: Exporting The Sample Log Entries
Exporting the sample log entries You can export the current sample log file in ASCII format for use by another program such as Microsoft Excel. 1. At the File menu, select Export 2. Select or create the folder in which you want to save the file. 3. -
Page 94: Batch Transmission To A Host Computer
At the Open window, select a file name for the report format. c. Select Open 8. Enter a start number in the Start number (S) field and a last number in the Last number (L) field. ADVIA 1800 Operator’s Guide... -
Page 95: Batch Printing
The Print Format Settings window can create up to ten report layouts. Shutting down the ADVIA Chemistry system Siemens recommends that each laboratory back up the data on the ADVIA Chemistry System on a regular basis. For detailed instructions on this procedure, see As Needed Maintenance, Backing Up System Files. -
Page 96: Examples Of Shutdown Settings
Otherwise, the automatic startup does not occur. In this case, you cannot shut down Windows even if you select on the Shutdown [ADVIA] Startup window. Additionally, the CRT screen saver does not operate. ADVIA 1800 Operator’s Guide... -
Page 97: Performing A System-Assisted Shutdown (Shutdown Set)
Performing a system-assisted shutdown (Shutdown set) 1. Verify that sufficient system reagents and wash solutions are available for the startup you want to run. 2. At the Menu Panel, select , then select Maint. System Startup/Shutdown Settings 3. In the Mode set list, select Shutdown set 4. -
Page 98: Emergency Stop, Shutdown, And Recovery Procedures
To resume operations after power is restored 1. If the Startup window is open, select and perform the normal shutdown Shutdown operation. 2. Turn off the workstation power and turn the Operate/Standby switch on the analyzer Standby ADVIA 1800 Operator’s Guide... -
Page 99: Additional Operating Instructions
3. Wait approximately 20 seconds. 4. Perform the normal startup operation and open the Startup window. 5. At the Startup window, enter a password. 6. Select , then select Re-Start 7. If possible, repeat the task prior to the power failure and verify that the data were stored. -
Page 100: Running Automatic Calibration
If that reagent container is empty, the reagent container with the next lowest reagent tray number is used. Before performing a reagent barcode read or a reagent reset, you should remove any empty reagent containers from the reagent tray. ADVIA 1800 Operator’s Guide... -
Page 101: Auto-Calibration And Auto-Qc Situations That Need Corrective Steps
Auto-calibration and auto-QC Situations that need corrective steps For additional information on auto-calibration and auto-QC, refer to the online Operator’s Guide. Auto calibration with system-related errors If the system switches to a Backup reagent pack and is scheduled to run a BLK (Blank) and STD calibration, but there is a system-related error ("s", "t", "S", "r", "F", "A", "M", "Q"... - Page 102 ADVIA 1800 Operator’s Guide...
-
Page 103: Calibration
3 Calibration Calibration overview WARNING When updating Calibration Factors, you must recalibrate all methods associated with that calibrator. When to calibrate Refer to the ADVIA Chemistry system methods documentation for the calibration and the reagent blank/rate recommendations. Setting up the calibration •... -
Page 104: Entering Multi-Standard Calibration Methods
Do not enter the factor values in the View Calibration Curve window at this time. These values may not be saved. Instead, enter the factor values in the Calibration Setup window. d. Select Return e. At the Calibration Setup window, select Save ADVIA 1800 Operator’s Guide... -
Page 105: How To Calibrate A Multi-Standard Method
How to calibrate a multi-standard method 1. At the Analytical Parameter (Chemistry) window, in the Standard Setting area, select Multipoint Cal Setting 2. When the Multi-Standards Set window opens, verify that all the parameter information is already pre-defined. 3. If this is not the case, enter method-specific values from the method's parameter sheet. -
Page 106: Reviewing The Calibration
NOTE: Select and drag the column heading borders to resize the columns in the calibration data table. 5. To clear the data for the method selected, select Clear 6. When prompted, select ADVIA 1800 Operator’s Guide... - Page 107 7. To reset the calibration, select the check box. Reset : You cannot cancel the reset once you select . If you resize the reset NOTE Save column and save your changes, those changes are retained when you exit out and back into the window.
- Page 108 ADVIA 1800 Operator’s Guide...
-
Page 109: Quality Control
4 Quality Control Quality control overview When to run control samples Refer to the ADVIA Chemistry system methods documentation for the quality control recommendations. Setting up quality control • Use the QC Sample Definition window to define each of the 26 controls that can reside on the calibrator/control tray (CTT). -
Page 110: Advia Qc Window
The laboratory should take and document appropriate corrective actions, which may include recalibration, before reporting patient results. Verify that the controls and reagents were prepared properly and have not expired. ADVIA 1800 Operator’s Guide... -
Page 111: Maintenance
ISE procedures marked with an *. WARNINGS • You must be a Siemens-trained user to perform the maintenance procedures described in this document. Some of these procedures require the top cover be opened and the probe splash shields removed, exposing the user to biohazard materials and moving parts. - Page 112 1. At the analyzer power panel, turn the Operate/Standby switch to Operate 2. At the Startup/Shutdown window, select Restart 3. Select 4. Enter the user name and password. When Initialize displays in the Operation Panel modes field, select Initialize. ADVIA 1800 Operator’s Guide...
- Page 113 Daily Every 2 Months Clean the probes. Clean the dilution tray cuvettes. Clean the mixing rods. Clean and replenish the cuvette Clean the reaction and dilution cuvette conditioner bottle. washers. Every 3 Months Check reagents and system solutions. Replace the lamp. Inspect the probe wash cups.
-
Page 114: Analytical Parameter Audit Trail
Analytical Parameter Audit Trail ADVIA 1800 software provides an Audit Trail to track user and APTool changes to any field in the Analytical Parameter window for all methods. The Audit Trail excludes fields from the Analytical Parameters (Serum) and the ISE Parameter Setting windows. -
Page 115: Daily Maintenance
Daily maintenance Inspecting and cleaning the probes Materials required: • Phillips screwdriver BIOHAZARD • Alcohol prep pad or lint-free towels and 5% bleach Wear personal protective equipment. solution Use universal precautions. Time: 10 minutes Analyzer mode: STANDBY 1. Visually inspect each probe daily. Dilution Probe (DPP) Sample Probe (SPP) Reagent Probe 1 (RPP1) - Page 116 6. Lift and manually rotate the probe arm to an accessible location. The movement may feel a bit awkward and tight. Figure 5-3. Manually adjusting probe ADVIA 1800 Operator’s Guide...
-
Page 117: The Probe Cleaning Tool Kit
Probe Accessible Location Dilution probe (DPP) Over the sample tray (STT) OR over the ISE Sample probe (SPP) Over the dilution tray (DTT) Reagent probe 1 (RPP1) Over reagent tray 1 (RTT1) Reagent probe 2 (RPP2) Over reagent tray 2 (RTT2) 7. -
Page 118: Procedure
To prepare a 10% solution of household bleach, dilute one part of bleach with nine parts of clean distilled water, or clean de-ionized water. The prepared solution is stable for one week when stored at room temperature. ADVIA 1800 Operator’s Guide... -
Page 119: Inspecting And Cleaning The Mixing Rods And Mixer Wash Cups
11. To remove the probe cleaning tool, hold the joint- holder end of the probe and carefully turn the push- in fitting counter clockwise. 12. Reinstall the probe. 13. Turn the Standby Operate Switch to Operate and reconnect. 14. To ensure proper flow through the probe, at the Operation Panel, perform a PRIME 2. -
Page 120: Checking Reagents And System Solutions
4. Examine RTT1 and RTT2 to determine if the DI H2O reagent wedges need to be filled with water. Fill as needed. 5. If water was added, replace the reagent tray covers and allow the water temperature to stabilize for at least 30 minutes. ADVIA 1800 Operator’s Guide... -
Page 121: Inspecting And Cleaning The Reaction (Wud) And Dilution (Dwud) Cuvette Washers
6. Place a thermometer inside the water reagent wedge and measure the temperature. The thermometer should read from 8° to 14°C. NOTE: If the temperature reading is outside this range, please contact your service provider. 7. Record the temperatures as part of the daily maintenance report. Inspecting and cleaning the reaction (WUD) and dilution (DWUD) cuvette washers Materials required:... - Page 122 Ensure that all tubes are securely connected. c. Remove and properly dispose of the toweling. d. Ensure that each nozzle is centered above the corresponding cuvette. 9. Ensure that no threads or fibers are left on the wash nozzles after cleaning. ADVIA 1800 Operator’s Guide...
-
Page 123: Inspecting And Cleaning The Cuvette Splash Covers
10. Return the analyzer to the READY mode. 11. Verify the wash head nozzles are correctly centered in the cuvettes: a. At the Menu Panel, select , then select Maint Manual Operation For additional information concerning the Manual Operation window, refer to the Manual Operation window in the online Operator’s Guide. -
Page 124: Inspecting And Cleaning The Probe Wash Cups
90° angle, then gently lift the tab of the DPP shield and remove. 5. Unscrew all thumb screws, then remove the splash guard protective covers from the wash cups. If the system includes an anti-rotation bracket, avoid hitting it while removing NOTE: the splash guard protective cover. ADVIA 1800 Operator’s Guide... -
Page 125: Inspecting The Pumps
6. Lift and manually rotate the probe arm over the STT or the RTT tray. The movement may feel a bit awkward and tight. 7. Pour deionized water into the wash cups and overflow sensor unit, then clean and dry these areas with lint-free towels. - Page 126 ( • Drip tray under the pumps Figure 5-11. Typical Pump b. If moisture is detected, ensure each tubing connection is snug (hand-tightened). c. If leaks persist, call your local technical support provider or distributor. ADVIA 1800 Operator’s Guide...
-
Page 127: Performing The Startup Wash (Wash3)
Performing the startup wash (WASH3) Materials required: • Deionized water BIOHAZARD Time: 26 minutes Wear personal protective equipment. Use universal precautions. Analyzer mode: READY The daily startup wash rinses the probe lines, reaction cuvettes and dilution cuvettes. Location Position Wash Solution CTT-15 ISE Detergent Solution CTT-16... -
Page 128: Performing The Shutdown Wash
1. At the Operation Panel, select Wash 2. Ensure the 10-mL tube at CTT ( ) position #49 contains a 10% solution of Cuvette Wash Solution and that the cup at CTT ( ) position #15 contains ISE Detergent. ADVIA 1800 Operator’s Guide... -
Page 129: Performing Additional Ise Electrode Washes
3. Ensure the bottle at RTT1 ( ) and RTT2 ( ) position #55 contains a 10% solution of Cuvette Wash Solution. 4. Ensure the 10-mL tube at CTT ( ) position #50 contains DI water. 5. Ensure the bottle at RTT1 ( ) and RTT2 ( ) position # 56 contains DI water. -
Page 130: Recording Ise Slopes
Recording ISE slopes Once a day, record the slopes from a successful ISE calibration on the Maintenance Log. The slopes are provided on the ISE Monitor, RBL/Calibration History, and RealTime Monitor windows following a successful calibration. ADVIA 1800 Operator’s Guide... -
Page 131: Weekly Maintenance
Weekly maintenance Performing the weekly wash Materials required: • 5% solution of Reagent Probe Wash 3 BIOHAZARD (REF 03164495, PN B01-4183-01) Wear personal protective equipment. • ISE Wash (REF 01307361, Use universal precautions. PN B01-4174-01) • Deionized water Time: 38 minutes Analyzer mode: READY Laboratories running the system more than 8 hours per day or running large numbers of dialysis or urine samples are advised to perform this Weekly wash procedure... -
Page 132: Checking And Replenishing The Lamp Coolant
Figure 5-13. Lamp access cover 2. Check the fluid level in the reservoir. If the level is between the 5- and 9-cm marks, the label is green on the reservoir, proceed to step 4. ADVIA 1800 Operator’s Guide... -
Page 133: Checking Lamp Energy
If the reservoir fluid level is less than 5 cm, the label is red on the reservoir, add coolant as follows: a. Turn the reservoir cover counterclockwise to remove it. b. Fill the reservoir to the 9-cm mark with a 5% solution of Lamp Coolant Additive (REF 04533710, PN B01-4496-51) in deionized water (do NOT fill with Reaction Bath Oil). - Page 134 • The AD points are not within ±40 of the center. • The voltage reading (Volts column) for any of the 14 wavelengths is outside the range 5.0 to 9.0 volts • The attenuation [ATTENU(%) column] for any of the 14 wavelengths falls below ADVIA 1800 Operator’s Guide...
-
Page 135: Reading Lamp Energy Data
Only if you replaced the lamp, select Regist Data , then select in the Registration window. 13. If not, proceed to step 14. The system uses the data from the lamp energy data registration as the NOTE: comparison standard for the next calculation of the attenuation ratio. The displayed attenuations for all the reference values are set to 100%, indicating no attenuation. -
Page 136: Cell Blank Measurement Results Are Summarized As Follows
Abnormal cuvettes remain registered as abnormal until a future measurement determines that they can be used. Reference value The reference value (the average value of the measurements of all cuvettes) remains the same until the next measurement. ADVIA 1800 Operator’s Guide... -
Page 137: Cleaning The Analyzer And Rack Handler Exterior Panels
Cleaning the analyzer and rack handler exterior panels Materials required: • Lint-free towel BIOHAZARD • 10% solution of bleach (5% sodium Wear personal protective equipment. hypochlorite) and water Use universal precautions. Time: 10 minutes Analyzer mode: OFF 1. Set the analyzer and rack handler (if applicable) to OFF. WARNING Turn off the main power switch at the back of the analyzer to avoid catching the toweling in the cooling fans. -
Page 138: Monthly Maintenance
Pull up the 2 Nylatch fasteners ( ) securing the STT tray in place. d. Lift out the STT tray by the two metal handles ( 5. Using lint-free towels, wipe the interior of the STT and CTT housings. ADVIA 1800 Operator’s Guide... -
Page 139: Cleaning The Inside Of The Reagent Tray Refrigerated Housing
CTT Tray STT Tray CTT Nylatch Fasteners - 2 places CTT Handle STT Nylatch Fasteners - 2 places STT Handles - 2 places Locator Screw Figure 5-15. Components of CTT and STT trays 6. Replace the CTT and STT tray and covers. a. -
Page 140: Cleaning Or Replacing The Wash Solution Reagent Containers (53 - 56)
15 µL Cuvette Conditioner 1:40 with water NOTE: The total volume of cuvette wash and cuvette conditioner used by the system can vary slightly from the volumes provided in the tables above. This is normal behavior. ADVIA 1800 Operator’s Guide... -
Page 141: Cleaning And Replenishing The Dilution Bottle
Cleaning and replenishing the dilution bottle Materials required: • Deionized Water BIOHAZARD • Physiological saline (0.9% NaCl) Wear personal protective equipment. Use universal precautions. Time: 10 minutes Analyzer mode: STANDBY The dilution bottle may be cleaned when it is refilled, but must be cleaned at least NOTE: once a month. -
Page 142: Cleaning And Replenishing The Cuvette Wash Bottle
), then turn it counter- clockwise and pull it out. WARNING Before handling any reagents read the warnings on page 196. CAUTION Make a note of the bottle position on the shelf to avoid mixing up the fluid bottles. ADVIA 1800 Operator’s Guide... -
Page 143: Cleaning The Chiller Filter
4. Remove the bottle. 5. Empty the remaining contents of the bottle. 6. Rinse the bottle with deionized water and drain well. CAUTION Do not allow the level sensor connector to get wet. This may damage it. 7. Refill the bottle with cuvette wash solution. 8. -
Page 144: Cleaning The Large Water Pump (Lwp) Filter
Figure 5-18. Location of LWP filter IMPORTANT Be sure to label the right and left sides of the LWP filter before removing it. 4. Gently pull the filter toward you to gain access to the attached, blue inlet and outlet tubes. ADVIA 1800 Operator’s Guide... - Page 145 5. Disconnect the blue tubes from the filter: a. Squeeze the quick-disconnect fitting (2) toward the elbow (3), while pulling the blue tube (1) away from the fitting. b. Repeat for the other tube to completely remove the filter from the system.
-
Page 146: Every 2 Months Maintenance
To remove the cuvettes under the dilution washer (DWUD) and splash cover, turn the tray by hand until the cuvettes are clear. You will feel resistance when manually moving the tray. This is normal NOTE: ADVIA 1800 Operator’s Guide... -
Page 147: Cleaning And Replenishing The Cuvette Conditioner Bottle
4. Immerse the cuvette segments in 5% Probe Wash 3 solution. a. Ensure no air bubbles are in the cuvettes. b. Allow the cuvettes to soak for at least 10 hours. 5. Wash the cuvettes under running water, then rinse them in deionized water. 6. - Page 148 Return the analyzer to the READY mode. b. At the Operation Panel, select Prime c. At the Prime Settings dialog box, select and type for the Number of Prime 2 times in all fields. d. Select Execute ADVIA 1800 Operator’s Guide...
-
Page 149: Every 3 Months Maintenance
Every 3 months maintenance Replacing the lamp Materials required: • Halogen lamp, 12 V/50 W BIOHAZARD (REF 02127928, PN 073-0099-01) Wear personal protective equipment. Time: 60 minutes Use universal precautions. Analyzer mode: STANDBY The lamp MUST be replaced: • Quarterly •... - Page 150 12. Register the data and verify that attenuations register at 100%, voltages are between 5–9, and scatter is no greater than ±40. 13. Perform the cell blank measurement test. Siemens recommends the assays on the system be calibrated after the lamp is NOTE: replaced.
-
Page 151: Washing The Electrodes Lines
Washing the electrodes lines Materials required: • Dummy electrode with o-ring and cap BIOHAZARD (REF 05938765, PN 073-0342-01) Wear personal protective equipment. • ISE detergent solution Use universal precautions. (REF 01307361, B01-4174-01) Time: 25 minutes Analyzer mode: Manual operation WARNING Read and follow the cautions on the box and label before handling any reagents. - Page 152 10. Verify no leaks or bubbles exist and that the buffer is going to the waste during the priming cycle. 11. At the ISE Operation window, next to the Initialize area, select Execute 12. Perform calibration and run controls. 13. Perform an additional 10 buffer primes, then calibrate, and run controls. ADVIA 1800 Operator’s Guide...
-
Page 153: Every 4 Months Maintenance
Every 4 months maintenance Cleaning the ancillary reagent bottle filters Materials required: • Filters (REF 08602474, PN 073-0033-01) BIOHAZARD order one set per bottle Wear personal protective equipment. Time: 20 minutes Use universal precautions. Analyzer mode: STANDBY Use this procedure to clean the filters in the following bottles •... -
Page 154: Cleaning The Pure-Water Bottle Filter
Figure 5-26. Pure-water bottle lines and filter 3. Unscrew and remove the bottom half of the filter holder, then remove the filter. If the filter is ripped or damaged, replace it with a new filter (18R). NOTE: ADVIA 1800 Operator’s Guide... -
Page 155: Replacing The Reaction And Dilution Cuvettes
4. Clean the old filter. An additional set of filters is included with the analyzer. Locate the spare NOTE: filters and place them on the analyzer to avoid downtime. 5. Place the filter in a beaker filled with a freshly made 10% solution of household bleach and water. - Page 156 5. Remove the 6 cuvette sets on the dilution tray (DTT). a. Unfasten the 2 thumbscrews ( ) on each section. b. Hold the cuvette section by the tab ( ) and lift it from the tray. ADVIA 1800 Operator’s Guide...
- Page 157 c. To remove the cuvettes under the dilution washer (DWUD) or cuvette splash cover, rotate the dilution tray by hand until the cuvettes are clear. 6. Install the new cuvette sets on the DTT and fasten the set screws by hand. 7.
-
Page 158: As Required Maintenance
System Files - Approximately 30 MB of disk space is required. • - Disk space required is dependent on the amount of data stored on the Data Files C:/ drive. A new CD holds approximately 650 MB. ADVIA 1800 Operator’s Guide... -
Page 159: Restoring System Files
7. Verify that the backup name is the current date. NOTE: The system names the backup automatically, which consists of a yyyymmdd format. Accept the destination folder default for the DVD disk drive letter (usually D:) or select to choose a different destination. If a recordable disk is not Browse available, then the backup can be stored on the partitioned storage drive (D:). -
Page 160: Replacing The Spp, Rpp1, And Rpp2 Probes
3. Lift and manually rotate the probe to an accessible location. 4. Loosen but do not remove the 2 screws on each side of the probe cover. Lift the cover off of the probe. NOTE: The screw holding Terminal 1 may need to be removed. ADVIA 1800 Operator’s Guide... - Page 161 Terminal 2 Probe Joint Connector Terminal 1 Joint Holder Flange Phillips Screws (4 places) Figure 5-29. Probe components 5. Cover the 12-volt LLS amplifier and wires with a lint-free paper towel. 6. Using the pliers, loosen the joint connector ( ) turning counterclockwise, then unfasten and remove it by hand.
-
Page 162: Install A New Probe
9. Remove any remaining lint-free towels from the analyzer. 10. Return the analyzer to the READY mode. 11. At the Menu Panel, select . Then select Maint User maint 12. Verify that the probes align correctly over the cuvettes. ADVIA 1800 Operator’s Guide... -
Page 163: Replacing Dpp Probes Equipped With Crash Detection
13. In the Position probes for routine cleaning area, select Start All probes (SPP, RPP1, and RPP2) move over cuvettes. 14. At the Operation Panel, select Prime PRIME 2 and then Execute to ensure proper water flow through the probe. 15. -
Page 164: Removing The Probe From The Probe Arm
) approximately 1 cm. 2. To remove it from the end of the probe body, gently flex and pull back on the tubing CAUTION Be careful not to damage the flare end or kink the tube. ADVIA 1800 Operator’s Guide... -
Page 165: Install The New Dpp Probe
3. Loosen but do not remove the probe wire screw ( ), then remove the orange probe wire from the post. 4. Hold the probe arm securely and open the two spring clips ( ) by grasping each at the side closest to the black wire ( ), then gently raising each to an open, locked position. -
Page 166: Aligning The Dpp Probe
• RRV (reaction) bath oil BIOHAZARD (REF 09323099, PN B01-4180-01) Wear personal protective equipment. Time: 10 minutes Use universal precautions. Analyzer mode: STANDBY RRV (Reaction) Bath Oil Bottl Level Sensor Connector Filter Cap Figure 5-33. RRV bath oil bottle ADVIA 1800 Operator’s Guide... - Page 167 CAUTION Do not attempt to clean the RRV bath oil bottle ( ) with water; RRV bath oil and water do not mix. 1. Set the analyzer to Standby. 2. Unscrew the filter cap ( ) at the front of the RRV bath oil bottle ( ), then pull up the tube with the filter.
-
Page 168: Preventive Cleaning Of The Wash Station Lines
4 parts of distilled or deionized water. The prepared solution is stable for one week when stored at room temperature. Minimum recommended volume is 200 mL of bleach plus 800 mL of deionized distilled water. ADVIA 1800 Operator’s Guide... - Page 169 NOTE: The remainder of this procedure describes the steps to clean the WUD and DWUD wash stations. Perform the entire procedure for the WUD lines and nozzles, then repeat the entire procedure for the DWUD lines and nozzles. The various parts are described as the "DWUD/WUD,"...
- Page 170 NOTE: Using more than 150 mL of wash solution may cause a leak from the vacuum tank on the side of the instrument. If a leak occurs, secure the WUD/DWUD wash head to the system and run a WASH3. ADVIA 1800 Operator’s Guide...
- Page 171 9. Ensure that the center nozzle (yellow-labeled overflow nozzle) is in liquid, without overflowing the tray. 10. Repeat step 5, to thoroughly clean the WUD/DWUD lines with wash solution. As an aid to cleaning the aspiration lines, manually lift the WUD/DWUD NOTE: wash head in and out of the cleaning solution to introduce air into the lines.
-
Page 172: Washing All The Ise Lines
Figurer 5-36. Location of ISE Buffer bottle 4. Loosen the thumb screw and lift the ISE cover. 5. Disconnect the electrode connectors. 6. Remove the thumbscrew ( ) to release the plate that secures the electrodes and the block containing the electrode. ADVIA 1800 Operator’s Guide... -
Page 173: Washing The Lines
Figure 5-37. ISE electrode plate thumbscrew 7. Remove the electrodes and replace it with the dummy electrode. 8. At the ISE Operation window, in the Bufferprime area, type in the Times field. 9. Select Execute 10. When prompted, select to execute buffer prime. Washing the lines 1. -
Page 174: Priming And Initializing The Ise Module
, then select Maint. ISE Operation 2. In the Period. wash area, select , then select 3. Using a Phillips screwdriver, remove the screws ( , see Figure 5-2) that secure the DPP shield to the analyzer panel. ADVIA 1800 Operator’s Guide... -
Page 175: Installing Electrodes
4. Push the DPP shield to the right and slowly lift the DPP shield until it reaches approximately a 90° angle, then gently lift the tab of the DPP shield and remove. 5. Loosen the thumb screw and lift the ISE cover. 6. -
Page 176: Calibrating The Ises
5. Cover the container and store at 0° - 40°C (32° - 104°F). 6. When ready to use, rinse the electrode with deionized water. If the electrode is stored cold, allow time for it to equilibrate to room NOTE: temperature before use. ADVIA 1800 Operator’s Guide... -
Page 177: Conditioning The Na And K Electrodes
Conditioning the Na and K electrodes Materials required: • 10 mL of serum pool BIOHAZARD • 30 mL of ISE Buffer Wear personal protective equipment. (REF 03463190, PN B01-4171-51) Use universal precautions. • 2-mL or 3-mL plastic, disposable pipette Time: 5 minutes (preparation) 24 hours (immersion) Analyzer mode: NA NOTES... -
Page 178: Cleaning The Dilution Bowl And Waste-Drain Nozzle
10. At the ISE Operation window, in the Final operation area, select Execute Water is dispensed into the ISE module. 11. To dissolve the crystals attached to the liquid-supply nozzle, let it stand for about five minutes. ADVIA 1800 Operator’s Guide... -
Page 179: Cleaning The Waste Drain Nozzle
12. At the ISE Operation window, in the Dil Bowl drain area, select Execute The water in the dilution bowl drains. 13. Absorb any water and clean any dirty parts around the liquid-supply nozzle ( ) using a damp cotton swab or similar item. Figure 5-39. -
Page 180: Maintaining The Ise Unit After The Dilution Bowl And Waste-Drain Nozzle Are Clean
4. At the ISE Operation window, in the Initialize area, select Execute 5. When prompted, select to execute. 6. At the ISE Operation window, in the Period.wash area, select , then select 7. At the ISE Operation window, select Exit 8. Perform calibration and run controls. ADVIA 1800 Operator’s Guide... -
Page 181: Troubleshooting
6 Troubleshooting For probable causes and solutions of the events listed below, refer to the Troubleshooting section of the online Operator’s Guide: • System error messages The error message log on the analyzer also has information to guide you NOTE: through resolving error messages. - Page 182 ADVIA 1800 Operator’s Guide...
-
Page 183: File Management
7 File Management Saving the error log to a test file You can create a text file to save to a CD or on the hard drive on the PC. These files are useful for troubleshooting, keeping track of analytical parameter (chemistry) settings for user defined methods, or for emailing. -
Page 184: Saving The Test Data From The User Maintenance Window
8. Select 9. In the Save of Text File dialog box make the following selections: a. Select the appropriate drive letter in the Save in list box. b. Enter the file name in File Name box. ADVIA 1800 Operator’s Guide... -
Page 185: Saving Reaction Data In Csv Format
10. Select Save You can save Control sample data by following steps 3-7. Select the control sample, date, and enter the control sample number (PAxx-PZxx). 11. Verify that the data was saved to the CD or DVD as follows: a. Select the Drag-to-Disc popup window. -
Page 186: Saving A Data Archive From User Maintenance Window
• Patient data is saved with an .idt file extension. • Control data is saved with an .pdt file extension. 11. Select Save in the File Save dialog box. 12. Use Windows Explorer to verify that the data was saved to the CD or DVD: ADVIA 1800 Operator’s Guide... -
Page 187: Viewing Data That Was Previously Archived
Viewing data that was previously archived 1. Verify that the analyzer is in READY or WAIT mode. 2. Place the data CD or DVD into the DVD/CD-RW drive on your PC. 3. Select Request , then select Review/Edit 4. Select Archive from the filing option in the pull down menu. - Page 188 ADVIA 1800 Operator’s Guide...
-
Page 189: System Setup
8 System Setup Connecting the ADVIA Chemistry System and your host computer 1. Have your laboratory computer professional connect the host computer as described in the publication titled LIS Interface Guide. 2. Use the Online Settings window to enter the communication parameters. 3. -
Page 190: During Operation System Settings Area
1. Set the ELA switch in the power supply distribution chassis panel (on the back of the analyzer) to the position. 2. At the Systems Specifications Settings window, set the Electrolyte option to Avail 3. At the System Monitor window, set the electrolyte option to Operate ADVIA 1800 Operator’s Guide... -
Page 191: Setting Up Ise Parameters
Setting up ISE parameters Perform any of the following tasks at the ISE Parameter settings window: • enter ISE parameters • Setup Calibration information • enter Normal value set • define wash and prime settings • define Rerun conditions • define Real time correction formula 1. - Page 192 If the dilution factor range is exceeded, a d flag is reported. 8. The fifth check is Th, that evaluates the ISE thermistor. If the thermistor is defective, the ISE calibration will fail and a T flag is reported. ADVIA 1800 Operator’s Guide...
-
Page 193: Configuring Reruns
Configuring reruns You may have to rerun some patient tests if they are flagged with an alarm mark or for any reason required by your laboratory review protocol. If needed, the chemistry system can automatically request and rerun flagged results. You can also manually request a rerun. - Page 194 ADVIA 1800 Operator’s Guide...
-
Page 195: Appendix A - Safety Information
To avoid damage to the eyes, never look directly at the laser beam or at its reflection from a shiny surface. All field service procedures must be followed precisely. Only Siemens-trained field service personnel should perform procedures related to laser assemblies. -
Page 196: Household Bleach Warning
In case of contact with skin, immediately wash with soap and water. • Avoid inhaling chemical vapors. If you inhale chemical vapors, promptly leave the area and seek fresh air ADVIA 1800 Operator’s Guide... -
Page 197: Regulatory Compliance
Regulatory compliance Laser information The chemistry system complies with CDRH laser radiation Class 1 and EN-60825-1 laser radiation Class II. In compliance with EN-60825-1, the analyzer sample tray (STT) barcode reader is classified as a Class II laser device having a maximum power output of ≤ mW at a wavelength of 670 nm, a pulse duration of 127 ns, and 4.78 mr units of beam divergence. - Page 198 ADVIA 1800 Operator’s Guide...
-
Page 199: Appendix B - Warranty And Support Information
CAUTION Please observe the warning and hazard statements appearing throughout the online operator’s guide. If the ADVIA 1800 Chemistry system is used in a manner not specified by Siemens, the protection provided by the equipment may be impaired. Warranty period The limited warranty period generally commences upon installation of the original instrument at the customer’s location and extends for a period of one year thereafter,... -
Page 200: Service Calls
1. Repairs or modifications have been made to the instrument by someone other than an authorized Siemens representative. 2. The instrument has been operated using accessories and supplies other than Siemens brand accessories, or consumable supplies and/or reagents not having the same grade, quality, and composition as defined in the system operator’s manuals. - Page 201 4. Customer did not purchase the instrument from Siemens or one of its authorized distributors. 5. The instrument has not been installed within 90 days of shipment to the customer’s facility unless otherwise specified.
-
Page 202: Design Changes And Retrofitting Of Instruments
Software License No title or ownership of software is transferred to the customer. The software component of this Siemens system and any of its modules are merely licensed to the customer for its own use on such system. Any software (including documentation) provided for the system contains proprietary information constituting valuable trade secrets and is protected by federal copyright law. -
Page 203: Advia Contact Information
If you are located in the United States, you can contact the Customer Service by calling toll free: 1-877-229-3711. Department If you are located outside the United States, please contact the Siemens office nearest you. Siemens Offices Worldwide www.siemens.com/diagnostics Appendix... - Page 204 ADVIA 1800 Operator’s Guide...
-
Page 205: Appendix C - Customer Replaceable Parts
Appendix C – Customer replaceable parts Description Location Adapter, STT (6PC/PKG) 073-0002-01 08192071 Sample tray Bottle, plastic, saline 073-0423-01 03136041 Cover, CTT 073-0948-01 06143936 Cover, RTT1 073-0870-01 06527904 Cover, STT 073-0949-01 00735246 Cuvette (DDT) 1x20 073-0022-01 05049669 Dilution tray Cuvette, (RRV) 1x17 073-0023-02 05024992 Reaction tray Electrode cover, ISE... - Page 206 073 0384-01 07199951 Screw, thumb, 3x6 073-0385-01 02291299 Shield, DPP 073-0951-01 04457097 Splash cover, RPP1 073-0859-01 02122926 Splash cover, RPP2 073-0860-01 08425947 Splash cover, SPP 073-0861-01 03102155 Splash cover, CTT/STT 073-0950-01 08176645 Waste bottle 073-0383-01 09457923 ADVIA 1800 Operator’s Guide...
-
Page 207: Appendix D - Specifications
1800 tests/hour Biochemistry 1200 tests/hour Electrolyte 600 tests/hour Simultaneous measurement item Normally 52 (main system) + 3 (ISE); 150 Siemens defined assays; 50 user-defined assays. Sample Measurement sample Blood serum, plasma, urine (method dependent), and CSF Containers 5-mL (13 x 75 mm), 7 –mL (13 x 100 mm), 10-mL (16 x 100 mm) collection tubes;... - Page 208 Stirring immediately after additions of samples and reagents (S, R1, R2) Mixer 1 is used for R1; Mixer 2 is used for R2. Reaction times 3, 4, 5, 10 minutes Extended reaction times: 15 & 21 minutes Reaction temperature 37°C Temperature regulation: ±0.1°C ADVIA 1800 Operator’s Guide...
- Page 209 Item Description Reaction tank Inert liquid circulation system Measurement point 98 detection points/6 seconds in 10 minute reaction Photometer Concavity diffraction grating, rear spectroscopy system Measurement wavelength 14 fixed wavelengths (340, 410, 451, 478, 505, 545, 571, 596, 658, 694, 751, 805, 845, and 884 nm), 1 or 2 wavelength calculation Light source 12V, 50W halogen lamp, cooled by forced water circulation...
- Page 210 Circuit breaker - 15 or 20 amps. • Ventilation sufficient to maintain +18°C to +30°C (+64° to +86°F) Cooling/ventilation requirements operating temperature • The maximum temperature change the system can accommodate is 2°C/hour. ADVIA 1800 Operator’s Guide...
- Page 211 Item Description • System is for indoor use at an altitude of up to 2000 meters with a pollution degree of 2. • Maximum relative humidity allowable with system operating is 40% to 70% with no condensation. • Heat output: 50 Hz 60 Hz Power off mode:...
- Page 212 ADVIA 1800 Operator’s Guide...
-
Page 213: Appendix E - Symbols
Appendix E – Symbols Explanations of symbols associated with the ADVIA 1800 system Warning and caution symbols These symbols are used for both caution and warning. WARNING indicates the risk of personal injury or loss of life. CAUTION indicates the possibility of damage to or destruction of equipment. -
Page 214: System Operation Symbols
Some parts of the system are off Alarm symbol Stop button Reset button Prime button Error log Indicates consult online instructions Operator's guide Wash button I indicates closed circuit or On. O indicates open circuit or Off. ADVIA 1800 Operator’s Guide... -
Page 215: System Rating Label Symbols
System rating label symbols Date of manufacture of the product Name and location of the product manufacturer. Manufacturer's authorized representative within the European community Product complies with the applicable directives of the European Union On the Universal Rack Handler this symbol indicates that the product is UL approved for safety in the United States and Canada. -
Page 216: Hardware Component Symbols
Sample tray Use these arrow symbols to align the tray covers. Ancillary reagent symbols Deionized water symbol on the reagent and sample trays 10% cuvette wash Probe wash 1 Probe wash 2 ISE detergent ISE De ADVIA 1800 Operator’s Guide... -
Page 217: Connector Symbols
Connector symbols Isotonic saline diluent connector Incubation bath oil connector Cuvette wash connector Cuvette conditioner connector ISE buffer connector Strong concentrated drain bottle sensor connector Concentrated drain bottle sensor connector Appendix... -
Page 218: System Packaging Label Symbols
Product or container should be oriented in the direction of the arrows. Package is printed with soy ink. Contents of the package must not be frozen. Number of tests available from the contents of this package Packaging materials can be or are recovered and recycled. ADVIA 1800 Operator’s Guide... -
Page 219: Appendix F - Flags
Appendix F – Flags Alarm (result) flags Flags Flag name Reason RealTime Review/ Patient Sent to Monitor Edit Report Variance Photometric tests Assay Data imprecise ISE tests—calibration value error ///// Overflow Calculation error. Do not cal error cal error cal error report as a result. - Page 220 A mixer motion error is detected Abnormal Insufficient valid data points number of effective points Cell blank Abnormal cell blank Prozone Failed prozone check Liquid level A liquid level sensor error sensor error occurs Photometric test insufficient sample ADVIA 1800 Operator’s Guide...
- Page 221 ISE test-insufficient sample Safety Photometric test—displayed after a system error, for example, lamp energy out of range or reagent probe crash occurs ISE test—Displayed after a system error Insufficient diluent Thermistor Abnormal thermistor (ISE) Photometric test— insufficient reagent Rerun result Indicates that a test result is a rerun Photometric tests—abnormal...
- Page 222 Original manufacturer of main analytical console JCA-BM6050/B: JEOL Ltd. 1-2 Musashino 3 Chome Akishima Tokyo 196 - 8558 Japan Tel: 81-42-542-2303 Fax: 81-42-542-3132 Manufacturer of ADVIA 1800 System: Siemens Healthcare Diagnostics Inc. 511 Benedict Avenue Tarrytown, NY 10591 - 5097 USA Tel: 914-524-3001 Fax: 914-524-2088...