
Related Manuals for Emerson Liebert CRV


Summary of Contents for Emerson Liebert CRV
- Page 1 Liebert Row-Based Cooling System ® ™ A SmartAisle™ Technology User Manual–60Hz 600mm Wide Air-Cooled, Water/Glycol-Cooled and Chilled Water Units 300mm Wide Air-Cooled Units...
-
Page 3: Table Of Contents
Moving the Unit Using Rigging—600mm (24") Models ......14 Unpacking the Liebert CRV—600mm (24") Models ....... . 15 Removing the Unit from the Skid . - Page 4 Liebert CRV Operation—Liebert iCOM Control ........93...
- Page 5 12.2 Liebert iCOM U2U Ethernet Network ......... 131 12.3 Wiring a Liebert iCOM U2U Network .
- Page 6 Figure 11 Removing the Liebert CRV 300mm (12") DX unit from the skid ......18...
- Page 7 Liebert CRV ........
- Page 8 Figure 118 U2U network diagram-600mm (24in. ) Liebert CRV ....... .
- Page 9 Figure 142 Liebert CRV fan assembly components ........
- Page 10 Liebert CRV™ - Glossary ........
-
Page 11: Save These Instructions
This manual contains important safety instructions that should be followed during the installation and maintenance of the Liebert CRV. Read this manual thoroughly before attempting to carry out any operations on the Liebert CRV, including installation and operation. Retain this manual for the entire service life of the Liebert CRV. - Page 12 Risk of sharp edges, splinters and exposed fasteners. Can cause injury. Only properly trained and qualified personnel wearing appropriate safety headgear, gloves, shoes and glasses should attempt to move, lift or remove packaging from the Liebert CRV or prepare the unit for installation.
- Page 13 Important Safety Instructions NOTICE Risk of internal system corrosion and frozen coolant fluid. Can cause equipment damage and major fluid leaks resulting in serious building damage, expensive repair costs and costly system down time. Cooling coils, heat exchangers and piping systems that are connected to open cooling towers or other open water/glycol systems are at high risk of freezing and premature corrosion.
- Page 14 — — Digits 1-2 - Unit Family Digit 15 - Water/Glycol Valve Type Liebert CRV = CR 1 = Two-Way Valve (W/G only) OR Default Air-Cooled Selection Digits 3-5 - Nominal Capacity, kW 7 = Three-Way Valve (W/G only) DX = 019 (300mm [12" wide]), 020, 035 (600mm [24"] wide), H = Default CW Selection 2000mm [78.75in.] height)
-
Page 15: Liebert Crv Component Location
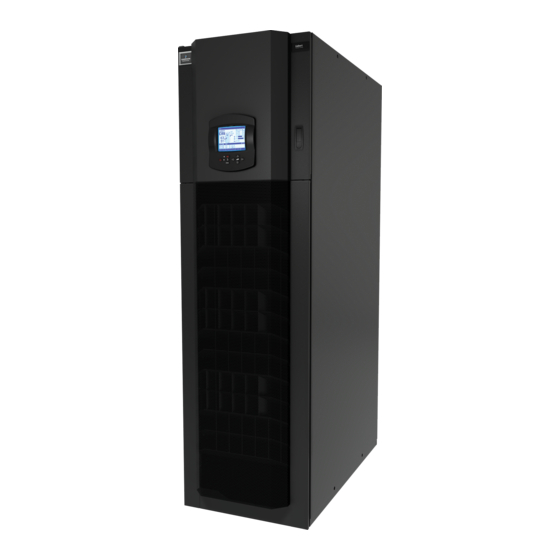
Liebert CRV Component Location CRV C IEBERT OMPONENT OCATION Figure 1 Component location, common components—600mm (24") models Top electrical entrance Electric box Top humidifier water supply, condensate pump drain Supply and Return Connections EC plug fans Electric heaters Humidifier distributor... -
Page 16: Figure 2 Component Location-Liebert 300Mm (12") Cr019 Dx Units
Liebert CRV Component Location Figure 2 Component location—Liebert 300mm (12") CR019 DX units Top electrical entrance FRONT ® Liebert iCOM Evaporator Coil Bottom Refrigerant Connections Knockouts for bottom electrical entrance Compressor Caster and leveling foot Serial Tag Electric box Main disconnect switch... -
Page 17: Figure 3 Overall Dimensions, Service Area-600Mm (24") Models
23-5/8" 3-5/16" (600mm) (100mm) 27-9/16" Air Filters (700mm) Access required for installation of the Liebert CRV within the row. REAR VIEW Front or Rear Clearance Required DPN001791 Rev. 3 Table 1 Dry weight, all model types, ± 5% Model Type... -
Page 18: Figure 4 Overall Dimensions, Service Area-300Mm (12") Dx Models
Liebert CRV Component Location Figure 4 Overall dimensions, service area—300mm (12") DX models Access Required to Service the Unit Between Existing Racks Within the Row Service area is S+A+B 12" 12" 12" (300mm) (300mm) (300mm) FRONT HOT AIR 36" (915mm) 79"... -
Page 19: Introduction
“hot aisle-cold aisle” configuration. Air enters the rear of the Liebert CRV from the hot aisle, is filtered, cooled and conditioned, then discharged into the cold aisle. The Liebert CRV provides all the necessary functions of a standard precision air conditioner, including cooling, heating, humidification, dehumidification, air filtration, condensate management, temperature control, alarm monitoring and data communication. -
Page 20: Smartaisle ™ Configuration
The Liebert CRV is a SmartAisle technology, appropriate for use with the SmartAisle design approach. Typical SmartAisle Components Each SmartAisle from Emerson is custom-designed, offering the most favorable layout for the installation. -
Page 21: Inspection And Unpacking
Risk of sharp edges, splinters and exposed fasteners. Can cause injury. Only properly trained and qualified personnel wearing appropriate safety headgear, gloves, shoes and glasses should attempt to move, lift or remove packaging from the Liebert CRV or prepare the unit for installation. -
Page 22: Handling
CR040 600mm (24") 21 (533) 12 (305) 32 (813) (chilled water) The center of gravity on the Liebert CRV varies with the options and the model's size. Table 4 Weights without packaging Weight ± 5%, lb (kg) Model Electrical Data... -
Page 23: Handling The Unit While It Is Packaged
• Do not lift the packaged unit any higher than 4" (102mm). All personnel except those moving the Liebert CRV must be kept 12' (3.7m) or more from the unit while it is being moved. • If the unit must be lifted higher than 4" (102mm), all personnel not directly involved in moving the Liebert CRV must be 20' (5m) or more from the unit. -
Page 24: Moving The Unit Using Rigging-600Mm (24") Models
Risk of sharp edges, splinters and exposed fasteners. Can cause injury. Only properly trained and qualified personnel wearing appropriate safety headgear, gloves, shoes and glasses should attempt to move, lift or remove packaging from the Liebert CRV or prepare the unit for installation. -
Page 25: Unpacking The Liebert Crv-600Mm (24") Models
Inspection and Unpacking Unpacking the Liebert CRV—600mm (24") Models 1. Remove the lag bolts securing ramp to skid. 2. Place the ramp and the plastic bag with orange clips to the side for use in removing the unit from the skid. -
Page 26: Removing The Unit From The Skid
2. Remove the bottom baffle panel assembly by removing the screws with a T30 Torx screwdriver. 3. Set the baffle panel assembly aside until the Liebert CRV is ready for it to be to reattached. 4. Close and latch the top panel door. -
Page 27: Reattaching The Baffle Panel-600Mm (24") Units
197023 Rev. 5 Reattaching the Baffle Panel—600mm (24") Units Once the Liebert CRV has been moved to where it will be installed, the baffle panel can be reattached. 1. Open top panel door (the one with the Liebert iCOM ®... -
Page 28: Uncrating And Removing The Liebert Crv From The Skid-300Mm (12") Dx Units
6" (152mm), exercise great care and keep all personnel who are not helping move the unit at least 20' (5m) away from the unit. • The Liebert CRV 300mm (12") DX unit has four casters to permit rolling it into position. The unit also has four outrigger-style stabilizer bars to help keep it from tipping. -
Page 29: Preparing The Liebert Crv For Installation
2. Open the rear panel, referring to Figure 10. The documents are located inside the display door. 3. After the Liebert CRV is in its final installation position, adjust the four base supports, or feet, with an adjustable wrench. Ensure that the unit is level to avoid corrosion or health hazards caused by condensate accumulation. -
Page 30: Piping
Risk of water leakage. Can cause severe property damage and loss of critical data center equipment. The Liebert CRV requires a water drain connection. The 600mm (24") model may require an external water supply to operate the humidifier. Improper installation, application and service practices can result in water leakage from the unit. -
Page 31: Refrigeration And Hydraulic Circuits
Valve Fusible Transducer Plug Liquid Liquid Liebert Lee-Temp Receiver Condenser Coil Condenser Coil Liquid Return Hot Gas Hot Gas Discharge Discharge Liebert CRV Unit and Associated Piping Solenoid Expansion Filter Sight Valve Valve Distributor Drier Glass Evaporator Coil Sensing Bulb... -
Page 32: Figure 14 General Arrangement, Fin/Tube Condenser-Air-Cooled 600Mm (24") Units With And Without
Service / Schrader (Access) Connection No Valve Core maintenance. Should be located Service / Schrader (Access) Connection With Valve Core near the indoor Liebert CRV unit. + Inverted Trap on Discharge and 1. Schematic representation shown. Do not use for specific connection locations. -
Page 33: Figure 15 General Arrangement, Liebert Mc Condenser With And Without Liebert
Transducer Plug Liquid Liquid Liebert Lee-Temp Receiver Condenser Coil Condenser Coil Liquid Return Hot Gas Hot Gas Discharge Discharge LIEBERT CRV UNIT AND ASSOCIATED PIPING Solenoid Expansion Filter Sight Valve Valve Drier Glass Distributor Evaporator Coil Sensing * For rises over... -
Page 34: Figure 16 General Arrangement-Water-Glycol Units, 600Mm (24") Models
Piping Figure 16 General arrangement—water-glycol units, 600mm (24") models Distributor Vibration Evaporator Coil Sensing Absorber Bulb CR020 Digital Rotalock Valve Solenoid Valve High- CR035 Digital Pressure Solenoid Valve External Equalizer Transducer Low Pressure Digital Transducer High-Pressure Switch Scroll Rotalock Valve Compressor Expansion Valve... -
Page 35: Figure 17 General Arrangement-Chilled Water, 600Mm (24") Models
Piping Figure 17 General arrangement—chilled water, 600mm (24") models NOTE: Schematic representation shown. Do not use for specific connection locations. Chilled Water Coil Air Bleed Valve 3-Way Motorized Ball 2-Way Motorized Ball Valve Configuration Valve Configuration Plug Pipe Chilled Water Return (Top of Unit Connection) Plug Pipe Chilled Water Return... -
Page 36: Condensate Drain Piping-Field-Installed
• Drain line may contain boiling water. Use copper or other suitable material • Drain line must comply with local building codes • Emerson recommends installing monitored under-floor leak detection equipment Condensate Pump—600mm (24") Models • 1/2" copper sweat connection is provided on units with optional factory-installed condensate pump •... -
Page 37: Gravity Drain-Units Without Factory-Installed Condensate Pump-600Mm (24")
Piping 5.2.2 Gravity Drain—Units Without Factory-Installed Condensate Pump 600mm (24") Models — • 3/4" FPT drain connection is provided on units without optional factory-installed condensate pump with infrared humidifier or no humidifier; 1-1/4" FPT connection is provided on units with steam generating humidifier •... -
Page 38: Gravity Drain-300Mm (12") Dx Units Without Factory-Installed Condensate Pump
Figure 20 Gravity drain connection, 300mm (12") DX units without condensate pump When coolant supply and return pipes enter through the top of the Liebert CRV 300mm (12"), remove this Adapter, 1"NPT plate and remove knockout for gravity drain. - Page 39 Piping General Guidelines • Equipment damage and personal injury can result from improper piping installation, leak checking, fluid chemistry and fluid maintenance. • Follow local piping codes, safety codes. • Qualified personnel must install and inspect system piping. • Contact a local water consultant regarding water quality, corrosion protection and freeze protection requirements.
- Page 40 Liebert unit fluid circuits should be checked for leaks at installation as described below. NOTE During leak checking of field-installed piping, Emerson recommends that the unit be isolated using field-installed shutoff valves. When the Liebert units are included in a leak test, use of fluid for pressure testing is recommended.
-
Page 41: Refrigerant Connections For Air -Cooled Units
The Liebert CRV can be connected to a condenser through either the top or bottom of the unit. The unit is piped for connections at the top of the unit as shown in Figure 23, with provision for connection through the bottom of the unit. -
Page 42: Figure 21 Connections For Vacuum Creation And Refrigerant Charge-600Mm (24") Models
Refrigerant Connections for Air-Cooled Units Figure 21 Connections for vacuum creation and refrigerant charge—600mm (24") models Suction and Supply Line Connections Liquid Line Connection High-Pressure Switch Pressure Transducer Figure 22 Connections for vacuum creation and refrigerant charge—300mm (12") DX models Service Connections for vacuum and charging ®... -
Page 43: Refrigerant Piping-Air-Cooled Models
Refrigerant Connections for Air-Cooled Units Refrigerant Piping—Air-Cooled Models Figure 23 Top refrigerant piping connections—600mm (24") models Figure 24 Bottom refrigerant piping connections—600mm (24") models If using bottom connections, cut the pipes just below the black pipe clamps Figure 25 Top refrigerant piping connections—300mm (12") DX models Rear Front Return... -
Page 44: Liebert Mc Condenser Selection-600Mm (24") And 300Mm (12")Crv Units
Refrigerant Connections for Air-Cooled Units Liebert MC Condenser Selection—600mm (24") and 300mm (12")CRV Units Table 6 Traditional open room 95°F (35°C)/23RH return air conditions Outdoor Design Ambient Temperature, °F (°C) Indoor Unit Model Width 95 (35) 100 (38) 105 (41) 110 (43) 115 (46) 120 (49) -
Page 45: Figure 26 Piping Line Cooling Unit
* Oil traps every 15 ft. (4.6m) of vertical piping ** See Table 10 Table 10 Liebert CRV position relative to the remote condenser—Liebert MC and fin/tube condenser with or without Liebert Lee-Temp Parameter Maximum Distances, ft. (m) From Liebert CRV to condenser 300 (91.4) equivalent length... -
Page 46: Table 11 Recommended Refrigerant Line Sizes, Cu, Od, For Liebert Mc And Vfd Control Fin/Tube Condensers With R-410A With And Without Liebert Lee-Temp
Refrigerant Connections for Air-Cooled Units Table 11 Recommended refrigerant line sizes, Cu, OD, for Liebert MC and VFD control fin/tube condensers with R-410A with and without Liebert Lee-Temp Liebert CRV Total Equivalent Hot Gas Line, Liquid Line Model # Length, ft. (m) in. -
Page 47: Heat Rejection Connection Sizes
1-1/8 Source: DPN001623, Rev. 7, Page 3 Table 15 Piping and refrigerant sizes for Liebert air-cooled, VFD control condensers with R-410A Liebert CRV 600mm (24in.) Condenser Piping Connection Sizes, Cu, O.D. Entering Hot Gas Returning Liquid Condenser Model # Line, in. (mm) Line, in. -
Page 48: Piping Guidelines For Liebert Mc And Fin/Tube Condensers
(e.g., on the receiver, on the low pressure side and on the compressor delivery). 6. Cut the spun-closed ends off the hot gas and liquid line connections on the Liebert CRV. 7. Fix (braze) the pipes to the connections on the air conditioner. -
Page 49: Figure 27 Connection Locations-Air-Cooled 600Mm (24") Models
Refrigerant Connections for Air-Cooled Units Figure 27 Connection locations—air-cooled 600mm (24") models Unsolder when connecting Rear through bottom 1-1/8" (28mm) 23-5/8" 9-3/4" 12-3/4" (600mm) 1-3/4" 2-15/16" (248mm) (325mm) 3-1/4" (83mm) 3-1/16" 17-5/16" (44mm) (74mm) 8-7/8" (77mm) (440mm) (226mm) 9-1/2" 9-5/16" (242mm) (237mm) 5-1/8"... -
Page 50: Table 16 Unit Connection Sizes, Air-Cooled Models-600Mm (24") Models
Refrigerant Connections for Air-Cooled Units Table 16 Unit connection sizes, air-cooled models—600mm (24") models Unit Connections CR20A (60Hz) CR35A (60Hz) Refrigerant Liquid Line Inlet 1/2" O.D. Cu Sweat 5/8" O.D. Cu Sweat Refrigerant Gas Line Outlet 5/8" O.D. Cu Sweat 7/8"... -
Page 51: Figure 28 Connections-Air-Cooled 300Mm (12") Models
Refrigerant Connections for Air-Cooled Units Figure 28 Connections—air-cooled 300mm (12") models Front of Unit Front of Unit 10-1/2" (267mm) 11-5/8" 22-5/16" 11-11/16" (295mm) 15-9/16" (567mm) (296mm) (395mm) 12-13/16" (325mm) 25-1/8" 16-9/16" (638mm) 14-9/16" (420mm) (370mm) 27-13/16" 18-1/8" (707mm) (460mm) 33-5/16" 2-3/8"... -
Page 52: Vacuum And Refrigerant Charge
Refrigerant Connections for Air-Cooled Units Vacuum and Refrigerant Charge NOTICE Risk of improper refrigerant charge. Can cause equipment damage and reduced efficiency. Check the refrigerant type to be used on the data plate of the air conditioner and on the refrigerating compressor. -
Page 53: Evacuation Air-Cooled Models-600Mm (24") And 300Mm (12")Models
Refrigerant Connections for Air-Cooled Units Table 22 Refrigerant and oil charge for water-cooled models—600mm (24") R-410A Refrigerant Initial Oil Model Charge, lb (kg) Charge, lb (kg) CR020RW 13.0 (5.9) 60 (1.68) CR035RW 17.0 (7.7) 110 (3.08) The air conditioner is supplied complete with refrigerant and oil. 1. -
Page 54: Calculating Charging Values For Liebert Mc Condenser Systems, Units Without Liebert Lee-Temp ™ Systems
When adding liquid refrigerant to an operating system, it may be necessary to add the refrigerant through the compressor suction service valve. Care must be exercised to avoid damage to the compressor. Emerson recommends connecting a sight glass between the charging hose and the compressor suction service valve. This will permit adjustment of the cylinder hand valve so that liquid can leave the cylinder while allowing vapor to enter the compressor. -
Page 55: Table 23 Target Subcooling For Ambient Outdoor Temperature
Refrigerant Connections for Air-Cooled Units NOTE To determine subcooling measurement, a liquid line pressure reading (at the factory-installed Schrader tap) needs to be measured along with obtaining a temperature reading on the liquid line. Convert the liquid line pressure reading into a temperature by utilizing a Pressure- Temperature Guide or Table 25. -
Page 56: Table 24 Difference In Subcooling Measurements-Indoor Minus Outdoor
Refrigerant Connections for Air-Cooled Units Sample Calculations The Liebert MC is 40 ft. (12.2m) above the evaporator of an R-410A system. The outdoor ambient from the Liebert MC condenser control menu ID F02, is 94.8°F (34.9°C). The liquid pressure is 421 psig (2903kPA) and the liquid temperature is 113°F (45.1°C). -
Page 57: Table 25 Liquid Pressure And Temperature Chart
Refrigerant Connections for Air-Cooled Units Table 25 Liquid pressure and temperature chart Pressure R-410A * PSIG °F °C 11.7 59.8 15.4 12.4 63.1 17.3 13.1 66.3 19.1 13.8 69.5 20.8 14.5 72.5 22.5 15.2 75.4 24.1 15.9 78.2 25.7 16.6 80.9 27.2 17.2... - Page 58 Refrigerant Connections for Air-Cooled Units Subtract Line 6 (Measured Line Temperature) from Line 5 (Liquid Pressure converted to Temperature) to obtain Calculated Subcooling. Circuit 1 Line 5 Line 6 Calculated Subcooling Elevation Correction Subtract Line 3 (Correction for Condenser Elevation above Evaporator) from Line 8 (Calculated Subcooling) to obtain Corrected Subcooling.
-
Page 59: Charging Fin/Tube Condenser With Variable Fan Speed Control
When adding liquid refrigerant to an operating system, it may be necessary to add the refrigerant through the compressor suction service valve. Care must be exercised to avoid damage to the compressor. Emerson recommends connecting a sight glass between the charging hose and the compressor suction service valve. This will permit adjustment of the cylinder hand valve so that liquid can leave the cylinder while allowing vapor to enter the compressor. -
Page 60: Water Onnections For
It will, however, assume the corrosivity of the water from which it is prepared and may become increasingly corrosive with use if not properly inhibited. Table 26 Water connection options Liebert CRV Option Top Connections Bottom Connections Condensate Pump Available... -
Page 61: Water Connections-Supply Humidifier And Drain Water
Water Connections for Water/Glycol Units—600mm (24") Models Water Connections—Supply Humidifier and Drain Water Units with a condensate pump and humidifier are preset to be connected from the top. If floor connections are used, the water lines can be intercepted at the following points: Figure 29 Water connection points, bottom entry Condensate Pump Drain... -
Page 62: Water Connections: Water/Glycol-Cooled Models
• Insulate both pipes. • Very important: Add water and ethylene glycol to the circuit when the ambient temperature is below 32°F (0°C); refer to the Liebert CRV technical data manual, SL-11978). Do not exceed the nominal operating pressure of the circuit components. -
Page 63: Figure 31 Connections-Water/Glycol Models
Water Connections for Water/Glycol Units—600mm (24") Models Figure 31 Connections—water/glycol models 6-1/8" 4-1/8" (155mm) (105mm) Piping and electrical 1-1/8" connections available at (28mm) Rear the top and bottom of unit. 9-3/4" 12-3/4" (248mm) (325mm) Top Connections 1-3/4" (44mm) 8-7/8" 3-1/4" 17-5/16"... -
Page 64: Water Connections For Chilled Water Units -600 Mm (24") Units
Water Connections for Chilled Water Units—600mm (24") Units —600 (24") U ATER ONNECTIONS FOR HILLED ATER NITS NITS NOTICE Risk of internal system corrosion and frozen coolant fluid. Can cause equipment damage and major fluid leaks resulting in serious building damage, expensive repair costs and costly system down time. -
Page 65: Figure 33 Chilled Water Circuit
• Install optional thermostats and pressure gauges on the inlet and outlet pipes. • Install a water drain tap at the lowest point in the circuit. • Fill the circuit with water or glycol. Figure 33 Chilled water circuit Liebert CRV Pressure Gauge Thermostat... -
Page 66: Figure 34 Connections-Chilled Water Models
Water Connections for Chilled Water Units—600mm (24") Units Figure 34 Connections—chilled water models Piping and electrical connections available 6-1/8" 4-1/8" (105mm) (155mm) at the top and bottom of the unit. REAR 1-1/8" (28mm) 9-3/4" (248mm) TOP CONNECTIONS 12-3/4" (325mm) 1-3/4" 3-1/4"... -
Page 67: Electrical
Electrical Connections LECTRICAL ONNECTIONS Electrical Field Connections Descriptions 9.1.1 Standard Electrical Connections—600mm (24") models (Source: DPN001884, Rev. 5, Page 1) 1. High Voltage Connection Through the Bottom of the Electric Panel—1-3/8" (34.9mm), 1-3/4" (44.5mm) 2-1/2" (64mm) diameter concentric knockout. 2. Low Voltage Connection Through the Bottom of the Electric Panel—Quantity (2) 7/8" (22mm) diameter knockouts. -
Page 68: Electrical Connections For Optional Features-600Mm (24") Models
NOTICE Risk of improper input power. Can cause equipment damage. The electronically commutated motors included in the Liebert CRV unit —included in 480V CR035 and CR040 units—are suitable for connection to an electrical service providing input power to the unit with 300V or less line-to-ground potential only. -
Page 69: Figure 35 Electrical Field Connections-600Mm (24") Models
Electrical Connections Figure 35 Electrical field connections—600mm (24") models Refer to 9.1.1 Standard Electrical Connections—600mm (24") models and 9.1.2 Electrical Connections for Optional Features—600mm (24") Unit Top models for keys to numbered components. 2-1/2" (64mm) Unit knockout Base 1-3/32" (28mm) 1-3/4"... -
Page 70: Figure 36 Canbus Communication Connection Liebert Crv And Liebert Mc (Premium) Unit
Electrical Connections Figure 36 CANbus communication connection Liebert CRV and Liebert MC (premium) unit TB50 CAN H OUTPUT CAN L Condenser TB49 INPUT TB50 CA N H CA N L TB49 INPU Detail1 CAN Cable (A) Connection Shield Connection Remove Jumper... -
Page 71: Standard Electrical Field Connections-300Mm (12") Dx Models
Figure 28. 5. Three-Phase Electrical Service—Connect to terminals on disconnect switch. Three-phase service not by Emerson. (Refer to serial tag for total unit full load amps, wire size amps and maximum overcurrent protective device size. 6. Factory-Installed Locking Disconnect Switch 7. -
Page 72: Figure 37 Electrical Field Connections-300Mm (12") Dx Models
General wire routing paths shown. Wiring must be run in conduit and must be inside Liebert CRV frame and panels. Attach conduit to inside of rails with cable ties. Control wiring must be run in separate conduit from power wiring. For top entry routing, see Figure 44;... -
Page 73: Figure 38 Low-Voltage Field Wiring Routing Into The Unit-300Mm (12") Dx
Electrical Connections Figure 38 Low-voltage field wiring routing into the unit—300mm (12") DX Low-Voltage Knockout Factory Wiring Low-Voltage Field Wiring ® ™ Liebert... -
Page 74: Electrical Connections
Electrical Connections Electrical Connections WARNING Arc flash and electric shock hazard. Can cause injury and death. Open all local and remote electric power supplies, verify with a voltmeter that power is Off and wear appropriate personal protective equipment per NFPA 70E before working within the electrical control enclosure. -
Page 75: Figure 39 Serial Tag Location--600Mm (24") Models
Electrical Connections Figure 39 Serial tag location——600mm (24") models Serial Tag 600mm (24" Unit) Figure 40 Remove electrical panel and lower front panel—600mm (24") models Remove these bolts to access high-voltage electrical panel Remove these bolts to access low voltage electrical panel Remove these bolts to open lower front... -
Page 76: Figure 41 Pull Out The Electric Panel-300Mm (12") Dx Models
Disconnect is Off Quarter-Turn Latch opens high-voltage electric panel (all connections made at factory). The disconnect switch Rear of Liebert CRV must be turned Off 300mm(12") Unit before electric box Filters removed for will slide out. Rear of Liebert CRV access to electric 300mm(12") Unit... -
Page 77: Figure 42 Power And Control Cable Entry Points And Routing-600Mm (24") Models
Electrical Connections Figure 42 Power and control cable entry points and routing—600mm (24") models Low Voltage Channel High Voltage Top Low Voltage Top High Voltage opening provides access Entry Port Entry Port Top Entry Port to the electrical panel Low-voltage cables are routed through a channel in the side panel to connect the bottom of the... -
Page 78: Figure 43 Power Cable Routing-Bottom Entry, 300Mm (12") Dx Models
SOME COMPONENTS NOT SHOWN FOR CLARITY General wire routing paths shown. Wiring must be run in conduit and must be inside Liebert CRV frame and panels. Attach conduit to inside of rails with cable ties. Control wiring must be run in separate conduit from power wiring. -
Page 79: Figure 44 Liebert Intellislot Cable Routing-Top Entry, 300Mm (12") Dx Models
Electrical Connections Figure 44 Liebert IntelliSlot cable routing—Top entry, 300mm (12") DX models Low-voltage field wiring (twisted pair) Low-voltage field wiring (twisted pair DPN002814 Pg. 1, Rev. 3 ® ™ Liebert... -
Page 80: Figure 45 Liebert Intellislot Cable Routing-Bottom Entry, 300Mm (12") Dx Models
Figure 45 Liebert IntelliSlot cable routing—Bottom entry, 300mm (12") DX models SOME COMPONENTS NOT SHOWN FOR CLARITY General wire routing paths shown. Wiring must be run in conduit and must be inside Liebert CRV frame and panels. Attach conduit to inside of rails with cable ties. -
Page 81: Power Supply Cable Connections
Electrical Connections 9.2.1 Power Supply Cable Connections • Connect the cable to the line inlet terminal board. • Use the appropriate cable size for the current draw, supply voltage and installation type. • Protect the supply using a backup fuse or circuit breaker. •... -
Page 82: Protective Features Of Electrical Heaters-600Mm (24") Models
Electrical Connections Protective Features of Electrical Heaters—600mm (24") Models Figure 46 Electrical heating with temperature sensor protection Temperature sensor protection When the temperature sensor detects overtemperature of electrical heating, the thermal protection turns Off the current. To reset the thermal protection, push the button on the front of the unit (see Figure 46). -
Page 83: Startup
16. Ensure that the fans rotate in the correct direction (see arrow on fan). 17. Ensure that all control system settings are correct and that there are no alarms (see Liebert CRV system screen, Figure 56). 18. W Models Only: Verify the water flow is adequate. -
Page 84: Automatic Restart
10.2 Automatic Restart The Liebert CRV may be set up through the Liebert iCOM to automatically restart on the return of power after a supply power interruption. To avoid an automatic cold restart of the compressor if a power interruption of several hours is expected, stop the unit before the blackout. -
Page 85: Figure 48 Refrigerant Line Components-300Mm (12") Dx Models
Startup Figure 48 Refrigerant line components—300mm (12") DX models Thermostatic expansion valve Sight Glass Pressure Transducer Solenoid Valve Pressure Transducer ® ™ Liebert... -
Page 86: Chilled Water Valve: Chilled Water 600Mm (24") Models
Ensure that the Liebert CRV is shut down and verify with a voltmeter that electric power has been disconnected before beginning any work on the unit. -
Page 87: 10.4.1 Adjust Baffles On 600Mm (24") Models
Startup The Liebert CRV is shipped with the baffles in an alternating pattern to direct cold air left and right. This configuration should be used when the cooling unit is located between racks. If a Liebert CRV is installed at the end of a row, all the baffles should be adjusted to blow air down the cold-aisle, toward the racks. -
Page 88: 10.4.2 Adjust Baffles On 300Mm (12") Models
To adjust the baffles on 300mm (12") models: NOTE The air baffles on 300mm (12") units may be changed to direct air either right or left. 1. Shut down the Liebert CRV. 2. Open the door containing the Liebert iCOM ®... -
Page 89: 10.4.3 Adjust Blocker Plate-600Mm (24") Models
A blocker plate inside the display door should also be adjusted to direct air toward the racks the Liebert CRV is intended to condition. The blocker plate can be installed on the left or right side of the display door, or it can be removed to discharge air left and right. -
Page 90: Liebert Icom ® Control
Each Liebert CRV includes three 2T rack temperature sensors to monitor three racks. A total of ten 2T temperature sensors can be connected to each cooling unit to monitor every rack a Liebert CRV is protecting. When multiple cooling units are connected in a Unit-to-Unit Liebert iCOM control network, all sensor data is shared to optimize their performance as a system. -
Page 91: Figure 53 Liebert Icom ® Default Screen Symbols
® Liebert iCOM Control Table 31 Keyboard icons and functions Icon Key Name Function On/Off Key Controls the operational state of the cooling unit. Alarm Key Silences an alarm. Help Key Accesses integrated Help menus. ESCape Key Returns to the previous display view. Enter Key Confirms all selections and selects icons or text. -
Page 92: Control Interface
® Liebert iCOM Control 11.1 Control Interface When the buttons on the Liebert iCOM control have not been pressed for a short period, the display ® backlight turns Off. Pressing any key will wake up the screen and display the Status menu of the last cooling unit viewed. -
Page 93: Figure 55 Service Menu Icons
® Liebert iCOM Control NOTE The Liebert iCOM control has three main menus: User, Service and Advanced. Menu settings may be viewed without a password, but changing settings requires a password. If a password is required, Liebert iCOM shows a prompt to enter the password. The password for the User menu is 1490. -
Page 94: 11.1.2 Accessing Submenus
® Liebert iCOM Control Advanced Menus Advanced menus contains factory settings that do not typically require changes in the field. Contact the factory with any questions about items in the Advanced menus. 11.1.2 Accessing Submenus To access the User, Service or Advanced menu, press the Enter or Down arrow key from the system view. -
Page 95: 11.1.3 Submenus
® Liebert iCOM Control Figure 58 Main screens, User, Service and Advanced User Display Service Display Advanced Display 11.1.3 Submenus While viewing the menu you wish to access (User, Service or Advanced), press the Enter key to highlight the first icon. Use the arrow keys to navigate through the icons. Each icon is described in the lower portion of the screen to help navigate the control. -
Page 96: Figure 59 Screen Transition
® Liebert iCOM Control Figure 59 Screen transition USER MENUS °C / °F EVENT % RH ALARMS 1 2 3 4 h ACTIVE ALARMS ® ™ Liebert... -
Page 97: Figure 60 Menu Tree-Stand-Alone Units Or Units Not In A Network
® Liebert iCOM Control Figure 60 Menu tree—Stand-alone units or units not in a network Status Menu - System View Status Menu - Unit View User Menu Unit 1 Service Menu Unit 1 Advanced Menu Unit 1 Setpoints Setpoints Compressor Info Spare Parts List Unit Diary MBV Settings... -
Page 98: 11.1.4 Viewing Multiple Units With A Networked Large Display
The Left and Right arrow keys toggles through the various units on the network. To go back to the System view from any unit view, press the Up arrow Figure 61 Liebert CRV system screen Fan Speed... -
Page 99: Figure 62 Menu Tree-Liebert Crv's In A Network
® Liebert iCOM Control Figure 62 Menu tree—Liebert CRV’s in a network Status Menu - System View Status Menu - Unit View Status Menu - Unit View Unit 1 Units 2, 3, ... User Menu User Menu Advanced Menu Unit 1... -
Page 100: Liebert Icom Display Readout
• CRV Simple • CRV Graphical The screens are a graphical representation of the Liebert CRV, selectable to show unit operation with or without rack sensors, unit operation with a rack sensor summary, historical temperature and humidity trending. The Liebert CRV display will always revert to the Unit Screen. -
Page 101: Figure 64 Liebert Icom Menu Components For Liebert Crv
® Liebert iCOM Control Figure 64 Liebert iCOM menu components for Liebert CRV Return Air Temperature and Humidity Summary of Rack Sensor Reading Supply Temperature Fan Speed and Humidity Cooling Capacity Next Recommended Maintenance Date Last Two Events, Warnings or Alarms... -
Page 102: Figure 65 Liebert Icom ® Menu Components For Liebert Crv
® Liebert iCOM Control ® Figure 65 Liebert iCOM menu components for Liebert CRV Supply Air Temperature and Humidity Fan Speed Next Recommended Maintenance Date Cooling Capacity Last Two Events, Warnings or Alarms SIMPLE DISPLAY Supply Temperature and Humidity Fan Speed... -
Page 103: Liebert Crv Operation-Liebert Icom Control
Using the supply and remote rack sensors in this decoupled mode is the preferred method for controlling the Liebert CRV in a hot / cold aisle configuration. In addition to this configuration, Emerson has provided additional flexibility for other applications shown in Table 33. -
Page 104: 11.3.1 Entering A Password
® Liebert iCOM Control 11.3.1 Entering a Password Changing the value of a parameter in a menu requires the password for that menu. Each menu— User, Service and Advanced—has a unique password to prevent unauthorized changes. The User menu password is 1490; the Service menu password is 5010. NOTE Entering the Service menu password permits access to both the User and Service menus;... -
Page 105: 11.3.2 Cooling
Liebert CRV needs to perform at an optimal level. A chilled water Liebert CRV will modulate the cooling capacity from 0% - 100% and the DX version of the Liebert CRV will modulate the cooling capacity of the unit from 10% -100% compressor capacity. -
Page 106: 11.3.3 Fan Speed
Manual Fan Control: Cooling off supply, remote, or return sensor are permitted in manual fan speed control. Manual control of the Liebert CRV’s fan speed can be achieve in two ways: • Manually setting the fixed speed at the local display OR •... -
Page 107: 11.3.5 Humidification
In a single fan fails, the Liebert CRV will ramp the remaining operating fan to 110% of its rated output to compensate for the loss of airflow. In addition, an alarm will report which fan failed. -
Page 108: Liebert Icom User Menu Screens
® Liebert iCOM Control 11.4 Liebert iCOM User Menu Screens User menus report general cooling unit operations and status. The user menu password is 1490. To review the full User Menu, refer to Figure 54. The User menu parameter tables in this document may differ from the display on some cooling units. The Liebert iCOM functions with several Liebert Thermal Management units, each with its own set of controls. -
Page 109: Figure 72 User Menus-Spare Parts Screen
® Liebert iCOM Control Figure 72 User menus—Spare Parts screen USER MENUS °C / °F EVENT % RH ALARMS 1 2 3 4 h ACTIVE ALARMS For more information regarding parts or part ordering, please call Liebert’s national parts help desk at (800) 543-2778. -
Page 110: Figure 74 User Menus-Network Screen
® Liebert iCOM Control View Network View Network—The view network screen provides an overview of the Liebert iCOM ® network and a status of each unit. This screen will provide the unit’s name. If no name is given, only the unit number will be displayed. -
Page 111: Figure 76 User Menus-Sensor Data Parameters Screen
® Liebert iCOM Control U301 Temperature Setpoint—Shows the cooling setpoint, which is the setpoint used to drive the cooling capacity. This parameter will automatically change based on which sensor is used for control (Return, Supply or Remote sensor). U302 Actual Control Temperature—The temperature reading of the actual sensor that is referenced to U301. -
Page 112: Figure 77 User Menus-Display Setup Parameters Screen
Off, extending the life of the display and saving energy. U408 Screen—Multiple screen layouts exist for the Liebert CRV, including Rack View and Trends to be monitoring on the main display. Views include a Unit View with or Without Sensors, Rack View and Graphical Data Record View. -
Page 113: Figure 78 User Menus-Total Run Hours Parameters Screen
1 2 3 4 h ACTIVE ALARMS User-Condenser Timer Menu Screens This menu is applicable to Liebert CRV DX units coupled to a Liebert MC outdoor condenser connected through CANbus communication. Figure 79 User menus—Condenser timer screen-page 1 USER MENUS °C / °F... -
Page 114: Figure 80 User Menus-Condenser Timer Screen
® Liebert iCOM Control U805 interval Days—Selects the interval day(s) low noise operations will be available for the condenser fan. When the parameter is set to YES the low noise operation is selected. When set to NO the low noise will be disabled even if an interval time is set below. U806 Interval From—Selects the time of day that the low noise feature will be enabled between 00:00 and 24:00. -
Page 115: Liebert Icom Service Menu Screens
® Liebert iCOM Control Example: The customer does not want fan speed to exceed 35% of the maximum speed at night. U807 would be set for 0% / 100% U818 = 35% (Max fan speed low noise) U819 = 100% (Max fan speed during normal operation) The settings above result in a 35% maximum speed when the timer is active (eg., a night) and have the ability to run between 0 and 100% maximum speed of when the timer is inactive (normal operation, during daytime). -
Page 116: Figure 82 Service Menus-Setpoints Parameters Screen
S114 Humidity Control Type—Selects the humidity control calculation. It can be set to “Proportional” or “PI” (proportional/integral) only. The Liebert CRV assumes the current humidity at the control sensor by calculating the return air dew point, and then taking the temperature setpoint of the selected cooling sensor (S103) as a reference to recalculate the humidity. -
Page 117: Figure 83 Service Menus-Setpoints Parameters Screen
Liebert CRV to drive the fan based on the temperature sensor selected for sensor control type. Setting this parameter to Manual mode=1 allows the Liebert CRV to be set to a fixed fan speed either through the local display or through a building management system. -
Page 118: Figure 84 Service Menus-Setpoints Parameters Screen
This can be set to 0 = Disabled, 1 = Supply Sensor and 2 = Return Sensor. NOTE The Liebert CRV fans are oversized and can be used to help protect equipment in emergency situations, such as high temperature and a single fan failure. -
Page 119: Service-Standby Settings Menu Screen
® Liebert iCOM Control 11.6 Service-Standby Settings Menu Screen Figure 85 Service menus—Standby settings / lead-lag parameters screen S502 Number of Standby Units—Selects the number of units that will be in Standby mode. When a unit is in standby mode, the fan will be Off and no cooling will be provided. S503 Rotation Frequency—Controls when a rotation will occur between the standby units and the operating units within a network. -
Page 120: Service-Wellness Menu Screens
® Liebert iCOM Control 11.7 Service—Wellness Menu Screens The next maintenance calculation, will help keep the cooling unit running at peak performance to ensure minimum component stress and maximum reliability. If the unit includes any of the following components, they are included in the calculation: •... -
Page 121: Figure 86 Service Menus-Wellness Basic Settings Screen
® Liebert iCOM Control Fans / Heaters / Humidifier Settings • Number of starts and working hours are counted separately since the last maintenance. Total working hours can be read in the standard working hours window (customer window). • Average Working Hours is the calculation resulting from starts and working hours. •... -
Page 122: Figure 87 Service Menus-Wellness Motor Settings Parameters Screen
® Liebert iCOM Control Figure 87 Service menus—Wellness motor settings parameters screen - Page 2 S013 Number of Starts—Shows the number of starts for the unit’s fans. S014 Run Hours—Shows the number of run hours for the unit’s fan. S015 Average Run Time—Displays the average run time of the unit’s fan. S016 Starts per Day Best—Displays the lowest number of starts in a rolling 24 hour period. -
Page 123: Figure 89 Service Menus-Wellness Electric Heater 1 Settings Parameters Screen
® Liebert iCOM Control Figure 89 Service menus—Wellness electric heater 1 settings parameters screen - Page 4 S035 Number of Starts—Shows the number of starts for the unit’s reheats. S036 Run Hours—Shows the number of run hours for the unit’s reheats. S037 Average Run Time—Displays the average run time of the unit's reheats. -
Page 124: Service-Diagnostics Menu Screens
® Liebert iCOM Control 11.8 Service Diagnostics Menu Screens — Figure 91 Service menus—Diagnostics / service mode parameters screen - Page 1 Lines S302-S304, S308 and S310 are not displayed on chilled water models. S302 HP 1 Alarm Code—Compressor 1 high pressure alarm code. S303 LP 1 Alarm Code—Indicates which phase Compressor 1 is operating in. -
Page 125: Figure 93 Service Menus-Diagnostics / Service Mode Parameters Screen
® Liebert iCOM Control S313 Manual Mode—Places the Liebert iCOM control in manual mode. This is the initial setting is ® necessary to activate any of the subsequent items. Manual Mode is used to check components and operation of the unit for proper operation and performance. To use Manual Mode enter the password, 5010, and select YES on line S313. -
Page 126: Figure 94 Service Menus-Diagnostics / Service Mode Parameters - Page 4 Cw Models
® Liebert iCOM Control S329 Humidifier—Activates the humidifier system in its entirety. S330 Humidifier Drain—Activates just the humidifier drain solenoid in the case of the steam generating humidifier, allowing water to drain from the canister. This line does not apply to units manufactured by Liebert North America. -
Page 127: Figure 96 Service Menus-Diagnostics / Service Mode Parameters Screen
® Liebert iCOM Control S341 Condenser Control Mode—Defines the condenser control mode in manual or in auto mode. User must select Manual and set S313 to Yes before S343 can be changed (not shown on CW models). S342 Current MBV / CWV (AnaOut2) (Read Only)—Shows the analog output for the MBV (motorized ball valve) in manual or automatic mode. -
Page 128: Service-Set Alarms Menu Screens
® Liebert iCOM Control Figure 98 Service menus Figure 85 Diagnostics / service mode parameters screen - Page 7 11.9 Service Set Alarms Menu Screens — Figure 99 Service menus—Set alarms parameters screen - Page 1 S204 Temp/Hum Events—Enables or disables all temperature and humidity events. When disabled, the setpoints to the right of S205-S211 will be hidden. -
Page 129: Figure 100 Service Menus-Set Alarms Parameters Screen
® Liebert iCOM Control S210 Low Return Humidity—Sets the threshold humidity for a return low humidity alarm to occur. The humidity level must be 2% above the threshold for one minute (nonadjustable) and the event must be acknowledged before it will reset. S211 High CW Temperature—Sets the threshold chilled water for a return high chilled water temperature alarm to occur. -
Page 130: Service-Sensor Calibration Menu Screens
® Liebert iCOM Control Figure 102 Service menus—Set alarms parameters screen - Page 4 This screen determines the operation of an active alarm. Each event can be enabled or disabled and can be set to operate as an alarm, warning or message. The delay is the time the control waits before reporting the event. -
Page 131: Figure 105 Service Menus-Sensor Calibration / Setup Parameters
S616 Supply T Sensor PTC or NTC—Sets the type of sensor that is connected to the unit. It is set at the factory as NTC and should be changed only by a certified Emerson technician. S617 Supply T Sensor—Provides an offset to the actual sensor reading to calibrate the unit’s sensor to other sensors. -
Page 132: Service-System/Network Unit-Level Setup Menu Screens
® Liebert iCOM Control Figure 107 Service menus—Sensor calibration / setup parameters - Page 4 This unit can be equipped with a total of 20 rack sensor readings or ten 2T temperature sensor modules. This menu permits temperature sensor calibration by entering a negative or positive offset. The calibrated reading is displayed in the far right column. -
Page 133: Figure 109 Service Menus-System / Network Setup Parameters-Large Display Only System
® Liebert iCOM Control S809 Configuration Safe—Saves or loads configuration settings for the display that have been modified from the factory defaults to an internal file that can be downloaded / uploaded using the Liebert iCOM Service Tool. Selecting Save will write the settings to the internal storage file and ®... -
Page 134: Figure 110 Service Menus-System/Network Setup Parameters Unit- Page 1 For The Board
® Liebert iCOM Control Figure 110 Service menus—System/Network setup parameters Unit- Page 1 for the Board S824 Monitoring Address—Sets the address used by the Liebert IntelliSlot cards. This is set to 3 ® at the factory and should not be changed. S825 Monitoring Timeout/Handshake—Can be used with a building management system to verify communication has not been lost between the Liebert iCOM ®... -
Page 135: Figure 111 Service Menus-System/Network Setup Parameters Unit - Page 2 For The Board
® Liebert iCOM Control Figure 111 Service menus—System/Network setup parameters Unit - Page 2 for the Board S835 Monitoring Protocol—Selects the monitoring protocol. Velocity V4 is the factory default which will provide communications to the Liebert IntelliSlot ® housing. Hironet is used only on HPM units. -
Page 136: Service-Options Setup Menu Screens
This parameter can be set between 0 to 5 minutes. S406 Electric Stages—A Liebert CRV can have only 0 or 1 heating stages. S407 Heater On at CFC—The selection on which point in the proportional band the heater will start 66% (factory default) S408 Water Detector—Three selections are available:... -
Page 137: Figure 113 Service Menus-Options Setup Parameters
S427 Valve Analog Output P14-3 changes to 7.5V (can be changed by the user) After each power cycle, the Liebert CRV will adjust fan and cooling output according to the settings on lines S426 and S427. These user-defined settings will override the actual call for fan and cooing until the delay set on S428 has elapsed. -
Page 138: Figure 115 Service-Service Contact Menu
® Liebert iCOM Control S428 Quick Start Overlap Time: When iCOM is ready with the boot process, a time can be added to continue the static quick start mode, giving the Liebert iCOM the chance to build calls meanwhile, and seamlessly overtake control when S428 times out. S429 Last Quick Start Duration—Informational only. -
Page 139: Table 34 Service Contact Info Parameters
® Liebert iCOM Control Table 34 Service contact info parameters Function Range Imperial Large Display Small Display (metric) Page 1 of 1 Password PASSWORD — None Austria Switzerland D Switzerland F Benelux D Benelux FL Germany France Country Country Hungary Italy Poland Spain... -
Page 140: Service-Remote Sensors Menu Screens
Rack Sensors are automatically detected when connected and set to Control. A maximum of ten 2T temperature and humidity sensors can be connected; the control automatically detects the type. Control—The Liebert CRV is using the sensor for temperature control. Reference—The sensor value is shown but used only for monitoring. -
Page 141: Operation In Teamwork Mode
CRV's serving a common area will work together and back each other up. The U2U setup unlocks the use of Lead-Lag/Rotation, Cascade and Teamwork Modes 1, 2 and 3 Lead-lag/rotation allows a standby Liebert CRV to activate based on an alarm or on a rotation based on time. -
Page 142: Wiring A Liebert Icom U2U Network
Group #: 1 Wall-Mount Large Display The Liebert CRV has a large display as standard equipment. Only large displays may be used for remotely monitoring and controlling cooling units connected on the same network. Each wall-mount large display requires 120V input power; Liebert provides an AC adapter wall plug. A straight through Ethernet cable must be connected between the network switch and the P64 port on the back of the display. -
Page 143: Figure 118 U2U Network Diagram-600Mm (24In. ) Liebert Crv
Operation in Teamwork Mode Figure 118 U2U network diagram-600mm (24in. ) Liebert CRV ® ™ Liebert... -
Page 144: Teamwork Modes
Operation in Teamwork Mode Figure 119 U2U network diagram-300mm (12in. ) Liebert CRV 12.4 Teamwork Modes Groups of cooling units connected to a network can be set up to work together in any of four teamwork modes: • No Teamwork •... -
Page 145: 12.4.1 Application Of Teamwork Modes
Operation in Teamwork Mode Figure 120 Teamwork modes and sensor management Average / Maximum of Liebert CRV Connected Sensors Average / Maximum of Teamwork Sensors Example: 72°F (22°C) Setpoint Teamwork Sensor Average = 74°F (23°C) Teamwork Sensor Maximum = 76°F (24°C) -
Page 146: Teamwork Mode 1
Operation in Teamwork Mode 12.4.3 Teamwork Mode 1 Teamwork Mode 1 works best in small rooms with balanced heat loads. The return temperature and humidity sensor readings of all units in operation (fan On) are averaged by the master unit and displays this information in the System View. -
Page 147: Teamwork Mode 2
Teamwork Mode 2 does not rotate; unevenly distributed working hours to be expected. AutoSet will not adjust the proportional band in this mode. NOTE The Liebert CRV is designed to use Teamwork Mode 3 where three 2T sensors are supplied to monitor the temperature at the racks and ramp the fans accordingly. NOTE In Teamwork Mode 2, all units must have the same setpoints. -
Page 148: Teamwork Mode 3 (Optimized Aisle)
Operation in Teamwork Mode 12.4.5 Teamwork Mode 3 (Optimized Aisle) Teamwork Mode 3 can be selected when the units are set to operate in Optimized Aisle Control mode and have been connected in a unit to unit (U2U) network. Teamwork provides coordination between the units that will prevent “fighting”... -
Page 149: Table 35 Teamwork Mode 1 Or 3, Definition Of Serial, Parallel And Local
Operation in Teamwork Mode Table 35 Teamwork Mode 1 or 3, definition of Serial, Parallel and Local Mode A (C = SUPPLY / F = SUPPLY) Teamwork Mode 3 Cooling On-Off Local Cooling Capacity Local Low Supply Limit Control Fanspeed Parallel Re-Heat during Dehum Local... -
Page 150: Remote Rack Sensor Wiring
Liebert CRV is capable of supporting up to ten (10) 2T remote rack temperature sensors. It is recommended that one (1) 2T housing be attached to each rack the Liebert CRV is intended to cool. The sensors provide feedback directly to the cooling unit to improve efficiency and performance. Rack sensors help combat cooling problems related to recirculation air, uneven rack loading and air distribution. -
Page 151: Set 2T Rack Sensor Identities-Dip Switch Settings
Table 36 DIP switch settings DIP Switch Position 2T Temperature and Factory-Set Humidity Sensor to Terminated Included with Liebert CRV Sensor # 1 Sensor # 2 Sensor # 3 Optional 2T Rack Sensors Sensor # 4 Sensor # 5 Sensor # 6... -
Page 152: Terminating The Last 2T Sensor On A Network
13.3.1 Using the Factory-Supplied Plug to Terminate the Last 2T Sensor on a Network The Liebert CRV is furnished with 2T sensors and an RJ-45 termination plug. Arrange the sensors and network as detailed in 13.7 Sensor Location and Mounting. Insert the termination plug into the RJ-45 connection on the 2T temperature and humidity sensor board (see Figure 125). -
Page 153: Figure 126 Termination Jumper Setting
Remote Rack Sensor Wiring Figure 126 Termination jumper setting 2T Sensor Housing (back) switches Screws, typically 3 Circuit board inside display housing Circuit board inside 2T sensor housing Termination Jumper in the Terminated Position Terminated Unterminated ® ™ Liebert... -
Page 154: Figure 127 Removing The Remote Temperature/Humidity Sensor Cover And Setting Dip Switches
Remote Rack Sensor Wiring Figure 127 Removing the remote temperature/humidity sensor cover and setting DIP switches See Detail Area Remote Sensor DIP switch and Jumper Locations DETAIL AREA Sensor DIPswitch and Jumper P6 6 1 2 3 4 5 6 7 8 Locations P6 7 Rotated 180°... -
Page 155: Canbus And Ethernet Cable Wiring
CRV. Each Liebert CRV includes three 2T sensors and three interconnecting shielded CAN cables. Up to an additional seven 2T sensors can be connected to a Liebert CRV for a total of 10 sensors. Additional 2T sensors can be purchased in kits of 1, 3 or 7, which include one, three or seven additional shielded CAN cables, each 6 ft. -
Page 156: Figure 128 Canbus Wire Cable With Grounding Wire
Violet 3. Any wire not terminated into a terminal/connector is provided with a strip length of .50. 4. Assembly must be provided in accordance with latest revision of Emerson engineering specification 1A10952. Yellow 5. Information in parenthesis is not to be hot stamped. -
Page 157: Route The Canbus Wire Into The Cooling Unit-600Mm (24")
Ensure there is enough slack in the wire to allow the door to open and close freely, but not so much that the wire could be in a bind or pinched when the door is shut. Emerson recommends securing the wiring with cable ties. -
Page 158: Route The Canbus Wire Into The Cooling Unit-300Mm (12")
CRV as shown in Top entry route the CANbus wire into the cooling unit-300mm (12") DX. Route the CANbus cable out of the Liebert CRV to an external 2T Sensor Terminal and sensors on the racks as shown in Top entry route the CANbus wire into the cooling unit-300mm (12") DX. See Figures 131 and 132 for an example of arranging the sensor array. -
Page 159: Sensor Location And Mounting
• Affix the 2T sensor housing to the rack using the supplied hook-and-loop fastener. Emerson recommends installing the housing in an easily accessible space with the sensor number label visible for maintenance and troubleshooting. -
Page 160: Figure 131 2T Rack Sensors Installed On Neighboring Racks-600Mm (24") Models
Remote Rack Sensor Wiring Figure 131 2T rack sensors installed on neighboring racks-600mm (24") models 600mm (24") Liebert CRV’s shown; arrangement is same for 300mm (12") units 2T Sensor Chain 12" (305mm) Approximate center of rack; in front of IT... -
Page 161: Figure 132 2T Rack Sensors Installed On Neighboring Racks-300Mm (12") Models
Remote Rack Sensor Wiring Figure 132 2T rack sensors installed on neighboring racks-300mm (12") models 4-3/8" Sensor wire enters 300mm (112mm) (12") Liebert CRV’s at rear; 1-5/8" refer to Figure 130. (41mm) 2 5/8" (67mm) 3/16" (4mm) Maximum Depth (3 3/8") 1-5/8"... -
Page 162: Remote Rack Sensor Operation And Rack View Setup
Remote Rack Sensor Wiring 13.8 Remote Rack Sensor Operation and Rack View Setup Figure 133 Remote Sensor Setup, page 1 of 1 Once the remote rack sensors have been configured and plugged into the CANbus network, the control can be configured to use the sensor for either control or reference. If the sensor is set to Disable, it will be ignored. -
Page 163: Operation
Liebert recommends using the supply temperature sensor to control the cooling capacity of the Liebert CRV, but cooling can be managed from any of the temperature sensors. The supply temperature is an accurate representation of the actual heat rejection the Liebert CRV needs to perform. - Page 164 (See also Appendix A - Humidifier—600mm (24") Units Only). The Liebert CRV's humidification is activated when the measured temperature and humidity sensor has been calculated to exceed the corresponding dew point setpoint. The dew point setpoint is calculated based on the temperature and humidity of the sensor set to control the control setpoint and relative humidity.
-
Page 165: Alarms/Events
14.1 Alarms/Events The following alarms and events are supported by the Liebert iCOM® control on the Liebert CRV. When an alarm is triggered the alarm sounds, the LED will flash red, an event will be written to the Event Log and the BMS will be notified. If the alarm is acknowledged, the alarm will silence and the LED will turn solid red. - Page 166 Operation ™ Table 37 Liebert CRV - Glossary ® Controller Liebert iCOM Data Label Data Description Sensor from which air temperature measurements will be used for cooling Air Temperature Control Sensor and heating control. Value that is divided evenly to form a temperature range above and below Air Temperature Dead Band [Air Temperature Set Point].
- Page 167 Operation ™ Table 37 Liebert CRV - Glossary (continued) ® Controller Liebert iCOM Data Label Data Description Condenser Refrigerant Pressure Over Condenser refrigerant pressure has exceeded a threshold. Threshold Condenser Refrigerant Pressure Sensor Condenser refrigerant pressure sensor is disconnected or the signal is out Issue of range.
- Page 168 Operation ™ Table 37 Liebert CRV - Glossary (continued) ® Controller Liebert iCOM Data Label Data Description Temperature control band above the temperature set point calculated for Fan Speed Proportional Band proportional fan speed control. If measured air temperature is within this band, fan speed operations are proportionally controlled.
- Page 169 Operation ™ Table 37 Liebert CRV - Glossary (continued) ® Controller Liebert iCOM Data Label Data Description Return Air Over Temp Threshold Threshold value used in the [Return Air Over Temperature] event. Return Air Over Temperature Return air high temperature event.
-
Page 170: Calibration And Regulation After Startup
EGULATION AFTER TARTUP The Liebert CRV has been factory-tested and calibrated, but it is very important to check, at startup, the superheating of the thermostatic valve (A/W versions). • For calibrations of instruments installed on the external condensers/drycoolers, refer to the manual for the equipment. -
Page 171: Maintenance
Maintenance 16.0 M AINTENANCE 16.1 Safety Instructions All maintenance operations must strictly observe national, state and local accident prevention regulations, especially the regulations concerning electrical systems, refrigerators and manufacturing resources. Air conditioning equipment maintenance may be performed only by authorized properly trained and qualified personnel. -
Page 172: Facility Fluid And Piping Maintenance For Water And Glycol Systems
16.4 Spare Parts Only original spare parts made by Emerson Network Power may be used. Using third-party material can invalidate the warranty. When making seeking technical assistance, always refer to the component list supplied with the equipment, and specify the model number, serial number and, if available, the part number. -
Page 173: Table 39 Maintenance Schedule
Maintenance Table 39 Maintenance schedule Maintenance Period Monthly Every Every Component By User 3 Months 6 Months Annually Check unit display for clogged-filter warning Check for irregular noise from unit fans Check for irregular noise from compressor (if General applicable) Check for irregular noise from remote condenser fan(s) (if applicable) Check state of filters... -
Page 174: Inspect And Replace The Air Filters-600Mm (24") Models
Safety Switch To extract the filters (refer to Figure 137: 1. Push up the upper filter. 2. Pull the bottom of the filter away from the Liebert CRV. 3. Pull it out of the unit. 4. Lift the lower filter up 5. -
Page 175: Figure 137 Remove The Air Filters-600Mm (24") Models
Figure 138 Differential pressure switch tubes—600mm (24") models Differential pressure switch tube Before restarting the unit, be sure that the Liebert CRV’s door is properly closed. If it is ajar, the microswitches on the door will keep the unit in safety status. ® ™... -
Page 176: Inspect And Replace The Air Filters-300Mm (12") Models
Maintenance 16.7 Inspect and Replace the Air Filters—300mm (12") Models Check the air filter monthly to maintain efficient air distribution through the evaporator coil. 1. Switch Off the CRV. 2. Open the rear door. The filters are just inside the door. 3. -
Page 177: Figure 140 Differential Pressure Switch Components, 300Mm (12") Dx Models
Maintenance Figure 140 Differential pressure switch components, 300mm (12") DX models Differential Pressure Sampling Point Differential Pressure Switch ® ™ Liebert... -
Page 178: Condensate Drain And Condensate Pump Systems
Maintenance 16.8 Condensate Drain and Condensate Pump Systems 16.8.1 Condensate Drain Check for and clear obstructions in tubing during routine maintenance. 16.8.2 Condensate Pump, Dual-Float Figure 141 Condensate pump Condensate Pump 600mm (24") Models 300mm (12") DX Models 1. Disconnect power to the unit using the disconnect switch. 2. -
Page 179: 16.11 Replace A Fan
6. Set the fan assembly in a work area. 7. Remove the four bolts attaching the fan to be replaced to the fan frame assembly. 8. Reverse the steps to install the replacement fan. Figure 142 Liebert CRV fan assembly components Fan Assembly for 600mm (24") -
Page 180: 16.12 Considerations When Dismantling The Unit
The Liebert CRV contains substances and components hazardous for the environment (electronic components, refrigerating gases and oils). At the end of its useful life, the Liebert CRV must be dismantled by specialized refrigerating technicians. The unit must be delivered to suitable centers specializing in the collection and disposal of equipment containing hazardous substances. - Page 181 Maintenance • Additional information located in a dedicated label of the unit (Reg. 1494/2007): a. Where fluorinated greenhouse gas is foreseen to be added to the equipment outside of the manufacturing site at the point of installation, a dedicated label accommodates notation of both the quantity (kg) pre-charged in the manufacturing plant and the quantity charged at the installation site, as well as the resulting total quantity of F-gas as a combination of the above-mentioned quantities, in a manner that conforms to legibility and indelibility.
-
Page 182: Troubleshooting
Evaporator Fans reading is correct compared with a manifold gauge. will not modulate from 100% Contact your local Emerson representative See 11.3 Liebert CRV Operation—Liebert iCOM Control Fan control not properly set Contact your local Emerson representative ® ™ Liebert... - Page 183 Verify sensor reading in User Menu, Sensor Data. Digital Scroll Sensor disconnected Check plug connections Sensor Failure Contact your local Emerson representative Low return temperature Place a unit into standby (if applicable) Install blanking panels in open areas of racks. Consult your local Emerson representative.
-
Page 184: Table 41 Liebert Icom ® Medium Control Board Dipswitch Settings
Corrective Action Room humidity is over acceptable limit Check room condition Water drops carried Condensate pan drain is clogged Contact your local Emerson representative by airflow Problem with humidifier control Contact your local Emerson representative Unit is not properly leveled... -
Page 185: Appendixa - Humidifier -600 Mm (24") Units Only
Humidifier—600mm (24") Units Only A - H —600 (24") U PPENDIX UMIDIFIER NITS RINCIPAL OF PERATION When the Liebert iCOM ® calls, the cylinder fills to 100% of the Full Load Amperage (FLA) or to the top of the cylinder, whichever comes first. See Figure 143. If it reaches 100% FLA, the water heats and boils away to a level giving 80% FLA. -
Page 186: Humidifier Water Supply And Plumbinghumidifier Water Supply And Plumbing
Humidifier—600mm (24") Units Only A.1.1 Humidifier Water Supply and Plumbing The fill valve is sized for an extended water pressure range of 30 to 80 psi. For installations where water pressure is less than 15 psi, add a pressure boost pump and notify the factory;... -
Page 187: Humidifier Startup And Operationhumidifier Startup And Operation
The red light may come on during initial startup, but this does not mean the cylinder must be replaced. See 10.0 Startup and 14.0 Operation. Contact Emerson or your local Emerson representative to obtain a replacement cylinder. To obtain the correct cylinder, supply the cylinder model from the white three-digit label on the cylinder, or supply the model, voltage and serial number from the unit specification label. -
Page 188: Figure 145 Sensor Pins, Cylinder Plugs
Humidifier—600mm (24") Units Only Remove the Old Cylinder 1. Turn Off the water supply to the unit. 2. The old cylinder must be drained completely before removing. This is done by pushing the auto On/Off/Drain switch to the “drain” position. 3. -
Page 189: Humidifier Troubleshootinghumidifier Troubleshooting
Humidifier—600mm (24") Units Only A.1.6 Humidifier Troubleshooting Terms Used • FLA (Full Load Amps) are amps listed on the humidifier specification label. • Short cycling occurs when the humidifier’s “On time” is less than 10 minutes upon a call for humidity. -
Page 190: Appendixb - Remote Rack Sensor Troubleshooting
ENSOR ROUBLESHOOTING If the sensor has been set up correctly and is communicating to the Liebert CRV, then the status of the LED (DS1) located on the sensor circuit board will be solid green. Figure 146 CANbus and Ethernet cable wiring Six-wire CANbus cable with RJ -12 long body connectors ;... -
Page 191: Starting Point
Remote Rack Sensor Troubleshooting TARTING OINT Auto On/Off/Drain switch in On position—unit will not fill: When the On/Off control circuit is made and the Auto On/Off/Drain switch is pushed to On, the 24V holding coil of the primary contactor should energize. The resulting magnetic pull closes the high voltage contacts with a distinct and audible “clunk.”... - Page 192 Philippines ® Liebert is a registered trademark of Liebert Corporation. +63 2 687 6615 All names referred to are trademarks Fax: +63 2 730 9572 or registered trademarks of their respective owners. SL-11975_REV9_04-14 Emerson Network Power Liebert www.emerson.com www.EmersonNetworkPower.com...