
Related Manuals for 3D Systems Cube 3rd Generation


Summary of Contents for 3D Systems Cube 3rd Generation
- Page 1 Generation Personal 3D Printer Quick Start Guide See Inside for Use and Safety Information The USB Mass Storage Device Contains the User Guide and Quick Start Guide in other Languages...
-
Page 3: Table Of Contents
Congratulations on the purchase of your new Cube® 3D Printer! This Quick Start Guide has the use and safety information you need to get started. Welcome to the 3D creative revolution – let the possibilities begin! If you have any questions, do not hesitate to reach us at [email protected]. This Quick Start Guide will give you basic instructions on how to get your Cube 3D Printer connected to ®... -
Page 4: Safety
DO NOT modify any safety features or make modifications to the Cube. Doing so is prohibited and voids your warranty. • Use of print materials other than 3D Systems print materials and genuine 3D Systems components may void warranty. •... -
Page 5: Your Cube At A Glance
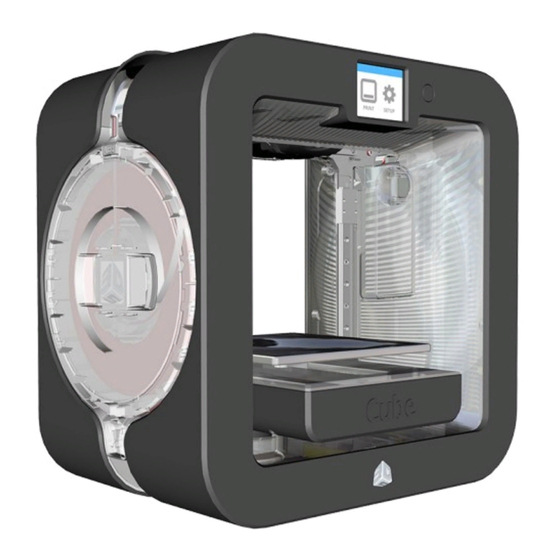
YOUR CUBE AT A GLANCE Print Jets Print Jet Tubes Material Cartridges Print Pad Print Platform Touchscreen Display On / Off Button USB Inlet Port (mass storage device only) Power Inlet Purge Bins with Wipers USB B Port (for future use) OPERATING ENVIRONMENT •... -
Page 6: Unpack Your Cube
UNPACK YOUR CUBE NOTE: Keep all packing materials for future transport. Shipping the printer without the original packing materials may damage the printer and void the manufacturer’s warranty. Pull the clips (A) and remove them from the top of the printer box and open the box. - Page 7 Front View Top View 8” (203 mm) 4” (102 mm) Back Front 4” (102 mm) Hand Clearance Around the Printer Build Plate Travel Area Remove the top insert. Fold the sides inward and remove the lower insert from the printer.
- Page 8 Raise the print platform (A) and remove the spacer (B) from the printer. Open the accessories box and unpack the material cartridges, the USB mass storage device, the power supply, cord, and the Cube Glue bottle. Connect the power supply cable to the power inlet port (A) on the printer.
-
Page 9: What's Included
WHAT’S INCLUDED Cube Removable Print Pad Cartridges Cube Glue Power Supply Power Cord Quick Start Guide Casing and Contents Casing Sandpaper Gap Gauge USB Mass 1.5 mm Allen Pliers Scraper Storage Device* Wrench Depending on your printer model or configuration, up to two cartridges may be included. NOTE: The sandpaper should only be used for lightly sanding the print pad when prompted by the touchscreen display. -
Page 10: Setting Up And Activating Your Cube
SETTING UP AND ACTIVATING YOUR CUBE Select your language. Press the checkmark to confirm your selection. NOTE: The selected language will be indicated. Enter a name for your printer. Scroll through the letters by pressing the arrow symbols on each side of the screen. - Page 11 Connect the printer to your network. Use the up or down arrows to scroll to your network choice and select the network name. Select SKIP to bypass this step. You can connect to a wireless network at any time by navigating to the Network screen and selecting WIFI.
- Page 12 NOTE: The display will indicate when the network connection has been made. NOTE: If the wrong password was entered, you will be asked to enter the password again after a few seconds. NOTE: Connection to a network is confirmed by a checkmark to the left of the network name.
- Page 13 checkmark Select the to continue to the registration and warranty activation process. Log in to Cubify.com. Go to www.cubify.com, select My Cubify and log in to your account. NOTE: If you have not activated an account on Cubify.com, select SIGN UP and follow the instructions.
- Page 14 NOTE: The serial number for your printer will appear on the printer’s touchscreen display. Take note of the serial number. You will need the serial number to activate your printer. Select the checkmark to continue. NOTE: This illustration provides an example of a serial number.
- Page 15 activation code Enter the 4-digit into the printer and select the checkmark to continue. checkmark Select the to complete the registration and warranty activation process. Before installing cartridges, select the cartridge icon or select START to begin the process of installing your print cartridge.
- Page 16 NOTE: The printer will begin to heat. Wait until the printer has finished heating and then follow the user prompts in the touchscreen menu. Insert the print jet (from the cartridge that will be mounted on the left side of the printer) into the left print jet opening on top of the printer.
- Page 17 NOTE: The print jet will begin to heat. Once the print jet has reached the operating temperature, the printer will prime melted material into the refuse bin. The left cartridge has been installed. Select the checkmark to continue. NOTE: The printer will begin to heat. Wait until the printer has finished heating and then follow the user prompts in the touchscreen menu.
- Page 18 Insert the print jet (from the cartridge that will be mounted on the right side of the printer) into the right print jet opening on top of the printer. Rotate the print jet clockwise until the dots align. NOTE: As you rotate the print jet, ensure the print jet tube is tucked under the top of the printer cover.
- Page 19 The right cartridge has been installed. Select the checkmark to continue. PRINT Select to continue. It is recommended that Auto Level is performed prior to the first print. Ensure the print pad is clean and installed properly and then select the checkmark to continue to Auto Level.
- Page 20 NOTE: The printer will begin the Auto Level procedure. This may take a few minutes. checkmark Select the to continue. NOTE: If the print pad is not level, remove the print pad and select the checkmark to continue. The print pad is magnetically attached to the adjustment knobs.
- Page 21 NOTE: Follow the instructions on the touchscreen display. Use the included 1.5 mm Allen wrench to loosen the lock screws before turning the knobs. Select the checkmark to continue. NOTE: The lock screw for knob A can be accessed from behind the printer. The lock screw for knob B can be accessed from the front of the printer.
- Page 22 checkmark Install the print pad and select the to perform Auto Gap. NOTE: To install the print pad, place it on top of the adjustment knobs. When the print pad is centered properly, magnets will secure the print pad to the adjustment knobs. NOTE: The printer will perform an automated gap measurement.
- Page 23 NOTE: If Auto Gap is not successful, it is recommended that you perform Auto Level and Auto Gap again. Select AUTO LEVEL to continue. NOTE: If Auto Gap is not successful the second time, select PLATE MAINTENANCE. For more information, refer to the section titled PRINT PAD MAINTENANCE.
- Page 24 NOTE: If the color built into the test print does not match a color of one of the installed print cartridges, the printer will assign an installed cartridge color to the test print. Select the checkmark to continue. Gently squeeze the bottle and apply two thin layers of Cube Glue to the print pad.
- Page 25 checkmark Select the to go to the main menu. NOTE: You may also press and release the button next to the touchscreen display to return to the main menu.
- Page 26 Function Checklist If you skip or exit from a function during the printer setup sequence below, that function can be performed at any time using the utilities in the printer menu. LANGUAGE CUBE NAME WIFI √ ACTIVATE PRINTER INSTALL CARTRIDGES AUTO LEVEL TEST PRINT...
-
Page 27: Finishing Your Creation
FINISHING YOUR CREATION REMOVING YOUR CREATION FROM THE PRINT PAD Remove the print pad and place it in a container filled with warm tap water. Allow it to soak for approximately ten minutes or until your creation can be easily removed from the print pad. After it has soaked, gently pry the creation from the print pad using the included scraper. -
Page 28: Removing Sidewalks
REMOVING SIDEWALKS A sidewalk is a mesh boundary that prints around the outside diameter of the part. Its main purpose is to reduce the tendency of warping especially when printing flat parts with ABS material. They are not recommended for parts that have fine details. Sidewalks are designed to easily break away from a part once it has been removed from the print pad. -
Page 29: Maintenance
MAINTENANCE PRINT PAD MAINTENANCE Auto Level and Auto Gap can be affected by a residual glue or print material adhered to the print pad. These procedures can also be affected by a print pad that is too shiny. Remove all glue and print material from the print pad before performing Print Pad Maintenance. - Page 30 Clean The Print Pad Remove the print pad from the printer. Wash all glue and print material from the print pad with warm tap water. If necessary, scrub the print pad with a soft brush. Dry the print pad thoroughly. If residual print material is still adhered to the print pad, gently use the scraper to remove it.
-
Page 31: Gap Verification
GAP VERIFICATION After the welcome message test print has printed and has been removed from the print pad, visually inspect the first (bottom) layer of the print and verify the quality. Turn the print upside down and inspect the printing grain. Correct Gap The gap is correct when the bottom of the print appears smooth and the lines are tightly fused together. - Page 32 Gap Is Too Large If the lines are more prominent (see the illustration below) and not tightly fused, the gap is too large. Auto Level and Auto Gap should be performed. If the first layer begins to fray when removing the print from the print pad, the gap is too large. Gap Is Too Narrow When the gap is too narrow, the part may be very difficult to remove from the print pad.
-
Page 33: Manual Gap Adjustment
MANUAL GAP ADJUSTMENT If Auto Gap is unsuccessful, you may perform a manual gap adjustment to ensure the first layer of the part prints properly. Select MANUAL GAP ADJUSTMENT. Place the gap gauge on top of the print pad under the left print jet. -
Page 34: Recover A Cartridge
RECOVER A CARTRIDGE PURGE JETS Use the utility to recover a print cartridge. If you do not have the door on your cartridge and need to recover it, contact Cubify Support. The cartridge must be properly installed in the printer before performing the procedure. Refer to the user guide for more information. - Page 36 3D Systems, Inc. 333 Three D Systems Circle | Rock Hill, SC | 29730 www.Cubify.com ©2015 3D Systems, Inc. All rights reserved. The 3D Systems logo, 3D Systems, Cube and Cubify are registered trademarks of 3D Systems, Inc. PN: 390186-00 Rev. F...