Fujitsu scansnap sv600 Operation Manual
Hide thumbs
Also See for scansnap sv600:
- Basic operation manual (180 pages) ,
- Getting started (2 pages) ,
- Getting started (2 pages)
Table of Contents
Quick Links
Table of Contents

Related Manuals for Fujitsu scansnap sv600


Summary of Contents for Fujitsu scansnap sv600
- Page 1 P3PC-4842-07ENZ2 Basic Operation Guide (Mac OS)
-
Page 2: Table Of Contents
Contents About This Manual ......................... 5 Safety Information..........................6 Manuals ...............................7 Trademarks............................9 Manufacturer............................10 Symbols Used in This Manual........................ 11 Arrow Symbols in This Manual....................... 12 Screen Examples in This Manual ......................13 Abbreviations Used in This Manual ......................14 What You Can Do with the ScanSnap ................. 15 Scanning a Document...................... - Page 3 Scanning Documents Using Page Turning Detection ................78 Scanning Documents Using Timed Mode....................82 Scanning Documents with Two ScanSnaps Connected to a Computer............85 Correcting the Scanned Images................... 86 Scanning a Document .......................... 87 Filling in Fingers Captured in a Scanned Image (When a Document Is Scanned) ........88 Scanning Books...........................
- Page 4 Conditions for Using the Carrier Sheet (For S1100) ................. 157 How to Load Documents (For S1100) ....................159 About Customer Support and Maintenance ............... 161...
-
Page 5: About This Manual
About This Manual About This Manual "Safety Information" (page 6) "Manuals" (page 7) "Trademarks" (page 9) "Manufacturer" (page 10) "Symbols Used in This Manual" (page 11) "Arrow Symbols in This Manual" (page 12) "Screen Examples in This Manual" (page 13) "Abbreviations Used in This Manual"... -
Page 6: Safety Information
Safety Information Safety Information The attached "Safety Precautions" manual contains important information about the safe and correct use of the ScanSnap. Make sure that you read and understand it before using the ScanSnap. -
Page 7: Manuals
[SV600 Safety Precautions]. When Setting Up the ScanSnap Manual Description and Location ScanSnap SV600 Getting This manual explains the setup procedure from the moment you open the package to Started testing the operations. Getting Started is included in the package. - Page 8 Manuals When Saving Scanned Images to a Mobile Device Manual Description and Location ScanSnap Connect This manual describes operations to be performed on an iOS-based mobile device Application User's Guide when you save scanned images to the mobile device. (iOS) This manual can be accessed by the following method: 1.
-
Page 9: Trademarks
Trademarks Trademarks Microsoft, Windows, Windows Vista, Excel, PowerPoint, Outlook, SharePoint, Windows Live, Internet Explorer, and Entourage are either registered trademarks or trademarks of Microsoft Corporation in the United States and/or other countries. Word is the product of Microsoft Corporation in the United States. Apple, App Store, the Apple logo, Mac, Mac OS, OS X, iPad, iPhone, iPhoto, iPod touch, and iTunes are trademarks of Apple Inc. -
Page 10: Manufacturer
Manufacturer Manufacturer PFU LIMITED YOKOHAMA i-MARK PLACE, 4-4-5 Minatomirai, Nishi-ku, Yokohama, Kanagawa, 220-8567, Japan © PFU LIMITED 2013-2015... -
Page 11: Symbols Used In This Manual
Symbols Used in This Manual Symbols Used in This Manual The following indications are used in this manual to obviate any chance of accident or damage to you and people near you, and your property. Warning labels indicate the warning level and statements. -
Page 12: Arrow Symbols In This Manual
Arrow Symbols in This Manual Arrow Symbols in This Manual Right-arrow symbols (→) are used to connect icons or menu options you should select in succession. Example: From the sidebar in Finder, select [Applications] → [ScanSnap]. -
Page 13: Screen Examples In This Manual
Screen Examples in This Manual Screen Examples in This Manual The screenshots used in this manual are of OS X v10.9. However, some screenshots are of OS X v10.10.3 or later. The actual windows and operations may differ depending on the operating system. The screen examples in this manual are subject to change without notice in the interest of product development. -
Page 14: Abbreviations Used In This Manual
Abbreviations Used in This Manual Abbreviations Used in This Manual When a ScanSnap model is referred to in this manual, "Color Image Scanner ScanSnap" is omitted. Also, the following abbreviations are used in this manual. Abbreviation Used Designation Mac OS OS X v10.10, OS X v10.9, OS X v10.8, or Mac OS X v10.7 Word ®... -
Page 15: What You Can Do With The Scansnap
What You Can Do with the ScanSnap What You Can Do with the ScanSnap The ScanSnap model that performs overhead scanning has a scanning unit that does not touch documents. The following scanning operations can be performed with this model: l A book or booklet that is up to A3 in size can be scanned without cutting pages out. - Page 16 What You Can Do with the ScanSnap This is useful also for scanning multiple documents (of any type) consecutively. There are two types of settings for timed mode: l Setting the time period before the ScanSnap starts scanning a document after the [Scan] button is pressed l Setting the time period for the ScanSnap to start the next scan when a document is scanned continuously...
- Page 17 What You Can Do with the ScanSnap "Filling in Fingers Captured in a Scanned Image (When a Book Is Scanned)" (page 100) When multiple documents are scanned at once "Correcting the Scanned Image Orientation" (page 105) "Modifying the Crop Area" (page 108) "Adding the Necessary Scanned Images"...
-
Page 18: Scanning A Document
Scanning a Document Scanning a Document Press the [Scan] or [Stop] button on the ScanSnap to turn the power on. [Stop] Button [Scan] Button a The power LED lights up in blue. In addition, the ScanSnap Manager icon in the Dock changes from Place the Background Pad on the front side of the ScanSnap. - Page 19 Scanning a Document White Sheets a Scanning starts. ATTENTION l Do not perform the following operations during scanning. Doing so will stop scanning. Connect or disconnect the ScanSnap and other USB devices. Switch users. Allow the computer to enter sleep mode. l Do not cover the white sheet with an object or hand during scanning.
- Page 20 Scanning a Document a When scanning is complete, the [ScanSnap Manager - Image scanning and file saving] window displays a scanning standby status. HINT To continue scanning, place down the next document to be scanned, and then perform one of the following operations.
- Page 21 Scanning a Document HINT Click the [Check/Correct] button in the [ScanSnap Manager - Image scanning and file saving] window to correct the scanned image. The following functions are available: "Filling in Fingers Captured in a Scanned Image (When a Document Is Scanned)" (page "Correcting the Scanned Image Orientation"...
- Page 22 Scanning a Document HINT l Clicking displays the description of an application. Placing the mouse cursor over the icon of another application displays the description of the application. l Performing a scan while an application that can be automatically linked with is active automatically starts the linkage between ScanSnap Manager and the application.
-
Page 23: Scanning A Book
Scanning a Book Scanning a Book Press the [Scan] or [Stop] button on the ScanSnap to turn the power on. [Stop] Button [Scan] Button a The power LED lights up in blue. In addition, the ScanSnap Manager icon in the Dock changes from Place the Background Pad on the front side of the ScanSnap. - Page 24 Scanning a Book White Sheets a Scanning of the book starts. ATTENTION l Do not perform the following operations during scanning. Doing so will stop scanning. Connect or disconnect the ScanSnap and other USB devices. Switch users. Allow the computer to enter sleep mode. l Do not cover the white sheet with an object or hand during scanning.
- Page 25 Scanning a Book a When scanning the book is complete, the [ScanSnap Manager - Image scanning and file saving] window displays a scanning standby status. HINT To continue scanning the book, open the next page to be scanned, and then perform one of the following operations: Continuous scanning of the book starts.
- Page 26 Scanning a Book HINT Click the [Check/Correct] button in the [ScanSnap Manager - Image scanning and file saving] window to correct the scanned image. The following functions are available: "Correcting Distorted Book Images" (page 93) "Splitting a Double-Page Spread Image into Two Page Images" (page 97) "Filling in Fingers Captured in a Scanned Image (When a Book Is Scanned)"...
- Page 27 Scanning a Book a The selected application starts up. For details, refer to the Advanced Operation Guide. ATTENTION l You cannot start scanning when the Quick Menu is displayed. Either select an icon from the Quick Menu and finish the process, or close the Quick Menu before you perform the next scan.
-
Page 28: Scanning Multiple Documents At Once
Scanning Multiple Documents at Once Scanning Multiple Documents at Once Press the [Scan] or [Stop] button on the ScanSnap to turn the power on. [Stop] Button [Scan] Button a The power LED lights up in blue. In addition, the ScanSnap Manager icon in the Dock changes from Place the Background Pad on the front side of the ScanSnap. - Page 29 Scanning Multiple Documents at Once White Sheets a Scanning starts. ATTENTION l Do not perform the following operations during scanning. Doing so will stop scanning. Connect or disconnect the ScanSnap and other USB devices. Switch users. Allow the computer to enter sleep mode. l Do not cover the white sheet with an object or hand during scanning.
- Page 30 Scanning Multiple Documents at Once a When scanning is complete, the [ScanSnap Manager - Image scanning and file saving] window displays a scanning standby status. HINT To continue scanning, place down the next document to be scanned, and then perform one of the following operations.
- Page 31 Scanning Multiple Documents at Once HINT Click the [Check/Correct] button in the [ScanSnap Manager - Image scanning and file saving] window to correct the scanned image. The following functions are available: "Correcting the Scanned Image Orientation" (page 105) "Modifying the Crop Area" (page 108) "Adding the Necessary Scanned Images"...
- Page 32 Scanning Multiple Documents at Once l Performing a scan while an application that can be automatically linked with is active automatically starts the linkage between ScanSnap Manager and the application. For details, refer to the Advanced Operation Guide.
-
Page 33: Scansnap Overview
ScanSnap Overview ScanSnap Overview This section provides an overview that you should be aware of before operating ScanSnap. "Parts and Functions" (page 34) "System Requirements" (page 37) "Overview of the Software Related to the ScanSnap" (page 38) "How to Install the Software" (page 39) "ScanSnap Manager Icon"... -
Page 34: Parts And Functions
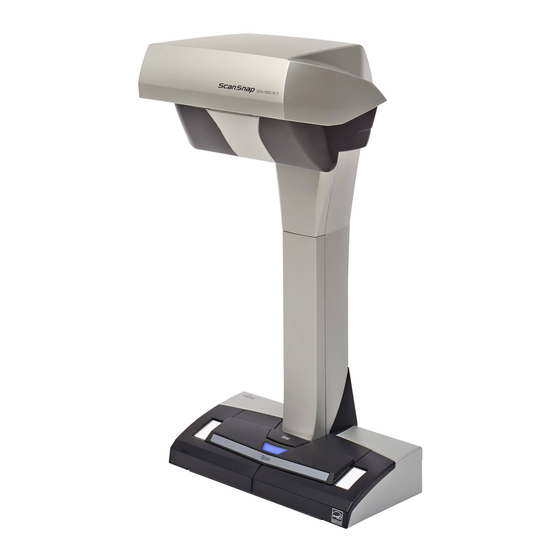
Parts and Functions Parts and Functions This section explains the names and functions of the ScanSnap parts. Front Name Description Head Neck [Scan] button (*1) l Turns on the ScanSnap. l Starts scanning. [Stop] button (*1) l Turns the ScanSnap on or off. l Stops scanning. - Page 35 Parts and Functions ATTENTION When carrying the ScanSnap, hold its base and neck. Do not carry the scanner by the head. Back Name Description Security cable slot Used to connect an anti-theft security cable (commercially available). USB connector Used to connect a USB cable. Power connector Used to connect the AC cable.
- Page 36 Parts and Functions Name Description Camera Detects page turning and glossy papers. Infrared LED Irradiates the scan area with infrared to detect page turning and glossy papers. Glass Protects the lens used to scan a document. Lamp Illuminates the document to be scanned.
-
Page 37: System Requirements
CardMinder: 600 MB l ABBYY FineReader for ScanSnap: 590 MB l ScanSnap Online Update: 10 MB l ScanSnap SV600 Basic Operation Guide: 100 MB l Nuance PDF Converter for Mac: 110 MB USB port USB 3.0 (*3)/USB 2.0/USB 1.1 *1: Updating Mac OS to the latest version is recommended. -
Page 38: Overview Of The Software Related To The Scansnap
Overview of the Software Related to the ScanSnap Overview of the Software Related to the ScanSnap This section gives an overview of each bundled software and their functions. You can edit, manage, and arrange the scanned image by using the following software: ScanSnap Manager This scanner driver is required to scan documents with the ScanSnap. -
Page 39: How To Install The Software
ScanSnap to the computer. l If a DVD-ROM drive is not available, the installers for the software programs can be downloaded from the following web page. http://scansnap.fujitsu.com/g-support/en/ The functions of each button in the [ScanSnap] window are as follows. Icon... -
Page 40: Scansnap Manager Icon
ScanSnap Manager Icon ScanSnap Manager Icon When ScanSnap Manager is running, the ScanSnap Manager icon is displayed in the Dock. The ScanSnap Manager icon indicates whether or not ScanSnap Manager is successfully communicating with the ScanSnap. The appearance of the icon changes according to the communication status as shown below. -
Page 41: Scansnap Manager Menu
ScanSnap Manager Menu ScanSnap Manager Menu This menu appears when you click the ScanSnap Manager icon in the Dock while holding down the [control] key on the keyboard. Click While Pressing the [control] Key on the Keyboard Item Function Scan Scans the document placed in the scan area of the ScanSnap. - Page 42 Opens the ScanSnap Manager Help. l Troubleshooting Displays [Troubleshooting] in the ScanSnap Manager Help. l ScanSnap Portal Site Opens the ScanSnap global homepage (http://scansnap.fujitsu.com). l About ScanSnap Manager Displays the [ScanSnap Manager - Version Information] window. l ScanSnap information Displays the [ScanSnap Manager - Scanner and driver information] window.
- Page 43 ScanSnap Manager Menu When SV600 and iX500 are connected to a computer...
-
Page 44: Scansnap Setup Window
ScanSnap Setup Window ScanSnap Setup Window When you click the ScanSnap Manager icon while holding down the [control] key on the keyboard, and then select [Settings] from the "ScanSnap Manager Menu" (page 41), the following ScanSnap setup window appears. In the ScanSnap setup window, you can use the [Use Quick Menu] checkbox to specify whether or not to use the Quick Menu. - Page 45 ScanSnap Setup Window...
-
Page 46: Turning The Scansnap On Or Off
Turning the ScanSnap On or Off Turning the ScanSnap On or Off This section explains how to turn the ScanSnap on or off. "Turning the ScanSnap On" (page 47) "Turning the ScanSnap Off" (page 49) "Sleep Mode" (page 50) "Automatic Power OFF" (page 51) -
Page 47: Turning The Scansnap On
Turning the ScanSnap On or Off Turning the ScanSnap On Turn on the computer. a The computer starts up and the ScanSnap Manager icon appears in the Dock. HINT l If the ScanSnap Manager icon is not displayed in the Dock, click [Applications] from the sidebar in Finder, click [ScanSnap], and then double-click [ScanSnap Manager]. - Page 48 Turning the ScanSnap On or Off 1. Click the ScanSnap Manager icon in the Dock while holding down the [control] key on the keyboard, and then select [Preferences] from the "ScanSnap Manager Menu" (page 41). a The [ScanSnap Manager - Preferences] window appears. 2.
-
Page 49: Turning The Scansnap Off
Turning the ScanSnap On or Off Turning the ScanSnap Off Press the [Stop] button on the ScanSnap for three seconds or longer. a The power LED turns off. In addition, the ScanSnap Manager icon in the Dock changes from ATTENTION If moving the ScanSnap, first turn the power off and remove all cables. -
Page 50: Sleep Mode
Turning the ScanSnap On or Off Sleep Mode When the ScanSnap is on and has not been used for 15 minutes, it enters sleep (power saving) mode. -
Page 51: Automatic Power Off
Turning the ScanSnap On or Off Automatic Power OFF When the ScanSnap is turned on and left unused for the specified time (default is "4 hours"), it will turn itself off automatically. To turn the ScanSnap back on, perform one of the following operations: l Press the [Scan] button on the ScanSnap (this will not start scanning) l Press the [Stop] button on the ScanSnap HINT... -
Page 52: Documents To Scan
Documents to Scan Documents to Scan The following documents can be scanned because the scanning unit does not touch the documents. l Thick documents, such as books l Documents that you want to keep intact, such as photographs and handwritten illustrations Conditions for Documents to Scan Document type Flat documents, such as office paper,... -
Page 53: How To Place Documents
How to Place Documents How to Place Documents When you place down documents, use the Background Pad. If you scan documents without using the Background Pad, the document edges may not be detected correctly and the created scanned image may be different from the document. For details about documents that can be scanned with the ScanSnap, refer to "Documents to Scan"... - Page 54 How to Place Documents When Placing a Standard Size Document When you select an option other than [Automatic detection] for [Paper size] on the [Paper] tab in the "ScanSnap Setup Window" (page 44), align the center of the document with the centering mark on the ScanSnap.
- Page 55 How to Place Documents l The number of documents placed must not exceed 10. SV600 15 mm (0.59 in.) or More 15 mm (0.59 in.) or More...
-
Page 56: What You Can Do With Related Software
What You Can Do with Related Software What You Can Do with Related Software This section explains the basic operation procedure of software related to the ScanSnap and gives an overview of its functions. "What You Can Do with the ScanSnap Organizer" (page 57) "What You Can Do with CardMinder"... -
Page 57: What You Can Do With The Scansnap Organizer
What You Can Do with the ScanSnap Organizer What You Can Do with the ScanSnap Organizer ScanSnap Organizer is an application used for displaying, organizing, and managing image data (PDF or JPEG files) scanned with the ScanSnap. You can use this application to create folders and arrange files for various uses. Pages of a PDF file can be opened with an associated application to check the scanned image data. -
Page 58: Basic Operation Procedure Of Scansnap Organizer
What You Can Do with the ScanSnap Organizer Basic Operation Procedure of ScanSnap Organizer This section explains the basic operation procedure of ScanSnap Organizer. From the sidebar in Finder, select [Applications] → [ScanSnap Organizer], and then double-click [ScanSnap Organizer] to start up ScanSnap Organizer. Scan documents with the ScanSnap. -
Page 59: Managing Files
What You Can Do with the ScanSnap Organizer Managing Files For details about operations, refer to the ScanSnap Organizer Help. Setting a Marked Character String as a Keyword Keywords can be set to a PDF file by using the keyword setting function. These keywords can be used when you search for PDF files. - Page 60 What You Can Do with the ScanSnap Organizer Searching Files You can search files that are managed in ScanSnap Organizer.
-
Page 61: Editing Files
What You Can Do with the ScanSnap Organizer Editing Files For details about operations, refer to the ScanSnap Organizer Help. Correcting a book distortion By starting Book Image Viewer from ScanSnap Organizer, you can correct distorted images of scanned books. For details about other image correction functions, refer to the ScanSnap Organizer Help. -
Page 62: Using Files
What You Can Do with the ScanSnap Organizer Using Files For details about operations, refer to the ScanSnap Organizer Help. Linking Files with Other Applications You can use files with a variety of applications. Sending Files by E-mail Files can be sent by e-mail. -
Page 63: What You Can Do With Cardminder
What You Can Do with CardMinder What You Can Do with CardMinder CardMinder is an application used for displaying, organizing, and managing card image data scanned with the ScanSnap. This application digitalizes large amounts of business cards into images at a high speed and recognizes text on those cards, thus allowing you to search for your clients' business cards from those data quickly, and create your client databases conveniently. - Page 64 What You Can Do with CardMinder "Searching Card Data with Keyboard Shortcuts" (page 70) "Attaching a File to Card Data" (page 71)
-
Page 65: Basic Operation Procedure Of Cardminder
What You Can Do with CardMinder Basic Operation Procedure of CardMinder This section explains the basic operation procedure of CardMinder. Start CardMinder. From the sidebar in Finder, select [Applications] → [CardMinder], and then double-click [CardMinder]. Scan a card with the ScanSnap. Load a card in the ScanSnap and press the [Scan] button to start scanning the card. - Page 66 What You Can Do with CardMinder Card Image View Card Data Edit View If the language to be used for text recognition is different, perform text recognition again in the following procedure: 1. Select [CardMinder] menu → [Preferences]. a The [General] window appears. 2.
- Page 67 What You Can Do with CardMinder The card data can be corrected in the following ways. For details, refer to the CardMinder Help. l Redoing the recognition process on the character strings in the selected areas l Entering text directly in the Card Data Edit view l Correcting the orientation of the card image or switching the front and back images No.
-
Page 68: Linking Card Data With Other Applications
What You Can Do with CardMinder Linking Card Data with Other Applications Click the following buttons on the Toolbar to use card data in a variety of applications. The following explains an example in which the Toolbar is customized to display the [Application] button. -
Page 69: Searching Card Data With The Basic Search Toolbar
What You Can Do with CardMinder Searching Card Data with the Basic Search Toolbar This section explains how to search card data with the CardMinder Basic Search Toolbar. Find (Basic Search Toolbar) To search card data, type in a search term (such as an individual name or a company name) in the Basic Search Toolbar. -
Page 70: Searching Card Data With Keyboard Shortcuts
What You Can Do with CardMinder Searching Card Data with Keyboard Shortcuts Even when CardMinder is not running, you can search card data by using a character string in another application (such as TextEdit) as the keyword for searching. Drag the mouse to select a character string you want to search for. Press [command ] + [shift] + [&] keys on the keyboard at the same time. -
Page 71: Attaching A File To Card Data
What You Can Do with CardMinder Attaching a File to Card Data A file can be attached to card data easily by dragging and dropping it. -
Page 72: Useful Usages
Useful Usages Useful Usages This section explains how to use related software for the scanned image that is created after a document is scanned with the ScanSnap and how to scan a document with a setting other than the default setting. "Managing Paper Documents by Folder on a Computer"... -
Page 73: Managing Paper Documents By Folder On A Computer
Managing Paper Documents by Folder on a Computer Managing Paper Documents by Folder on a Computer This section explains how to digitize paper documents and manage the data by folder in ScanSnap Organizer. Scan a paper document with the ScanSnap. For details about scanning a document, refer to "Scanning a Document"... - Page 74 Managing Paper Documents by Folder on a Computer From the menu bar, select [File] → [New Folder]. a A new folder is created in the folder list. Rename the created folder. HINT To create multiple folders, repeat steps 3 to 4. Select the scanned image from the file list, and drag and drop it to the folder.
- Page 75 Managing Paper Documents by Folder on a Computer a The scanned image is moved to the folder. HINT For details about other functions, refer to the ScanSnap Organizer Help.
-
Page 76: Saving Business Cards To A Computer
Saving Business Cards to a Computer Saving Business Cards to a Computer This section explains how to digitize business cards and save the card data in CardMinder. ATTENTION If you do not log in as a user with Administrator privileges, you may not be able to link the ScanSnap with another application properly. - Page 77 Saving Business Cards to a Computer Check the card data. Make sure that the text on the card images are displayed correctly in the Card Data Edit view. If the card data must be corrected, click the text to be corrected and then directly edit it. Card Image View Card Data Edit View HINT...
-
Page 78: Scanning Documents Using Page Turning Detection
Scanning Documents Using Page Turning Detection Scanning Documents Using Page Turning Detection This section explains how to detect page turning to start scanning automatically. ATTENTION When the installation environment of the ScanSnap or the specification of the book to be scanned encounters any of the following, use timed mode to scan a document. - Page 79 Scanning Documents Using Page Turning Detection a The [Scanning mode option] window appears. Select the [Configure settings for starting the next scan.] checkbox and then [Page turning detection mode]. Click the [OK] button to close the [Scanning mode option] window. Click the [Apply] button in the ScanSnap setup window.
- Page 80 Scanning Documents Using Page Turning Detection Open the page of a book you want to scan and place the book in the scan area of the ScanSnap. For details, refer to "How to Place Documents" (page 53). Press the [Scan] button on the ScanSnap to start scanning the book. a The [ScanSnap Manager - Image scanning and file saving] window appears.
- Page 81 Scanning Documents Using Page Turning Detection a The page turning is detected and continuous scanning starts. ATTENTION l While the [Turn the page.] message appears on the [ScanSnap Manager - Image scanning and file saving] window, if you hold or move your hand over the Background Pad, such motion may be incorrectly detected as page turning.
-
Page 82: Scanning Documents Using Timed Mode
Scanning Documents Using Timed Mode Scanning Documents Using Timed Mode This section explains how to automatically start scanning by setting the time period for the document scanning to start. Click the ScanSnap Manager icon in the Dock while holding down the [control] key on the keyboard, and select [Settings] from the "ScanSnap Manager Menu"... - Page 83 Scanning Documents Using Timed Mode l To set the time period for the ScanSnap to start the next scan when a document is scanned continuously: 1. Select the [Configure settings for starting the next scan.] checkbox, and then select [Timed interval (Timed mode)]. 2.
- Page 84 Scanning Documents Using Timed Mode Click the [ ] button at the upper left of the window to close the ScanSnap setup window. Place a document with the scanned side face-up in the scan area of the ScanSnap. For details, refer to "How to Place Documents"...
-
Page 85: Scanning Documents With Two Scansnaps Connected To A Computer
Scanning Documents with Two ScanSnaps Connected to a Computer Scanning Documents with Two ScanSnaps Connected to a Computer You can use SV600 and another ScanSnap connected to a computer. When both of the ScanSnap models are connected and turned on, you can use one of them at a time. When the two ScanSnap models are turned on, the ScanSnap Manager icon in the Dock changes from Note that you cannot scan a document with two ScanSnap models simultaneously. -
Page 86: Correcting The Scanned Images
Correcting the Scanned Images Correcting the Scanned Images The scanned images can be corrected before ScanSnap Manager is linked with an application. The scanned images can be corrected in the following cases: "Scanning a Document" (page 87) "Scanning Books" (page 92) "Scanning Multiple Documents at Once"... -
Page 87: Scanning A Document
Scanning a Document Scanning a Document When a document is scanned with the ScanSnap, the following correction can be made on the scanned image: "Filling in Fingers Captured in a Scanned Image (When a Document Is Scanned)" (page 88) -
Page 88: Filling In Fingers Captured In A Scanned Image (When A Document Is Scanned)
Scanning a Document Filling in Fingers Captured in a Scanned Image (When a Document Is Scanned) Fingers that are captured when a document is scanned can be filled in. ATTENTION l Do not hold the corners of the document when you scan. If you do so, the shape of the image may not be recognized correctly. - Page 89 Scanning a Document For details about scanning, refer to "Scanning a Document" (page 18). a The [ScanSnap Manager - View cropped images] window is displayed. Select a scanned image to fill in fingers captured in the image. Select the [Continue with Point Retouch] checkbox and click the [Next] button.
- Page 90 Scanning a Document a The [ScanSnap Manager - Book Image Viewer] window appears in the point retouch mode. Click on a finger captured in a scanned image with the mouse. a When a finger is detected, it is indicated with a red dashed outline. To change a range of the outline, drag the white dot on the outline.
- Page 91 Scanning a Document HINT When a finger captured in a scanned image is not detected, a default outline is displayed around the finger. In that case, drag the white dot on the outline to align the outline with the shape of the finger. Click the [Apply] button.
-
Page 92: Scanning Books
Scanning Books Scanning Books The book image correction allows you to correct scanned images. The book image correction refers to making the following corrections to the images scanned from books with the ScanSnap: "Correcting Distorted Book Images" (page 93) "Splitting a Double-Page Spread Image into Two Page Images" (page 97) "Filling in Fingers Captured in a Scanned Image (When a Book Is Scanned)"... -
Page 93: Correcting Distorted Book Images
Scanning Books Correcting Distorted Book Images To correct the distortion of a scanned image from a book, follow the procedure below. ATTENTION l To correct the distortion of a scanned image, the shape of the book needs to be detected. If a book is scanned as follows, the shape of the book may not be detected correctly. - Page 94 Scanning Books Filling in the captured fingers in image If you edit in the book image correction mode after editing in the point retouch mode, the edited results in point retouch mode are overridden. On the window that appears after a book is scanned, select [Double-page spread (Book/Magazine)] and click the [Check/Correct] button.
- Page 95 Scanning Books If the outline of the book is not aligned with the shape of the book in the scanned image, drag the upper part and lower part of the outline to correct each position. HINT If the shape of the book was not detected, the corner points and the outline are displayed on the entire window.
- Page 96 Scanning Books 1. Modify the corner points. The corner points can be modified by either of the following: l Double-click the position where you want to move the corner points. a The corner points automatically move to the double-clicked position. If the corner points cannot be modified properly, drag them to move.
-
Page 97: Splitting A Double-Page Spread Image Into Two Page Images
Scanning Books Splitting a Double-Page Spread Image into Two Page Images The double-page spread image can be split into the right and left pages. When a JPEG file is split, the file is divided into two files. ATTENTION Follow the procedure below to perform multiple book image correction for one page. 1. - Page 98 Scanning Books a The [ScanSnap Manager - Book Image Viewer] window appears. Select the page to be split. Click , and then click a The split line is indicated with a green dashed line. If the split line is not aligned with the gutter of the book, drag the corner points to correct the position.
- Page 99 Scanning Books Click the [Apply] button. a A message for confirming the split target appears. Click the [Selected Pages] button. a The page is split. When you have completed splitting the page, click the [Save and Quit] button.
-
Page 100: Filling In Fingers Captured In A Scanned Image (When A Book Is Scanned)
Scanning Books Filling in Fingers Captured in a Scanned Image (When a Book Is Scanned) Fingers that are captured when a book is scanned can be filled in. ATTENTION l To fill in fingers captured in the scanned image, the fingers need to be detected. If a book is scanned in the following ways, captured fingers may not be detected correctly. - Page 101 Scanning Books If you edit in the book image correction mode after editing in the point retouch mode, the edited results in point retouch mode are overridden. HINT l Up to five fingers on each side (right/left) can be filled in. l To prevent image deterioration, select and fill in as many fingers as possible in one go.
- Page 102 Scanning Books HINT When a finger captured in a scanned image is not detected, a default outline is displayed around the finger. In that case, drag the white dot on the outline to align the outline with the shape of the finger. Click the [Apply] button.
- Page 103 Scanning Books a The finger captured in a scanned image is filled in. When you have completed filling in the captured finger, click the [Save and Quit] button.
-
Page 104: Scanning Multiple Documents At Once
Scanning Multiple Documents at Once Scanning Multiple Documents at Once When multiple documents are scanned at once with the ScanSnap, the following corrections can be made on the scanned images: "Correcting the Scanned Image Orientation" (page 105) "Modifying the Crop Area" (page 108) "Adding the Necessary Scanned Images"... -
Page 105: Correcting The Scanned Image Orientation
Scanning Multiple Documents at Once Correcting the Scanned Image Orientation The orientation of scanned images that are skewed or upside-down can be corrected. On the window that appears after multiple documents are scanned at once, select [Flat document] and click the [Check/Correct] button. For details about scanning multiple documents, refer to "Scanning Multiple Documents at Once"... - Page 106 Scanning Multiple Documents at Once Click a The scanned image is rotated by 90 degrees. When you have completed correcting the orientation, click the [Save and Quit] button.
- Page 107 Scanning Multiple Documents at Once HINT l To fine-tune the orientation of the crop frame, select which scanned image you want to rotate and then perform one of the following operations: Drag the green operating point that appears at the top of the crop frame by as little or as much as you want.
-
Page 108: Modifying The Crop Area
Scanning Multiple Documents at Once Modifying the Crop Area The size of the crop frame that is used to crop the scanned image can be modified. On the window that appears after multiple documents are scanned at once, select [Flat document] and click the [Check/Correct] button. For details about scanning multiple documents, refer to "Scanning Multiple Documents at Once"... - Page 109 Scanning Multiple Documents at Once Click any position on the window. a The crop area is fixed. When you have completed changing the crop area, click the [Save and Quit] button. HINT l To move a crop frame, place the mouse inside the crop frame and drag it when all the operating points have turned red.
-
Page 110: Adding The Necessary Scanned Images
Scanning Multiple Documents at Once Adding the Necessary Scanned Images If the necessary scanned images do not become the targets to be cropped, you can manually add them to the targets. Up to 20 crop frames can be added for one scanned image. On the window that appears after multiple documents are scanned at once, select [Flat document] and click the [Check/Correct] button. - Page 111 Scanning Multiple Documents at Once a A crop frame is added to the scanned image that is automatically recognized, and the scanned image that was cropped by dragging the mouse is added to the end of [Cropped image]. After you have added a crop frame, click the [Save and Quit] button. HINT If the [Next] button is displayed, clear the [Continue with Point Retouch] checkbox.
-
Page 112: Deleting Unnecessary Scanned Images
Scanning Multiple Documents at Once Deleting Unnecessary Scanned Images When there are multiple scanned images, unnecessary crop frames can be deleted. Scanned images without crop frames are not output and cannot be linked with an application. On the window that appears after multiple documents are scanned at once, select [Flat document] and click the [Check/Correct] button. - Page 113 Scanning Multiple Documents at Once Click a A confirmation message appears. Click the [Yes] button. a The crop frame is removed from the selected scanned image, and the scanned image disappears from [Cropped image].
- Page 114 Scanning Multiple Documents at Once After you have removed the crop frame from the unnecessary scanned image, click the [Save and Quit] button. HINT If the [Next] button is displayed, clear the [Continue with Point Retouch] checkbox. The [Next] button changes to the [Save and Quit] button.
-
Page 115: Troubleshooting
[control] key on the keyboard, and select [Help] → [Troubleshooting] from the "ScanSnap Manager Menu" (page 41). l ScanSnap Support Site (http://scansnap.fujitsu.com/g-support/en/) If you cannot solve the problem after referring to the above section, contact your FUJITSU scanner dealer or an authorized FUJITSU scanner service provider. -
Page 116: If You Have Installed The Software Before
If You Have Installed the Software Before If You Have Installed the Software Before If your attempt to reinstall the software related to the ScanSnap (including models other than SV600) failed, uninstall the software and then reinstall it. For details, refer to the following: "Uninstalling the Software"... -
Page 117: When The Scansnap Manager Icon Does Not Appear
When the ScanSnap Manager Icon Does Not Appear When the ScanSnap Manager Icon Does Not Appear This section explains how to troubleshoot when the ScanSnap Manager icon does not appear in the Dock even though the software is installed and the ScanSnap is connected to the computer. "Displaying the ScanSnap Manager Icon"... -
Page 118: Displaying The Scansnap Manager Icon
When the ScanSnap Manager Icon Does Not Appear Displaying the ScanSnap Manager Icon From the sidebar in Finder, select [Applications] → [ScanSnap], and then double-click [ScanSnap Manager] to start ScanSnap Manager. HINT If the problem is solved, you can change the setting so that ScanSnap Manager will start up automatically from the next time you log in to the computer. -
Page 119: When Scansnap Manager Does Not Operate Normally
When ScanSnap Manager Does Not Operate Normally When ScanSnap Manager Does Not Operate Normally If the ScanSnap Manager icon in the Dock is displayed as even though the software is installed and the ScanSnap is connected to the computer, perform the following procedures. "Checking the Connection between the ScanSnap and the Computer"... -
Page 120: Checking The Connection Between The Scansnap And The Computer
When ScanSnap Manager Does Not Operate Normally Checking the Connection between the ScanSnap and the Computer Unplug the USB cable from the computer and the ScanSnap, then plug it back in. Make sure to leave at least 5 seconds between unplugging and plugging the cable. If you are using a USB hub, connect the USB cable to the computer directly. -
Page 121: Checking If Scansnap Manager Is Operating Normally
When ScanSnap Manager Does Not Operate Normally Checking If ScanSnap Manager Is Operating Normally Turn off the ScanSnap and then turn it on again. Make sure to leave at least 5 seconds between turning off and on the ScanSnap. If the problem persists, proceed to step 2. If you are using a USB hub, connect the ScanSnap to the computer directly with a USB cable. -
Page 122: Cleaning
Cleaning Cleaning This section explains about the cleaning materials and how to clean the ScanSnap. "Cleaning Materials" (page 123) "Cleaning the ScanSnap" (page 124) -
Page 123: Cleaning Materials
Cleaner F1. *3: Any lint-free cloth can be used. Contact your FUJITSU scanner dealer or an authorized FUJITSU scanner service provider for details about purchasing the cleaning materials. For details, refer to the following web page:... -
Page 124: Cleaning The Scansnap
Cleaning the ScanSnap Cleaning the ScanSnap This section explains how to clean the outside of the ScanSnap. If the white sheet, glass, camera, lamp, or infrared LED is dirty, errors may appear in the scanned images. Whenever an error appears in a scanned image, clean the ScanSnap. Unplug the cables from the ScanSnap. -
Page 125: Appendix
Appendix Appendix "Preparations for Using Nuance PDF Converter for Mac" (page 126) "Updating the Software" (page 130) "Uninstalling the Software" (page 131) "Specifications of the Background Pad" (page 138) "Specifications of the ScanSnap" (page 139) -
Page 126: Preparations For Using Nuance Pdf Converter For Mac
Preparations for Using Nuance PDF Converter for Mac Preparations for Using Nuance PDF Converter for This section explains how to install and activate Nuance PDF Converter for Mac. "Installing Nuance PDF Converter for Mac" (page 127) "Activating Nuance PDF Converter for Mac" (page 129) -
Page 127: Installing Nuance Pdf Converter For Mac
Preparations for Using Nuance PDF Converter for Mac Installing Nuance PDF Converter for Mac Install Nuance PDF Converter for Mac in the following procedure. System Requirements Operating system OS X v10.10 OS X v10.9 OS X v10.8 Mac OS X v10.7 Disk space 110 MB Insert the Nuance PDF Converter for Mac DVD-ROM into the DVD-ROM drive. - Page 128 To complete the activation process, you need to have access to the Internet. l For details about the activation procedure, refer to "Activating Nuance PDF Converter for Mac" (page 129). For the installation procedure of the PDF editing software, refer to the following web page: http://www.pfu.fujitsu.com/imaging/downloads/manual/install/en...
-
Page 129: Activating Nuance Pdf Converter For Mac
Preparations for Using Nuance PDF Converter for Mac Activating Nuance PDF Converter for Mac Activate Nuance PDF Converter for Mac in the following procedure. ATTENTION To complete the activation process, you need to have access to the Internet. Start up Nuance PDF Converter for Mac. a The [End User License Agreement] window appears. -
Page 130: Updating The Software
It is recommended that you apply latest updates to enhance security, operability and functions. For the software programs that can be updated, refer to the following: http://www.fujitsu.com/global/support/computing/peripheral/scanners/software/online-setup-help.html ScanSnap Online Update checks the download server periodically. When the latest version of ScanSnap is available, the update list window appears. -
Page 131: Uninstalling The Software
Uninstalling the Software Uninstalling the Software This section explains how to uninstall the following software programs: "Uninstalling ScanSnap Manager" (page 132) "Uninstalling ScanSnap Organizer" (page 134) "Uninstalling CardMinder" (page 135) "Uninstalling ABBYY FineReader for ScanSnap" (page 136) "Uninstalling ScanSnap Online Update" (page 137) -
Page 132: Uninstalling Scansnap Manager
Uninstalling the Software Uninstalling ScanSnap Manager Uninstall ScanSnap Manager. The procedure is as follows. Turn on the computer and log in as a user with Administrator privileges. From the sidebar in Finder, select [Applications] → [ScanSnap] → [Sub], and then double-click [ScanSnap Uninstaller]. a The [ScanSnap Uninstaller] window (the [Welcome to ScanSnap Uninstaller] screen) appears. - Page 133 Uninstalling the Software 8. Close the [Users & Groups] window.
-
Page 134: Uninstalling Scansnap Organizer
Uninstalling the Software Uninstalling ScanSnap Organizer Uninstall ScanSnap Organizer. The procedure is as follows. Turn on the computer and log in as a user with Administrator privileges. Exit ScanSnap Organizer if it is running. From the sidebar in Finder, select [Applications] → [ScanSnap Organizer], and drag the [ScanSnap Organizer] folder into the Trash. -
Page 135: Uninstalling Cardminder
Uninstalling the Software Uninstalling CardMinder Uninstall CardMinder. The procedure is as follows. Turn on the computer and log in as a user with Administrator privileges. Exit CardMinder if it is running. From the sidebar in Finder, select [Applications] → [CardMinder], and drag the [CardMinder] folder into the Trash. -
Page 136: Uninstalling Abbyy Finereader For Scansnap
Uninstalling the Software Uninstalling ABBYY FineReader for ScanSnap Uninstall ABBYY FineReader for ScanSnap. The procedure is as follows. Turn on the computer and log in as a user with Administrator privileges. Exit ABBYY FineReader for ScanSnap if it is running. From the sidebar in Finder, select [Applications] →... -
Page 137: Uninstalling Scansnap Online Update
Uninstalling the Software Uninstalling ScanSnap Online Update Uninstall ScanSnap Online Update. HINT Before uninstalling ScanSnap Online Update, make sure that none of the following software is installed. l ScanSnap Manager l ScanSnap Organizer l CardMinder The procedure is as follows. Turn on the computer and log in as a user with Administrator privileges. -
Page 138: Specifications Of The Background Pad
Qty. Part No. Background Pad 1 sheet PA03641-0052 Contact your FUJITSU scanner dealer or an authorized FUJITSU scanner service provider for details about purchasing the Background Pad. For details, refer to the following portal site: http://scansnap.fujitsu.com/ Cleaning As you keep using the Background Pad, dirt and dust will accumulate on the surface. -
Page 139: Specifications Of The Scansnap
Specifications of the ScanSnap Specifications of the ScanSnap The following table summarizes the specifications of the ScanSnap. Item Specification Product Name ScanSnap SV600 Scanning method Overhead scanning Scanning color mode Color/gray/black and white/auto (automatic color, gray, and B&W detection) Optical system/image sensor Lens reduction optics/color CCD ×... -
Page 140: Documents That Can Be Scanned With The Scansnap And How To Load Them (Ix500, S1500, S1500M, S1300I, S1300, Or S1100)
Documents That Can Be Scanned with the ScanSnap and How to Load Them (iX500, S1500, S1500M, S1300i, S1300, or S1100) Documents That Can Be Scanned with the ScanSnap and How to Load Them (iX500, S1500, S1500M, S1300i, S1300, or S1100) This section describes the documents that can be scanned with the following ScanSnap models and explains how to load the documents. -
Page 141: Documents For Scanning (For Ix500, S1500 Or S1500M)
Documents for Scanning (For iX500, S1500 or S1500M) Documents for Scanning (For iX500, S1500 or S1500M) This section explains about the documents that can be scanned with the ScanSnap and the conditions for using the Carrier Sheet. "Conditions for Documents to Scan (For iX500, S1500 or S1500M)" (page 142) "Conditions for Using the Carrier Sheet (For iX500, S1500 or S1500M)"... -
Page 142: Conditions For Documents To Scan (For Ix500, S1500 Or S1500M)
Documents for Scanning (For iX500, S1500 or S1500M) Conditions for Documents to Scan (For iX500, S1500 or S1500M) iX500 S1500/S1500M Document type Office paper, postcards, business cards Office paper, postcards, business cards Plastic cards conforming to the ISO781A ID-1 type (54 × 86 mm/2.1 × 3.4 in.) Paper weight 40 to 209 g/m (10.7 to 55.7 lb) - Page 143 Documents for Scanning (For iX500, S1500 or S1500M) 1. Click the [Option] button in the [Scanning] tab of the "ScanSnap Setup Window" (page 44). a The [Scanning mode option] window appears. 2. Select the [Increase text contrast] checkbox.
-
Page 144: Conditions For Using The Carrier Sheet (For Ix500, S1500 Or S1500M)
Documents for Scanning (For iX500, S1500 or S1500M) Conditions for Using the Carrier Sheet (For iX500, S1500 or S1500M) The bundled Carrier Sheet is a sheet designed to transport documents through the ScanSnap. You can scan documents that are larger than A4/Letter size, photographs and clippings. Conditions for documents that can be scanned using the Carrier Sheet are as follows: AUTION l Do not use a damaged Carrier Sheet. - Page 145 Documents for Scanning (For iX500, S1500 or S1500M) Because carbonless paper may contain chemicals that can harm the ScanSnap internal rollers, it is recommended that you use the Carrier Sheet to scan such documents. Make sure to clean the rollers occasionally to maintain the scanner performance when scanning carbonless paper directly without using the Carrier Sheet.
-
Page 146: How To Load Documents (For Ix500, S1500 Or S1500M)
How to Load Documents (For iX500, S1500 or S1500M) How to Load Documents (For iX500, S1500 or S1500M) Load documents in the ScanSnap in the following procedure. For details about documents that can be loaded, refer to "Documents for Scanning (For iX500, S1500 or S1500M)"... - Page 147 How to Load Documents (For iX500, S1500 or S1500M) Open the ADF paper chute (cover) of the ScanSnap. ADF Paper Chute (Cover) Pull the stacker towards you. Stacker Depending on documents to scan, pull out the extension on the ADF paper chute (cover) and open the stacker.
- Page 148 How to Load Documents (For iX500, S1500 or S1500M) Side Guide ATTENTION Do not accumulate more than 50 sheets (with paper weight of 80 g/m [20 lb]) in the stacker. Adjust the side guides to the width of the documents. Hold each side guide in the middle to adjust them.
-
Page 149: Documents For Scanning (For S1300I Or S1300)
Documents for Scanning (For S1300i or S1300) Documents for Scanning (For S1300i or S1300) Office paper, postcards, business cards S1300i/S1300 Document type Office paper, postcards, business cards Paper weight 64 to 104.7 g/m (17 to 20 lb) Paper size Width: 50.8 to 216 mm (2 to 8.5 in.) Length: 50.8 to 360 mm (2 to 14.17 in.) l For long page (*1) 216 ×... - Page 150 Documents for Scanning (For S1300i or S1300) Coated paper Photographs (photographic paper) Perforated or punched documents Documents that are not rectangular or square Carbon paper or thermal paper Documents with memo papers or sticky notes attached Picture Postcards Picture postcards can be scanned when a power cable connection is used. S1300i/S1300 Document type Picture postcards...
-
Page 151: How To Load Documents (For S1300I Or S1300)
How to Load Documents (For S1300i or S1300) How to Load Documents (For S1300i or S1300) Load documents in the ScanSnap in the following procedure. For details about documents that can be loaded, refer to "Documents for Scanning (For S1300i or S1300)"... - Page 152 How to Load Documents (For S1300i or S1300) ADF Paper Chute (Cover) Pull out the extension. Extension Load the documents in the ADF paper chute (cover). Load the documents face-down and top-first with their back facing you. Use the reference marks within the side guides to adjust the number of the documents to be loaded.
- Page 153 How to Load Documents (For S1300i or S1300) Documents...
-
Page 154: Documents For Scanning (For S1100)
Documents for Scanning (For S1100) Documents for Scanning (For S1100) This section explains about the documents that can be scanned with the ScanSnap and the conditions for using the Carrier Sheet. "Conditions for Documents to Scan (For S1100)" (page 155) "Conditions for Using the Carrier Sheet (For S1100)"... -
Page 155: Conditions For Documents To Scan (For S1100)
Documents for Scanning (For S1100) Conditions for Documents to Scan (For S1100) S1100 Eject method With the output guide closed With the output guide open Document type Office paper, postcards, business cards Office paper Plastic cards conforming to the ISO7810 ID-1 type (54 × 86 mm) Paper weight 52.3 to 209.3 g/m... - Page 156 Documents for Scanning (For S1100) 2. Select the [Increase text contrast] checkbox.
- Page 157 Documents for Scanning (For S1100) Conditions for Using the Carrier Sheet (For S1100) The optional Carrier Sheet is a sheet designed to transport documents through the ScanSnap. You can scan documents that are larger than A4/Letter size, photographs and clippings. Conditions for documents that can be scanned using the Carrier Sheet are as follows: AUTION l Do not use a damaged Carrier Sheet.
- Page 158 Documents for Scanning (For S1100) Because carbonless paper may contain chemicals that can harm the ScanSnap internal rollers, it is recommended that you use the Carrier Sheet to scan such documents. Make sure to clean the rollers occasionally to maintain the scanner performance when scanning carbonless paper directly without using the Carrier Sheet.
- Page 159 How to Load Documents (For S1100) How to Load Documents (For S1100) Load documents in the ScanSnap in the following procedure. For details about documents that can be loaded, refer to "Documents for Scanning (For S1100)" (page 154). ATTENTION You can only load one document at a time in the ScanSnap. Open the feed guide of the ScanSnap.
- Page 160 How to Load Documents (For S1100) Insert the document straight into the feeding section of the ScanSnap, with the scanning side facing up. a The document is pulled in until it is set inside the ScanSnap. ATTENTION l When you select an option other than [Automatic detection] for [Paper size] on the [Paper] tab in the "ScanSnap Setup Window"...
-
Page 161: Customer Support
For other inquiries on the ScanSnap, refer to the ScanSnap Support Site. http://scansnap.fujitsu.com/g-support/en/ If your problem cannot be solved after referring to the above web pages, visit the following web page to check the contact information of a suitable Fujitsu office and contact the Fujitsu office. http://imagescanner.fujitsu.com/warranty.html Suppliers of Consumables/Optional Parts http://scansnap.fujitsu.com/...