beautypg.com
Manuals
Brands
GE Manuals
Medical Equipment
Optima XR646
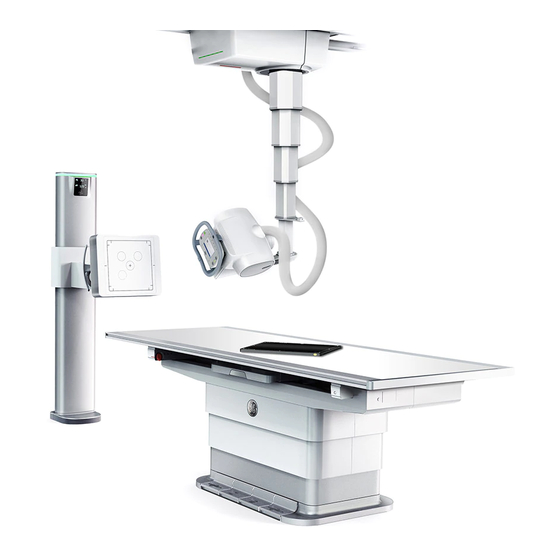
GE Optima XR646 Manuals
Manuals and User Guides for GE Optima XR646. We have
1
GE Optima XR646 manual available for free PDF download: Operator's Manual
GE Optima XR646 Operator's Manual (463 pages)
Digital Radiographic System
Brand:
GE
| Category:
Medical Equipment
| Size: 13.82 MB
Table of Contents
EN Rev.9
2
EN Rev.9
3
EN Rev.9
4
EN Rev.9
5
EN Rev.9
7
EN Rev.9
8
Table of Contents
9
Chapter 1: Introduction
22
How to Access the Electronic Version of a Manual on a Website
22
Technical Manual Updates
23
Scope of this Manual
23
Prerequisite Skills
23
Safety Information
24
Safety Notices
24
Graphic Conventions and Legends
25
Software User Interface Controls
26
Chapter 2: Safety and Regulatory
28
X-Ray Protection
28
Indications for Use
28
Contraindication
29
Users
29
Safety
29
Know the Equipment
31
IEC Equipment Classifications
31
UWB (Ultra Wideband) Compliance Statement
31
Accessories & Software
34
Wireless Parts Included
34
Wireless Regulatory Information for EU
34
Declaration of Conformity (for RED)
35
EU Authorized Representative
35
Safety Design in Wireless Link
35
Electromagnetic Compatibility
36
Radiation Safety
41
Radiation Protection
42
Monitoring of Personnel
42
Emergency Procedures
43
Emergency Devices
43
Emergency Stop
43
General Use Warnings
44
Laser Radiation Warnings
47
Patient Positioning Warnings
48
Tabletop Motion Warnings
49
Digital Detector Warnings
51
Pinch Points and Crush Hazard Summary
51
Symbols
52
Special Notices
52
X-Ray Tube Operational Symbols
54
System Power on and Reset
55
Electrical Type
56
Electrical Current
56
Ground
57
Collimator
58
Identification and Compliance Plates
59
Identification Plate and Compliance Plate Locations
59
NRTL Listed Label
60
Digital Table Warning Labels
60
Standard Table Warning Labels
63
OTS Label
65
Collimator Label
66
Keyboard Label
68
Lateral Bar Label
68
RCIM Label
69
UDI Label
69
Regulatory Requirements
70
Disposal of Waste
71
Battery Disposal
71
Pollution Control Label
72
Dose Chart
73
X-Ray Source Assembly Filtration
74
Dose/Dap Indication
74
Environmental Protection
75
Chapter 3: Pediatrics and Small Patients
77
Pediatric Use
77
Optimize Pediatric Protocols for Your Facility
77
What Do I Need to Know about
78
Radiation Exposure Sensitivity
78
Suggestions for Minimizing Unnecessary Dose
78
Guidelines for Adjusting Individual Exposure Parameters by Patient
79
Patient Dose Reporting
80
Protocol Database Edit
80
Chapter 4: General Information
81
System Start up and Shutdown
82
Start up
82
Shutdown
83
Login and Log off
84
Standard Login
84
Invalid Password Message
85
Emergency Login
85
Inactivity Time out (Screen Saver)
86
Log off
86
System Interlocks
87
Grid Interlock
87
Automatic Exposure Control (AEC) Interlock
87
OTS Position Interlock
87
Tube Pivot Interlock
87
Free Cassette Interlock
87
Emergency Stop
89
System Emergency off Buttons
90
System Reset
90
Tube Warm up
91
Identification of Radiographs
93
Image Markers
93
Ilinq
94
Chapter 5: Quick Steps
99
Hardware
99
Emergency Stop Button
99
Raise and Lower the Digital Table
99
Position the Table Longitudinally and Transversely
100
Adjust the Overhead Tube Suspension (OTS) Position
101
Adjust the Tube Position
101
Rotate the Multi-Leaf Collimator
102
General Acquisition
102
Manual Patient Entry (Worklist)
104
Add Patient
104
Edit Patient Information
104
Chapter 6: Status Bar
105
Overview
105
Digital Detector Status
108
Chapter 7: Digital Detector
113
Detector Overview
113
Panel
113
Electronics
114
Physical Appearance / Finish
114
Nameplates and Markings
114
Detector Handling
114
Hardware Overview
115
Appearance
115
Front of the Digital Detector
115
Back of the Digital Detector
117
Detector Top
118
Detector Base
119
Accessories
119
Battery and Tether
119
Battery Charging
121
Desktop Battery Charger
121
Replace the Battery
121
Battery Calibration
122
Detector Charging bin
122
Connection
123
Tether Interface Box (TIB)
123
Detector Grid
124
Detector Holder
125
Grid Attachment
125
Grid Handling
125
Use
127
Power on and Power off
127
On/Off
127
Detector Alignment
127
Indicator Led's
128
Electro-Magnetic Interference
132
Cleaning
133
Specifications
133
Physical Characteristics
133
Communication
134
Environmental Constraints
134
Chapter 8: System Hardware Overview
137
Configurations
137
Component Identification
138
Available Accessories
140
Acquisition Workstation
141
Radiology Control Interface Module (RCIM)
142
Hand Switch
145
High Throughput Mode
146
Mouse Controls
146
Bar Code Scanner (Option)
147
Overhead Tube Suspension (OTS)
148
OTS User Interface
148
OTS Control Screen
154
Multiple Wireless Detector Pop-Up Window
156
Overhead Stationary Rail and Lateral Bridge
157
Telescopic Column and Carriage
157
Longitudinal and Lateral Detents
157
Axes Indicators
158
Vertical Detent
158
Column Rotation
159
Tube Angulation
159
Tube and Column Positioning Instructions
160
Adjust the Overhead Tube Suspension (OTS) Position
160
Adjust the Tube Position
160
Multi-Leaf Collimator
162
Collimator Display
164
Collimator Field and Linear Laser Lights
165
Automatic or Manual Collimator Modes
166
Exposure Inhibit Conditions
166
Accessory Rail Locking Lever
166
Rotating the Multi-Leaf Collimator
167
Digital Wallstand
168
Receptor Information Display
170
Position the Receptor
171
Vertical Adjustment
171
Foot Control
172
Vertical Adjust and Detector Tilt Handle
172
Tilt
173
Insert or Remove Grids
175
Positioning Bars and Hand Grips
177
Remove or Attach the Lateral Positioning Bar
177
Ion Chambers
178
Manual Wallstand
180
Position the Receptor
182
Vertical Adjustment
182
Vertical Adjust Handle
183
Insert or Remove Grids
183
Positioning Bars and Hand Grips
185
Remove or Attach the Lateral Positioning Bar
185
Ion Chambers
186
Mobile Table
186
Digital Table
187
Components
187
Raise and Lower the Digital Table
190
Position the Table Longitudinally and Transversely
191
Digital Cassette Imaging in Extended Table Detector Tray
192
Finger Pinch Lock Release
192
Grid Loading and Removal
193
Standard Table
195
Components
195
Raise and Lower the Standard Table
198
Position the Table Longitudinally and Transversely
199
Digital Cassette Imaging in Extended Table Detector Tray
200
Finger Pinch Lock Release
200
Grid Loading and Removal
201
Non Wireless Configuration
202
Detector Management
203
Accessories and Optional Equipment
203
Grids
204
Digital Table Hand Grips and Compression Band
207
Grid and Accessories Holder
207
Installation
208
Standard Table Hand Grips and Compression Band
208
Installation
210
Remote Control
211
Remote Control Functions
213
Removing the Batteries
216
Auto Image Paste Patient Positioner (Option)
217
System Cabinet
217
Radiographic Mobile Tables (Option)
218
Wallstand with Extended Arm (Option)
219
Digital Detector Accessories
220
Cross Table Holders
220
Weight-Bearing Stand (Option)
220
Lateral Bridge Lengths
221
Chapter 9: Worklist
223
Overview
223
Patient List Columns
227
Manage List / Find Procedures
228
Search
228
Sort by Column
228
Filter List
229
Refresh
232
Auto Refresh
232
Manual Refresh
232
Select Procedures
233
Select a Single Procedure
233
Select Multiple Procedures
233
Delete Procedures
234
Delete a Single Procedure
234
Delete All Completed, Discontinued, and Local Procedures
234
Delete Suspended Procedures
235
Add or Edit Patient Information
235
Overview
235
Add Patient
239
Edit Patient Information
239
Chapter 10: Image Acquisition
241
Overview
241
Patient Dose Reporting
248
Dose Reporting Tool
249
How to Export
249
Re-Start Completed or Discontinued Exams
251
Resume Suspended Exams
252
Select or Change Protocols
252
Automatic Protocol Assist (Option)
254
Conduct a Table Exam
255
Conduct a Wallstand Exam
257
Conduct a Table Top Exam
259
Conduct a Cassette Exam
260
Conduct an Emergency Exam
263
Automatic Exposure Control (AEC)
264
Acquisition Screens
264
Ion Chamber Detectors
266
Applications for Detector Sensing Areas
266
Areas 1 and 3
266
Applications
267
Area 2
267
AEC Limitation Messages
269
Acquire AEC Images
270
End Exam
271
Suspend
271
Close
271
Discontinue
271
Image Recovery
272
Chapter 11: Image Viewer
274
Overview
274
Tool Selection List
277
Select Images
278
Change Viewing Format and Size
279
Adjust Images
280
Annotate and Mask Images
282
Customize System Annotations
285
Add Image Annotations
286
Delete Image Annotations
287
Adjust Image Shutter (Crop Image)
288
Automatic Shutter
289
Re-Process Images
290
Deviation Index (DI)
292
Corrective Actions
294
Exceptions to Corrective Actions
294
Change Pointer Controls
295
Apply Quality Check Indicator (Auto Tag)
296
Repeat/Reject Analysis (RRA)
297
Print Images
299
Auto Print
299
Manual Print
299
Quick Print
300
Print Multiple Images
304
Print Multiple Patient Images (Option)
305
Orthopedic Magnification (Option)
307
Send Images
308
Image Processing
310
Chapter 12 : Image Management
314
View Patient Information
314
Search List
315
Open Exams and Images
316
Copy Images to Another Exam
317
Delete Exams, Series, or Images
320
Unlock Exams
321
Chapter 13 : Advanced Applications
324
Dual Energy
324
General Guidelines
325
Grid
326
Copper Filtration
327
Orthopedic Magnification
328
Print Multiple Images
329
Orthopedic Magnification Preferences
330
Repeat/Reject Analysis (RRA)
331
RRA Confirmation Screen
332
Not Enough Space to Save RRA Images
335
Auto Image Paste
336
Auto Image Paste Patient Positioner with Integrated Foot Step (for Wallstand)
337
Lock Positioner in Place
339
Move Lateral Positioning Bars
341
Conduct Wallstand Exam
342
Alternate Auto Image Paste Acquisition Workflows
347
Image Viewer
348
View Pasted Composite Image
349
Re-Process Images
350
Change Looks Processing (Vertical Equalization)
353
Print Pasted Images
354
Add or Edit Auto Image Paste Protocols
356
Edit Image Processing
357
Chapter 14 : Quality Assurance and Maintenance
358
Quality Assurance Process
358
Phantoms
359
Acquisition Screen Overview
360
Perform QAP
362
Failed QAP
368
Result History
370
QAP CD/USB Export
371
Maintenance
372
Qualified Service
373
Detector Cleaning
374
Periodic Maintenance Schedule
375
Chapter 15 : Preferences
377
Accessing Preferences
377
System
378
Network Connections
379
Remove Network Host
382
Perform C-Echo Test
383
Add or Edit DICOM Printers
384
Remove DICOM Printer
387
Wireless Detector
388
Adding a New Detector Identified by Name
389
Adding a New Detector Identified by Color and Shape
390
Detector System List
391
Worklist
392
Auto Refresh
394
Add Preset Names
395
Remove Preset Names
396
Retry Failed Print
397
Auto Print
398
Orthopedic Magnification
399
Auto Delete
400
Image Viewer
402
Configure Pre-Set Annotations
403
Add Pre-Set Annotation
404
Edit Pre-Set Annotation
405
DI (Deviation Index)
407
DI Control Limits
408
Change the DI Display
409
Change the Target EI (Exposure Index)
410
Export the Deviation Index Log
411
Protocols
412
Retrieve Protocol Database from CD or DVD
413
Edit Protocol Database
414
Add or Edit Category
415
Add or Edit View
416
Protocol Editor Copy Functions
421
Copy Category
422
Copy View
423
Image Processing
424
Build Custom Looks
426
Change Image Processing from the Viewer
429
Tissue Equalization Overview
430
TE Parameters
431
Strength
432
Electromagnetic Interference (EMI) Reduction
433
Gird Line Reduction: Single Energy
434
Repeat/Reject Analysis (RRA)
435
To View Detector Bump Event Report:
436
Time Stamp
438
Appendix A: Login Administration
440
Enabling EA3 Login
440
Configure Applications
441
Configure Local Users
443
Add a Local User
444
Change a User Password
445
Change a User Full Name
446
Add or Remove a User from a Group
447
Change User Roles
448
Some Fields May Not be Selectable if the Following Conditions Occur
449
Add a Local Group
450
Add a Enterprise Group
451
Manage a Group
452
Change Group's Roles
453
Auto Configuration
455
Manual Configuration
456
Field Highlighting for Changes
457
Related Products
GE Optima XR220amx
GE Biacore X100
GE Healthcare Brivo XR118
GE Optima XR200amx
GE Optima XR642
GE Optima XR648
GE Optima CT680 Series
GE Optima CT670
GE OPTIMA MR360
GE Optima IGS 320
GE Categories
Refrigerator
Ranges
Microwave Oven
Air Conditioner
Dishwasher
More GE Manuals