beautypg.com
Manuals
Brands
Dell Manuals
Desktop
PowerEdge R420
Dell PowerEdge R420 Manuals
Manuals and User Guides for Dell PowerEdge R420. We have
11
Dell PowerEdge R420 manuals available for free PDF download: Owner's Manual, Manual, Technical Manual, Portfolio Manual, Getting Started Manual, Installation Manual, Features
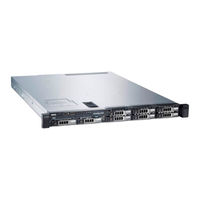
Dell PowerEdge R420 Owner's Manual (145 pages)
Brand:
Dell
| Category:
Server
| Size: 8.1 MB
Table of Contents
Table of Contents
3
1 About Your System
9
Front-Panel Features and Indicators
9
LCD Panel Features
12
Home Screen
13
Setup Menu
13
View Menu
14
Diagnostic Indicators
14
Hard-Drive Indicator Patterns
16
Back-Panel Features and Indicators
17
NIC Indicator Codes
18
Power Indicator Codes
18
Other Information You May Need
19
2 Using the System Setup and Boot Manager
21
Choosing the System Boot Mode
21
Entering System Setup
22
Responding to Error Messages
22
Using the System Setup Navigation Keys
22
System Setup Options
23
System Setup Main Screen
23
System BIOS Screen
23
System Information Screen
23
Memory Settings Screen
24
Processor Settings Screen
24
SATA Settings Screen
26
Boot Settings Screen
26
Integrated Devices Screen
27
Serial Communications Screen
28
System Profile Settings Screen
28
System Security Screen
29
Miscellaneous Settings
30
System and Setup Password Features
30
Assigning a System And/Or Setup Password
31
Deleting or Changing an Existing Setup Password
32
Using Your System Password to Secure Your System
32
Operating with a Setup Password Enabled
32
Entering the UEFI Boot Manager
33
Using the Boot Manager Navigation Keys
33
Boot Manager Screen
34
UEFI Boot Menu
34
Embedded System Management
34
Idrac Settings Utility
34
Entering the Idrac Settings Utility
35
Changing the Thermal Settings
35
3 Installing System Components
37
Recommended Tools
37
Front Bezel (Optional)
37
Installing the Front Bezel
37
Removing the Front Bezel
38
Opening and Closing the System
38
Opening the System
38
Closing the System
39
Inside the System
39
Cooling Shroud
42
Removing the Cooling Shroud
42
Installing the Cooling Shroud
43
System Memory
43
General Memory Module Installation Guidelines
45
Mode-Specific Guidelines
45
Sample Memory Configurations
46
Removing Memory Modules
48
Installing Memory Modules
49
Hard Drives
50
Removing a 2.5 Inch Hard-Drive Blank
51
Installing a 2.5 Inch Hard-Drive Blank
51
Removing a 3.5 Inch Hard-Drive Blank
52
Installing a 3.5 Inch Hard-Drive Blank
52
Removing a Hot-Swap Hard Drive
52
Installing a Hot-Swap Hard Drive
53
Removing a Cabled Hard Drive
54
Installing a Cabled Hard Drive
55
Removing a 2.5 Inch Hard Drive from a 3.5 Inch Hard-Drive Adapter
55
Installing a 2.5 Inch Hard Drive into a 3.5 Inch Hard-Drive Adapter
56
Removing a Hard Drive or a Hard-Drive Adapter from a Hard-Drive Carrier
56
Installing a Hard Drive or a Hard-Drive Adapter into a Hard-Drive Carrier
59
Optical Drive (Optional)
60
Removing the Optical Drive in Hot-Swappable Hard-Drive Systems
60
Installing the Optical Drive in Hot-Swappable Hard-Drive Systems
61
Removing the Optical Drive in Cabled Hard-Drive Systems
61
Installing the Optical Drive in Cabled Hard-Drive Systems
62
Cooling Fans
63
Removing a Cooling Fan
63
Installing a Cooling Fan
64
Internal USB Memory Key (Optional)
65
Replacing the Internal USB Key
65
Expansion Cards and Expansion-Card Risers
65
Expansion Card Installation Guidelines
66
Removing an Expansion Card
67
Installing an Expansion Card
68
Removing Expansion-Card Risers 1 and 2
69
Installing Expansion-Card Risers 1 and 2
70
Idrac Ports Card (Optional)
70
Removing the Idrac Ports Card
71
Installing the Idrac Ports Card
72
SD Vflash Card
72
Replacing an SD Vflash Card
72
Internal Dual SD Module
73
Removing the Internal Dual SD Module
73
Installing the Internal Dual SD Module
74
Internal SD Card
75
Removing an Internal SD Card
75
Installing an Internal SD Card
75
Integrated Storage Controller Card
75
Removing the Integrated Storage Controller Card
76
Installing the Integrated Storage Controller Card
77
Processors
77
Removing a Processor
77
Installing a Processor
79
Power Supplies
80
Hot Spare Feature
81
Removing a Redundant Power Supply
81
Installing a Redundant Power Supply
82
Removing a Non-Redundant Power Supply
82
Installing a Non-Redundant Power Supply
83
Removing the Power Supply Blank
84
Installing the Power Supply Blank
84
System Battery
84
Replacing the System Battery
84
Hard-Drive Backplane
85
Removing the Hard-Drive Backplane
86
Installing the Hard-Drive Backplane
90
Control Panel Assembly
90
Removing the Control Panel
91
Installing the Control Panel
92
Removing the Control-Panel Module
93
Installing the Control-Panel Module
96
VGA Module
97
Removing the VGA Module
97
Installing the VGA Module
98
Power Distribution Board Shroud
98
Removing the Power Distribution Board Shroud
98
Installing the Power Distribution Board Shroud
99
Power Distribution Board
100
Removing the Power Distribution Board
100
Installing the Power Distribution Board
101
System Board
101
Removing the System Board
101
Installing the System Board
102
4 Troubleshooting Your System
105
Safety First-For You and Your System
105
Troubleshooting System Startup Failure
105
Troubleshooting External Connections
105
Troubleshooting the Video Subsystem
105
Troubleshooting a USB Device
105
Troubleshooting a Serial I/O Device
106
Troubleshooting a NIC
106
Troubleshooting a Wet System
107
Troubleshooting a Damaged System
107
Troubleshooting the System Battery
108
Troubleshooting Power Supplies
108
Troubleshooting Cooling Problems
108
Troubleshooting Cooling Fans
109
Troubleshooting System Memory
109
Troubleshooting an Internal USB Key
110
Troubleshooting an SD Card
110
Troubleshooting an Optical Drive
111
Troubleshooting a Tape Backup Unit
111
Troubleshooting a Hard Drive
112
Troubleshooting a Storage Controller
112
Troubleshooting Expansion Cards
113
Troubleshooting Processors
114
5 Using System Diagnostics
115
Dell Online Diagnostics
115
Dell Embedded System Diagnostics
115
When to Use the Embedded System Diagnostics
115
Running the Embedded System Diagnostics
115
System Diagnostic Controls
116
6 Jumpers and Connectors
117
System Board Jumper Settings
117
System Board Connectors
118
Disabling a Forgotten Password
119
7 Technical Specifications
121
8 System Messages
127
LCD Messages
127
Viewing LCD Messages
127
Removing LCD Messages
127
System Error Messages
127
Warning Messages
143
Diagnostic Messages
143
Alert Messages
143
9 Getting Help
145
Contacting Dell
145
Dell PowerEdge R420 Owner's Manual (143 pages)
Owners Manual
Brand:
Dell
| Category:
Server
| Size: 8.96 MB
Table of Contents
Notes, Cautions, and Warnings
2
Table of Contents
3
1 About Your System
9
Front-Panel Features and Indicators
9
LCD Panel Features
12
Home Screen
13
Setup Menu
13
View Menu
14
Diagnostic Indicators
14
Hard-Drive Indicator Patterns
16
Back-Panel Features and Indicators
17
NIC Indicator Codes
19
Power Indicator Codes
19
Other Information You May Need
20
2 Using the System Setup and Boot Manager
21
Choosing the System Boot Mode
21
Entering System Setup
22
Responding to Error Messages
22
Using the System Setup Navigation Keys
22
System Setup Options
22
System Setup Main Screen
23
System BIOS Screen
23
System Information Screen
23
Memory Settings Screen
24
Processor Settings Screen
24
SATA Settings Screen
26
Boot Settings Screen
26
Integrated Devices Screen
27
Serial Communications Screen
28
System Profile Settings Screen
28
System Security Screen
29
Miscellaneous Settings
30
System and Setup Password Features
31
Assigning a System And/Or Setup Password
31
Deleting or Changing an Existing Setup Password
32
Using Your System Password to Secure Your System
32
Operating with a Setup Password Enabled
32
Entering the UEFI Boot Manager
33
Using the Boot Manager Navigation Keys
33
Boot Manager Screen
34
UEFI Boot Menu
34
Embedded System Management
34
Idrac Settings Utility
34
Entering the Idrac Settings Utility
35
Changing the Thermal Settings
35
3 Installing System Components
37
Recommended Tools
37
Front Bezel (Optional)
37
Installing the Front Bezel
37
Removing the Front Bezel
38
Opening and Closing the System
38
Opening the System
38
Closing the System
39
Inside the System
39
Cooling Shroud
41
Removing the Cooling Shroud
41
Installing the Cooling Shroud
42
System Memory
43
General Memory Module Installation Guidelines
45
Mode-Specific Guidelines
45
Sample Memory Configurations
46
Removing Memory Modules
47
Installing Memory Modules
48
Hard Drives
49
Removing a 2.5 Inch Hard-Drive Blank
50
Installing a 2.5 Inch Hard-Drive Blank
50
Removing a 3.5 Inch Hard-Drive Blank
50
Installing a 3.5 Inch Hard-Drive Blank
51
Removing a Hot-Swap Hard Drive
51
Installing a Hot-Swap Hard Drive
52
Removing a Cabled Hard Drive
53
Installing a Cabled Hard Drive
54
Removing a 2.5 Inch Hard Drive from a 3.5 Inch Hard-Drive Adapter
54
Installing a 2.5 Inch Hard Drive into a 3.5 Inch Hard-Drive Adapter
55
Removing a Hard Drive or a Hard-Drive Adapter from a Hard-Drive Carrier
55
Installing a Hard Drive or a Hard-Drive Adapter into a Hard-Drive Carrier
58
Optical Drive (Optional)
59
Removing the Optical Drive in Hot-Swappable Hard-Drive Systems
59
Installing the Optical Drive in Hot-Swappable Hard-Drive Systems
60
Removing the Optical Drive in Cabled Hard-Drive Systems
60
Installing the Optical Drive in Cabled Hard-Drive Systems
61
Cooling Fans
62
Removing a Cooling Fan
62
Installing a Cooling Fan
63
Internal USB Memory Key (Optional)
64
Replacing the Internal USB Key
64
Expansion Cards and Expansion-Card Risers
64
Expansion Card Installation Guidelines
65
Removing an Expansion Card
66
Installing an Expansion Card
67
Removing Expansion-Card Risers
68
Installing Expansion-Card Risers
69
Idrac Ports Card (Optional)
70
Removing the Idrac Ports Card
70
Installing the Idrac Ports Card
71
SD Vflash Card
71
Replacing an SD Vflash Card
71
Internal Dual SD Module
72
Removing the Internal Dual SD Module
72
Installing the Internal Dual SD Module
73
Internal SD Card
74
Removing an Internal SD Card
74
Installing an Internal SD Card
74
Integrated Storage Controller Card
74
Removing the Integrated Storage Controller Card
75
Installing the Integrated Storage Controller Card
76
Processor
76
Removing a Processor
76
Installing a Processor
78
Power Supplies
79
Hot Spare Feature
79
Removing a Redundant Power Supply
80
Installing a Redundant Power Supply
81
Removing a Non-Redundant Power Supply
81
Installing a Non-Redundant Power Supply
82
Removing the Power Supply Blank
83
Installing the Power Supply Blank
83
System Battery
83
Replacing the System Battery
83
Hard-Drive Backplane
84
Removing the Hard-Drive Backplane
85
Installing the Hard-Drive Backplane
89
Control Panel Assembly
90
Removing the Control Panel
90
Installing the Control Panel
91
Removing the Control-Panel Module
92
Installing the Control-Panel Module
95
VGA Module
96
Removing the VGA Module
96
Installing the VGA Module
97
Power Distribution Board Shroud
97
Removing the Power Distribution Board Shroud
97
Installing the Power Distribution Board Shroud
98
Power Distribution Board
99
Removing the Power Distribution Board
99
Installing the Power Distribution Board
100
System Board
100
Removing the System Board
100
Installing the System Board
101
4 Troubleshooting Your System
103
Safety First-For You and Your System
103
Troubleshooting System Startup Failure
103
Troubleshooting External Connections
103
Troubleshooting the Video Subsystem
103
Troubleshooting a USB Device
103
Troubleshooting a Serial I/O Device
104
Troubleshooting a NIC
104
Troubleshooting a Wet System
104
Troubleshooting a Damaged System
105
Troubleshooting the System Battery
106
Troubleshooting Power Supplies
106
Troubleshooting Cooling Problems
106
Troubleshooting Cooling Fans
107
Troubleshooting System Memory
107
Troubleshooting an Internal USB Key
108
Troubleshooting an SD Card
108
Troubleshooting an Optical Drive
109
Troubleshooting a Tape Backup Unit
109
Troubleshooting a Hard Drive
110
Troubleshooting a Storage Controller
110
Troubleshooting Expansion Cards
111
Troubleshooting Processors
112
5 Using System Diagnostics
113
Dell Online Diagnostics
113
Dell Embedded System Diagnostics
113
When to Use the Embedded System Diagnostics
113
Running the Embedded System Diagnostics
113
System Diagnostic Controls
114
6 Jumpers and Connectors
115
System Board Jumper Settings
115
System Board Connectors
116
Disabling a Forgotten Password
117
7 Technical Specifications
119
8 System Messages
125
LCD Messages
125
Viewing LCD Messages
125
Removing LCD Messages
125
System Error Messages
125
Warning Messages
141
Diagnostic Messages
141
Alert Messages
141
9 Getting Help
143
Contacting Dell
143
Dell PowerEdge R420 Owner's Manual (137 pages)
Owner's Manual
Brand:
Dell
| Category:
Desktop
| Size: 9.19 MB
Table of Contents
Notes, Cautions, and Warnings
2
Table of Contents
3
1 About Your System
9
Front-Panel Features and Indicators
9
LCD Panel Features
12
Home Screen
13
Setup Menu
13
View Menu
14
Diagnostic Indicators
14
Hard-Drive Indicator Patterns
16
Back-Panel Features and Indicators
17
NIC Indicator Codes
18
Power Indicator Codes
18
Other Information You May Need
19
2 Using the System Setup and Boot Manager
21
Choosing the System Boot Mode
21
Entering System Setup
22
Responding to Error Messages
22
Using the System Setup Navigation Keys
22
System Setup Options
22
System Setup Main Screen
23
System BIOS Screen
23
System Information Screen
23
Memory Settings Screen
24
Processor Settings Screen
24
SATA Settings Screen
25
Boot Settings Screen
26
Integrated Devices Screen
26
Serial Communications Screen
27
System Profile Settings Screen
28
System Security Screen
29
Miscellaneous Settings
30
System and Setup Password Features
30
Assigning a System And/Or Setup Password
30
Deleting or Changing an Existing Setup Password
31
Using Your System Password to Secure Your System
32
Operating with a Setup Password Enabled
32
Entering the UEFI Boot Manager
32
Using the Boot Manager Navigation Keys
33
Boot Manager Screen
33
UEFI Boot Menu
34
Embedded System Management
34
Idrac Settings Utility
34
Entering the Idrac Settings Utility
34
3 Installing System Components
35
Recommended Tools
35
Front Bezel (Optional)
35
Installing the Front Bezel
35
Removing the Front Bezel
36
Opening and Closing the System
36
Opening the System
36
Closing the System
37
Inside the System
37
Cooling Shroud
40
Removing the Cooling Shroud
40
Installing the Cooling Shroud
41
System Memory
41
General Memory Module Installation Guidelines
43
Mode-Specific Guidelines
43
Memory Mirroring
44
Removing Memory Modules
45
Installing Memory Modules
47
Hard Drives
47
Removing a 2.5 Inch Hard-Drive Blank
48
Installing a 2.5 Inch Hard-Drive Blank
49
Removing a 3.5 Inch Hard-Drive Blank
49
Installing a 3.5 Inch Hard-Drive Blank
49
Removing a Hot-Swap Hard Drive
49
Installing a Hot-Swap Hard Drive
50
Removing a Cabled Hard Drive
51
Installing a Cabled Hard Drive
52
Removing a 2.5 Inch Hard Drive from a 3.5 Inch Hard-Drive Adapter
52
Installing a 2.5 Inch Hard Drive into a 3.5 Inch Hard-Drive Adapter
53
Removing a Hard Drive or a Hard-Drive Adapter from a Hard-Drive Carrier
53
Installing a Hard Drive or a Hard-Drive Adapter into a Hard-Drive Carrier
56
Optical Drive (Optional)
56
Removing the Optical Drive in Hot-Swappable Hard-Drive Systems
56
Installing the Optical Drive in Hot-Swappable Hard-Drive Systems
57
Removing the Optical Drive in Cabled Hard-Drive Systems
58
Installing the Optical Drive in Cabled Hard-Drive Systems
59
Cooling Fans
60
Removing a Cooling Fan
60
Installing a Cooling Fan
61
Internal USB Memory Key (Optional)
62
Replacing the Internal USB Key
62
Expansion Cards and Expansion-Card Risers
62
Expansion Card Installation Guidelines
63
Removing an Expansion Card
63
Installing an Expansion Card
65
Removing Expansion-Card Risers 1 and 2
66
Installing Expansion-Card Risers 1 and 2
67
Idrac Ports Card (Optional)
67
Removing the Idrac Ports Card
68
Installing the Idrac Ports Card
69
SD Vflash Card
69
Replacing an SD Vflash Card
69
Internal Dual SD Module
70
Removing the Internal Dual SD Module
70
Installing the Internal Dual SD Module
71
Internal SD Card
72
Removing an Internal SD Card
72
Installing an Internal SD Card
72
Integrated Storage Controller Card
72
Removing the Integrated Storage Controller Card
73
Installing the Integrated Storage Controller Card
74
Processors
74
Removing a Processor
74
Installing a Processor
76
Power Supplies
77
Hot Spare Feature
78
Removing a Redundant Power Supply
78
Installing a Redundant Power Supply
79
Removing a Non-Redundant Power Supply
79
Installing a Non-Redundant Power Supply
80
Removing the Power Supply Blank
81
Installing the Power Supply Blank
81
System Battery
81
Replacing the System Battery
81
Hard-Drive Backplane
82
Removing the Hard-Drive Backplane
83
Installing the Hard-Drive Backplane
87
Control Panel Assembly
88
Removing the Control Panel
88
Installing the Control Panel
89
Removing the Control-Panel Module
90
Installing the Control-Panel Module
93
VGA Module
94
Removing the VGA Module
94
Installing the VGA Module
95
Power Distribution Board Shroud
95
Removing the Power Distribution Board Shroud
95
Installing the Power Distribution Board Shroud
96
Power Distribution Board
97
Removing the Power Distribution Board
97
Installing the Power Distribution Board
98
System Board
98
Removing the System Board
98
Installing the System Board
99
4 Troubleshooting Your System
101
Safety First-For You and Your System
101
Troubleshooting System Startup Failure
101
Troubleshooting External Connections
101
Troubleshooting the Video Subsystem
101
Troubleshooting a USB Device
101
Troubleshooting a Serial I/O Device
102
Troubleshooting a NIC
102
Troubleshooting a Wet System
102
Troubleshooting a Damaged System
103
Troubleshooting the System Battery
104
Troubleshooting Power Supplies
104
Troubleshooting Cooling Problems
104
Troubleshooting Cooling Fans
105
Troubleshooting System Memory
105
Troubleshooting an Internal USB Key
106
Troubleshooting an SD Card
106
Troubleshooting an Optical Drive
107
Troubleshooting a Tape Backup Unit
107
Troubleshooting a Hard Drive
108
Troubleshooting a Storage Controller
108
Troubleshooting Expansion Cards
109
Troubleshooting Processors
110
5 Using System Diagnostics
111
Dell Online Diagnostics
111
Dell Embedded System Diagnostics
111
When to Use the Embedded System Diagnostics
111
Running the Embedded System Diagnostics
111
System Diagnostic Controls
112
6 Jumpers and Connectors
113
System Board Jumper Settings
113
System Board Connectors
114
Disabling a Forgotten Password
115
7 Technical Specifications
117
8 System Messages
121
LCD Messages
121
Viewing LCD Messages
121
Removing LCD Messages
121
System Error Messages
121
Warning Messages
135
Diagnostic Messages
135
Alert Messages
135
9 Getting Help
137
Contacting Dell
137
Dell PowerEdge R420 Technical Manual (51 pages)
Technical Guide
Brand:
Dell
| Category:
Server
| Size: 1.02 MB
Table of Contents
Table of Contents
3
1 System Overview
5
Introduction
5
New Technologies
6
Table 1. New Technologies
6
2 System Features
7
Comparison of Poweredge Systems
7
Table 2. Comparing the Poweredge R410 to Poweredge R420
7
Specifications
8
Table 3. Technical Specifications
8
3 Chassis Views and Features
11
Chassis Views
11
Figure 1. Front View Without Bezel
11
Figure 2. Front View with Bezel
11
Figure 3. Back View
11
Chassis Features
12
Table 4. Chassis Features
12
Figure 4. Internal View
12
Figure 5. LCD Control Panel
13
Figure 6. QRL Location
13
Table 5. Security Features
14
4 Processor
15
Processor Features
15
Supported Processors
15
Chipset
16
Table 6. Supported Processors
16
5 Memory
17
Supported Memory
17
Table 7. Memory Technologies Supported
17
Memory Configurations
18
Table 8. Dimms Supported
18
Memory Speed
19
Table 9. Memory Speed Capabilities
19
Memory RAS Features
20
Table 10. Memory RAS Features
20
6 Storage
21
Internal Storage
21
Table 11. Supported Hard Drives
21
External Storage
22
Storage Controllers
22
Table 12. Supported RAID Controllers
22
Optical Drive
23
Tape Drive
23
Table 13. Hard-Drive Backplane Options
23
7 Networking and Pcie
24
Embedded NIC Controller
24
Pcie Expansion
24
Table 14. Pcie Slot Configurations
24
Table 15. Supported Nics and Hbas
25
8 Power, Thermal, and Acoustics
26
Power Consumption and Energy Efficiency
26
Table 16. Power Tools and Technologies
26
Power Supply Units
27
Thermal and Acoustics
28
Table 17. Power Supply Efficiency
28
Figure 7. 550W Power Supply Unit
28
Acoustical Design
29
Table 18. Acoustical Performance
30
9 Rack Rails and Cable Management
31
Sliding and Static Rail Systems
31
Figure 8. Sliding Rails with Optional CMA
31
Table 19. Supported Rack Types
32
Figure 9. Static Rails
32
Cable Management Arm
33
10 Operating Systems and Virtualization
34
Supported Operating Systems
34
Table 20. Primary Operating System Support
34
Supported Virtualization
35
Table 21. Virtualization Support
35
11 Dell Openmanage Systems Management
36
Systems Management Solutions
36
Figure 10. Dell Systems Management Solutions
36
Openmanage Systems Management
37
Table 22. Idrac7 with Lifecycle Controller Functions and Benefits
37
Table 23. Feature Comparison for Basic Management, Idrac7 Express, and Idrac7 Enterprise
38
Dell Consoles
40
Openmanage Systems Management Tools and Utilities
40
Dell Server Management Operations
42
Figure 11. Systems Management Server Lifecycle
42
Table 24. One- To- One and One- To- Many Operations
43
Appendix A. Additional Specifications
44
Chassis Dimensions and Weight
44
Video Specifications
44
Table 25. Supported Video Modes
44
Figure 12. System Dimensions
44
Environmental Specifications
45
Table 26. Environmental Specifications
45
Power Supply Specifications
46
Rack Rail Specifications
46
Table 27. Power Supply Specifications
46
Table 28. Rail Adjustability Range
46
USB Peripherals
47
Appendix B. Standards Compliance
48
Table 29. Industry Standard Documents
48
Appendix C. Additional Resources
49
Table 30. Additional Resources
49
Appendix D. System Board Block Diagram
51
Figure 13. R420 System Board Block Diagram
51
Dell PowerEdge R420 Manual (84 pages)
Glossary
Brand:
Dell
| Category:
Desktop
| Size: 1.14 MB
Dell PowerEdge R420 Technical Manual (49 pages)
2-socket 1U Rack Server
Brand:
Dell
| Category:
Server
| Size: 1.93 MB
Table of Contents
Table of Contents
3
New Technologies
6
Specifications
7
Processor
8
Chipset
15
Memory
16
Supported Memory
17
Memory Configurations
18
Storage
20
External Storage
21
Optical Drive
23
Tape Drive
23
Embedded NIC Controller
24
Pcie Expansion
25
Power Supply Units
26
Sliding and Static Rail Systems
31
Operating Systems and Virtualization
34
Supported Operating Systems
34
Dell Openmanage Systems Management
36
Systems Management Solutions
36
Openmanage Systems Management
37
Idrac7 with Lifecycle Controller
37
Power Supply Specifications
44
Environmental Specifications
45
USB Peripherals
46
Dell PowerEdge R420 Manual (11 pages)
Cable Routing Procedures
Brand:
Dell
| Category:
Server
| Size: 0.84 MB
Table of Contents
Table of Contents
3
Introduction
4
Section 1: Cabling a Poweredge R320 or R420 System with a CMA
4
Connecting the Cables to the System
4
Figure 1. System with Cables Installed
4
Routing the Power Cables through the Strain Reliefs
5
Installing the CMA
5
Figure 2. Routing Power Cables through the Strain Reliefs on Hot Swap Power Supplies
5
Figure 3. Routing Power Cable through the Strain Relief on Fixed Power Supply
5
Figure 4. Attaching the Inner CMA Attachment Bracket
6
Figure 5. Routing the Cables through the CMA
6
Figure 6. Left-Side Mounted CMA Installation (Preferred)
7
Figure 7. Right-Side Mounted CMA Installation
7
Section 2: Replacing a Hot Swap Power Supply on a Poweredge R320 or R420 System with a CMA
8
Replacing a Hot Swap Power Supply with a Left-Side Mounted CMA
8
Replacing a Hot Swap Power Supply with a Right-Side Mounted CMA
8
Figure 8. Disconnecting the CMA Attachment Housings
9
Figure 9. Replacing the Outer Power Supply
9
Section 3: Cabling a Poweredge R320 or R420 System on Sliding Rails Without a CMA
10
Routing the Cables
10
Removing the Outer CMA Brackets for Shallow Racks
10
Figure 10. Cable Routing on Sliding Rails Without a CMA
10
Figure 11. Removing the Outer CMA Brackets for Shallow Racks
10
Figure 12. Cabling a System Installed in Static Rails
11
Section 4: Cabling a Poweredge R320 or R420 System Installed on Static Rails
11
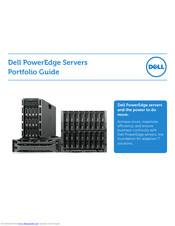
Dell PowerEdge R420 Portfolio Manual (27 pages)
PowerEdge Series
Brand:
Dell
| Category:
Server
| Size: 5.9 MB
Dell PowerEdge R420 Getting Started Manual (9 pages)
Getting Started Guide
Brand:
Dell
| Category:
Server
| Size: 2.38 MB
Table of Contents
Getting Started Guide
1
Notes, Cautions, and Warnings
2
Installation and Configuration
3
Unpacking a Rack System
3
Optional-Connecting the Keyboard, Mouse, and Monitor
3
Connecting the Power Cables
4
Securing the Power Cable(S)
4
Turning on the System
5
Installing the Optional Bezel
5
Complete the Operating System Setup
5
Dell Software License Agreement
5
Other Information You May Need
6
Obtaining Technical Assistance
6
NOM Information (Mexico Only)
6
Technical Specifications
6
Dell PowerEdge R420 Installation Manual (8 pages)
Second Processor Installation–Information Update
Brand:
Dell
| Category:
Server
| Size: 0.49 MB
Dell PowerEdge R420 Features (2 pages)
A two-socket, 1U rack server
Brand:
Dell
| Category:
Server
| Size: 0.38 MB
Related Products
Dell PowerEdge R415
Dell Alienware Aurora R4
Dell PowerEdge R610
Dell PowerEdge R520
Dell PowerEdge R810
Dell Alienware Aurora - R2
Dell PowerEdge R820
Dell Precision R7610
Dell PowerEdge R830
Dell Aurora R6
Dell Categories
Laptop
Desktop
Server
Monitor
Storage
More Dell Manuals