beautypg.com
Manuals
Brands
Canon Manuals
Projector
REALiS WUX5000
Canon REALiS WUX5000 Manuals
Manuals and User Guides for Canon REALiS WUX5000. We have
5
Canon REALiS WUX5000 manuals available for free PDF download: User And Installation Manual, User's Manual & Installation Manual, User Manual, User Commands, Specifications
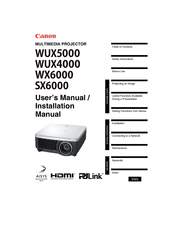
Canon REALiS WUX5000 User And Installation Manual (240 pages)
LCOS Projector
Brand:
Canon
| Category:
Projector
| Size: 31.84 MB
Table of Contents
How to Use this Manual
2
Quick Reference Guide
4
Table of Contents
5
Safety Instructions
12
Safety Precautions
13
Caution on Hanging from the Ceiling
13
Read and Keep this Owner's Manual for Later Use
14
AC Power Cord Requirement
16
Canadian Radio Interference Regulations
17
Federal Communication Commission Notice
17
Precautions for Use
18
Precautions for Installation
19
Precautions on the Lamp
21
Precautions for the Batteries of the Remote Control
22
For Safe Use
23
Before Use
25
Supplied Accessories
26
Installing Remote Control Batteries
27
Preparing the Remote Control
29
Remote Control Operating Range
29
When a Remote Control Is Connected Using a Cable (WX6000 / SX6000)
30
Part Names
31
Main Unit (the Illustration Shows WUX5000.)
31
Front Side
31
Bottom Side
32
Rear Side
32
Remote Control
34
Rs-Rc04
34
Rs-Rc05
36
Side Control
38
LED Indicator Displays
39
Input Terminal
40
User's Manual (Operation)
43
Projecting an Image
45
Steps for Connecting the Projector and Projecting an Image
46
Connecting the Projector
47
Connecting the Projector to a Computer
47
Connecting to RGB Monitor Output Terminal (Analog Connection)
47
Connecting to DVI Monitor Output Terminal (Digital Connection)
50
Connecting with a HDMI Cable (Input Signal Type: [HDMI] - P59)
51
Outputting Audio to Speakers
51
Connecting to AV Equipment
52
Connecting to Digital Video Output Terminal (Digital Connection)
52
Connecting to Analog Video Output Terminal (Analog Connection)
53
Outputting Audio to Speakers
55
Starting Projection
56
When the Language Selection Screen Appears
57
When the Password Input Screen Appears
58
When "No Signal" Appears
58
When Notebook Computer Screen Does Not Appear
58
Adjusting Image
58
Changing Notebook Computer Screen Output
58
Turning on External Monitor Output
58
Selecting an Input Signal (INPUT)
59
Types of Input Signals
59
Selecting an Input Signal
60
Adjusting the Image
61
Setting the Display Resolution of the Computer
61
Windows 7
61
Windows Vista
61
Windows XP
61
Mac os X
62
Auto Pc
62
Performing the Auto PC Function
62
Selecting Screen Aspect and Aspect
63
Selecting Screen Aspect
63
Resetting the Image Shift
69
Selecting Aspect Ratio
69
Types of Aspect Ratios
69
How to Select an Aspect Ratio
70
Adjusting the Image Size
71
Adjusting the Focus
73
Adjusting the Image Position
74
Resetting the Position
75
Adjusting Keystone Distortion
76
Resetting the Keystone Adjustment
77
Selecting an Image Mode
78
Image Modes
78
How to Select an Image Mode
79
Turning off the Projector
80
Useful Functions Available During a Presentation
81
Useful Functions Available During a Presentation
82
Temporarily Blacking out an Image
82
Freezing the Picture
82
Adjusting the Volume
83
Muting the Sound
83
Zooming an Image
84
Showing the Elapsed Time (WUX5000 / WUX4000)
85
Setting Functions from Menus
87
How to Use Menus
88
Menu Configuration
88
Basic Menu Operations
90
Setting Display Status
93
Selecting an Image Projection Mode
93
Automatic Display Adjustment (WX6000 / SX6000)
94
Selecting an Input Signal Type (Analog PC)
94
Selecting an Input Signal Type (Component) (WUX5000 / WUX4000)
95
Adjust Input Signal Type (Analog PC) Total Dots
95
Adjust Input Signal Type (Analog PC) Tracking
96
Adjust Input Signal Type (Analog PC) Horizontal Position
96
Adjust Input Signal Type (Analog PC) Vertical Position
97
Adjust Input Signal Type (Analog PC) Horizontal Pixels
97
Adjust Input Signal Type (Analog PC) Vertical Pixels
98
Selecting HDMI Input Level
98
HDMI Color Format
99
Select HDMI over Scan
100
Performing Progressive Processing
101
Selecting a Menu Position
102
Correcting the Screen Color
103
Reversing Projection
104
No Signal Screen
105
Screen When Blank
106
Selecting a Logo at Startup
106
Selecting Aspect Ratio of Screen
107
Adjusting Keystone Distortion (WX6000 / SX6000)
108
Image Shift Adjustment (WX6000 / SX6000)
108
Selecting an Image Quality
109
Image Adjustment
109
Saving the Desired Image Quality
110
Adjusting the Brightness
111
Adjusting the Contrast
112
Adjusting the Sharpness
113
Performing Gamma Correction
113
Adjusting Color
114
Correcting the Image According to the Ambient Light
115
Noise Reduction
116
Dynamic Gamma
116
Memory Color Correction
117
6-Axis Color Adjust (Detailed Color Adjustment)
117
Detailed Gamma Correction
118
Reducing the Lamp Brightness (WUX4000)
119
Resetting the Image Adjustment Settings
119
Setting Various Functions
120
Selecting the Power Management Mode
120
Skip the POWER Button Operation
121
Enabling / Disabling the Beep
122
Key Repeat (WX6000 / SX6000)
122
Prohibiting Operations
123
Main Unit and Remote Control Channel Settings
124
Selecting a Display Language
125
Showing / Hiding the Guide Screen
126
Showing / Hiding the Input Status
127
Selecting the HDMI Input
127
Setting a Password
128
Registering a Password
129
Prohibiting Operation of the Lens (WUX5000 / WUX4000)
130
Lens Shift Reset
131
Extending the Menu Display Time
132
Showing / Hiding the High Temperature Warning Icon
133
Reducing Flickering (WUX5000 / WUX4000)
134
Gamma Restore (WX6000 / SX6000)
134
Lamp Warning Display (WX6000 / SX6000)
135
Resetting the Lamp Counter
135
About the Display of the Lamp Counter
136
Filter Warning Display (WX6000 / SX6000)
137
Resetting the Air Filter Counter (WX6000 / SX6000)
137
Displaying Test Pattern (WX6000 / SX6000)
138
Selecting Audio in Terminal (WX6000 / SX6000)
139
Locking Installation Related Functions (WX6000 / SX6000)
139
Resetting to the Default Setting
140
Checking Projector Information
141
Installation Manual (Installation and Maintenance)
143
Installation
145
Installation Precautions
146
Precautions When Carrying the Projector
146
Precautions When Carrying and Transporting the Projector
146
Install Facing in the Correct Direction
148
When Using Mounted on the Ceiling
148
Installation Procedure
149
Selecting the Projection Method and Installation Location
150
Ceiling Mounting or Rear Projection
150
Adjusting the Projection Position When Installed on the Floor
150
Installing / Removing the Lens Unit
151
Installing the Lens Unit
151
Removing the Lens Unit
155
Setting up the Projector
156
Positioning the Projector in Front of the Screen
156
Relationship between Image Size and Projecting Distance
156
Lens Shift Function
160
Connecting to AV Equipment
162
Connectable Equipment and Input Terminals
162
Connection Terminal and Connection Cable
164
Connecting to a Network
165
Preparing the Remote Control
166
Connection Methods
166
Setting an IP Address
167
Windows 7
167
Windows Vista
168
Windows XP
169
Mac os X
170
Resetting the IP Address Setting of the Computer
170
Network Settings on the Projector
171
Locking the Network Settings
171
Turning the Network Function on / off
172
Setting a Network Password
173
Registering a Network Password
173
Turning the Pjlink Function on / off
174
Turning DHCP Function on / off
175
TCP / IP Setting
175
Initializing Network Settings
176
Configuring the Network from the Computer
177
Displaying and Configuring the Network Configuration Screen
177
Resetting to Factory Defaults
180
Setting Errors
180
Setting up the Network
182
Setting Basic Information [Network]
182
Setting up Email [Mail]
183
Mail Authentication Settings [Mail Auth]
184
Sending a Test Mail [Send Test Mail]
185
SNMP Settings [SNMP]
185
Setting Projector Information [Projector Info.]
186
Setting Pjlink [Pjlink]
187
Controlling the Projector from a Computer
188
Error Mail
190
Maintenance
191
Cleaning the Projector
192
Cleaning and Replacing the Air Filter
193
Replacing the Air Filter
193
Cleaning the Air Filter
194
Replacing the Lamp
195
Replacement Lamp
196
Replacing the Lamp
196
Appendix
199
Appendix
201
Troubleshooting
202
LED Indicator Meanings
202
Symptoms and Solutions
203
You Cannot Project an Image from the Projector
203
You Cannot Turn on the Projector
203
There Is no Sound
204
The Projected Image Is Blurred
205
The Projector Power Turns off
205
You Cannot Project an Image Appropriately
205
You Cannot Operate the Remote Control
206
Relationship between Aspect and Screen Aspect
207
Wux5000 / Wux4000
207
When the Image Is Projected on a 16:10 Screen
207
When the Image Is Projected on a 16:9 Screen
208
When the Image Is Projected on a 4:3 Screen
208
When Projecting on a 16:10 Screen in the Aspect Ratio of the Connected Device
209
When Projecting on a 16:9 Screen in the Aspect Ratio of the Connected Device
209
When Projecting on a 4:3 Screen in the Aspect Ratio of the Connected Device
210
Wx6000
210
When the Image Is Projected on a 16:10 Screen
210
When the Image Is Projected on a 16:9 Screen
211
When the Image Is Projected on a 4:3 Screen
211
When Projecting on a 16:10 Screen in the Aspect Ratio of the Connected Device
212
When Projecting on a 16:9 Screen in the Aspect Ratio of the Connected Device
212
When Projecting on a 4:3 Screen in the Aspect Ratio of the Connected Device
213
Sx6000
213
When the Image Is Projected on a 4:3 Screen
213
When the Image Is Projected on a 16:10 Screen
214
When the Image Is Projected on a 16:9 Screen
214
When Projecting on a 16:10 Screen in the Aspect Ratio of the Connected Device
215
When Projecting on a 4:3 Screen in the Aspect Ratio of the Connected Device
215
When Projecting on a 16:9 Screen in the Aspect Ratio of the Connected Device
216
Displayed Test Patterns
217
Supported Signal Types
218
Analog Rgb
218
Connecting to a Computer
218
Connecting with Av Equipment
218
Product Specifications
219
Projector
219
Remote Control
221
Specification of each Lens Unit (Option)
221
External View
223
ANALOG PC (WUX5000 / WUX4000), ANALOG PC-1 (WX6000 / SX6000) / COMPONENT in Terminal
223
Communication Format
224
Control Commands
224
Pin Assignment
224
Service Port (CONTROL)
224
Index
228
Menu Configuration
232
Display Settings Menu
232
Image Adjustment Menu
233
System Settings Menu
234
Network Setting Menu
234
Information Menu
234
Canon REALiS WUX5000 User's Manual & Installation Manual (240 pages)
Brand:
Canon
| Category:
Projector
| Size: 42.86 MB
Table of Contents
How to Use this Manual
2
Quick Reference Guide
4
Table of Contents
5
Safety Instructions
12
Safety Precautions
13
Caution on Hanging from the Ceiling
13
Read and Keep this Owner's Manual for Later Use
14
AC Power Cord Requirement
16
Canadian Radio Interference Regulations
17
Federal Communication Commission Notice
17
Precautions for Use
18
Precautions for Installation
19
Precautions on the Lamp
21
Precautions for the Batteries of the Remote Control
22
For Safe Use
23
Before Use
25
Supplied Accessories
26
Installing Remote Control Batteries
27
Preparing the Remote Control
29
Remote Control Operating Range
29
When a Remote Control Is Connected Using a Cable (WX6000 / SX6000)
30
Part Names
31
Main Unit (the Illustration Shows WUX5000.)
31
Front Side
31
Bottom Side
32
Rear Side
32
Remote Control
34
Rs-Rc04
34
Rs-Rc05
36
Side Control
38
LED Indicator Displays
39
Input Terminal
40
User's Manual (Operation)
43
Projecting an Image
45
Steps for Connecting the Projector and Projecting an Image
46
Connecting the Projector
47
Connecting the Projector to a Computer
47
Connecting to RGB Monitor Output Terminal (Analog Connection)
47
Connecting to DVI Monitor Output Terminal (Digital Connection)
50
Connecting with a HDMI Cable (Input Signal Type: [HDMI] - P59)
51
Outputting Audio to Speakers
51
Connecting to AV Equipment
52
Connecting to Digital Video Output Terminal (Digital Connection)
52
Connecting to Analog Video Output Terminal (Analog Connection)
53
Outputting Audio to Speakers
55
Starting Projection
56
When the Language Selection Screen Appears
57
When the Password Input Screen Appears
58
When "No Signal" Appears
58
When Notebook Computer Screen Does Not Appear
58
Adjusting Image
58
Changing Notebook Computer Screen Output
58
Turning on External Monitor Output
58
Selecting an Input Signal (INPUT)
59
Types of Input Signals
59
Selecting an Input Signal
60
Adjusting the Image
61
Setting the Display Resolution of the Computer
61
Windows 7
61
Windows Vista
61
Windows XP
61
Mac os X
62
Auto Pc
62
Performing the Auto PC Function
62
Selecting Screen Aspect and Aspect
63
Selecting Screen Aspect
63
Resetting the Image Shift
69
Selecting Aspect Ratio
69
Types of Aspect Ratios
69
How to Select an Aspect Ratio
70
Adjusting the Image Size
71
Adjusting the Focus
73
Adjusting the Image Position
74
Resetting the Position
75
Adjusting Keystone Distortion
76
Resetting the Keystone Adjustment
77
Selecting an Image Mode
78
Image Modes
78
How to Select an Image Mode
79
Turning off the Projector
80
Useful Functions Available During a Presentation
81
Useful Functions Available During a Presentation
82
Temporarily Blacking out an Image
82
Freezing the Picture
82
Adjusting the Volume
83
Muting the Sound
83
Zooming an Image
84
Showing the Elapsed Time (WUX5000 / WUX4000)
85
Setting Functions from Menus
87
How to Use Menus
88
Menu Configuration
88
Basic Menu Operations
90
Setting Display Status
93
Selecting an Image Projection Mode
93
Automatic Display Adjustment (WX6000 / SX6000)
94
Selecting an Input Signal Type (Analog PC)
94
Selecting an Input Signal Type (Component) (WUX5000 / WUX4000)
95
Adjust Input Signal Type (Analog PC) Total Dots
95
Adjust Input Signal Type (Analog PC) Tracking
96
Adjust Input Signal Type (Analog PC) Horizontal Position
96
Adjust Input Signal Type (Analog PC) Vertical Position
97
Adjust Input Signal Type (Analog PC) Horizontal Pixels
97
Adjust Input Signal Type (Analog PC) Vertical Pixels
98
Selecting HDMI Input Level
98
HDMI Color Format
99
Select HDMI over Scan
100
Performing Progressive Processing
101
Selecting a Menu Position
102
Correcting the Screen Color
103
Reversing Projection
104
No Signal Screen
105
Screen When Blank
106
Selecting a Logo at Startup
106
Selecting Aspect Ratio of Screen
107
Adjusting Keystone Distortion (WX6000 / SX6000)
108
Image Shift Adjustment (WX6000 / SX6000)
108
Selecting an Image Quality
109
Image Adjustment
109
Saving the Desired Image Quality
110
Adjusting the Brightness
111
Adjusting the Contrast
112
Adjusting the Sharpness
113
Performing Gamma Correction
113
Adjusting Color
114
Correcting the Image According to the Ambient Light
115
Noise Reduction
116
Dynamic Gamma
116
Memory Color Correction
117
6-Axis Color Adjust (Detailed Color Adjustment)
117
Detailed Gamma Correction
118
Reducing the Lamp Brightness (WUX4000)
119
Resetting the Image Adjustment Settings
119
Setting Various Functions
120
Selecting the Power Management Mode
120
Skip the POWER Button Operation
121
Enabling / Disabling the Beep
122
Key Repeat (WX6000 / SX6000)
122
Prohibiting Operations
123
Main Unit and Remote Control Channel Settings
124
Selecting a Display Language
125
Showing / Hiding the Guide Screen
126
Showing / Hiding the Input Status
127
Selecting the HDMI Input
127
Setting a Password
128
Registering a Password
129
Prohibiting Operation of the Lens (WUX5000 / WUX4000)
130
Lens Shift Reset
131
Extending the Menu Display Time
132
Showing / Hiding the High Temperature Warning Icon
133
Reducing Flickering (WUX5000 / WUX4000)
134
Gamma Restore (WX6000 / SX6000)
134
Lamp Warning Display (WX6000 / SX6000)
135
Resetting the Lamp Counter
135
About the Display of the Lamp Counter
136
Filter Warning Display (WX6000 / SX6000)
137
Resetting the Air Filter Counter (WX6000 / SX6000)
137
Displaying Test Pattern (WX6000 / SX6000)
138
Selecting Audio in Terminal (WX6000 / SX6000)
139
Locking Installation Related Functions (WX6000 / SX6000)
139
Resetting to the Default Setting
140
Checking Projector Information
141
Installation Manual (Installation and Maintenance)
143
Installation
145
Installation Precautions
146
Precautions When Carrying the Projector
146
Precautions When Carrying and Transporting the Projector
146
Install Facing in the Correct Direction
148
When Using Mounted on the Ceiling
148
Installation Procedure
149
Selecting the Projection Method and Installation Location
150
Ceiling Mounting or Rear Projection
150
Adjusting the Projection Position When Installed on the Floor
150
Installing / Removing the Lens Unit
151
Installing the Lens Unit
151
Removing the Lens Unit
155
Setting up the Projector
156
Positioning the Projector in Front of the Screen
156
Relationship between Image Size and Projecting Distance
156
Lens Shift Function
160
Connecting to AV Equipment
162
Connectable Equipment and Input Terminals
162
Connection Terminal and Connection Cable
164
Connecting to a Network
165
Preparing the Remote Control
166
Connection Methods
166
Setting an IP Address
167
Windows 7
167
Windows Vista
168
Windows XP
169
Mac os X
170
Resetting the IP Address Setting of the Computer
170
Network Settings on the Projector
171
Locking the Network Settings
171
Turning the Network Function on / off
172
Setting a Network Password
173
Registering a Network Password
173
Turning the Pjlink Function on / off
174
Turning DHCP Function on / off
175
TCP / IP Setting
175
Initializing Network Settings
176
Configuring the Network from the Computer
177
Displaying and Configuring the Network Configuration Screen
177
Resetting to Factory Defaults
180
Setting Errors
180
Setting up the Network
182
Setting Basic Information [Network]
182
Setting up Email [Mail]
183
Mail Authentication Settings [Mail Auth]
184
Sending a Test Mail [Send Test Mail]
185
SNMP Settings [SNMP]
185
Setting Projector Information [Projector Info.]
186
Setting Pjlink [Pjlink]
187
Controlling the Projector from a Computer
188
Error Mail
190
Maintenance
191
Cleaning the Projector
192
Cleaning and Replacing the Air Filter
193
Replacing the Air Filter
193
Cleaning the Air Filter
194
Replacing the Lamp
195
Replacement Lamp
196
Replacing the Lamp
196
Appendix
199
Appendix
201
Troubleshooting
202
LED Indicator Meanings
202
Symptoms and Solutions
203
You Cannot Project an Image from the Projector
203
You Cannot Turn on the Projector
203
There Is no Sound
204
The Projected Image Is Blurred
205
The Projector Power Turns off
205
You Cannot Project an Image Appropriately
205
You Cannot Operate the Remote Control
206
Relationship between Aspect and Screen Aspect
207
Wux5000 / Wux4000
207
When the Image Is Projected on a 16:10 Screen
207
When the Image Is Projected on a 16:9 Screen
208
When the Image Is Projected on a 4:3 Screen
208
When Projecting on a 16:10 Screen in the Aspect Ratio of the Connected Device
209
When Projecting on a 16:9 Screen in the Aspect Ratio of the Connected Device
209
When Projecting on a 4:3 Screen in the Aspect Ratio of the Connected Device
210
Wx6000
210
When the Image Is Projected on a 16:10 Screen
210
When the Image Is Projected on a 16:9 Screen
211
When the Image Is Projected on a 4:3 Screen
211
When Projecting on a 16:10 Screen in the Aspect Ratio of the Connected Device
212
When Projecting on a 16:9 Screen in the Aspect Ratio of the Connected Device
212
When Projecting on a 4:3 Screen in the Aspect Ratio of the Connected Device
213
Sx6000
213
When the Image Is Projected on a 4:3 Screen
213
When the Image Is Projected on a 16:10 Screen
214
When the Image Is Projected on a 16:9 Screen
214
When Projecting on a 16:10 Screen in the Aspect Ratio of the Connected Device
215
When Projecting on a 4:3 Screen in the Aspect Ratio of the Connected Device
215
When Projecting on a 16:9 Screen in the Aspect Ratio of the Connected Device
216
Displayed Test Patterns
217
Supported Signal Types
218
Analog Rgb
218
Connecting to a Computer
218
Connecting with Av Equipment
218
Product Specifications
219
Projector
219
Remote Control
221
Specification of each Lens Unit (Option)
221
External View
223
ANALOG PC (WUX5000 / WUX4000), ANALOG PC-1 (WX6000 / SX6000) / COMPONENT in Terminal
223
Service Port (CONTROL)
224
Communication Format
224
Control Commands
224
Pin Assignment
224
Index
228
Menu Configuration
232
Display Settings Menu
232
Canon REALiS WUX5000 User Manual (188 pages)
MULTIMEDIA PROJECTOR
Brand:
Canon
| Category:
Projector
| Size: 20.46 MB
Table of Contents
How to Use this Manual
2
Quick Reference Guide
3
Table of Contents
4
Safety Instructions
10
Safety Precautions
11
Caution on Hanging from the Ceiling
11
Read and Keep this Owner's Manual for Later Use
12
AC Power Cord Requirement
14
Federal Communication Commission Notice
15
Canadian Radio Interference Regulations
15
Precautions for Use
16
Precautions for Installation
17
Precautions on the Lamp
19
Precautions for the Batteries of the Remote Control
20
For Safe Use
21
Before Use
23
Supplied Accessories
24
Installing Remote Control Batteries
24
Preparing the Remote Control
26
Remote Control Operating Range
26
Part Names
27
Main Unit
27
Front Side
27
Rear Side
28
Bottom Side
28
Remote Control
30
Side Control
32
LED Indicator Displays
33
Input Terminal
34
User's Manual (Operation)
35
Projecting an Image
37
Steps for Connecting the Projector and Projecting an Image
38
Connecting the Projector
39
Connecting the Projector to a Computer
39
Connecting to RGB Monitor Output Terminal (Analog Connection)
39
Connecting to DVI Monitor Output Terminal (Digital Connection)
40
HDMI Cable (Input Signal Type: [HDMI] - P48)
41
Outputting Audio to Speakers
41
Connecting to AV Equipment
42
Connecting to Digital Video Output Terminal (Digital Connection)
42
Connecting to Analog Video Output Terminal (Analog Connection)
43
Outputting Audio to Speakers
44
Starting Projection
45
When the Language Selection Screen Appears
46
When the Password Input Screen Appears
46
When "No Signal" Appears
46
When Notebook Computer Screen Does Not Appear
47
Adjusting Image
47
Changing Notebook Computer Screen Output
47
Turning on External Monitor Output
47
Selecting an Input Signal (INPUT)
48
Types of Input Signals
48
Selecting an Input Signal
49
Adjusting the Image
50
Setting the Display Resolution of the Computer
50
Windows 7
50
Windows Vista
50
Windows XP
50
Mac os X
51
Auto Pc
51
Performing the Auto PC Function
51
Selecting Screen Aspect and Aspect
52
Selecting Screen Aspect
52
Selecting Aspect Ratio
56
How to Select an Aspect Ratio
57
Adjusting the Image Size
58
Adjusting the Focus
59
Adjusting the Image Position
60
Resetting the Position
61
Adjusting Keystone Distortion
62
Resetting the Keystone Adjustment
63
Selecting an Image Mode
64
Image Modes
64
How to Select an Image Mode
65
Turning off the Projector
66
Useful Functions Available During a Presentation
67
Useful Functions Available During a Presentation
68
Temporarily Blacking out an Image
68
Freezing the Picture
68
Adjusting the Volume
69
Muting the Sound
69
Zooming an Image
70
Showing the Elapsed Time
71
Setting Functions from Menus
73
How to Use Menus
74
Menu Configuration
74
Basic Operation of Menu
75
Setting Display Status
77
Selecting an Image Projection Mode
77
Selecting an Input Signal Type (Analog PC)
78
Selecting an Input Signal Type (Component)
78
Adjust Input Signal (Analog PC) Total Dots
79
Adjust Input Signal (Analog PC) Tracking
79
Adjust Input Signal (Analog PC) Horizontal Position
80
Adjust Input Signal (Analog PC) Vertical Position
80
Adjust Input Signal (Analog PC) Horizontal Pixels
81
Adjust Input Signal (Analog PC) Vertical Pixels
81
Selecting HDMI Input Level
82
HDMI Color Format
82
Select HDMI over Scan
83
Performing Progressive Processing
83
Selecting a Menu Position
84
Correcting the Screen Color
84
Reversing Projection
85
No Signal Screen
86
Screen When Blank
86
Screen When Blank
87
Selecting a Logo at Startup
87
Selecting Aspect Ratio of Screen
87
Selecting an Image Quality
88
Image Adjustment
88
Saving the Desired Image Quality
89
Adjusting the Brightness
90
Adjusting the Contrast
90
Adjusting the Sharpness
91
Making a Gamma Correction
91
Adjusting Color
92
Correcting the Image According to the Ambient Light
93
Noise Reduction
94
Dynamic Gamma
94
Memory Color Correction
95
6-Axis Color Adjust
95
Detailed Gamma Correction
96
Reducing the Lamp Brightness
97
Resetting the Image Settings
97
Setting Various Functions
98
Selecting the Power Management Mode
98
Skip the POWER Button Operation
98
Enabling / Disabling the Beep
99
Prohibiting Operations
99
Main Unit and Remote Control Channel Settings
100
Selecting a Display Language
101
Showing / Hiding the Guide Screen
101
Showing / Hiding the Input Status
102
Selecting the HDMI Input
102
Setting a Password
103
Registering a Password
104
Prohibiting Operation of the Lens
104
Lens Shift Reset
105
Extending the Menu Display Time
105
Showing / Hiding the High Temperature Warning Icon
106
Reducing Flickering
106
Resetting the Lamp Counter
107
About the Display of the Lamp Counter
108
Resetting to the Default Setting
109
Checking Projector Information
110
Installation Manual (Installation and Maintenance)
111
Installation
113
Installation Precautions
114
Precautions When Carrying the Projector
114
Precautions When Carrying and Transporting the Projector
114
When Using Mounted on the Ceiling
116
Install Facing in the Correct Direction
116
Installation Procedure
117
Selecting the Projection Method and Installation Location
118
Ceiling Mounting or Rear Projection
118
Adjusting the Projection Position When Installed on the Floor
118
Installing / Removing the Lens Unit
119
Installing the Lens Unit
119
Removing the Lens Unit
123
Setting up the Projector
124
Positioning the Projector in Front of the Screen
124
Relationship between Image Size and Projecting Distance
124
Lens Shift Function
126
Connecting to AV Equipment
128
Connectable Equipment and Input Terminals
128
Connection Terminal and Connection Cable
129
Connecting to a Network
131
Preparing the Remote Control
132
Connection Methods
132
Setting an IP Address
133
Windows 7
133
Windows Vista
134
Windows XP
135
Mac os X
136
Resetting the IP Address Setting of the Computer
136
Network Settings on the Projector
137
Locking the Network Settings
137
Turning on / off the Network Function
138
Setting a Network Password
138
Registering a Network Password
139
Turning on / off the Pjlink Function
139
Turning on / off DHCP Function
140
TCP / IP Setting
141
Initializing Network Settings
141
Configuring the Network from the Computer
142
Displaying and Configuring the Network Configuration Screen
142
Resetting to Factory Defaults
145
Setting Errors
145
Setting up the Network
147
Setting Basic Information [Network]
147
Setting up Email [Mail]
148
Mail Authentication Settings [Mail Auth]
149
Sending a Test Mail [Send Test Mail]
150
SNMP Settings [SNMP]
150
Setting Projector Information [Projector Info.]
151
Setting Pjlink [Pjlink]
152
Controlling the Projector from a Computer
153
Error Mail
155
Maintenance
157
Cleaning the Projector
158
Cleaning and Replacing the Air Filter
159
Replacing the Air Filter
159
Cleaning the Air Filter
160
Replacing the Lamp
161
Replacement Lamp
162
Replacing the Lamp
162
Appendix
165
Appendix
167
Troubleshooting
168
LED Indicator Meanings
168
Symptoms and Solutions
169
You Cannot Turn on the Projector
169
You Cannot Project an Image from the Projector
169
You Cannot Hear Sound
170
The Projected Image Is Blurred
171
You Cannot Project an Image Appropriately
171
The Projector Power Turns off
171
You Cannot Operate the Remote Control
172
Relationship between Aspect and Screen Aspect
173
Supported Signal Types
175
Product Specifications
176
Projector
176
Remote Control
177
Specification of each Lens Unit (Option)
177
External View
178
ANALOG PC / COMPONENT in Terminal
178
Service Port (CONTROL)
179
Index
182
Menu Configuration
185
Image Adjustment Menu
186
System Settings Menu
187
Network Setting Menu
187
Information Menu
187
Canon REALiS WUX5000 User Commands (74 pages)
Brand:
Canon
| Category:
Projector
| Size: 0.47 MB
Table of Contents
Table of Contents
2
Overview
4
Communication Specifications
5
Usable Character Codes
6
Communication System (Serial)
7
Communication System (LAN)
7
Commands
8
Response
9
Other
10
Communication Flow
11
Transmission Sent
11
Transmission Received
11
Command / Response
11
Response Reception Timeout
11
Control Mode
11
Other
11
Command System
12
Command List
14
Details of Commands
16
6Axadj
17
6Axr-Y
18
Ambadj
19
Amblevel
20
Ambtype
21
Aspect
22
Autopc
24
Autosetexe
25
Avol
26
Blank
27
Bri
28
Color_Temp
29
Comver
30
Cont
31
Dgamma
32
Dzoom_Pos
33
Dzoom_Rat
34
Err
35
Fine_Gamma_R
36
Fine_Gamma_G
37
Fine_Gamma_B
38
Freeze
39
Gamma
40
Hdmi_In
41
Hdmi_Ovscan
42
Hue
43
Image
44
Imageflip
46
Input
47
Lamp
48
Lampcounter
49
Main
50
Memcadj
51
Mode
52
Mute
53
Power
55
Prodcode
56
Rgbgain
59
Rgboffset
60
Romver
61
Sat
62
Saveimgprof
63
Scrnaspect
64
Sel
65
Sharp
66
Signal_Info
67
Signalstatus
68
Temp
69
Error List
70
Error Processing
72
Other
74
Canon REALiS WUX5000 Specifications (2 pages)
PRO AV PROJECTORS
Brand:
Canon
| Category:
Projector
| Size: 3.28 MB
Related Products
Canon WUX500
Canon WUX500ST
Canon WUX5800
CANON WUX5800Z
Canon REALIS WUX10 MARK II D
Canon REALiS WUX4000 D
Canon WUX450
Canon WUX400ST
Canon WUX6500
Canon WUX6700
Canon Categories
Printer
Digital Camera
All in One Printer
Camcorder
Scanner
More Canon Manuals