
Related Manuals for YT TUES


Summary of Contents for YT TUES
- Page 1 rtfm. read first - then unpack Zuerst Lesen - dAnn AusPAcKen d’ABord Lire - ensuite deBALLer BiKe mAnuAL...
- Page 2 Welcome to good times. yt-industries.com...
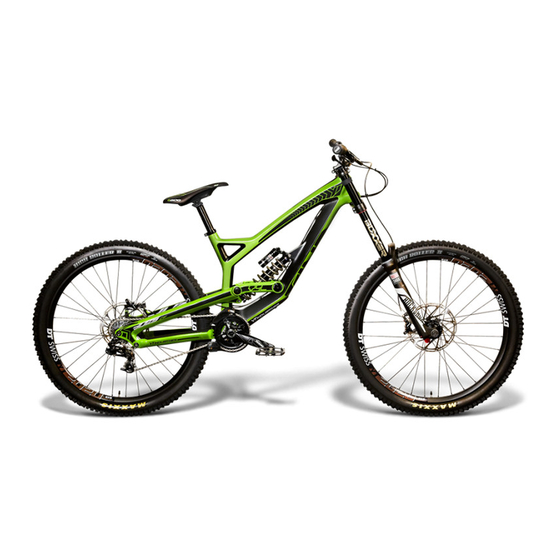
- Page 3 RAHMEN / FRAME / CADRE FEDERGABEL / SUSPENSION FORK / Oberrohr / Toptube / Tube Supérieur FOURCHE Unterrohr / Downtube / Tube Oblique Gabelkrone / Crown / Té Sitzrohr / Seattube / Tube de selle Standrohr / Stanchions / Plongeur Kettenstrebe / Chainstay / Base Tauchrohr / Casting / Fourreaux Sitzstrebe / Seatstay / Hauban...
- Page 4 MONTAGE WERKZEUG ASSEMBLY TOOLS OUTILS DE MONTAGE Inbusaufsatz Größe 4, 5 und 6mm Torque wrench with Allen key adapter size 4, 5 and 6 Clé dynamométrique avec insert Clé Allen, taille 4, 5 et 6 Inbusschlüssel Größe 4, 5 und 6mm Allen key size 4, 5 and 6 Clé...
- Page 5 TIP: been implemented correctly and to the full extent. Please save the YT Industries BikeBox including the packaging material. This way, you can repack your You may reach us by email at: [email protected]...
- Page 6 ASSEMBLY INSTRUCTIONS STEP STEP STEP STEP STEP STEP OPENING THE BOX UNPACKING THE WHEELS UNPACKING THE FRAME Cut the straps using wire cutters or a box cutter. Lift the wheels upwards out of the box. Now you can pull your bike upwards out of the BikeBox. Just make sure that you do not damage the BikeBox.
- Page 7 The adjustment lines will help you with this. Handlebar clamp screws (small) Handlebar clamp screws (small) Adjust the handlebar to your preferred position by using a 5 mm Allen wrench. YT Industries Direct Mount YT Industries Direct Mount (Last updated 2015)
- Page 8 Attach the handlebar and the top clamps to the base of the stem Respect the torque recommendations of the manufacturer of the handlebar and stem. Handlebar clamp screws (small) Handlebar clamp screws (small) (on the top crown of the fork). YT Industries Direct Mount YT Industries Direct Mount (Last updated 2015)
- Page 9 STEP STEP INSTALLING THE HANDLEBAR - YT INDUSTRIES DIRECT MOUNT 04 C CAUTION! Remove the screws of the stem from the upper fork crown (6 mm Allen wrench). Install the handlebar in the stem. Install the stem on the fork bridge (6 mm Allen wrench).
- Page 10 ASSEMBLY INSTRUCTIONS REMOVE WHEELS STEP STEP STEP STEP INSTALLING THE REAR DERAILLEUR FROM PACKAGING a a b b Cut the cable ties using wire cutters and Open the rear derailleur cage by holding the derailleur body with one hand, Mount the derailleur using the Torx T25 (7-speed) or remove the cardboard packaging.
- Page 11 STEP STEP INSERTING THE REAR WHEEL & ASSEMBLY STAND INSTRUCTIONS Lift the frame out of the rear stand. Pull the brake protector from the brake cylinder straight downwards. Please store this Tighten the rear axle using a torque wrench (15 Nm). Place the rear stand upright...
- Page 12 ASSEMBLY INSTRUCTIONS STEP STEP STEP STEP INTERMEDIATE STATE If your bike looks like the image, then you have done everything correctly so far. Remove the front axle stand Well done! and turn the bike upside down.
- Page 13 INSERTING THE FRONT WHEEL - ROCKSHOX BOXXER Loosen the screw on the brake side using a 6 mm Allen wrench until you no Now insert the front wheel in the fork dropouts. Slide the lightly greased axle through the hub until the thread longer hear a clicking sound.
- Page 14 ASSEMBLY INSTRUCTIONS INSERTING THE FRONT WHEEL - BOS IDYLLE Loosen the four securing screws using a 4 mm Allen wrench. Remove the pad spacer from the front brake caliper. Store the spacer in a Ensure that the brake rotor sits correctly between the brake pads. b b b Remove the axle using a 6 mm Allen wrench.
- Page 15 STEP STEP INSTALLING PEDALS Tighten the securing screws on the brake rotor side alternately with only one Place the pedal washer on the pedal axle. Install the pedals using an Allen wrench (the size will vary by pedal manufacturer). The turn per screw.
- Page 16 ASSEMBLY INSTRUCTIONS STEP STEP FULLY ASSEMBLED BIKE You’re fi nished! Congratulations! You’re bike is now fully assembled. Please note the following information for adjusting your bike.
- Page 17 - Checking bearing play in the bottom bracket, headset, hubs, and pedals performance. In addition, the braking performance increases after a short break-in period. you want to ride your YT Bike in “normal” traffi c. and tightening if necessary Try to get used to the braking response and how it differs when riding over various surfaces.
- Page 18 Other major mechanical stresses If you would like to shorten the handlebar, note the specifi cations of the manufacturer YT Industries carbon frames are equipped with protective foils or protectors made of Unusual noises from the frame (e.g. snapping sounds) or contact us directly.
- Page 19 TORQUE CHART 33 - 41 Nm Bottom bracket 9,5 Nm Brake caliper screw to frame and fork 2,5 - 4 Nm Shifter 6 Nm Disc brake bolts to hub 8 - 10 Nm Rear derailleur (fi xing bolt) 4 - 5 Nm Rear derailleur (clamp bolt) 2,8 - 3,4 Nm Brake lever...
- Page 20 GmbH ZWEIBRÜCKENSTRASSE 2 ZWEIBRÜCKENSTRASSE 2 91301 FORCHHEIM 91301 FORCHHEIM GERMANY GERMANY PHONE +49 (0) 9191 . 73 63 05 0 +49 (0) 9191 . 73 63 05 0 +49 (0) 9191 . 73 63 05 55 +49 (0) 9191 . 73 63 05 55 MAIL [email protected]...