
Related Manuals for Pandigital PAN7004AWBB


Summary of Contents for Pandigital PAN7004AWBB
-
Page 1: Digital Photo Frame
Effortlessly Moving Images Out of your Camera and Into your Life Digital Photo Frame & Bulletin Board User Guide PAN7004AWBB... - Page 2 NOTE: If you must mail your 1-year registration, please send your name, address, phone number, model & serial number, and when & where purchased to: Pandigital, P.O. Box 2969, Dublin, CA 94568-2969 USA Note: Your frame style and features may differ from those documented in this User Guide.
-
Page 3: Table Of Contents
Table of Contents Introduction ....................5 DPF Key Features ....................5 Compatible Memory Cards ..................5 What’s in the Box ..................... 5 Overview of the DPF ..................6 Remote Control .................... 6 Control Buttons on DPF ................8 Traditional Photo Frame ................9 Getting Started ..................... - Page 4 CALENDAR/CLOCK ................... 20 Select Media Source for Calendar Slideshow............20 Set Schedule ......................20 Disable Schedule ....................21 Run the Schedule ....................21 Run Schedule from Slideshow ................22 Run Schedule from CALENDAR/CLOCK Screen ..........22 Set the Date and Time ................... 22 DPF to PC –...
-
Page 5: Introduction
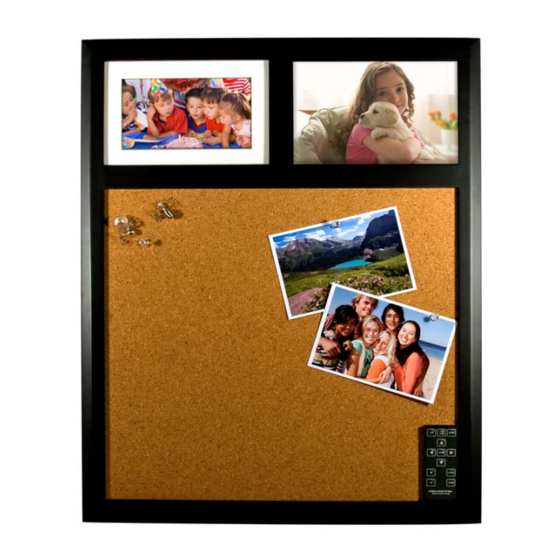
Introduction Welcome to the Pandigital Multimedia Digital Photo Frame (DPF) with Bulletin Board. This all-in-one message center combines a bulletin board with a removable 7” digital photo frame and a traditional photo frame. No computer is necessary; you can display your digital photos and videos, or play your digital audio files directly from your memory card. -
Page 6: Overview Of The Dpf
Overview of the DPF ►Right arrow ◄ Left arrow MENU EXIT ENTER Memory Brightness cards slot control Power ON/OFF power jack Mini USB Device (The memory card slots, ports, and jacks in your DPF may be different than those pictured here.) Remote Control You can access all of the DPF’s features, and perform all of the functions by using the remote control. -
Page 7: Replace The Remote Control Battery
Note: Before first time use, pull the plastic tab sticking out of the remote control. It protects the battery and the remote control will not work unless it is removed. Start Slideshow Access Setup screens Exit or go back Scroll Up Scroll Previous Scroll Forward Play/Pause/Select object... -
Page 8: Control Buttons On Dpf
Store Remote Control You can avoid misplacing the remote control by storing it on the front of the bulletin board when not in use. The back of the remote control has a built-in magnet, and the lower right corner of the bulletin board has a magnetic area so you can simply attach the remote control for safe keeping. -
Page 9: Traditional Photo Frame
Button Action Scroll right Exit the current display, or go back a screen EXIT MENU Displays function setup screens Traditional Photo Frame 1. Slide the traditional frame out of the side of the bulletin board. 2. Turn the brackets to remove the back. 3. -
Page 10: The Home Screen
5. After the initial start up screen is displayed, a slideshow will automatically begin displaying the photos that are stored in the internal memory. 6. To view your own photos, insert a memory card containing your photos into the slot on the DPF, and then press ENTER Start Slideshow... -
Page 11: Setup Menu Overview
SETUP Menu Overview Setup Menu Use the for DPF functions to optimize your viewing/listening preferences. HOME Setup Menu On the screen press to display the screen. MENU Select Media Select the media source for current viewing Source (page 12) Set multiple slideshow functions to optimize your Slideshow Setup viewing preferences (page 17) -
Page 12: About Selecting Options
About Selecting Options Throughout this User Guide, when you are instructed to ‘select’ a function option or button, unless otherwise instructed, use to highlight [the , and then press to select. referenced option] ENTER Select Media Source If you have inserted one or more external media sources (i.e., memory card), you can use the function to switch between Select Media Source... -
Page 13: View Individual Photo During A Slideshow
2. Use to scroll through individual photos, or use the arrows to scroll full pages. Page Up/Page Down 3. To view an individual photo in full screen, press on the ENTER highlighted photo. 4. While the photo is displayed, you can use to view the next/previous photos. -
Page 14: Adjust Screen Colors
Zoom or Rotate a photo from the Photo Thumbnails screen HOME PHOTOS 1. On the screen, select the button. Manage 2. On the screen, press to select Photo Thumbnails ENTER the desired photo to be magnified or rotated, and then press multiple times if necessary to achieve the ZOOM ROTATE... -
Page 15: Photo Import Method
Photo Import Method When importing files into the internal memory from an external media source, the file can be optimized or left as the original file size and resolution. HOME Setup Menu 1. On the screen, press to display the MENU 2. -
Page 16: Import Photos Into Internal Memory
Import Photos into Internal Memory You can import your photo files from memory cards into the DPF’s internal memory. The number of photo files you can import depends on file size and available memory. Import All Photos into Internal Memory 1. -
Page 17: Photo Slideshows
3. A confirmation message appears; select to delete the photos, or to keep the photos in the internal memory. EXIT TIP: If, by mistake, you select to delete photos, press to cancel the delete operation. Photos already deleted will not be automatically restored. PHOTO SLIDESHOWS The DPF can display all of the photos on the selected media source as a slideshow, or you can select specific photos for a custom slideshow. -
Page 18: Play Slideshow From Slideshow Folder
Assign Photos to Slideshow Folder HOME PHOTOS 1. On the screen, select the button. Manage Photo Thumbnails 2. On the screen, use to scroll through your photos. 3. To assign an individual photo: With the desired photo displayed, press MENU To assign multiple photos: Press ‘... -
Page 19: Set Slideshow Interval
Set Slideshow Interval You can set the speed at which the slideshow photos transition from one to another. HOME Setup Menu 1. On the screen, press to display the MENU 2. Select Slideshow Setup 3. Use to select , and then use Slideshow Interval select your desired setting. -
Page 20: Calendar/Clock
4. Select Done CALENDAR/CLOCK Your DPF can be used as a personal desk calendar which displays a continuous slideshow of photos on the selected media source, and real- time clock. CALENDAR/CLOCK To display the screen, select from the CALENDAR HOME screen. -
Page 21: Disable Schedule
mode throughout the weekend. The following Monday morning, the DPF would resume operation at 8:30am. CALENDAR/CLOCK 1. On the screen, press MENU 2. Select Set Schedule 3. Use to move between the fields and to change the field values in Weekdays On/Off Weekends On/Off 4. -
Page 22: Run Schedule From Slideshow
Run Schedule from Slideshow 1. Start a slideshow, and then press when the ENTER button appears (approx 10 seconds). A small timer Schedule clock will appear indicating the schedule is active. To run the schedule when the button is no longer displayed, Run Schedule restart your slideshow and then press when the... -
Page 23: Connect Dpf To Windows Pc
2. A window opens listing all drives connected to your computer, similar to the following screen: 3. The internal memory (titled Pandigital) and each memory card present in the DPF will be associated with one disk drive on your PC. - Page 24 5. To copy files from a media source, select and drag them into the DPF’s internal memory drive (Pandigital). 6. Similarly, to copy files from your computer to the internal memory, first locate the files on your computer, select the files you want to copy, and then drag and drop them into the DPF’s...
-
Page 25: Disconnect Dpf From Macintosh Computer
Windows Vista 1. On the Windows System Tray, click the hardware removal icon 2. Click the message Safely remove USB mass Storage device corresponding with the DPF device drive. 3. When the message “This device can now be safely removed from the computer”... -
Page 26: Personalized Digital Greeting Card
Personalized Digital Greeting Card You can set a personalized greeting which displays when the DPF is powered on. This feature is especially useful when presenting this DPF as a gift. The Virtual Keyboard You will use a virtual keyboard for entering your personalized greeting. Navigate the keyboard as follows: To select the desired characters, use to highlight... -
Page 27: Enter Greeting
Note: You can also use the remote control buttons as follows: ‘ ’ = Scroll forward through entry to edit as needed ‘ ‘ = Scroll back through entry to edit as needed = Backspace, erases last selected character ROTATE = Toggles between ABC / abc / SYM screens ZOOM Enter Greeting... -
Page 28: Assign Personal Background Image
Assign Personal Background Image You can enhance your personal greeting even more by assigning one of your own photos as the greeting background. 1. Choose the photo you want as your background, and then name it exactly showme.jpg 2. Import the file into the DPF’s internal memory (see page 16 for importing instructions). -
Page 29: Reset To Factory Defaults
Set Language 2. Select , and then select the desired language. Reset to Factory Defaults If you have changed function settings, using this feature will restore all settings to the factory pre-set defaults. HOME Setup Menu 1. On the screen, press to display the MENU 2. -
Page 30: Important Safety Precautions
B) Make sure the memory card is inserted all the way into the card slot. HOME screen, press MENU , choose Select Media C) On the Source , select the desired media source, and then press ENTER . HOME Press EXIT to return to the screen and then select the PHOTOS - PLAY button. -
Page 31: Cleaning The Dpf
Do not block the ventilation holes on the back of the DPF at any time. Keep your DPF out of direct sunlight and heat sources. Protect the power cord. Route power cords so that they are not likely to be walked on or pinched by items placed on or against them. Pay particular attention to the point where the cord attaches to the DPF. -
Page 32: Limited Warranty
LABOR: For a period of one (1) year from the date of purchase, if this product is found to be defective, Pandigital will repair or replace the product, at its option, at no charge. After this one (1) year, labor charges will be charged on a case by case basis. -
Page 33: Fcc Statement
This warranty gives you specific legal rights, and you may have other rights, which vary from state to state. All content included on the Pandigital website as well as Pandigital products, including pre-loaded demonstration images, digital media, digital cookbooks, text,...