Motorola MBP26 User Manual
Hide thumbs
Also See for MBP26:
- User manual (27 pages) ,
- Quick start manual (2 pages) ,
- Quick start manual (2 pages)

Related Manuals for Motorola MBP26


Summary of Contents for Motorola MBP26
- Page 1 USER’S GUIDE MBP26, MBP26/2, MBP26/3, MBP26/4 BABY MONITOR USER’S GUIDE The features described in User's Guide are subject to modifications without prior notice.
- Page 2 Please retain your original dated sales receipt for your records. For warranty service of your Motorola product, you will need to provide a copy of your dated sales receipt to confirm warranty status.
-
Page 3: Menu Icons
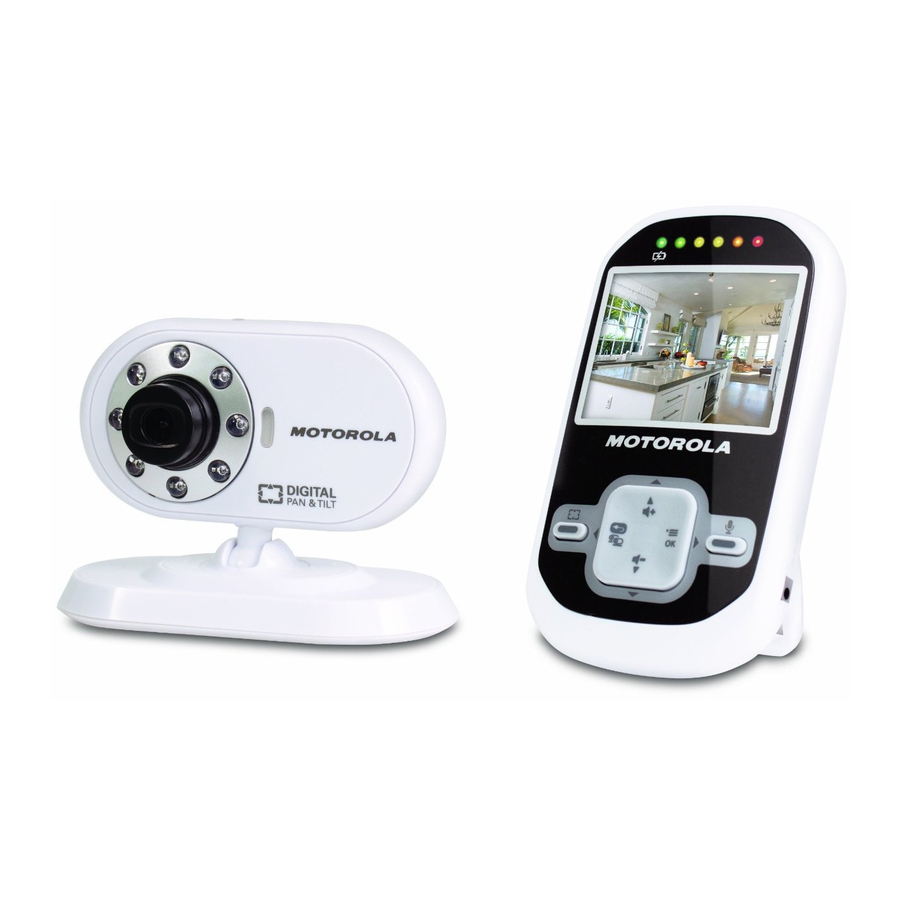
Overview of the Parent Unit 1. Display (LCD screen) 7. Talk Key Press and hold to talk back through 2. Scroll Up/Volume+ Button the camera. 3. Scroll Down/Volume- Button 8. Power indicator LED Blue when 4. Return/Switch Camera Button main adaptor power ON. Press to return to previous menu level. -
Page 4: Baby Unit Overview
Overview of Your Baby Unit 1. Photo Sensor (Night Vision Mode) 6. Power Adapter Socket 2. Camera Lens 7. Pair Key 3. Infrared LEDs 8. Microphone 4. Power LED 9. Speaker 5. ON/OFF Switch Important guidelines for installing your Baby Monitor •... -
Page 5: Table Of Contents
Table of contents 1. Safety Instructions ................. 6 2. Getting Started ................8 Baby Unit Power Supply..............8 Parent Unit Battery Installation ............8 Parent Unit Power Supply ..............9 Registration (Pairing)..............11 3. Using the Baby Monitor ............... 12 Setting up ..................12 Night Vision Mode ................12 Video ON/OFF................12 Talk Mode..................12 4. -
Page 6: Safety Instructions
1. Safety Instructions WARNING: STRANGULATION HAZARD - Keep the unit and adapter cord more than 1 metre from the cot and out of baby’s reach. NEVER place camera or cords within the cot. Secure the cord more than 1 metre away from baby’s reach. Never use extension cords with AC Adapters. - Page 7 • Test this monitor and all its functions so that you are familiar with it prior to actual use. • Do not use the baby monitor in moist places or close to water. • Do not install the baby monitor in extreme cold or heat, or in direct sunlight, or close to a heat source.
-
Page 8: Getting Started
2. Getting Started Baby Unit Power Supply 1. Connect the small plug of the power adapter to the baby unit (camera) and the other end to the electrical outlet. NOTE Only use the enclosed power adapter (6V DC / 500mA) with the slightly larger DC plug. -
Page 9: Parent Unit Power Supply
Small cross head or Flat end screw driver. 2. Place the battery cover over the compartment and gently tighten the screw in a clockwise direction using a Small cross head or Flat end screwdriver. Parent Unit Power Supply IMPORTANT Installing the rechargeable battery pack and charging it fully before use is recommended. - Page 10 4. IfIf there is no connection or you are out of range, the video display will go off and the symbol will flash on the LCD display, and the unit will beep every 9 seconds. (If the unit is on scan symbol displays.) Move the parent unit closer to the baby until the link is re-established.
-
Page 11: Registration (Pairing)
Registration (Pairing) The Baby monitor camera is pre-registered to your Parent Unit. You do not need to register it again unless the Baby Unit loses its link with the Parent Unit. To re-register your Baby Unit, or register a new Baby Unit, follow the procedure below: 1. -
Page 12: Using The Baby Monitor
3. Using the Baby Monitor Setting up • Place the baby unit in a convenient location (e.g. on a table) and point the camera lens towards the area you want to monitor. • Adjust the baby unit's head angle by rotating the camera up, down, left and right until you are satisfied with the image in the parent unit. -
Page 13: Parent Unit Menu Options
4. Parent Unit Menu Options Volume 1. While in monitor mode, press the UP button or DOWN button to select the desired volume level from level 1 ~ 8. (The default volume level setting is level Brightness 1. Press the button and the first menu option will appear. -
Page 14: Camera Control
Camera Control 4.5.1 Add (pair) a camera 1. Press the button and the first menu option will appear. 2. Press the DOWN button to select the ADD CAMERA icon press the button to confirm. will pop up, press the UP button or DOWN button to select the desired Camera identification number, and press the button to start searching for a camera unit. -
Page 15: Scan The Cameras
NOTE You cannot delete the camera if it is the only camera paired in the system. 4.5.4 Scan the cameras 1. Press the button and the first menu option will appear. 2. Press the DOWN button to select the VIEW CAMERA icon and press the button to confirm. -
Page 16: Disposal Of The Device (Environment)
5. Disposal of The Device (environment) At the end of the product lifecycle, you should not dispose of this product with normal household waste. Take this product to a collection point for the recycling of electrical and electronic equipment. The symbol on the product, user's guide and/or box indicates this. -
Page 17: Cleaning
6. Cleaning Clean the MBP26, MBP26/2, MBP26/3, MBP26/4 with a slightly damp cloth or with an anti-static cloth. Never use cleaning agents or abrasive solvents. Cleaning and care • Do not clean any part of the product with thinners or other solvents and chemicals –- this may cause permanent damage to the product... -
Page 18: Help
7. Help Display No display • Try recharging or replacing the battery pack. • Reset the units. Disconnect the battery pack of the parent unit and unplug both the units' electrical power, then plug them back in. • Is the unit turned on? Press and hold the ON/OFF button on the parent unit to turn it •... - Page 19 Interference Noise interference on your parent unit • Your baby and parent units may be too close. Move them farther apart. • Make sure there is at least 1 to 2 metres between the 2 units to avoid audio feedback. •...
-
Page 20: General Information
To order a replacement battery pack, contact customer service. Consumer Products and Accessories Limited Warranty ("Warranty") Thank you for purchasing this Motorola branded product manufactured under license by Binatone Electronics International LTD ("BINATONE"). What Does this Warranty Cover? Subject to the exclusions contained below, BINATONE warrants that this Motorola branded product ("Product") or certified accessory... - Page 21 CONSUMER, AND IS PROVIDED IN LIEU OF ALL OTHER WARRANTIES, EXPRESS OR IMPLIED. IN NO EVENT SHALL MOTOROLA OR BINATONE BE LIABLE, WHETHER IN CONTRACT OR TORT (INCLUDING NEGLIGENCE) FOR DAMAGES IN EXCESS OF THE PURCHASE PRICE OF THE PRODUCT OR ACCESSORY, OR...
- Page 22 (c) use of the Products or Accessories for commercial purposes or subjecting the Product or Accessory to abnormal usage or conditions; or (d) other acts which are not the fault of MOTOROLA or BINATONE, are excluded from coverage. Use of Non-Motorola branded Products and Accessories. Defects or...
- Page 23 Unauthorised Service or Modification. Defects or damages resulting from service, testing, adjustment, installation, maintenance, alteration, or modification in any way by someone other than MOTOROLA, BINATONE or its authorised service centers, are excluded from coverage. Altered Products. Products or Accessories with (a) serial numbers or date tags that have been removed, altered or obliterated;...
-
Page 24: Technical Specifications
Technical Specifications Baby unit (Model: MBP26BU) Frequency 2.4GHz to 2.48GHz Image sensor colour CMOS 0.3M Pixels Lens f 2.5mm, F 2.4 IR LED 8 pcs Power Adapter: 5E-AD 060050-E; Input: 100-240V, 50/60Hz 150mA; Output: 6V, 500mA Adapter: BLJ5W060050P; Input: 100-240V, 50/60Hz 150mA;... - Page 25 Parent unit (Model: MBP26PU) Frequency 2.4GHz to 2.48GHz Display 2.4" diagonal Display colours 16M colour LCD Brightness control 8 steps Volume control 8 steps Power Adapter: 5E-AD 060050-E; Input: 100-240V, 50/60Hz 150mA; Output: 6V, 500mA Adapter: BLJ5W060050P; Input: 100-240V, 50/60Hz 150mA; Output: 6V, 500mA WARNING Use only with provided power supply.
- Page 26 NW2 7HF,United Kingdom. Declare under our sole responsibility that the following product Type of equipment: Digital Baby Monitor Model Name: MBP26, MBP26/2, MBP26/3, MBP26/4 Country of Origin: China Brand: Motorola complies with the essential protection requirements of R&TTE Directive 1999/5/EC on the...
- Page 27 MOTOROLA and the Stylized M Logo, are trademarks or registered trademarks of Motorola Trademark Holdings, LLC. and are used under license. All other trademarks are the property of their respective owners. © 2013 Motorola Mobility LLC. All rights reserved. Version 3.0 Printed in China...