Table of Contents
Quick Links
HOME APPLIANCES
Installation Instructions
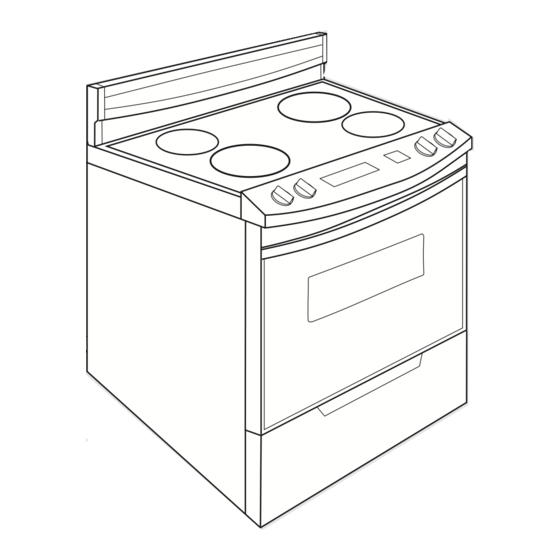
30" Electric Range
Slide-in
Range
WARNING
Tip Over Hazard
A child or adult can tip the range
and be killed.
Connect anti-tip bracket to rear
range foot.
Reconnect the anti-tip bracket, if
the range is moved.
Failure to follow these instructions
can result in death or serious
burns to children and adults.
®
with self-cleaning
thermal/convection
oven
Freestanding
Range
Quick Reference
Table of Contents:
Pages
2
Before you start
Product dimensions
3
Cabinet dimensions/requirements
3 - 4
4
Electrical requirements
5 - 8
Installation steps
9
Check operation
10
If range does not operate
10
If you need assistance/service
10
Moving the range
If you need assistance:
Check your Use and Care Guide for a toll-free number to
call or call the dealer from whom you purchased this
appliance. The dealer is listed in the Yellow Pages of your
phone directory under "Appliances — Household —
Major — Service and Repair. "
Call when you:
Have questions about range installation or operation.
Need to obtain the name and number of an authorized
service company.
When you call, you will need:
The range model number.
The range serial number.
Both numbers are listed on the model/serial rating plate
located on the oven frame behind the storage drawer
panel.
IMPORTANT:
Read and save these instructions.
IMPORTANT:
Installer: Leave Installation Instructions with the homeowner.
Homeowner: Keep Installation Instructions for future reference.
Save Installation Instructions for local electrical inspector's use.
Part No. 9757988
www.kitchenaid.com
Table of Contents

Related Manuals for KitchenAid Convection Oven


Summary of Contents for KitchenAid Convection Oven
- Page 1 Homeowner: Keep Installation Instructions for future reference. Save Installation Instructions for local electrical inspector's use. Before you start Product dimensions Cabinet dimensions/requirements Electrical requirements Installation steps Check operation If range does not operate If you need assistance/service Moving the range Part No. 9757988 www.kitchenaid.com...
-
Page 2: Tools Needed
Before you start... Your safety and the safety of others are very important. We have provided many important safety messages in this manual and on your appliance. Always read and obey all safety messages. This is the safety alert symbol. This symbol alerts you to potential hazards that can kill or hurt you and others. -
Page 3: Product Dimensions
Product dimensions Freestanding Range 30" (76.2 cm) 8-1/4" cooktop (21 cm) width 1" (2.5 cm) spacer 27-3/4" (70.5 cm) depth with handle Cabinet dimensions/requirements Freestanding Range 13" (33 cm) max. upper cabinet depth 30" (76.2 cm) min. cabinet opening width 18"... -
Page 4: Electrical Requirements
Slide-in ranges: countertop preparation The cooktop sides of the slide-in range fit over the cutout edge of your countertop. If you have a square finish (flat) countertop and the opening width is 30" (76.2 cm), no countertop preparation is required. Formed front-edged countertops: Must have molded edge shaved flat 1/2"... -
Page 5: Electrical Connection
Now start... WARNING Excessive Weight Hazard Use two or more people to move and install range. Failure to do so can result in back or other injury. Put on safety glasses and gloves. Remove shipping materials, tape and protective film from range. Keep cardboard bottom and shipping base under range. - Page 6 Power supply cord method: NOTE: The bag containing three aluminum terminal lugs is not used when connecting the range using a power supply cord. WARNING Electrical Shock Hazard Disconnect power before servicing. Use a new 40 amp power supply cord. Plug into a grounded outlet.
- Page 7 Direct wire method: Copper or Aluminum wire NOTE: The bag containing three aluminum terminal lugs must be used when making a direct wire connection. WARNING Electrical Shock Hazard Disconnect power before servicing. Use 8 gauge copper or 6 gauge aluminum wire. Electrically ground range.
-
Page 8: Operating Position
Operating position Move range close to cabinet opening. Remove cardboard or hardboard from under range. Carefully move range into final position. Pull drawer open to first stop position. Lift front of drawer to clear white wheels in drawer guides. Remove drawer and set it aside on a protected surface. -
Page 9: Check Operation
Press the “CANCEL/OFF” pad. To get the most efficient use from your new electric range, read your KitchenAid Use and Care Guide. Keep Installation Instructions and Guide close to the electric range for easy reference. -
Page 10: If You Need Assistance
If you need service: In the event that your KitchenAid appliance should need service, call the dealer from whom you purchased the appliance or a KitchenAid- authorized service company. - Page 11 Notes...
- Page 12 ® HOME APPLIANCES Part No. 9757988 © 2003 KitchenAid ® Registered Trademark of KitchenAid. Prepared by KitchenAid, Benton Harbor, Michigan 49022 Printed in U.S.A.