Table of Contents
Operating instruction
Counting scales
KERN CXB/CXP
Version 1.6
11/2010
GB
KERN & Sohn GmbH
Ziegelei 1
D-72336 Balingen
E-Mail: [email protected]
Tel: +49-[0]7433- 9933-0
Fax: +49-[0]7433-9933-149
Internet: www.kern-sohn.com
CXB/CXP-BA-e-1016
Table of Contents

Related Manuals for KERN CXB 3K0.2


Summary of Contents for KERN CXB 3K0.2
-
Page 1: Operating Instruction
KERN & Sohn GmbH Ziegelei 1 Tel: +49-[0]7433- 9933-0 D-72336 Balingen Fax: +49-[0]7433-9933-149 E-Mail: [email protected] Internet: www.kern-sohn.com Operating instruction Counting scales KERN CXB/CXP Version 1.6 11/2010 CXB/CXP-BA-e-1016... -
Page 2: Table Of Contents
KERN CXB/CXP Version 1.6 11/2010 Operating instruction Counting scales Table of Contents Technical data ....................4 Declaration of conformity ................7 Appliance overview ..................8 Overview of display........................ 10 3.1.1 Display weight .......................... 11 3.1.2 Display reference weight ......................11 3.1.3... - Page 3 Automatic reference optimization ..................27 Store/call reference weight ....................28 9.4.1 Save............................28 9.4.2 Call-up ............................29 Count with tolerance control - Fill to target ................ 29 9.5.1 Set tolerance value for target number of pieces ..............29 9.5.2 Set tolerance value for target weight..................30 Taring......................
-
Page 4: Technical Data
1 Technical data CXB models: KERN CXB 3K0.2 CXB 6K0.5 CXB 15K1 CXB 30 K2 Readability (d) 0.2 g 0.5 g Weighing range (max) 3 kg 6 kg 15 kg 30 kg Reproducibility 0.2 g 0.5 g Linearity ± 0.4 g ±... - Page 5 KERN 6K2M 15K5M 30K10M 3K1M Readability (d) 10 g Weighing range (Max) 3 kg 6 kg 15 kg 30 kg Reproducibility 10 g Linearity 10 g 20 g Verification class Stabilization time 2 sec. 2 sec. 2 sec. 2 sec.
- Page 6 CXP models: KERN CXP 30K2 CXP 75K5 CXP 150K10 Readability (d) 10 g Weighing range (max) 30 kg 75 kg 150 kg Reproducibility 10 g Linearity ± 4 g ± 10 g ± 20 g Stabilization time 2 sec. 2 sec.
-
Page 7: Declaration Of Conformity
Electronic Balance: KERN CXB/RXB/CXP EU Directive Standards 2004/108/EC EN 61326-1:2006 EN 61000-3-2:2006 EN 61000-3-3:1995/A2:2005 2006/95/EC EN 61010-1:2001 Date: 12.07.2010 Signature: KERN & Sohn GmbH Management KERN & Sohn GmbH, Ziegelei 1, D-72336 Balingen, Tel. +49-[0]7433/9933-0 Fax +49-[0]7433/9933-149, E-Mail: [email protected], Internet: www.kern-sohn.com CXB/CXP-BA-e-1016... -
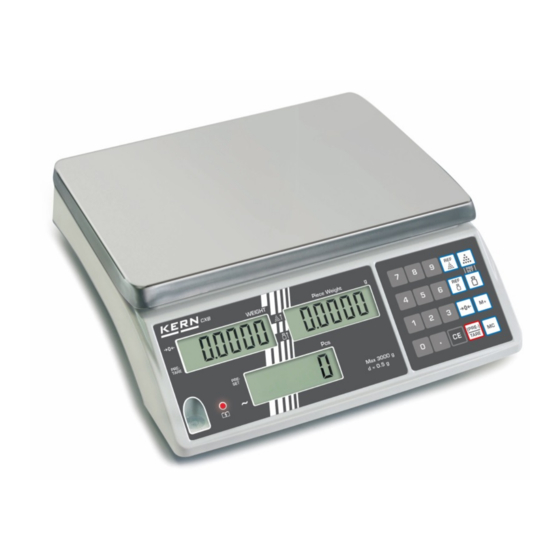
Page 8: Appliance Overview
3 Appliance overview CXB models: 1. Bubble level 2. Battery compartment 3. Mains cable connection 4. ON/OFF switch CXB/CXP-BA-e-1016... - Page 9 CXP models: 1. ON/OFF switch 2. Mains cable connection 3. RS 232 interface 4. Bubble level CXB/CXP-BA-e-1016...
-
Page 10: Overview Of Display
3.1 Overview of display CXB models: Weight Reference weight Loading status display Pieces CXP models: Weight Reference weight Pieces Loading status display CXB/CXP-BA-e-1016... -
Page 11: Display Weight
3.1.1 Display weight Here, the weight of your goods is displayed. Overlay indicates: Zeroing display PRE- Tare in memory TARE Battery very low 3.1.2 Display reference weight The reference weight of a sample is shown here. This value is either entered by user of calculated by balance. -
Page 12: Keyboard Overview
3.2 Keyboard overview CXB models: CXP models: CXB/CXP-BA-e-1016... - Page 13 Choice Function • Number keys • Delete key • Call counting with tolerance control • Store reference weights in memory • Call stored reference weights • Addition in total memory • Call up total memory • Delete summation memory • Enter reference weight through weighing •...
-
Page 14: Basic Information (General)
The balance may only be used according to the described conditions. Other areas of use must be released by KERN in writing. 4.3 Warranty Warranty claims shall be voided in case •... -
Page 15: Monitoring Of Test Resources
Infor- mation is available on KERN’s home page (www.kern-sohn.com with regard to the monitoring of balance test substances and the test weights required for this. In KERN’s accredited DKD calibration laboratory test weights and balances may be... -
Page 16: Unpacking, Setup And Commissioning
7 Unpacking, Setup and Commissioning 7.1 Installation Site, Location of Use The balances are designed in a way that reliable weighing results are achieved in common conditions of use. You will work accurately and fast, if you select the right location for your balance. Therefore, observe the following for the installation site: •... -
Page 17: Setup
7.2.1 Setup Level balance with foot screws until the air bubble of the water balance is in the pre- scribed circle. Models CXP: Weighing plate Platform Cantilever Display part Screws (x 2) Support Spring Screws (x 4) Substructure Allen keys A) Insert screw (3) in eye of spring (4) and screw it down. -
Page 18: Scope Of Delivery
7.3 Mains connection Power is supplied via the external mains adapter. The stated voltage value must be the same as the local voltage. Only use original KERN mains adapters. Using other makes requires consent by KERN. 7.4 Battery power supply The optionally supplied battery is charged with the supplied power supply. -
Page 19: Start-Up
7.5.1 Start-up Turn on scales with ON/OFF switch (left). The balance will carry out a self-test As soon as the weight display shows "0" in all the three display windows your balance is ready to weigh. On CXP models (with RS 232) an internal number appears before the balance counts down to zero. -
Page 20: Adjustment With External Weight
7.6 Adjustment with external weight As the acceleration value due to gravity is not the same at every location on earth, each balance must be coordinated - in compliance with the underlying physical weighing principle - to the existing acceleration due to gravity at its place of location (only if the balance has not already been adjusted to the location in the factory). -
Page 21: Adjustment Of Models Cxb
7.6.2 Adjustment of models CXB Operation Ensure that there are no objects on the weighing plate. The display shows: Press : If „-----„ is displayed, press : „01 FnC“ is displayed: 12345 Press : „02 EC“ is displayed: Press : „EC 00“ appears, the first digit flashes: Use numeric key to enter „01“... - Page 22 12345 (Example) Press , then 12345 (Example) The value of the used adjustment weight appears flashing Place the adjustment weight Press : „EC01“ is displayed, cipher „1“ flashes Take away weight and press Press anew, herewith the adjustment process is finished. CXB/CXP-BA-e-1016...
-
Page 23: Adjustment Of Models Cxb_M
* The adjustment should be made with the recommended adjustment weight (see chap. 1 "Technical data"). Weights of different nominal values may be used for ad- justment but are not optimal for technical measuring. Info about adjustment weights can be found on the Internet at: http://www.kern- sohn.com CXB/CXP-BA-e-1016... -
Page 24: Verification
8 Verification General introduction: According to EU directive 90/384/EEC balances must be verified if they are used as follows (legally controlled area): a) For commercial transactions if the price of goods is determined by weighing. b) For the production of medicines in pharmacies as well as for analyses in the medical and pharmaceutical laboratory. -
Page 25: Adjustment Key And Seals
8.1 Adjustment key and seals When verification of a scale is finished, the positions indicated on the scale are sealed. Verification of a scale without a seal is invalid. Position of seals: SEAL SEAL SEAL CXB/CXP-BA-e-1016... -
Page 26: Parts Counting
9 Parts counting With parts counting you can either count parts into a container or remove parts from a container. To count a greater number of parts the average weight per part has to be determined with a small quantity (reference quantity). The larger the reference quantity, the higher the counting exactness. -
Page 27: Numeric Entering Of The Reference Weight
9.2 Numeric entering of the reference weight If you know the reference weight/piece you can enter this via number keys. Enter reference weight via number keys 1. 8 33 PRE- TARE Confirm with 1. 8 33 PRE- TARE Reference weight Now you can place the parts to be counted onto the weighing plate. -
Page 28: Store/Call Reference Weight
9.4 Store/call reference weight There are 10 memory locations at your disposal (occupied via number keys 0 -9). 9.4.1 Save Enter the reference weight to be stored 0. 0 PRE- TARE Press button PlSET PRE- TARE Press button PlSET PRE- TARE Enter the storage location for the reference weight via the number keys (0 - 9) 0. -
Page 29: Call-Up
9.4.2 Call-up When the reference weight is required at a later point in time it can be called by pressing the key and entering the relevant storage location number. Press button PlSET PRE- TARE Enter memory location (0 - 9) via number keys and the stored reference weight will appear. -
Page 30: Set Tolerance Value For Target Weight
Press button ----- PRE- TARE Press button 0. 0 PRE- TARE 9.5.2 Set tolerance value for target weight Reaching the target value will be indicated by an audio signal and [-efPST-] will be flashing in the reference window Press button ----- PRE- TARE... -
Page 31: Taring
10 Taring The dead weight of any weighing container may be tared away by pressing a button, so that the following weighings show the net weight of the goods to be weighed. 10.1 Determination of the tare weight by weighing Place empty tare container on the weighing plate. -
Page 32: Numerical Input Of Tare (Pre-Tare)
10.2 Numerical input of tare (PRE-TARE) Pre-setting PRE-TARE mode (not models CXB-M) Press key, [CEnTR] appears on the weight display. ------ CEnTR ------ Press the key during this display USER Press button USER PTTXP Use the keys to select the desired setting: PRE-TARE setting "0"... - Page 33 PRE-TARE setting „1“: Objects present on weighing plate. 177. 5 1. 7 752 PRE- TARE Enter your tara weight via number keys. 177. 5 1. 0 PRE- TARE Press the key. The net weight of the goods to be weighed is displayed 176.
- Page 34 PRE-TARE setting „0“: Remove all objects from weighing plate. PRE- TARE Press PlETA 0. 0 ----- PRE- TARE Enter tare via number keys. PlETA 6. 8 ----- PRE- TARE Press - key, tare weight is indicated as negative value -6. 8 ----- PRE- TARE...
-
Page 35: Numerical Input Of Tare (Pre-Tare)
10.3 Numerical input of tare (PRE-TARE) Modelle CXB-M: PRE-TARE setting „1“: Objects present on weighing plate. 177. 5 1. 7 752 PRE- TARE Enter your tara weight via number keys. 177. 5 1. 0 PRE- TARE The net weight of the goods to be weighed is displayed 176. - Page 36 PRE-TARE setting „0“: Remove all objects from weighing plate. PRE- TARE Press - key PlETA 0. 0 ----- PRE- TARE Enter your tara weight via number keys. PlETA 6. 8 ----- PRE- TARE Press - key, tare weight is indicated as negative value -6.
-
Page 37: Add Up
11 Add up The balance is equipped with a summation memory used for adding up of identical counted parts to total quantity and total weight. 11.1 Add up “number parts" Select reference weight and place number of parts for first weighing. 118. -
Page 38: Add Up "Weight
11.2 Add up “weight" Place weight on weighing plate. 118. 3 PRE- TARE The display value is added to the summation memory by pressing the key. ----- ----- PRE- TARE The [ ] display next to "M+" indicates the stored value. After dead stop control was carried out the balance will return automatically to counting mode. -
Page 39: Delete Stored Values
11.3 Delete stored values Unload balance and press the key. Stored values, total weight, total number of pieces and number of weighings will be set to zero. The [ ] display next to "M+" disappears. 12 Application menu To adjust the balance to individual requirements, use the application menu to change settings for the balance 12.1 Navigation in the menu Press... -
Page 40: Menu Overview [User]
12.2 Menu overview [USER] Function Choice Parame- ter selec- Description of function tion Display Weighing data pop up for 3 sec. after key was pressed Display Weighing data remain popped up after weighing data in key was pressed until key is op- nnPLU summation erated... -
Page 41: Configurations Menu
13 Configurations menu 13.1.1 Display background illumination (not models CXB-M) The back light for the display can be adjusted as follows: Adjustment Function This display will appear Auto back- Press key, [CEnTR] appears on the backlit for weight value light weight display Press the key during >... -
Page 42: Setting The Display Speed
13.1.2 Setting the display speed (not models CXB-M) You may set values ranging from 01 to 15 as a display speed: 01 = slow and sensitive 15 = fast and insensitive Adjustment Press key, [CEnTR] appears on the weight display. Press the key during this display. -
Page 43: Data Output
14 Data output (CXP models only) The balance is typically equipped with a RS 232C interface. 14.1 RS 232C interface The RS 232C interface allows a bi-directional data exchange from the balance to ex- ternal devices. This data exchange is asynchronous using ASCII - Code. Pin allocation of balance output plug: Technical specifications of interface: Baud rate... -
Page 44: Description Of Interface
14.2 Description of interface The selection of a certain operating mode allows you to set the output format, the output control, the transmission speed and the parity bit. Navigation in the menu: Press key, [CEnTR] appears on the reference weight display. During this display press the key, on the weight display appears [FVnCT]. - Page 45 Number of output values STl XX X: 0 – F (0-15) Confirm setting X by pressing the key, then enter settings according to table 2. See also delineation 1 (example for input) XXXXXX Type of output values STl XX 40 XX K0SET Not documented PAlAL...
- Page 46 Table 1: Code Significance Output after pressing M+ Printout header line Printout last line Table 2: Pre -character Code Description End -character code code Gross Tare Reference weight Weighing unit Memory # Pieces Stability display None User defined input in ASCII Cod#1 User defined input in ASCII Cod#2 Decimal point weight Decimal point reference weight...
- Page 47 Delineation 1: Number of positions (max. 15) 0 : 1.- 4. Position 1 : 5. - 8. Position Code (Tab. 1) 2 : 9.- 12. Position 3 :13.-15. Position Net (Tab. 2) Gross Piece number Reference weight ( For codes see table 2) Output of this setting: Reference weight Number pcs.
-
Page 48: Example: Setting An Output Format
14.2.1 Example: Setting an output format Call up function Piece number Weight Reference weight STl XX Use number keys to select desired code (XX, see table 1). Example 00 = Output after pressing M+ STl 00 Confirm setting by pressing the key, reference display is flashing. -
Page 49: Service, Maintenance, Disposal
Spilled weighing goods must be removed immediately. 15.2 Service, maintenance The appliance may only be opened by trained service technicians who are authorized by KERN. Before opening, disconnect from power supply. 15.3 Disposal Disposal of packaging and appliance must be carried out by operator according to valid national or regional law of the location where the appliance is used. -
Page 50: Instant Help
16 Instant help In case of an error in the program process, briefly turn off the balance and disconnect from power supply. The weighing process must then be restarted from the beginning. Fault Possible cause • The balance is not switched on. The displayed weight does not glow. -
Page 51: Appendix Ascii Code Table
17 Appendix ASCII CODE table symbol symbol (ZERO) Ctrl 2 & & Ctrl A Ctrl B Ctrl C Ctrl D Ctrl E Ctrl F Ctrl G Backspace Ctrl J Ctrl K Ctrl L Enter Ctrl N Ctrl O Ctrl P Ctrl Q Ctrl R Ctrl S... - Page 52 symbol symbol ¦ ¦ Δ Ctrl ← Ç Alt 128 ü Alt 129 é Alt 130 â Alt 131 ä Alt 132 à Alt 133 å Alt 134 ç Alt 135 ê Alt 136 ë Alt 137 è Alt 138 ï...
- Page 53 symbol HEX symbol £ Alt 156 ─ Alt 196 ┼ ¥ Alt 157 Alt 197 Alt 158 ╞ Alt 198 Alt 159 ╟ Alt 199 ƒ ╚ á Alt 160 Alt 200 ╔ í Alt 161 Alt 201 ó Alt 162 ╩...
- Page 54 symbol symbol Alt 236 ÷ Alt 246 Alt 237 Alt 247 ˜ Alt 238 º Alt 248 Alt 239 • Alt 249 Alt 240 · Alt 250 Alt 241 Alt 251 ± Alt 242 Alt 252 Alt 243 ² Alt 253 Alt 244 Alt 254 ¦...