Table of Contents
Quick Links
ELECTRIC OVEN
FOUR ÉLECTRIQUE
HORNO ELÉCTRICO
EO1270 EO1270 B EO1270 1B
Register this product on-line and receive a free trial issue of Cook's Illustrated. Visit
www.delonghiregistration.com.
Visit www.delonghi.com for a list of service centers near you.
Enregistrez ce produit en ligne et recevez un numéro gratuit de Cook's Illustrated. Visitez
www.delonghiregistration.com.
Visitez www.delonghi.com pour y voir une liste des centres de réparation proches de
chez vous.
Registre este producto en línea y reciba un ejemplar gratis de Cook's Illustrated. Visite
www.delonghiregistration.com.
Visite www.delonghi.com para ver la lista de centros de servicios cercanos a usted.
Instructions for use
Keep these instructions
Mode d'emploi
Conservez cette notice
Instrucciones para el uso
Repase y guarde estas instrucciones
Lea cuidadosamente este instructivo antes de usar su aparato.
ELECTRICAL SPECIFICATIONS: CARACTÉRISTIQUES ÉLECTRIQUES: CARACTERISTICAS
ELECTRICAS:
120 V~ 60 Hz 1 400 W
Table of Contents

Related Manuals for DeLonghi EO1270


Summary of Contents for DeLonghi EO1270
-
Page 1: Electric Oven
Enregistrez ce produit en ligne et recevez un numéro gratuit de Cook's Illustrated. Visitez www.delonghiregistration.com. Visitez www.delonghi.com pour y voir une liste des centres de réparation proches de chez vous. Registre este producto en línea y reciba un ejemplar gratis de Cook's Illustrated. Visite www.delonghiregistration.com. -
Page 2: Electrical Connection
ELECTRICAL CONNECTION If you are not sure that the power outlet are properly grounded, contact a qualified electrician. If an extension cord Only use a three-pin, 120 Volt, 60 Hz power outlet is required, only use three-wire extension cords with three- GROUNDING INSTRUCTIONS pin plugs and sockets that fit the plug on the appliance. -
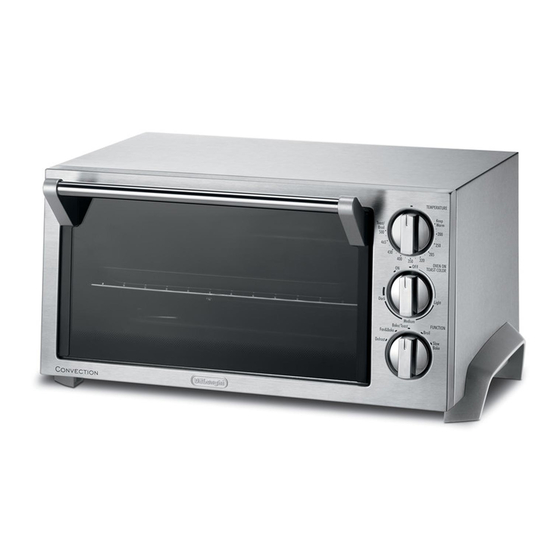
Page 3: Description Of The Appliance
DESCRIPTION OF THE APPLIANCE thermostat knob timer knob indicator light function selector knob glass door bottom heating element 12” pizza-shaped wire rack bake pan reversible wire rack (if supplied) crumb tray M top heating element interior light (if supplied) broil rack (if supplied) -
Page 4: Important Warnings
those it has been designed for. IMPORTANT WARNINGS 15. Use maximum care when removing the bake pan or When using electrical appliances, a number of funda- throwing out the hot fat. mental safety rules must be observed, including the fol- 16. -
Page 5: Summary Table
SUMMARY TABLE Wire rack and Thermostat knob Function selector Notes/Tips Program accessory position knob position position • Defrost DEFROST Delicate cooking 200°F - 465°F SLOW BAKE BAKE/TOAST Keeping warm KEEP WARM Ideal for lasagna, meat, pizza, cakes in general, foods that should be crunchy on the sur- face (“au gratin”) and bread. -
Page 6: Using The Controls
USING THE CONTROLS BAKE/TOAST (only top heating Thermostat knob (A) element and bottom Select the desired temperature, as follows: heating element on) • To defrost (see page 7): Thermostat knob in the “•” position. • To keep food warm (see page 7): Thermostat knob in the “KEEP WARM”... -
Page 7: Using The Oven
USING THE OVEN the dish with the food on the rack. • To terminate the operation, turn the Timer knob (B) ma- General tips nually to the “OFF” position. • When cooking with the convection oven, traditional oven It is recommended not to leave the foods in the oven for and grilling, always preheat the oven for 5 minutes to too long, as these may dry out. - Page 8 Thermostat wire rack Program Times Comments and tips position knob Macaroni “au gratin” 1 kg/2.2 lb 430°F 20 min. lower Turn the bake pan halfway through cooking. Lasagna 1 kg/2.2 lb 430°F 20 min. Use an ovenproof dish, turn after 10 min. “...
- Page 9 Note: Toast This appliance can automatically perform various degrees of • The dimensions of the wire rack (G) allow six slices of toasting. bread to be toasted at the same time. Best results are If, however, lighter toasting is preferred, simply stop the au- achieved, however, with four slices at a time.
- Page 10 • Close the door. Broil • Turn the Timer knob (B) to the “ON” position. • Place the flat wire rack (G) in the upper guide. • When cooking is completed, turn the Timer knob (B) ma- • Turn the function selector knob (D) to the BROIL posi- nually to the “OFF”...
-
Page 11: Cleaning And Maintenance
CLEANING AND MAINTENANCE Frequent cleaning prevents the formation of smoke and bad odors during cooking. Do not let fat accumulate inside the ap- pliance. Before any maintenance or cleaning operation, unplug the oven and wait for it to cool down. Clean the door, the inside walls and the enamel or painted surfaces of the oven with a soap and water solution;... -
Page 12: Limited Warranty
If repairs become necessary, see contact information below: U.S. Residents: Please contact our toll free hotline at 01-800-322-3848 or log onto our website at www.delonghi.com. Residents of Canada: Please contact our toll free hotline at 01-888-335-6644 or log onto our website at www.delonghi.com.