Toshiba e-studio 2330C Quick Start Manual
Multifunctional digital color system
Hide thumbs
Also See for e-studio 2330C:
- Imaging manual (262 pages) ,
- Printing manual (178 pages) ,
- Troubleshooting manual (122 pages)
Table of Contents
Quick Links
Table of Contents

Related Manuals for Toshiba e-studio 2330C


Summary of Contents for Toshiba e-studio 2330C
- Page 2 ©2008 TOSHIBA TEC CORPORATION All rights reserved Under the copyright laws, this manual cannot be reproduced in any form without prior written permission of TTEC. No patent liability is assumed, however, with respect to the use of the information contained herein.
- Page 3 Preface Thank you for purchasing the TOSHIBA Multifunctional Digital Color Systems. This Quick Start Guide describes the preparation of the operation, the basic and advanced usage of this equipment. Be sure to read this manual before you use this equipment. Keep this manual handy and retain it for future reference.
-
Page 4: Lineup Of Our Manuals
This Quick Start Guide describes the preparation of the operation, the basic and advanced usage of this equipment. Safety Information This Safety Information describes the necessary precautions for using this TOSHIBA Multifunctional Digital Systems. For your added safety, be sure to read this booklet before using this equipment. PDF files Copying Guide This Copying Guide describes the operations and settings enabled with the [COPY] button on the control panel. - Page 5 Software Installation Guide This Software Installation Guide describes the installation procedures of printer drivers and utilities. Printing Guide This Printing Guide describes the settings of printer drivers required for printing with this equipment and the various printing procedures. TopAccess Guide This TopAccess Guide describes procedures for remote setup and management of this equipment from a web-based utility, the “TopAccess”.
-
Page 6: How To Read This Manual
How to Read This Manual Symbols in this manual In this manual, some important items are described with the symbols shown below. Be sure to read these items before using this equipment. Indicates a potentially hazardous situation which, if not avoided, could result in death, serious injury, or WARNING serious damage, or fire in the equipment or surrounding assets. -
Page 7: Table Of Contents
CONTENTS Preface .................. Lineup of Our Manuals . - Page 9 Chapter PREPARATIONS Items Included in This Product ........8 CD-ROM .
-
Page 10: Chapter Preparations
Chapter 1 PREPARATIONS Items Included in This Product The items included in this product are shown below. The following items are included in the e-STUDIO2330C/2820C/2830C/3520C/3530C/520C Multifunctional Digital Color Systems. Check that you have all the items. Items included in the product Quick Start Guide (this guide) Safety Information Client Utilities CD-ROM... -
Page 11: Cd-Rom
CD-ROM CD-ROM The software included in the Client Utilities CD-ROM is shown below. The following pieces of client software are included in the Client Utilities CD-ROM. Client software For Windows Client Software Installer PCL6 printer driver PS3 printer driver XPS printer driver TWAIN driver File downloader N/W-Fax driver... -
Page 12: Client Software
Chapter 1 PREPARATIONS Client Software This product provides you with Client software for the printing, scanning e-Filing, network management and network fax functions. Client software for the print functions PCL6 printer driver This printer driver enables users to print color or black-and-white documents with the True Type font from Windows computers. - Page 13 Client Software Client software for the network management TopAccess TopAccess enables you to view the device information, monitor jobs, create templates and manage address book from your computers using a browser. The device can be set up and maintained with the administrator’s function from your computers using a browser.
-
Page 14: Description Of Each Component
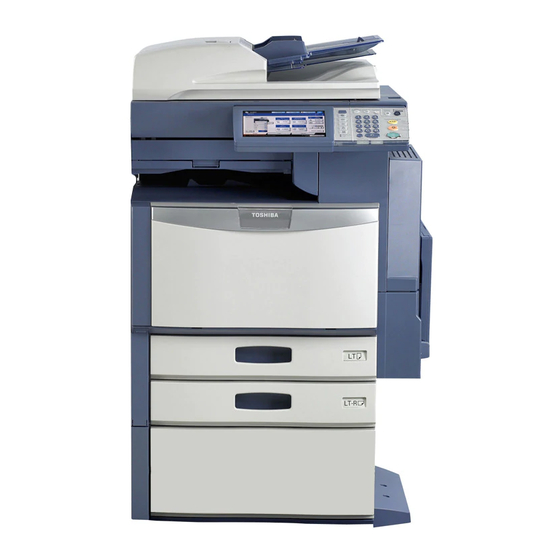
Chapter 1 PREPARATIONS Description of Each Component This section describes the names and operations of the components and options. Front / Right side Reversing Automatic Document Feeder Paper size indicator (optional, MR-3018) Paper Feed Pedestal (optional, KD-1023) and The stack of originals is scanned one sheet at a time. Both Additional Drawer Module (optional, MY-1032) sides of the originals can be scanned. - Page 15 Description of Each Component Left side / Inner side Platen sheet Paper exit stopper & P.6 “Daily Inspection” Use this to prevent the exiting paper from falling. Open this when you make many copies or prints on a larger size Original glass of paper such as A3, B, LD and LG.
- Page 16 Chapter 1 PREPARATIONS Configuration of options Original Cover (KA-3511PC) Finisher (MJ-1101) This is used to hold an original. This Finisher enables sort/group finishing and stapling. The Hole Punch Unit (optional, MJ-60) can be installed Reversing Automatic Document Feeder (MR-3018) in this Finisher. The Bridge Unit (optional, KN-520) is This unit automatically feeds a stack of originals one by required for the installation of this Finisher.
- Page 17 Description of Each Component Other options available are as follows. Contact your service technician or Toshiba product distributors for details. Work Table (KK-3511) Antenna (GN-3010) This is a small table for placing originals while the equipment is This is used when the Wireless LAN Module or Bluetooth Module being operated.
-
Page 18: Control Panel
Chapter 1 PREPARATIONS Control panel Use the buttons on the control panel for various operations and settings in the equipment. [MENU] button [ENERGY SAVER] button Use this button to display frequently used templates. Use this button for the equipment to enter the energy saving mode. - Page 19 Description of Each Component [ACCESS] button Touch panel Use this button when the department code or user Use this panel for the various settings of the copying, information has been set. If this button is pressed after scanning and Fax functions. This panel also indicates the copying, etc., the next user cannot use functions such as status of the equipment, such as when you run out of copying without keying in the department code or user...
-
Page 20: Adjusting The Angle Of The Control Panel
Chapter 1 PREPARATIONS Adjustment of the angle of the control panel Adjusting the angle of the control panel The angle of the control panel is adjustable at any angle between 7 and 52 degrees from the horizontal position. CAUTION When changing the angle of the control panel, be careful not to catch your hands in the gap between the equipment and the control panel. - Page 21 Description of Each Component Slide the stopper (in position A) slightly to the Fit the latches of the stopper in the holes in right, and then pull it out. position B and insert them by turning the stopper itself. Shift the stopper to the left until it clicks. The angle of the control panel is fixed at 7 degrees.
-
Page 22: Touch Panel
Chapter 1 PREPARATIONS Touch panel When the power is turned ON, the basic menu for the copying function appears on this touch panel. The status of the equipment is also displayed on the touch panel with messages and illustrations. The menu shown at the time of turning the power ON can be changed to one for functions other than copying, for example, Fax function. - Page 23 Description of Each Component Clearing functions selected When you press the selected button, the function which has been selected is cleared. Or the selected setting is cleared automatically by the automatic function clear* when the equipment has been left inactive for a specified period of time. Automatic function clear: This function works when a specified period of time has passed since the last paper exit or the last entry of any button.
- Page 24 Chapter 1 PREPARATIONS Setting letters The following menu appears when the entry of any letter is required for the operations of scanning, e-Filing, template and Internet Fax. Use the buttons on the touch panel for letter entry and use the digital keys on the control panel for number entry. After entering the letters, press [OK].
-
Page 25: Turning Power On/Off
Turning Power ON/OFF Turning Power ON/OFF This section explains how to turn the power ON and OFF. Turning the power ON If the MAIN POWER lamp is not lit, open the main power switch cover and turn the power ON with the main power switch. - Page 26 Chapter 1 PREPARATIONS Turning the power OFF (Shutdown) When turning OFF the power of the equipment, be sure to shut it down according to the procedure below. Check the following three points before shutdown. • No jobs should be left in the print job list. •...
-
Page 27: Energy Saving Mode
Turning Power ON/OFF Energy saving mode This equipment supports two energy saving modes; the Automatic Energy Save mode and the Sleep mode. Automatic Energy Save The equipment enters the Automatic Energy Save mode automatically after a specified period of time since its last use. -
Page 28: When Department Or User Management Is Used
Chapter 1 PREPARATIONS When Department or User Management is Used When the equipment is managed with the department or user management function, users need to enter the department code or user information before making copies, etc. Department management You can restrict users or manage copy volumes made by an individual group or department in your company using the department codes. -
Page 29: User Management
When Department or User Management is Used User management Users of the equipment can be limited and the available functions and past record of each user can be controlled by using the user management function. When the equipment is managed under this function, turn the power of the equipment ON and enter the information required (e.g. - Page 30 Chapter 1 PREPARATIONS The menu for user authentication appears. MFP local authentication, LDAP authentication Windows Domain Authentication The domain name previously set by the network administrator is displayed in [DOMAIN]. If the domain name belonging to your organization is not displayed, press [DOMAIN] and select it.
- Page 31 When Department or User Management is Used Press [USER NAME]. Enter the user name (maximum 128 letters) and then press [OK]. Press [PASSWORD].
- Page 32 Chapter 1 PREPARATIONS Enter the password (maximum 64 letters) and then press [OK]. Press [OK].
-
Page 33: Placing Paper
Placing Paper Placing Paper This section explains how to set paper in the drawers of the equipment. Pull out the drawer and set the end guide so that Release the lock and set the side guides so that it matches the paper size. they match the paper size. - Page 35 Chapter BASIC OPERATION Basic Copying Operation ........3 Basic Fax Operation .
-
Page 36: Chapter Basic Operation
Chapter 2 BASIC OPERATION Basic Copying Operation The basic color copying procedure is as follows. Press the [COPY] button to use the copying functions. Place the original(s). Original glass Reversing Automatic Document Feeder (optional) Key in the desired number of copy sets, and then press the [START] button. Refer to the Copying Guide for details. - Page 37 Basic Copying Operation In this case To stop copying Press the [STOP] button on the control panel and [MEMORY CLEAR] on the touch panel. Refer to “Chapter 2 HOW TO MAKE COPIES” in the Copying Guide for details. To perform Interrupt copying Press the [INTERRUPT] button on the control panel.
-
Page 38: Basic Fax Operation
Chapter 2 BASIC OPERATION Basic Fax Operation The basic procedure for sending a Fax is as follows (The Fax Unit is optional). Press the [FAX] button to use the Fax functions. Place the original(s). Original glass Reversing Automatic Document Feeder (optional) Specify the Fax number using the digital keys or in the address book, and then press [SEND] on the touch panel. - Page 39 Basic Fax Operation In this case If you make a mistake when dialing the Fax number Press the [CLEAR] button on the control panel to delete all the Fax numbers you entered. Or press [BACK SPACE] on the touch panel to delete them one by one. Refer to “Chapter 2 SENDING/RECEIVING A FAX”...
-
Page 40: Basic Scanning Operation
Chapter 2 BASIC OPERATION Basic Scanning Operation The basic scanning procedure is as follows. Press the [SCAN] button to use the scanning functions. Place the original(s). Original glass Reversing Automatic Document Feeder (optional) Specify the location where the scanned data will be stored, and then press [SCAN] on the touch panel. - Page 41 Basic Scanning Operation In this case To store the scanned data in e-Filing Press [e-FILING] on the touch panel. Refer to “Chapter 2 BASIC OPERATION” in the Scanning Guide and “Chapter 2 OPERATIONS WITH THIS EQUIPMENT” in the e-Filing Guide for details. To store the scanned data in a shared folder or USB device Press [FILE/USB] on the touch panel.
-
Page 42: Basic E-Filing Operation
Chapter 2 BASIC OPERATION Basic e-Filing Operation The basic e-Filing procedure is as follows. Press the [e-FILING] button to use the e-filing functions. Storing documents The originals are stored as e-Filing documents in this equipment as well as being copied. Place the original(s). -
Page 43: Printing Documents
Basic e-Filing Operation Printing Documents The procedure for printing documents stored in e-Filing is as follows. Press the box button in which the documents are stored. If the password is set in the box, enter the password and press [OK] on the touch panel. Select the document you want to print, and then press [PRINT] on the touch panel. -
Page 44: Basic Printing Operation
Chapter 2 BASIC OPERATION Basic Printing Operation The procedure for printing with a PS3 printer driver from a Windows application is as follows. Select [Print] in the [File] menu of the application. Select the printer driver of the equipment, and then click [Preferences]. Set the print options and click [OK]. - Page 45 Basic Printing Operation In this case To specify paper size or number of copy sets Click the [Basic] tab in the property dialog box of the printer driver. Refer to “Chapter 2 PRINTING FROM WINDOWS” in the Printing Guide for details. To specify 2-sided printing or N-up printing Click the [Finishing] tab in the property dialog box of the printer driver.
-
Page 46: Basic Menu Operation
The template which the user logging in can use is (GS-020) is installed. Contact your service technician or displayed. Toshiba product distributors for details. Total print counter The total print counter (Black/Full color) of the user logging in is displayed. -
Page 47: Replacement Of Supplies
Chapter REPLACEMENT OF SUPPLIES Replacing Toner Cartridge ........6 Replacing Waste Toner Box . -
Page 48: Replacing Toner Cartridge
Chapter 3 REPLACEMENT OF SUPPLIES Replacing Toner Cartridge The procedure for replacing the toner cartridge is as follows. Open the front cover. Remove the color toner cartridge you want to replace. Shake the new toner cartridge well to loosen the Pull out the seal. -
Page 49: Replacing Waste Toner Box
Replacing Waste Toner Box Replacing Waste Toner Box The procedure for replacing the waste toner box is as follows. Open the waste toner box cover. Pull out the waste toner box until the opening appears. Screw the lid on the opening of the waste toner Holding the upper section, remove the waste box. -
Page 50: Adding Staples
Chapter 3 REPLACEMENT OF SUPPLIES Adding Staples The procedure for adding staples of the Finisher (optional) is as follows. Finisher (Optional: MJ-1101) Open the front cover of the Finisher. Take off the staple cartridge. Take the empty staple case out of the staple Install a new staple case into the staple cartridge. - Page 51 Adding Staples Saddle Stitch Finisher (Optional: MJ-1030) Open the front cover of the Saddle Stitch Finisher Press the buttons on both sides of the cartridge and take off the staple cartridge. and take out the empty staple case. Install a new staple case into the staple cartridge. Press down the transparent cover and pull out the seal.
- Page 52 Chapter 3 REPLACEMENT OF SUPPLIES Saddle stitch unit Open the front cover of the Finisher, and then pull Pull the handle of the stapler toward you, and out the saddle stitch unit. then turn it clockwise. Take out two empty staple cartridges. Install two new staple cartridges.
- Page 53 Adding Staples Hanging Finisher (Optional: MJ-1031) Push the lever to separate the Hanging Finisher Take off the staple cartridge, and then take the from the equipment, and then open the cover. empty staple case out of the staple cartridge. Install a new staple case into the staple cartridge. Press down the transparent cover and pull out the seal.
-
Page 55: Chapter 4 Advanced Functions / Troubleshooting
Chapter ADVANCED FUNCTIONS / TROUBLESHOOTING Advanced Functions ..........5 Messages or Other Indications on Touch Panel . -
Page 56: Advanced Functions
Chapter 4 ADVANCED FUNCTIONS / TROUBLESHOOTING Advanced Functions This section describes the advanced functions. COPY SCAN e-FILING PRINT Making a booklet stapled at the center in 2-sided printing EXAMPLE How to print 12 pages of a B5 size file in 2- sided printing by shrinking them so that each 2 pages are printed on 1 A4 sheet, and then stapled at the center for making 10... - Page 57 Advanced Functions COPY SCAN e-FILING PRINT Copying different-sized originals and stapling copies EXAMPLE The procedure of how to copy 5 sets of different-sized originals (A4: 1 sheet, A3: 4 sheets) and staple the copies is as follows. The Reversing Automatic Document Feeder and the Finisher (optional) are required.
- Page 58 Chapter 4 ADVANCED FUNCTIONS / TROUBLESHOOTING COPY SCAN e-FILING PRINT Attaching the scanned data to an E-mail. EXAMPLE The procedure for attaching the scanned data to an E-mail and sending it to the specified E-mail address is as follows. Place the original(s). Press [E-MAIL] on the touch panel.
- Page 59 Advanced Functions COPY SCAN e-FILING PRINT Requesting a password for receiving a fax EXAMPLE The procedure for requesting a password when printing a received Fax using the ITU- T mailbox function is as follows. The Fax Unit (optional) is required. Password Press the [ADVANCED] tab, and then [ITU MAILBOX].
- Page 60 Chapter 4 ADVANCED FUNCTIONS / TROUBLESHOOTING COPY SCAN e-FILING PRINT Copying or scanning originals without blank sheets EXAMPLE The procedure for copying or scanning without blank sheets is as follows. (In this case, two blank originals are omitted when six originals are copied or scanned.) When copying Press the [EDIT] tab, and then press on the touch panel in the basic menu for the copying...
- Page 61 Advanced Functions COPY SCAN e-FILING PRINT Adding date and time to document files EXAMPLE The procedure for printing a document file stored in e-Filing with the date and time added at its bottom is as follows. 2008 . 5 . 10 11:11 Select the box in which the desired document is stored.
- Page 62 Chapter 4 ADVANCED FUNCTIONS / TROUBLESHOOTING COPY SCAN e-FILING PRINT Printing a PDF file stored in the USB device. EXAMPLE The procedure for printing 1 set of a PDF file stored in the USB device is as follows. Connect the USB device to the USB port.
- Page 63 Advanced Functions COPY SCAN e-FILING PRINT Copying or scanning originals which are to have their periphery whitened EXAMPLE To whiten the dark area on the copied image around thick originals such as booklets, carry out the following setting. When copying Press the [EDIT] tab, and then on the basic menu for the copying functions.
-
Page 64: Messages Or Other Indications On Touch Panel
Chapter 4 ADVANCED FUNCTIONS / TROUBLESHOOTING Messages or Other Indications on Touch Panel This section describes the messages, symbols and error codes displayed on the touch panel of the equipment. Alert message indication area Messages appear when paper has run out, etc. Symbols blinking on the touch panel Symbols such as paper jam, call service, etc. -
Page 65: Chapter 5 Maintenance & Specifications
Chapter MAINTENANCE & SPECIFICATIONS Daily Inspection ..........6 Specifications of Equipment . -
Page 66: Daily Inspection
Chapter 5 MAINTENANCE & SPECIFICATIONS Daily Inspection The cleaning method for the equipment is as follows. We recommend you to clean the following items weekly, so that the originals can be scanned in unsoiled conditions. Be careful not to scratch the parts that you are cleaning. Notes •... -
Page 67: Specifications Of Equipment
Specifications of Equipment Specifications of Equipment The specifications of the equipment are as follows. Acceptable paper Feeder Media type Weight Maximum sheet capacity Paper size 600 sheets (6 g/m , 7 lb. Bond) PLAIN, 6 - 05 g/m 550 sheets (80 g/m , 20 lb. - Page 68 — LT format: CG3700/3M Only Toshiba-recommended OHP film should be used. Using any other film may cause a malfunction. This type of paper is available for automatic duplex copying (A4/LT or smaller sizes are recommended). Place the sheets one by one on the bypass tray.
- Page 69 00 mm (3.3”) (W) x 855 mm (33.7”) (D) Storage capacity Max. 000 sheets or until the memory is full (Toshiba’s own chart) • This specification varies depending on the printing conditions and the environment. • Specifications and appearance are subject to change without notice in the interest of product improvement.
-
Page 70: Specifications Of Options
Chapter 5 MAINTENANCE & SPECIFICATIONS Specifications of Options The specifications of the options are as follows. Reversing Automatic Document Feeder Model name MR-308 Copy sides -side, Duplex Number of originals 00 originals (35 - 80 g/m , 9.3 - 20 lb. Bond) or 6 mm/0.63” or less in height (more than 80 g/m , 20 lb. - Page 71 Specifications of Options Finisher (MJ-1101) Model name MJ-0 Type Floor type (Console type) A3, A, A-R, A5-R, B, B5, B5-R, FOLIO, 305 mm x 57 mm, LD, LG, LT, LT-R, ST-R, COMP, 8.5”SQ, 3”LG, Acceptable paper size 2” x 8”, 8K, 6K, 6K-R Acceptable paper 6 - 280 g/m , 7 lb.
- Page 72 Chapter 5 MAINTENANCE & SPECIFICATIONS Tray loading capacity of Saddle Stitch Finisher (MJ-1030) Unit: mm (with allowable error of ±7 mm or 0.276”) Unit: mm (with allowable error of ±7 mm or 0.276”) Values in parentheses: Number of sheets (80 g/m Values in parentheses: Number of sheets (80 g/m or 20 lb.
- Page 73 Specifications of Options Tray loading capacity of Hanging Finisher (MJ-1031) Unit: mm (with allowable error of ±4 mm or 0.158”) Unit: mm (with allowable error of ±4 mm or 0.158”) Values in parentheses: Number of sheets (80 g/m Values in parentheses: Number of sheets (80 g/m or 20 lb.
- Page 74 (Total HDD accessible capacity may vary depending on operating environment.) Refer to the GD-1250/GD-1260/GD-1270 Operator's Manual for FAX Unit for details of the Fax Unit (GD-250). Toshiba-recommended paper is used for the values above. Specifications and appearance are subject to change without notice in the interest of product improvement.
-
Page 75: Index
INDEX INDEX A, B Paper exit stopper ..........13 Paper feed cover . - Page 77 Printed in China FC-2330C/2820C/2830C/3520C/3530C/4520C OME08004000...
- Page 78 6LH40006000 R071220F2300-TTEC 2008-03...