Table of Contents
Quick Links
See also:
Owner's Manual
© Copyright 2014 LG Electronics U.S.A., Inc.
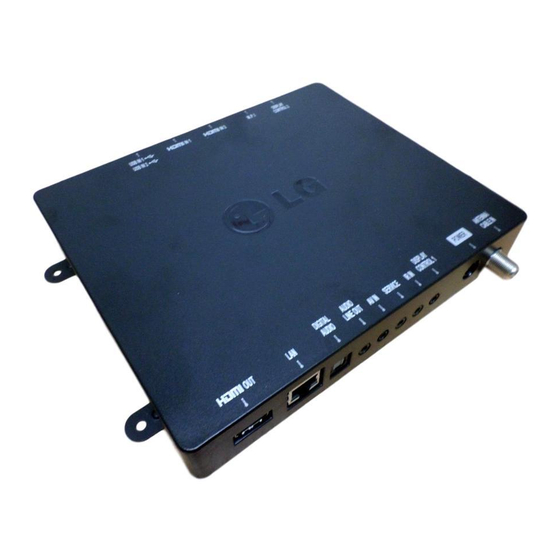
HD Commercial Interface Set-top Box
Commercial Mode Setup Guide
STB-2000
Interactive Pro:Centric
Functionality
RF or IP Content Delivery
EXPERIENCED INSTALLER
EZ-Manager Wizard
pages 15 – 22
Custom Master STB Setup
pages 35 – 38
FTG Mode of Operation
pages 45 – 51
P/N: 206-4256 (Rev A)
®
•
•
Table of Contents

Related Manuals for LG STB-2000


Summary of Contents for LG STB-2000
- Page 1 RF or IP Content Delivery • EXPERIENCED INSTALLER EZ-Manager Wizard pages 15 – 22 Custom Master STB Setup pages 35 – 38 FTG Mode of Operation pages 45 – 51 P/N: 206-4256 (Rev A) © Copyright 2014 LG Electronics U.S.A., Inc.
-
Page 2: Safety Warnings
• Consult the dealer or an experienced radio/TV technician for help. CAUTION: Do not attempt to modify this product in any way without written authorization from LG Electronics U.S.A., Inc. Unauthorized modification could void the user’s authority to operate this product. -
Page 3: Important Safety Instructions
IMPORTANT SAFETY INSTRUCTIONS Read these instructions. 17. Power Cord Caution: It is recommended that appliances be placed Keep these instructions. upon a dedicated circuit; that is, a single outlet circuit Heed all warnings. which powers only that appliance and has no additional outlets or branch circuits. - Page 4 IMPORTANT SAFETY INSTRUCTIONS 26. Do not touch the ventilation openings, as they may become (Continued from previous page) hot while the STB is operating. 22. Outdoor Antenna Grounding 27. If you smell smoke or other odors coming from the STB or If an outside antenna or cable system is connected to the hear strange sounds, unplug the power cord, and contact an product, follow the precautions below.
-
Page 5: Table Of Contents
Accessing and Using the LG Smart Install Utility ..23 STB-2000 Jack Panels....... 76 Installer Menu . -
Page 6: Stb-2000 Introduction / Setup Checklist
__ Obtain an LG Installer Remote for configuration purposes. If you are using an LG display panel, the LG remote provided with the display should be sufficient. If you are not using an LG display panel and/or if you intend to use multiple STBs/displays in a single room installation environment, an LG Installer Remote dedicated to STB control is available for purchase. -
Page 7: Stb-2000 Cabling Connections
• For commercial non-LG TVs: Use the MPI/MTI cable provided to connect DISPLAY CONTROL 2 on the STB-2000 front jack panel to the MTI (typically labeled “DATA”) port on the rear jack panel of the display. -
Page 8: Stb-2000 Cabling Diagram
4. Select the video output resolution (i.e, the STB’s video output format), and complete the appropriate Commercial Mode setup procedures, as described in this document. Note: It is recommended that you complete STB-2000 Commercial Mode setup procedures before you make external equipment connections to the STB-2000. -
Page 9: Commercial Mode Overview
STB’s CPU or Protocol Translator Card (PTC) or it resides externally from the STB (i.e., in a device from the solution provider). The STB-2000 is capable of Free-To-Guest (FTG) Mode operation via the STB CPU. Alternatively, the STB can be configured for Pass-through Mode (default). When in Pass-through Mode, the STB-2000 may also be controlled externally via its MPI port. -
Page 10: Ftg Mode
External MPI Control To control the STB using an external MPI control device, you must use the STB’s MPI port for communication purposes. Note: The STB-2000 is not equipped with an MPI card slot. FTG Mode In this mode, the STB’s CPU is configured with an FTG Channel Map, and the CPU controls and restricts the tuning operation of the STB based on this FTG Channel Map. The FTG Channel Map enables the ®... -
Page 11: Determining The Stb Operating Mode
Commercial Mode Overview (Cont.) While the STB is in FTG Mode: • Users can still access the Installer Menu using an LG Installer Remote; however, all Installer Menu items will be read-only. • Any FTG configuration changes must be made using a TLX file (typically edited in the FTG File Manager). The FTG File Manager’s FTG Channel Map Configuration and FTG Installer Menu Configuration Utilities enable you to make changes, respectively, to the FTG Channel Map and FTG Installer Menu settings as necessary. -
Page 12: Pro:centric Operation
Pro:Centric Operation Pro:Centric Interactive Menu Features LG’s Pro:Centric application enables guests to locate and select television entertainment using an interactive channel guide, check the daily weather, and view hotel and surrounding amenities via custom billboards and points-of-interest maps. Pro:Centric application features include: • Portal and information screens/pages (including a “Welcome”... -
Page 13: Pro:centric Setup
Pro:Centric Operation (Cont.) Pro:Centric Setup Administration and management options for the Pro:Centric server are described in detail in the Pro:Centric Server Admin Client User Guide. This document describes only those settings that must be specified on the STB to enable Pro:Centric remote management and/or the Pro:Centric application. • Remote management (TV E-Z Installation): The Pro:Centric server Admin Client provides remote management facilities for downloading software/firmware updates as well as facilities for downloading a TLX file for FTG Mode configuration. -
Page 14: Setting The Video Output Resolution
Setting the Video Output Resolution The first time you turn ON the STB/display panel, the Setting a Resolution screen will be displayed, and you will need to select the appropriate option—720p, 1080p, or 1366 x 768—for the STB’s video output format. You cannot proceed with STB configuration until you make a selection. Refer to documentation for the applicable display panel(s) to determine the appropriate resolution setting. -
Page 15: Ez-Manager Wizard
USB memory device. See “LG Smart Install Utility” on pages 23 to 24 for further information. Caution: Do NOT unplug the STB power cord or remove the antenna cable or, if applicable, the LAN cable during the configuration process, as doing so will interrupt the current step and may corrupt the configuration data. -
Page 16: Initiate Configuration Or Exit The Ez-Manager Wizard
EZ-Manager Wizard (Cont.) Initiate Configuration or Exit the EZ-Manager Wizard The Welcome screen provides a brief introduction to the EZ-Manager wizard. EZ-Manager Wizard Welcome to LG’s EZ-Manager Wizard • Use this setup wizard to configure the TV for Pro:Centric and/or Free- To-Guest (FTG) operation. Select ‘Next’ to continue. • If a Pro:Centric Server will not be installed and/or you do not wish to use the wizard to configure this TV for FTG Mode, you may exit the wizard. Select ‘No Pro:Centric’ to disable the Pro:Centric feature of this TV, or select ‘Exit’... -
Page 17: Tv Configuration Options
21 to 22 for further information. Note: If you have already inserted a USB memory device with the intent to use the LG Smart Install utility and the Integrated USB Downloading screen is on display, you may still set the Zoning features on this STB by selecting Previous to return to the EZ-Manager’s TV Configuration Options... - Page 18 • If you wish to use a USB memory device in conjunction with the STB’s standard USB Download Menu to complete the configuration, continue to “USB Configuration” on pages 21 to 22. • If you wish to use a USB memory device in conjunction with the LG Smart Install utility to complete the configuration, see “LG Smart Install Utility” on pages 23 to 24.
-
Page 19: Configure Pro:centric Settings
EZ-Manager Wizard (Cont.) Configure Pro:Centric Settings Once you select “Next” from the TV Configuration Options screen, EZ-Manager Wizard the Searching for Pro:Centric Server screen is displayed (see example at right), and you have the following options: Searching for Pro:Centric Server... • You can allow the EZ-Manager Wizard to proceed with a It may take 1 min 32 second(s). - Page 20 EZ-Manager Wizard (Cont.) Manual Pro:Centric Configuration 1. With the Searching for Pro:Centric Server screen on display, EZ-Manager Wizard use the arrow keys on the Installer Remote to select/highlight the Manual Pro:Centric option at the bottom right of the Searching for Pro:Centric Server... screen, and press OK.
-
Page 21: Usb Configuration
EZ-Manager Wizard (Cont.) (Continued from previous page) 4. Once all fields are completed as required, you have two EZ-Manager Wizard options (see also note below): • To save the data entered and exit the wizard, use the arrow Pro:Centric Manual Configuration Are you sure you want to exit the wizard? keys to select Exit and then press OK. - Page 22 EZ-Manager Wizard (Cont.) The procedure below assumes that the desired file(s) is/are already loaded onto the USB device. For further information on USB Download Menu functions and file requirements, and/or for information on creating configuration files, refer to the appropriate section(s) in this document. Before You Begin • If you intend to use the Zoning feature(s) on this STB, make sure to assign the appropriate TV Zone # and/or Wi-Fi Zone # in the EZ-Manager’s Zones, Label, and Room Number screen BEFORE continuing with USB Configuration. See “TV Configuration Options” on page 17 for further information.
-
Page 23: Lg Smart Install Utility
TV Zone # and/or the Wi-Fi Zone # in the STB BEFORE continuing with LG Smart Install. If the EZ- Manager is currently active, see “TV Configuration Options” on page 17 for further information. - Page 24 Downloading Data... Warning - Do not remove the USB device during this process Note: Use the arrow keys on the Installer Remote to select Previous and press OK, as necessary, to exit the LG Smart Maintenance File Complete File Name : STB-2000-UA00001.TLX...
-
Page 25: Installer Menu
Once you re-enter the correct password (e.g., press 9-8-7-6 + EXIT), the STB Installer Menu will display. Note: If an LG Hospitality TV (for example, LP645H, LT670H, etc.) is being used as the display panel (connected to DISPLAY CONTROL 2 on the STB) and you press the TV Installer Menu entry sequence + OK, you will access the TV’s Installer Menu instead of the STB’s Installer Menu. -
Page 26: Using The Installer Menu
Installer Menu (Cont.) As part of the Installer Menu header (in all modes), two 3-character acronyms are displayed to indicate the STB’s current configuration mode. The table below lists all possible mode identifiers for the STB-2000. Acronym Description CPU-CTV Pass-through Mode with Channel Map in CPU CPU-FTG FTG Mode via CPU CPU-P:C Application Tuning Mode via CPU... - Page 27 MUTE DISABLE 0 / 1 Set to 1 to disable Mute Function. If set to 1, menu navigation buttons/functions on LG Hospitality and commercial KEY DEFEAT 0 / 1 non-LG display panels are not functional/available. N/A for LG Public Displays or LG Commercial Monitors.
- Page 28 EN NOISE MUTE 0 / 1 (Analog channels only) If set to 1, audio is muted if no signal is present. If set to 1, all LG Hospitality and commercial non-LG display panel button KEY LOCK 0 / 1 functions are locked. N/A for LG Public Displays or LG Commercial Monitors.
- Page 29 Installer Menu (Cont.) Detailed Descriptions of Installer Menu Items 000 - INSTALLER SEQUENCE 004 - STRT CHANNEL (Start Channel) Specifies entry sequence to the Installer Menu. If active, this function allows you to determine the initial Major Start Channel number when the STB/display panel is turned 0 = 9876 1 = 4321 ON.
- Page 30 Channel Up/Down or by direct keypad entry. This setting also allows full access to channel settings in the STB Note: This feature does not apply to LG Public Displays or LG setup menus (i.e., channels may be added or removed from the Commercial Monitors since the STB will always disable those channel lineup, channel labels and icons may be edited, etc.).
- Page 31 Installer Menu (Cont.) 031 - POLL RATE 047 - AUX STATUS MPI Communication Parameter. Selects poll rate for MPI. Step Set to 1 for MPI Aux source to be reported as a channel number size of 16 ms. Changing from default may affect communication via instead of channel 0. Set to 0 to disable Aux identification change.
- Page 32 HDMI cable from the STB to the appropriate HDMI port on the display panel once you have exited the Installer Menu. Note: This feature does not apply to LG Public Displays or LG Commercial Monitors since the STB will always disable those 102 - ATSC BAND displays’...
- Page 33 “IP Address” in the FTG File Manager, which is used to 113 - PANEL TYPE configure STB CPUs for FTG Mode operation. It is not possible to Selects the display panel type. This setting is only applicable for LG change the value to “253” directly in the Installer Menu. Public Display TVs and Commercial Monitors that use the DISPLAY CONTROL 1 port for STB-to-display panel communication.
- Page 34 Installer Menu (Cont.) 121 - UPDATE TIME HR 122 - UPDATE TIME MN Based on the settings of this item and item 122 UPDATE TIME Set the Wake For Update minute from 0 to 59. If item 121 is NOT MN, the Wake For Update feature wakes the STB once daily to set to 128 and you wish to invoke the “random”...
-
Page 35: Custom Master Stb Setup
Custom Master STB Setup This section describes how to create a customized Master STB Setup for cloning purposes when the STB is in Pass-through Mode. Note: Cloning requirements and procedures are described in detail on pages 40 to 44. Refer to FTG Mode information on pages 45 to 51 for details on entering FTG Mode and configuring/editing the FTG Channel Map and FTG Installer Menu settings. -
Page 36: Custom Master Stb Setup Procedure
Custom Master STB Setup (Cont.) Custom Master STB Setup Procedure 1. Turn ON the STB/display panel. The next step depends on whether the EZ-Manager Wizard appears on the screen when you turn ON the STB/display: • If the wizard is displayed, the STB is in the required factory default state. - Page 37 Custom Master STB Setup (Cont.) (Continued from previous page) 3. Set up STB/display panel features. On-screen setup menus control the features of the STB/display. Press MENU on the Installer Remote to access the STB setup menus, and then set Channel, Picture, Audio, Time, etc. options to the desired PICTURE AUDIO CHANNEL...
- Page 38 Custom Master STB Setup (Cont.) (Continued from previous page) 5. (PTC cloning only) Transfer the auto-tuned/edited channel lineup (if applicable) and setup menu settings to the PTC: 2-5-5 + MENU Mode Note: This step is essential for successful cloning using a TLL file.
-
Page 39: Channel Icons / Custom Text Labels (2-5-4 + Menu Mode)
Channel Icons / Custom Text Labels (2-5-4 + MENU Mode) Changing Channel Icons and/or Adding or Editing Changing icons and/or adding or editing custom text labels Custom Text Labels in the Channel-Time Display can only be done if there are channels that have been transferred to the STB’s PTC either during Master STB If there is no pre-assigned icon for a channel, you can add Setup (see pages 35 to 38) or by cloning (TLL file only). -
Page 40: Cloning Procedures
Cloning Procedures Cloning Overview Cloning refers to the process of capturing a Master STB Setup and transferring it to a Target STB that is to remain in Pass-through Mode. There are two different procedures for cloning a Master STB Setup, each with its own advantages and limitations (see also “Cloning Methods” on page 35): • Using a USB memory device / TLX file • Using a USB memory device / TLL file Each cloning method is described in further detail on the pages that follow. - Page 41 “Restoring Factory Defaults on the STB(s),” as necessary, for further information. Note: If desired, you can complete the Teaching process via the EZ- Manager Wizard (see “USB Configuration” on pages 21 to 22) or using the LG Smart Install utility (see “LG Smart Install Utility” on pages 23 to 24). (Continued on next page) 206-4256...
- Page 42 “7” key a total of seven times to display the USB Download Menu. STB-2000-UA00003.TLX 6. With the USB Download Menu on display, use the Up/Down arrow keys to select Teach To STB (TLX), and then press OK.
-
Page 43: Learning / Teaching A Master Stb Setup Using A Tll File
Menu, key in the following number sequence on the Installer Remote: 9-8-7-6. Learn From STB (TLL) 5. Use the Up/Down arrow keys to select Learn From STB (TLL), and then Select the file name and press OK to start press OK. STB-2000-UA00001.TLL 6. In the Learn From STB (TLL) window, to differentiate this TLL file from others, you can use the Up/Down arrow keys to change the last five digits Previous of the filename. Press OK when you are ready to initiate Learning. Learn From STB Learning status will be shown on a progress bar in a new window. - Page 44 Master STB Setup you want to install. Teach To STB (TLL) Note: Filenames for TLL files Learned from an STB are comprised of the STB model and a five-digit number, for example, STB-2000-UA00001.TLL. STB-2000-UA00001.TLL 8. Press OK when you are ready to initiate the Teaching process. Teaching status will be shown on a progress bar in a new window. Do NOT remove the USB device until Teaching is complete.
-
Page 45: Ftg Mode Of Operation
FTG Mode of Operation This section describes how to create an FTG Configuration (.tlx) file using the FTG File Manager. It also describes how to locally configure a TV for FTG Mode operation. See also the FTG Mode overview on pages 10 to 11 for further information on FTG Mode. - Page 46 List contents, click the Clear button in the List command section of the FTG File Manager main screen. 8. Transfer the FTG Configuration (.tlx) file to a USB memory device, and proceed to “Teaching FTG Configuration to an STB” on the following page to transfer the FTG Configuration file to an STB-2000. 206-4256...
-
Page 47: Teaching Ftg Configuration To An Stb
Teaching process (see “TV Configuration Options” and/or “USB Configuration” on pages 17 and 21, respectively, as necessary). • You may also use the LG Smart Install utility to complete the Teaching process. See “LG Smart Install Utility” on pages 23 to 24 for further information. • If the Target STB is currently in Pass-through Mode and you intend to use the STB’s Zoning feature(s)—i.e., the FTG Configuration file you are Teaching contains an FTG Channel Map... - Page 48 STB setup menus or the Lock menu icon from the Function Teach To STB (TLX) Menu. Then, press the number “7” key a total of seven times to display the STB-2000-UA00005.TLX USB Download Menu. 7. With the USB Download Menu on display, use the Up/Down arrow keys to select Teach To STB (TLX), and then press OK.
-
Page 49: Learning Ftg Configuration From An Stb
1. Turn ON the Master STB/display panel, and then insert a USB memory Select the file name and press OK to start device into either of the USB ports on the STB. STB-2000-UA00005.TLX 2. Press MENU on the Installer Remote to display the STB setup menus (STB is in Pass-through Mode) or the Function Menu (STB is already in Previous FTG Mode). -
Page 50: Optional Manual Configuration / Stb Setup
Set Installer Menu Items These steps provide specific instruction only on the Installer Menu items that should be set on an STB-2000. Refer to pages 25 to 34 for detailed information on all Installer Menu items. 1. Turn ON the STB/display panel. 2. The next step depends on whether the EZ-Manager Wizard appears on the screen when you turn ON the STB/display: • If the wizard is displayed, the STB is in the required factory default state. - Page 51 FTG Mode of Operation (Cont.) (Continued from previous page) 4. Set Installer Menu item 003 BAND/AFC, as appropriate. • Broadcast: Set to 0. • HRC: Set to 2. • CATV: Set to 1 (default). • IRC: Set to 3. 5. Set any other Installer Menu items that affect your TV programming network to the required configuration. For example, enable/disable Aux inputs, set a Start Channel, etc.
-
Page 52: Ftg File Manager Utilities Overview
Copy FTG Installer Menu settings to and from FTG Configuration List. Assign Zone as applicable. Load default FTG Installer Menu for STB-2000. TLX FILE CONTENTS TV SETUP MENU LIST STB Setup Menu data to be Data contained in opened FTG Configuration (.tlx) file. -
Page 53: Ftg Channel Map Configuration Utility
FTG File Manager Utilities Overview (Cont.) FTG Channel Map Configuration Utility The FTG Channel Map Configuration Utility enables you to create, view, edit, and print a Logical Channel Map. PRINT MAP EDIT/ADD MAP Click to open the FTG Click to display a printable Channel Map Editor to create FTG Channel Map Report. -
Page 54: Ftg Channel Map Editor
FTG File Manager Utilities Overview (Cont.) FTG Channel Map Editor The FTG Channel Map Editor shows a single Logical Channel’s data and the FTG Channel Map. LOGICAL CHANNEL MAPPING CUSTOM CHANNEL LABELS/ICONS SET CHANNEL ATTRIBUTES Select a Logical Channel number. Then, Enter custom labels and select icons Check/select Encrypted, OSD, assign the RF, Major, and Minor channel... -
Page 55: Ftg Installer Menu Configuration Utility
LAN features, including the Wi-Fi Zoning feature. Refer to the Free-To-Guest (FTG) File Manager User Guide for further information. Also, see Reference section, “Using the STB’s Zoning Features,” for additional information on Wi-Fi Zoning. • Hospital parameters are not applicable for the STB-2000. 206-4256... -
Page 56: Ip Environment Setup
IP Environment Setup The IP Environment Menu enables you to set up the network features of the STB. With the exception of Network Connection settings, the IP Environment settings are editable (with the Installer Remote) only if the STB is in Pass-through Mode and read-only when the STB is not in Pass-through Mode. Also, if you intend to create a Master STB Setup for cloning purposes (using a TLX file—see Master STB Setup procedure on pages 35 to 38), all IP Environment settings, with the exception of Wired Network Connection settings and the STB name (editable in the Media Share Menu), may be cloned. - Page 57 IP Environment Setup (Cont.) Wired Network Connection 1. The next Network Connection window will enable you to specify Network Connection the IP and DNS configuration for this STB. Auto (DHCP) tabs will be selected by default. If a DHCP server is configured and Configure IP and DNS modes. Auto (DHCP) or Static a static configuration is not required, you can simply select OK IP Mode Auto (DHCP) Static (on the screen) and then press OK on the Installer Remote.
-
Page 58: Network Status
IP Environment Setup (Cont.) (Continued from previous page) Note: Make sure you have the network security password/PIN available if you are attempting to connect to a secured network. Note: (AP List and Enter the SSID options only) As with a wired connection, a second Network Connection window will enable you to specify the IP and DNS configuration for this network connection. -
Page 59: Ip Stream Control
IP Environment Setup (Cont.) (Continued from previous page) A status screen will be displayed as the STB confirms each Network Status of the network elements, including the STB/TV status, the gateway status, the DNS status, and the Internet status (see Wired network is connected. example at right). If the network is connected successfully, a “Wired/Wireless network is connected”... -
Page 60: Pro:centric Setup
IP Environment Setup (Cont.) IP Environment Move Pro:Centric Setup Pro:Centric options enable you to configure the STB with the appropriate settings to connect to the Pro:Centric server. Use the Up/Down arrow keys on the Installer Remote to navigate between fields. 1. With the IP Environment Menu on display, use the arrow keys on the Installer Remote to select Pro:Centric. -
Page 61: Wake On Lan Setup
IP Environment Setup (Cont.) (Continued from previous page) Note: Setting the Media Type to “IP” automatically sets the Data Channel field to “253.” You cannot alter this setting (unless you revert Media Type to “RF”). Also, it is not possible to direct enter “253” in the Data Channel field. b) In the Server IP and Port Number fields, either key in or use the Left/Right arrow keys to select the appropriate values for the Pro:Centric server IP address and port number. The IP address must match the IPv4 multicast address and the port number must match the port number that is set in the Pro:Centric server. -
Page 62: Media Share Setup
Media Share Setup Media Share allows you to enable Smart Share™, Wi-Fi Screen Share, and DMR options on the STB. • The LG Smart Share feature allows guests to see data on the STB/display shared by ® DLNA Certified devices on the same network. -
Page 63: Pre-Loaded Applications
IP Environment Setup (Cont.) Pre-loaded Applications This option allows you to select which of the pre-loaded application icons to display on this STB/display panel’s Application Launch bar. The Application Launch bar is available when the Pro:Centric application is disabled. If the Pro:Centric application is enabled, it is not necessary for pre-loaded applications to be selected as described below. -
Page 64: Upgrading Stb Software Using A Usb Memory Device
This section describes how to update STB (CPU) and/or PTC software using the USB Download Menu, though you may also use the LG Smart Install utility to upgrade software, if desired. See “LG Smart Install Utility” on pages 23 to 24 for further information. -
Page 65: Display Panel Specifications
Display TVs (LD450C, LT560C, etc.) that support the TV-Link Monitor (TLM) interface. Use the 3.5 mm-to-DB9 TLM cable provided to connect the 3.5 mm DISPLAY CONTROL 1 jack on the STB-2000 rear jack panel to the RS-232 CONTROL connector on the rear jack panel of the display. -
Page 66: Stb Aux Input Configuration
Reference: STB Aux Input Configuration ENABLE MPI DATA MPI DATA DATA STATUS DATA STATUS DIRECT ACCESS Installer STATUS TYPE TYPE 0xD2 TYPE 0x0D Tuning Menu Item Installer Menu 0x41 SOURCES CURRENT AV 046 START ENABLED (R/W) SOURCE (R) SOURCE (R) AUX SRCE (Start Aux Installer... -
Page 67: Auto Input(S) Sensing Feature
Aux inputs. The input #s in the display code (7, 6, 0 in this example) identify the enabled Aux inputs. See first table below for a listing of the STB-2000 Aux inputs and their corresponding display code UPN 000-000-000-000 ASIC D279 input #s. -
Page 68: Restoring Factory Defaults On The Stb(S)
Restore All Factory Defaults This section describes how to restore a single STB, regardless of its current mode, to a factory default condition. The following procedure requires that you contact LG technical support to obtain a predefined value/password for Installer Menu item 117 FACT DEFAULT that enables access to initiate a factory “IN-STOP” process, which restores all factory defaults on the STB. This procedure will also reactivate the EZ-Manager Wizard. -
Page 69: Using The Stb's Zoning Features
Reference: Using the STB’s Zoning Features This section describes the TV Zoning and Wi-Fi Zoning features available with the STB-2000. These features are primarily intended for use when the STB is configured for FTG Mode via CPU operation; however, Wi-Fi Zoning, along with selected elements of TV Zoning (Installer Menu and TV (STB) Setup Menu profile Zone assignments), may also be used with STB cloning processes using a USB memory device / TLX file. Refer to the appropriate section(s) below for further information on the Zoning features and how to set the TV or Wi-Fi Zone # in an STB that is currently in Pass-through Mode. - Page 70 FTG Channel Map with Zone restrictions on several channels. Each STB that still has the default TV Zone 0 setting will only be configured by the Installer Menu and/or TV Setup Menu profile(s) with a Zone 0 designation. If, on the other hand, the TV Zone # is set to 1, the STB will first look in the file for the STB-2000 Installer Menu and/or TV Setup Menu profile(s) with a Zone 1 designation. If none of the STB-2000 Installer Menu and/or TV Setup Menu profiles has a Zone 1 designation, the STB will then look for the STB-2000 profile(s) with a Zone 0 designation. For the FTG Channel Map configuration, when the TV Zone # is set to 0, the STB will ignore any Zone restrictions (1–8) that may be placed on channels in the FTG Channel Map.
- Page 71 Reference: Using the STB’s Zoning Features (Cont.) Using the Wi-Fi Zoning Feature with Cloning Configuration A location-specific Wi-Fi configuration / .tlx file may be saved (Learned) from an individual STB as part of a Master STB Setup and then be used during Teaching. First, the wireless network (i.e., the access point login data) must be configured in the Master STB’s IP Environment Menu (see Wireless Network Connection” on page 57).
- Page 72 5. When you have completed the fields as necessary, select OK, and then press OK on the Installer Remote to close the window and return to the Option Menu. 6. Press MENU to return to TV viewing. OPTION • LG Logo Light • Pointer • Balloon Help : On • Set ID • Demo Mode...
-
Page 73: Wi-Fi Screen Share Features
Reference: Wi-Fi Screen Share Features When the STB’s Wi-Fi Screen Share and DMR options are enabled in the IP Environment / Media Share Menu (see “Accessing the IP Environment Menu” and “Media Share Setup” on pages 56 and 62, as necessary), guests have the ability to use the following Wi-Fi Screen Share features: • Wi-Fi Direct: Enables users to select a Wi-Fi Direct, Smart Share enabled device from which to view media files (photos, videos, music, etc.). - Page 74 OK. Device name Connection 3. A new pop-up window will prompt you to confirm your connection LG-P930 request. Select Yes and press OK to continue. The share request will be sent to the targeted device. The user of that device may choose to allow or not allow the share connection.
- Page 75 Reference: Wi-Fi Screen Share Features (Cont.) Smart Mirroring / WiDi Smart Mirroring / WiDi With the Smart Mirroring / WiDi pop-up window on display, use the following procedure to turn ON Smart Mirroring and WiDi and establish A device which supports Smart Mirroring or WiDi technology can connect and have its display a connection.
-
Page 76: Stb-2000 Jack Panels
* Only one DISPLAY CONTROL connection should be used depending on the type of display panel to be controlled. Refer to “STB-2000 Cabling Connections” on pages 7 to 8, and/or see Reference section, “Display Panel Specifications,” for information on determining the appropriate connection. -
Page 77: External Ir Receiver Specifications
Reference: External IR Receiver Specifications The IR IN 3.5 mm stereo jack on the rear panel of the STB-2000 provides an input for an optional external IR receiver (Example: Sung Nam Electronics EAD61273113). The jack provides external IR VCC of 3.5 volts. -
Page 78: External Audio Line Out Specifications
Reference: External Audio Line Out Specifications The AUDIO LINE OUT 3.5 mm stereo jack on the rear panel of the STB-2000 provides stereo fixed line level analog audio output for external audio equipment. Installer Menu item 097 AUDIO OUTPUT must be set to 9 to make analog audio output available. -
Page 79: Installer Remote Typical Key Functions
Reference: Installer Remote Control Typical Key Functions An LG Installer Remote is required to set up and operate the STB. The LG Installer Remote illustrated below shows typical remote control functions and is provided for reference only. See also “STB Installer Remote”... -
Page 80: Stb Installer Remote
Reference: STB Installer Remote If you are using an LG display panel, the LG remote provided with the display should be sufficient. However, if you are using a commercial non-LG display panel and/or if you intend to use multiple STBs/displays... -
Page 81: Troubleshooting
Replace batteries. Wrong battery polarity. Check that “+” and “-” match in battery compartment. Too much light in room. Dim room light. Wrong Installer Remote. Requires compatible LG Installer Remote (see examples in this document). Contact your LG representative. 206-4256... -
Page 82: Stb Quick Check
Quick Check Plug AC/DC power conected to adapter into AC outlet. AC power? STB LED steady red? Press POWER on LG Installer Remote. Check the Display STB LED STB LED Control connection blinks off twice blinking? * between the STB and every five the display panel. -
Page 83: Commercial Mode Check
Troubleshooting (Cont.) Commercial Mode Check Use this flowchart to determine whether the STB is currently in Commercial Mode. Press POWER on LG Installer Remote. STB/display See STB Quick turned ON? Check flow chart. Leave STB/display ON, and press MENU on the Installer Remote. -
Page 84: Glossary Of Terms
The process of capturing a Master STB Refers to a particular commercial mode of server.) Setup and transferring it to a Target STB operation within an LG STB. See also FTG using a USB memory device. Mode. Pro:Centric Admin Client... -
Page 85: Document Revision History / Open Source Software Notice
To obtain the source code under GPL, LGPL, MPL and other open source licenses, that is contained in this product, please visit http://opensource.lge.com. In addition to the source code, all referenced license terms, warranty disclaimers and copyright notices are available for download. LG Electronics will also provide open source code to you on CD-ROM for a charge covering the cost of performing such distribution (such as the cost of media, shipping and handling) upon e-mail request to opensource@ lge.com. -
Page 86: Back Cover
1-888-865-3026 www.LGsolutions.com Pro:Idiom is a registered trademark of Zenith Electronics LLC. Pro:Centric is a registered trademark of LG Electronics Inc. Smart Share is a trademark of LG Electronics Inc. DLNA Certified is a registered trademark of Digital Living Network Alliance. Intel is a registered trademark of Intel Corporation in the U.S. and/or other countries.