Quick Links
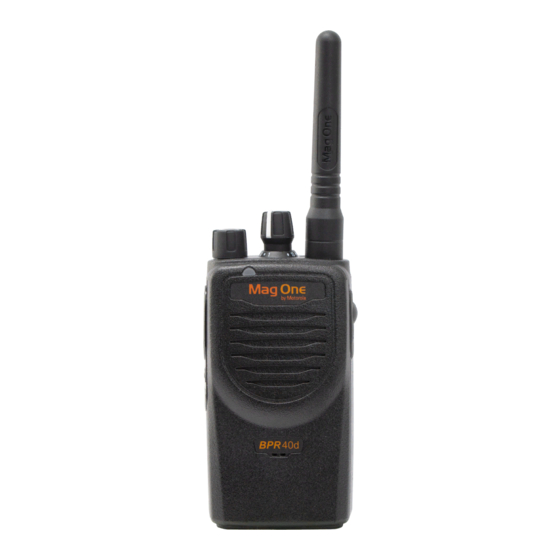
Attaching and Removing the Antenna
Antenna
Connector
Threaded End
of Antenna
To Attach Antenna
1.
Fasten the antenna to the radio by placing
the threaded end of the antenna into the
Antenna Connector.
2.
Rotate the antenna clockwise until tight.
To Remove Antenna
1.
Turn the antenna in a counter-clockwise
direction until it disengages from the radio.
Attaching and Removing the Battery
To Attach Battery
1.
Align and fit the battery tongue into the
groove of the chassis of the radio.
2.
Secure the latch at the bottom of the radio.
To Remove Battery
1.
Unlatch the battery clasp at the bottom of
the radio.
2.
Gently lift the hilt of the battery nearest to
the battery latch away from the housing.
3.
Slide battery downwards to remove.
Attaching and Removing the Belt Clip
Release Tab
To Attach Belt Clip
1.
Align mounting rails of the radio with the
grooves of the belt clip.
2.
Slide the belt clip downwards until it clicks
into place.
To Remove Belt Clip
1.
Lift the release tab.
2.
Slide the belt clip upwards.
Charging your Radio
Charger Pocket
1.
Turn off your radio and the A/C power sup-
ply to your charger (if they are turned on).
2.
Place your radio in the charger pocket.
3.
Turn on the charger's A/C power supply.
4.
While charging your radio, the charger's
LED shows a steady red light. The radio
should be charged at least 16 hours initially
before decreasing charging time to 12 hours.
5.
Turn off the charger's A/C power supply,
and remove the radio from the charger
pocket.
6.
For more details, refer to the Charger
Manual (6881013Y27).

Related Manuals for Motorola Mag One BRP 40


Summary of Contents for Motorola Mag One BRP 40
- Page 1 Attaching and Removing the Antenna Attaching and Removing the Belt Clip Attaching and Removing the Battery Charging your Radio Release Tab Charger Pocket Antenna Connector Threaded End of Antenna Turn off your radio and the A/C power sup- ply to your charger (if they are turned on). To Attach Battery Place your radio in the charger pocket.
- Page 2 LED Indicators LED Indicator Colour State Indication • Colours indicate various states Channel Knob Illuminated Radio is transmitting. of the radio • Turn knob to change channel. Blinking Battery voltage is low. Green Illuminated Radio is receiving with PL/DPL disabled. On/Off and Volume Knob •...