Haier HLT364XXQ Service Manual
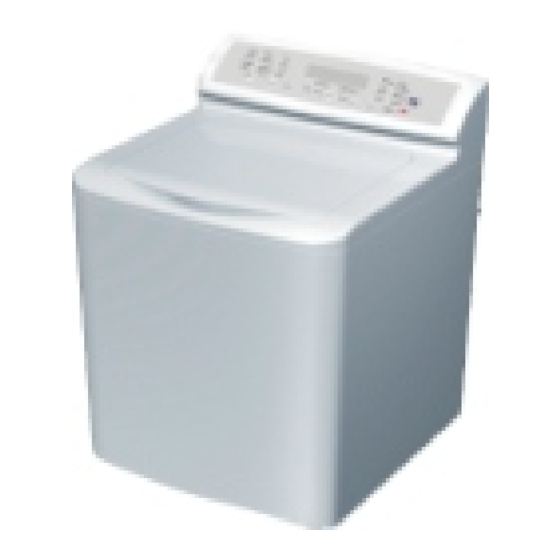
Full automatic washing machine
Hide thumbs
Also See for HLT364XXQ:
- User manual (52 pages) ,
- User manual (19 pages) ,
- User manual (52 pages)

Related Manuals for Haier HLT364XXQ


Summary of Contents for Haier HLT364XXQ
-
Page 1: Service Manual
Full automatic washing machine SERVICE MANUAL Models HLT364XXQ GWT800AW WD-8888-92 Edition: 2006.06.27... -
Page 2: Table Of Contents
CONTENTS 1. Contents Features 3. Specifications Safety precautions Warning and cautions 6. Net dimension Installation and accessory parts 8.Operating instructions 9. Maintenance service and trouble shooting 10. Wiring diagram How to disassemble washing machine... -
Page 3: Features
FEATURES Haier frenquency-cenvsion and double drive blanket washing easily Shift washing, shift spinning Cold & warm water inlet selection Drain up function Cabinet with the door open in the front: Super capacity for more clothes Pulsator type for wash efficiency, twist free and low wear... -
Page 4: Specifications
SPECIFICATIONS Model HLT364XXQ GWT800AW Free standing Built under × × EAN code Energy efficiency class Technical data Was h capac ity 10.0 10.0 Spin capacity 10.0 10.0 1/28L 2/36L 3/49L 4/54L 5/61L 6/67L 1/28L 2/36L 3/49L 4/54L 5/61L Level/Vol ume... -
Page 5: Safety Precautions
SAFETY PRECAUTIONS The power cord plug should be convenient to be pluged in or pluged out with hand Be sure to earth the earthing wire reliably. while the washing machine runs normally. Be sure to pull the plug out and close the water tap when the machine is idle,when moving the machine,or when cleaning the machine.Do not use wet hand to ins-... -
Page 6: Warning And Cautions
WARNING AND CAUTIONS Do not decompose, repair or alter the Do not stretch hands into the working machine by yourself. machine. It is dangerous even if the rotation is slow. Take special care of the children. Do not put any hot or heavy items (such Do not wash articles that have been as the kettle with hot water ) on the previously cleaned in, washed in, soaked... -
Page 7: Net Dimension
NET DIMENSION Unit mm INSTALLATION AND ACCESSORY PARTS Please install and adjust the machine according to the requirement of the manual. It is very important to your security and correct operating the machine. Pull the shipping bar out to avoid damage to your washing machine before your first use of it. -
Page 8: Install The Drain Hose
INSTALLATION AND ACCESSORY PARTS Install the drain hose First install the drain hose hook on the parts of Outer drain hose Drain hose neck component outer drain hose component. Drain hose hoop Put the drain hose clamp on the outer drain hose, insert the outer drain hose into the joint for it, and then clutch tightly with drain hose hoop. -
Page 9: Operating Instructions
OPERATING INSTRUCTIONS Parts and function Top lid Inner tub cover Control panel Door switch Control panel seat Cabinet Bleach injection inlet Front door Adjustable foot (four pieces) Back cover Water inlet valve Power line Drain hose joint... - Page 10 OPERATING INSTRUCTIONS Soak or Pre-wash will not work in the Cycles: Hand Wash,Quick Wash, Delicate Casual and Wrinkle Control. Water level indicator will shut off if only Spin is selected.
- Page 11 OPERATING INSTRUCTIONS Total time Program Including soak Not including soak Normal About54-78 About44-58 Heavy Duty About57-91 About47-61 Whites About53-89 About43-59 colors About50-86 About40-56 Hand Wash About26-38 Quick Wash About24-30 Delicate Casual About25-35 Wrinkle control About25-34...
-
Page 12: Bleach Dispenser
OPERATING INSTRUCTIONS Bleach Dispenser: Bleachdispenser is located on front corner under the loading door. Pour in recommended amount of bleach into dispenser during the first wash fill. Note:Use only liquid bleach in dispenser. Warning: Be careful not to spill undiluted bleach on the washer cabinet or your clothes. -
Page 13: Normal Operating Sounds
OPERATING INSTRUCTIONS Normal Operating Sounds The following sounds are normally heard during the operation Of the washer: Tumbling sounds: This is normal as the heavy wet clothes in the Washer are continuously being lossed around. Air rushing noise: This happens when the Washer tub spins at very high RPM. -
Page 14: Lint Filter
OPERATING INSTRUCTIONS Lint Filter The lint filter must be used during washing. It must be cleaned in time after each using. Take off the lint filter. Clean up the lint in the filter. Install the lint filter. Install the inner cover 1.Open the top lid of the washing machine. -
Page 15: Maintenance Service And Trouble Shooting
MAINTENANCE SERVICE AND TROUBLE SHOOTING T rouble-shooting charts If you replace the computer sequencer without checking the other components carefully, the computer sequencer may be damaged again. Therefore, please first check if the other components working normally before replacing the sequencer in maintenance. No action(The indicator is off) Confirm that there's no power failure, and the power plug is inserted reliably. -
Page 16: Keep Filling Water
MAINTENANCE SERVICE AND TROUBLE SHOOTING No draining After insert the plug, turn the sequencer knob to the drain location Check the inset is normal Exist Check if the drain pump acts. and measure the voltage of two ends of the drain pump Replace the drain pump Exist Check if the drain motor is normal... -
Page 17: Too Much Noise In Washing
MAINTENANCE SERVICE AND TROUBLE SHOOTING 8. Analysis Of The Common Breakdown No spinning The washing and draining are normal. No On/Off point Check the On/Off point of the Replace the microswitch microswitch and stop switch. or stop switch. Normally Check if the clutch pawl Replace the drain motor. - Page 18 MAINTENANCE SERVICE AND TROUBLE SHOOTING Trouble alarm and solve method Phenomenan The reason How to settle The top lid is not closed. Close the top lid. In pre-wash , the washer stops running,the numeral tube shows E0 The draining does not work, or the speed of draining is too slow Open and close the top lid once.
-
Page 19: Wiring Diagram
WIRING DIAGRAM There is overload protector installed in the motor. In case that the motor is overload or meets breakdown in working, the protector will act and stop the motor. When the breakdown is removed, the motor will resume normal working. -
Page 20: How To Disassemble Washing Machine
HOW TO DISASSEMBLE WASHING MACHINE Component Step Picture dismantle the tapping screw dismantle the fasten button The back cover dismantle the screw of the back cover push the control panel dismantle control panel take off the control panel... -
Page 21: How To Disassemble Washing Machine
HOW TO DISASSEMBLE WASHING MACHINE Component Step Picture top lid dismantle the screw of the top lid dismantle the screw of the lid switch dismantle the lid switch take off the lid switch dismantle the connector of the part dismantle the wire module dismantle the wire connector... - Page 22 HOW TO DISASSEMBLE WASHING MACHINE Component Step Picture dismantle the earth wire dismantle the wire module remove the clamp of the wire modul dismantle the screw of the front door the front door take off the front door the connector dismantle the connector pipe pipe lamp,and take off the pipe...
- Page 23 HOW TO DISASSEMBLE WASHING MACHINE Component Step Picture the water filling dismantle the water filling pipe pipe clamp pull the control panel seat dismantle the control panel seat take off the control panel seat dismantle the pull the inner cover to dismantle inner cover the inner cover dismantle the...
- Page 24 HOW TO DISASSEMBLE WASHING MACHINE Component Step Picture dismantle the dismantle the connector of the connector of drive board the drive board dismantle the screw of the drain pipe drain pipe dismantle the pipe clamp the tub take out the tub component from component the front side of the cabinet...
- Page 25 HOW TO DISASSEMBLE WASHING MACHINE Component Step Picture dismantle the screw of the drive board in the bottom of the cabinet dismantle the drive board take out the drive board dismantle the motor unfix the bolt of the motor unfasten the line of the retractor. dismantle the retractor dismantle the retractor...
- Page 26 Sincere Forever Group Haier Industrial Park, No.1, Haier Road 266101, Qingdao, China http://www.haier.com...