Table of Contents
Available languages
Available languages
Quick Links
NSA-220 Series
Network Storage Appliance
Firmware v1.00
Edition 1, 09/2008
DEFAULT LOGIN DETAILS
Web Address:
Username:
Password:
CONTENTS
www.zyxel.com
QUICK START GUIDE
nsa220
nsa220plus
admin
1234
3
35
69
103
137
173
207
241
Copyright
2008 ZyXEL Communications Corporation
C
Chapters
Table of Contents

Related Manuals for ZyXEL Communications NSA-220 Series


Summary of Contents for ZyXEL Communications NSA-220 Series
-
Page 1: Table Of Contents
NSA-220 Series QUICK START GUIDE Network Storage Appliance Firmware v1.00 Edition 1, 09/2008 DEFAULT LOGIN DETAILS Web Address: nsa220 nsa220plus Username: admin Password: 1234 CONTENTS ENGLISH DEUTSCH ESPAÑOL FRANÇAIS ITALIANO SVENSKA 繁體中文 www.zyxel.com Copyright 2008 ZyXEL Communications Corporation... -
Page 3: English
ENGLISH ENGLISH ENGLISH Introduction The NSA lets you share files and back up data on your home network. You can also play video, music, and show photo files stored on the NSA using a media client such as the DMA-1000. How It Works Above is the NSA in a home network. - Page 4 ENGLISH • Map the NSA to Your Computer Network Drive, • Using the NSA as a Multi-media Server, • Backing up Files Using Memeo Autobackup, See the User’s Guide on the included CD for details on configuring all of the NSA’s features.
-
Page 5: Before You Begin
ENGLISH ENGLISH Before You Begin You need the following before you start: • NSA • Included CD containing the NSA Discovery Utility, Memeo Autobackup program, Media Client software, and User’s Guide • Power cord and power supply (external) • Included Ethernet cable •... - Page 6 ENGLISH Install Hard Drives Once you intall a hard drive on the NSA and create a volume, all existing data on the disk will be erased. If you want to install two hard drives and configure them as RAID volumes (see page 17), it is recommended to use the same disk size and model for best performance.
- Page 7 ENGLISH ENGLISH 3. Use a screwdriver to remove the retaining screw from a disk tray. 4. Slide the disk tray out. 5. Place the disk on a flat surface with the screw holes facing up. Place the disk tray on top of it and secure it with the screws as shown.
- Page 8 ENGLISH 6. Slide the tray back into the disk bay. Make sure the screw hole is at the top. Push the tray in all the way so the screw hole at the top is flush with the internal frame. 7. Put the disk tray retaining screw back in. 8.
- Page 9 ENGLISH ENGLISH 9. Put the rear panel back on and tighten the thumbscrews.
- Page 10 ENGLISH Connect the NSA 1. Use the included Ethernet cable to connect the LAN port on the rear of the NSA to a computer, switch, or router on your network. 2. Connect one end of the power cord to the POWER socket on the rear of the NSA and the other end to the external power supply.
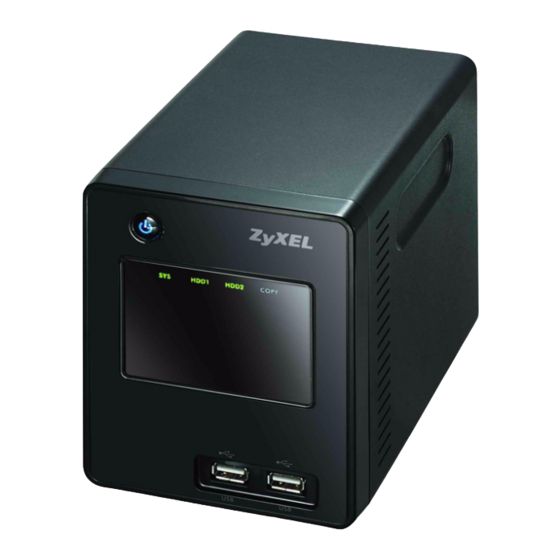
- Page 11 ENGLISH ENGLISH 3. Press the power button on the front of the NSA to turn it on. Look at the front panel lights. If no lights turn on, make sure the power cord is not loose and that the power source is turned on. •...
- Page 12 ENGLISH Access the NSA For a Windows computer, use the Discovery Utility (see page 12). For another type of computer (like Mac or Linux), use Direct Access (see page 14). Using the Discovery Utility to Access the NSA 1. Insert the included CD into your CD-ROM drive. Click Setup in the screen that displays.
- Page 13 ENGLISH ENGLISH 3. In Windows, click Start > All Programs > ZyXEL NSA > NSA Discovery Utility to run the discovery utility. If your computer has more than one network card, then you will be prompted to select one. 4. The utility lists the NSAs in your network. 5.
- Page 14 ENGLISH Direct Access Open Internet Explorer (or another web browser like Firefox). Type ‘nsa220’ or ‘nsa220plus’ as the website address and press [Enter] or click Go.
- Page 15 ENGLISH ENGLISH NSA Login This section shows you how to log into the NSA and change the administrator’s password. If you cannot get to the login screen, see the troubleshooting section at the end of this guide. 1. Enter the default username ‘admin’ and password ‘1234’ and click Login. The username and password are case sensitive.
- Page 16 ENGLISH 3. The My NSA screen displays.
- Page 17 ENGLISH ENGLISH Create a Volume This section shows you how to create an internal volume in the NSA. A volume is a storage area on one or more hard drives. 1. Click Administration.
- Page 18 ENGLISH 2. If there is not already an internal volume (storage area), click Storage from the navigation panel, and then click Create an Internal Volume. If your hard drive already has a volume that you want to use, skip to section 6.
- Page 19 ENGLISH ENGLISH • RAID 1 (recommended) Mirrors one disk’s data on the second disk for data security. RAID 1 is slower than RAID 0, but you can recover all of your data if a disk fails. Total data storage space is limited to the capacity of the smallest disk.
- Page 20 ENGLISH 6. You can use the volume after the status is Healthy. For a RAID volume, the status is Resync until the volume is ready. 7. If two disks are installed and you created a single-disk JBOD volume, repeat the steps to create a second volume on the other disk.
- Page 21 ENGLISH ENGLISH Map the NSA to Your Computer Network Drive You store files on the NSA in shares (these are like shared Windows folders). Map a NSA share to a Windows network drive to be able to use Windows Explorer to transfer files to and from the NSA. After mapping a share, you can drag and drop files between your computer and the NSA.
- Page 22 ENGLISH 3. The NSA public folder displays in Windows Explorer. 4. Click Tools > Map Network Drive. In the Drive field, select a drive letter to use for the NSA. In the Folder field, select the NSA (you may need to browse to find it).
- Page 23 ENGLISH ENGLISH Using the NSA as a Multi-media Server The NSA is also a media server. By default, computers with the included media client software installed or media client devices (like the DMA-1000) can play media files in the NSA’s Public, Video, Music and Photo shares. You can also apply the multi-media server function to other shares.
- Page 24 ENGLISH Media Client Software Installation 1. Put the CD into your CD-ROM. Click Tools in the screen that displays. Then click Media Client Software. If this screen does not display, use Windows Explorer (My Computer) to go to the CD-ROM (commonly drive D). Double- click setup.exe.
- Page 25 ENGLISH ENGLISH 3. Enter your information in this screen. Enter a user name (up to 64 ASCII characters recommended). The company name is optional (up to 64 ASCII characters recommended). The serial number is on the sleeve of the included CD and also on the underside of the NSA. 4.
- Page 26 ENGLISH 5. The following screen displays if you do not have DirectX version 9.0 installed, click yes to install it. 6. Close any other applications and click Finish to restart your computer. Play Your Media Files Use a media client (like the DMA-1000) or a computer with DLNA-compliant media client software (included on your NSA CD) to play video, music, and photo files stored on the NSA.
- Page 27 ENGLISH ENGLISH 1. After your computer restarts, click Start > All Programs > DigiOn > DiXiM Media Client to start the media client. 2. The media client sorts the shared files on your network’s media servers into MUSIC, VIDEO and PHOTO menus. Use the the SERVER menu to view files on a specific media server (like the NSA).
- Page 28 ENGLISH 4. Double-click the file you want to play. Files with unsupported formats or codecs may not display properly. See the User’s Guide product specifications appendix for details on the supported formats and codecs. Since the media software uses your computer’s installed codecs, it is also possible that the media client software supports a file’s codec but the codec is not installed on your computer.
- Page 29 ENGLISH ENGLISH Backing up Files Using Memeo Autobackup Use the Memeo Autobackup software included on the CD to automatically back up selected files from your computer to the NSA whenever you modify the files. Requirements Memeo Autobackup works with Windows 2000 Workstation with Service Pack 6, Windows XP Pro, or Windows XP Home Edition.
- Page 30 ENGLISH If this screen does not display, use Windows Explorer (My Computer) to go to the CD-ROM (commonly drive D). Double- click setup.exe. 3. Follow the instructions to install the software. Memeo Autobackup requires Microsoft.NET version 1.1. The wizard installs it for you if it is not already on your computer. 4.
- Page 31 ENGLISH ENGLISH 5. Select the NSA’s mapped drive and click OK. 6. In this screen, select the items that you want to back up.
- Page 32 ENGLISH 7. This screen lists the items you selected for backup. Confirm your selections and click Next. 8. Specify a name for your backup plan (or just use the default). Click Next and then Done.
- Page 33 ENGLISH ENGLISH Using Memeo Autobackup After the Initial Setup After you have installed and configured Memeo Autobackup, double-click the icon in the system tray to open the program’s start screen. If the icon is not displayed, you can click Start > Programs > Memeo Autobackup >...
-
Page 34: Troubleshooting
ENGLISH Troubleshooting Try the following if you cannot get to the NSA login screen. • Make sure the NSA is turned on. • Check the NSA’s cable connections. Make sure the NSA’s LAN LED (located on the LAN port) is on or flashing. •... -
Page 35: Deutsch
DEUTSCH DEUTSCH ENGLISH Einführung Mit dem NSA können Sie in Ihrem Heimnetzwerk von verschiedenen Geräten aus gemeinsam auf Dateien zugreifen und Daten sichern. Sie können mit einem Medien-Client wie dem DMA-1000 auch Video-, Musik- und Fotodateien abspielen, die auf dem NSA abspielen. So funktioniert es Die obige Abbildung zeigt den NSA in einem Heimnetzwerk. - Page 36 ENGLISH • Zugreifen auf den NSA, • Anmelden, • Erstellen eines Volumens, • Mappen des NSA auf das Computernetzwerklaufwerk, • Verwenden des NSA als Multimedia-Server, • Sichern von Dateien mit Memeo Autobackup, Eine Beschreibung zum Konfigurieren aller Funktionen des NSA finden Sie im Benutzerhandbuch, das auf der CD enthalten ist.
- Page 37 DEUTSCH ENGLISH Vor der Installation Bevor Sie anfangen, benötigen Sie Folgendes: • NSA • Die mitgelieferte CD (mit dem NSA Discovery Utility-Programm, dem Memeo Autobackup-Programm, der Medienclient-Software und dem Benutzerhandbuch) • Netzkabel und Netzteil (extern) • Das mitgelieferte Ethernet-Kabel • Eine oder zwei Festplatten mit 15-poligen SATA-Anschlüssen, die mit SATA I oder SATA 3.0 Gbit/s (Serial Advanced Technology Attachment) kompatibel sind.
- Page 38 ENGLISH Installieren der Festplatten Sobald Sie eine Festplatte auf dem NSA installieren und ein Volume erstellen, werden alle auf der Disk vorhandenen Daten gelöscht. Wenn Sie zwei Festplatten installieren und sie als RAID-Volumes konfigurieren möchten (siehe Seite 49), sollten Sie für eine optimale Leistung zweimal dasselbe Festplattenmodell mit derselben Größe verwenden.
- Page 39 DEUTSCH ENGLISH 3. Drehen Sie mit einem Schraubendreher die Rückhalteschraube aus der Laufwerkslade heraus. 4. Ziehen Sie die Laufwerkslade heraus.
- Page 40 ENGLISH 5. Legen Sie die Festplatte mit den Schraublöchern nach oben zeigend auf eine flache Unterlage. Legen Sie die Laufwerkslade darauf, und schrauben Sie sie wie abgebildet fest. 6. Schieben Sie die Lade zurück in den Schacht. Das Schraubloch muss sich oben befinden.
- Page 41 DEUTSCH ENGLISH 7. Drehen Sie die Rückhalteschraube wieder in die Laufwerkslade ein. 8. Wenn Sie ein zweites Laufwerk installieren möchten, wiederholen Sie die Schritte bis 7. 9. Setzen Sie die Gehäuserückseite wieder auf, und drehen Sie die Rändelschrauben fest.
- Page 42 ENGLISH Anschließen des NSA 1. Schließen Sie das mitgelieferte Ethernet-Kabel an den LAN-Port an der Rückseite des NSA und an einen Computer, Switch oder Router des Netzwerks an. 2. Schließen Sie ein Ende des Netzkabels an den POWER-Anschluss an der Rückseite des NSA und das andere Ende an das externe Netzteil an.
- Page 43 DEUTSCH ENGLISH 3. Drücken Sie auf die Ein/Aus-Taste an der Vorderseite des NSA, um das Gerät einzuschalten. Die LED-Anzeigen befinden sich an der Gerätevorderseite. Wenn keine Anzeige leuchtet, prüfen Sie noch einmal die Kabelanschlüsse und die Stromquelle. • Die Betriebsanzeige-LED leuchtet blau. •...
-
Page 44: Zugreifen Auf Den Nsa
ENGLISH Zugreifen auf den NSA Wenn Sie mit einem Windows-Computer arbeiten, verwenden Sie das Discovery Utility (siehe Seite 44). Für andere Computertypen (z. B. Mac oder Linux) verwenden Sie Direct Access (siehe Seite 46). Zugreifen auf den NSA mit dem Discovery Utility 1. - Page 45 DEUTSCH ENGLISH 2. Auf dem Bildschirm wird der Installationsassistent angezeigt. Führen Sie die Anweisungen auf dem Bildschirm aus. Klicken Sie auf Finish (Fertig stellen), um die Installation abzuschließen. 3. Um das Discovery Utility zu starten, klicken Sie bei Windows auf Start > Alle Programme >...
- Page 46 ENGLISH 4. Das Utility-Programm listet die NSAs Ihres Netzwerks auf. 5. Klicken Sie auf das Symbol Admin (Administrator), um das Anmeldefenster des Web-Konfigurators aufzurufen (siehe Seite 47). • Wenn Sie die NSA IP-Adresse ändern müssen, klicken Sie auf das Symbol unter Config (Konfigurieren). •...
-
Page 47: Nsa Anmelden
DEUTSCH ENGLISH NSA Anmelden In diesem Abschnitt wird beschrieben, wie Sie sich beim NSA anmelden und das Administratorkennwort ändern. Wenn das Anmeldefenster nicht angezeigt wird, lesen Sie im Abschnitt Problembeseitigung am Ende dieser Anleitung nach. 1. Geben Sie den Standardbenutzernamen admin und das Kennwort 1234 ein, und klicken Sie auf Login (Anmelden). - Page 48 ENGLISH 2. Es wird empfohlen, das Kennwort zu ändern (notieren Sie es sich). Klicken Sie auf Apply (Übernehmen), um die Änderungen zu speichern und zum nächsten Fenster zu wechseln. 3. Das Fenster My NSA (Mein NSA) wird angezeigt.
-
Page 49: Erstellen Eines Volumens
DEUTSCH ENGLISH Erstellen eines Volumens In diesem Abschnitt wird beschrieben, wie Sie im NSA ein internes Volume erstellen. Ein Volume ist ein Speicherbereich auf einer oder mehreren Festplatten. 1. Klicken Sie auf Administration. - Page 50 ENGLISH 2. Wenn es noch kein internes Volume (Speicherbereich) gibt, klicken Sie im Navigationsfeld auf Storage (Speicher) und klicken Sie dann auf Create an Internal Volume (Internes Volumen erstellen). Wenn Ihre Festplatte bereits ein Volumen hat, das Sie verwenden möchten, gehen Sie weiter zu Abschnitt 6.
- Page 51 DEUTSCH ENGLISH • RAID 0 (nicht empfohlen) Diese Konfiguration bietet die größte Geschwindigkeit, aber bei Ausfall einer Festplatte gehen alle Daten auf beiden Festplatten verloren. Verwenden Sie RAID 0 nur für unwichtige Daten, die große Schreibgeschwindigkeiten erfordern (z. B. Videos, Grafiken und Spiele).
- Page 52 ENGLISH 5. Warten Sie, während das Volumen erstellt wird. 6. Wenn der Status Healthy (In Ordnung) angezeigt wird, kann das Volumen verwendet werden. Bei einem RAID-Volumen wird der Status Resync (Resynchronisieren) angezeigt, bis das Volumen bereit ist. 7. Wenn Sie zwei Festplatten installiert und ein JBOD-Volumen auf einer Festplatte erstellt haben, wiederholen Sie diese Schritte, um auf der anderen Festplatte ein zweites Volumen zu erstellen.
-
Page 53: Mappen Des Nsa Auf Das Computernetzwerklaufwerk
DEUTSCH ENGLISH Mappen des NSA auf das Computernetzwerklaufwerk Dateien werden auf dem NSA in Shares (diese können mit gemeinsamen Windows-Ordnern verglichen werden) gespeichert. Mappen Sie ein NSA- Share auf ein Windows-Netzwerklaufwerk, damit Sie mit Windows Explorer Dateien vom und auf den NSA übertragen können. Nach dem Mappen eines Shares können Sie Dateien zwischen dem Computer und dem NSA verschieben. - Page 54 ENGLISH 3. Bei Windows Explorer wird der öffentliche NSA-Ordner angezeigt. 4. Klicken Sie auf Tools > Map Network Drive (Extras > Netzwerklaufwerk mappen). Wählen Sie aus dem Feld Drive (Laufwerk) einen Laufwerksbuchstaben aus, der für den NSA verwendet werden soll. Wählen Sie aus dem Feld Folder (Ordner) den NSA aus (möglicherweise müssen Sie die Verzeichnisse durchsuchen).
- Page 55 DEUTSCH ENGLISH 5. Wenn auf dem Computer nicht das Discovery Utility-Programm installiert ist, können Sie Windows Explorer aufrufen, zwei Rückwärtsschrägstriche und den NSA-Servernamen (nsa220 standardmäßig) oder die IP-Adresse eingeben.
-
Page 56: Verwenden Des Nsa Als Multimedia-Server
ENGLISH Verwenden des NSA als Multimedia-Server Der NSA ist auch ein Medien-Server. Standardmäßig können Computer, auf denen Medienclient-Software installiert ist, und Medienclient-Geräte (wie der DMA-1000) Mediendateien aus den Shares Public (Öffentlich), Video (Video), Music (Musik) und Photo (Foto) des NSA abspielen. Sie können die Multimedia-Serverfunktion auch auf andere Shares anwenden. - Page 57 DEUTSCH ENGLISH Installieren der Medienclient-Software 1. Legen Sie die CD in das CD-ROM-Laufwerk. Klicken Sie im nächsten Fenster auf Tools (Extras). Klicken Sie dann auf Media Client Software (Medienclient-Software). Wenn dieses Fenster nicht gezeigt wird, rufen Sie mit Windows Explorer (Arbeitsplatz) die CD-ROM (normalerweise Laufwerk D) auf.
- Page 58 ENGLISH Wenn Sie Probleme bei der Installation oder Benutzung des Medienservers haben, lesen Sie im Abschnitt Systemvoraussetzungen nach. 3. Geben Sie in diesem Fenster die erforderlichen Daten ein. Geben Sie einen Benutzernamen ein (bis maximal 64 ASCII-Zeichen empfohlen). Die Eingabe des Firmennamens ist optional (bis maximal 64 ASCII-Zeichen empfohlen).
- Page 59 DEUTSCH ENGLISH Wenn auf Ihrem Computer eine andere Firewall-Software (z. B. ZoneAlarm) verwendet wird, die konfiguriert werden muss, lesen Sie im Benutzerhandbuch nach. 5. Das folgende Fenster wird angezeigt, wenn auf dem Computer nicht DirectX Version 9.0 installiert ist. Klicken Sie auf Yes (Ja), um es zu installieren.
- Page 60 ENGLISH Sie die folgenden Schritte aus, um mit der Medienclient-Software Dateien abzuspielen. Für andere Clients finden Sie eine Beschreibung in der entsprechenden Dokumentation. 1. Um den Medienclient zu starten, klicken Sie nach dem Neustart des Computers auf Start > Alle Programme > DigiOn > DiXiM Media Client. 2.
- Page 61 DEUTSCH ENGLISH 3. Navigieren Sie zu dem Ordner, der die gewünschte Datei enthält, oder markieren Sie den Ordner All Videos (Alle Videos). 4. Klicken Sie doppelt auf die Datei, die abgespielt werden soll. Dateien nicht unterstützter Formate und Codecs werden u. U. nicht einwandfrei wiedergegeben.
-
Page 62: Sichern Von Dateien Mit Memeo Autobackup
ENGLISH Sichern von Dateien mit Memeo Autobackup Die auf der CD enthaltene Memeo Autobackup-Software kann dazu verwendet werden, automatisch die ausgewählten Dateien vom Computer auf den NSA zu sichern, sobald sie geändert werden. Systemvoraussetzungen Memeo Autobackup arbeitet mit Windows 2000 Workstation mit Service Pack 6, Windows XP Pro und Windows XP Home Edition. - Page 63 DEUTSCH ENGLISH 2. Legen Sie die mitgelieferte CD in das CD-ROM-Laufwerk ein. Klicken Sie im nächsten Fenster auf Tools (Extras). Klicken Sie dann auf Memeo Instant Backup Software. Wenn dieses Fenster nicht gezeigt wird, rufen Sie mit Windows Explorer (Arbeitsplatz) die CD-ROM (normalerweise Laufwerk D) auf.
- Page 64 ENGLISH 4. Wenn das folgende Fenster angezeigt wird, wählen Sie Network Places (Netzwerkposition), und klicken Sie auf die Verknüpfung, um den Sicherungsordner auszuwählen. 5. Wählen Sie das auf den NSA gemappte Laufwerk, und klicken Sie auf OK.
- Page 65 DEUTSCH ENGLISH 6. Wählen Sie in diesem Fenster die Elemente aus, die gesichert werden sollen. 7. In diesem Fenster werden die Einträge aufgeführt, die Sie zum Sichern ausgewählt haben. Bestätigen Sie Ihre Auswahl, und klicken Sie auf Next (Weiter).
- Page 66 ENGLISH 8. Geben Sie dem Sicherungsplan einen Namen (oder verwenden Sie den Standardnamen). Klicken Sie auf Next (Weiter), und dann auf Done (Fertig). Verwenden von Memeo Autobackup nach der Installation Wenn Sie Memeo Autobackup installiert und konfiguriert haben, klicken Sie doppelt auf das Symbol in der Taskleiste, um das Startfenster des Programms aufzurufen.
- Page 67 DEUTSCH ENGLISH Wenn das Symbol nicht angezeigt wird, können Sie auch auf Start > Programme > Memeo Autobackup > Memeo Autobackup klicken, um es zu starten.
- Page 68 ENGLISH Problembeseitigung Wenn Sie nicht das Anmeldefenster des NSA aufrufen können, versuchen Sie Folgendes. • Stellen Sie sicher, dass der NSA eingeschaltet ist. • Prüfen Sie die Kabelverbindungen des NSA. Stellen Sie sicher, dass die LAN-LED des NSA (am LAN-Port) leuchtet oder blinkt. •...
-
Page 69: Español
ESPAÑOL ESPAÑOL ENGLISH Introducción El NSA le permite compartir archivos y copiar datos en su red doméstica. También puede reproducir vídeo, música y mostrar archivos de fotos guardados en el NSA utilizando un cliente de medios como DMA-1000. Cómo funciona Arriba el NSA está... - Page 70 ENGLISH • Inicio de sesión NSA, • Crear un volumen, • Mapear el NSA en la unidad de red de su ordenador, • Usar el NSA como servidor multimedia, • Copiar archivos utilizando Memeo Autobackup, Consulte la Guía del usuario en el CD incluido para más detalles sobre la configuración de todas las características del NSA.
- Page 71 ESPAÑOL ENGLISH Antes de comenzar Necesita lo siguiente antes de comenzar: • NSA • El CD incluido que contiene la utilidad NSA Discovery, el programa Memeo Autobackup, software cliente de medios y la Guía del usuario • Cable de alimentación y fuente de alimentación (externa) •...
- Page 72 ENGLISH Instalar discos duros Una vez instalado el disco duro en el NSA y creado un volumen, se borrarán todos los datos existentes en el disco. Si desea instalar dos unidades de disco y configurarlas como volúmenes RAID (ver página 83), se recomienda utilizar el mismo tamaño de disco y modelo para obtener el mejor rendimiento.
- Page 73 ESPAÑOL ENGLISH 3. Utilice un destornillador para quitar el tornillo de retención de una bandeja de disco. 4. Extraiga la bandeja de disco.
- Page 74 ENGLISH 5. Coloque el disco en una superficie plana con los agujeros de los tornillos mirando hacia arriba. Coloque la bandeja del disco en la parte superior y fíjela con los tornillos como se muestra. 6. Vuelva a introducir la bandeja de nuevo en la bahía para discos. Compruebe que el agujero del tornillo esté...
- Page 75 ESPAÑOL ENGLISH 7. Vuelva a colocar el tornillo de retención de la bandeja del disco. 8. Repita los pasos para el segundo disco duro si tiene uno. 9. Vuelva a colocar el panel posterior de nuevo y apriete los tornillos.
- Page 76 ENGLISH Conecte el NSA 1. Utilice el cable Ethernet incluido para conectar el puerto LAN de la parte posterior del NSA a un ordenador, switch o router en su red. 2. Conecte un extremo del cable de alimentación en el zócalo POWER de la parte posterior del NSA y el otro extremo en la fuente de alimentación externa.
- Page 77 ESPAÑOL ENGLISH 3. Pulse el botón de alimentación de la parte frontal del NSA para encenderlo. Fíjese en las luces del panel frontal. Si no se encienden luces, compruebe que el cable de alimentación no esté suelto y que la fuente de alimentación esté encendida.
- Page 78 ENGLISH Acceso al NSA Para un ordenador con Windows, utilice Discovery Utility (ver página 78). Para otro tipo de ordenador (como Mac o Linux), utilice Direct Access (ver página 80). Utilizar la utilidad discovery para acceder al NSA 1. Inserte el CD incluido en la unidad de CD-ROM. Haga clic en Setup (Instalar) en la pantalla que aparece.
- Page 79 ESPAÑOL ENGLISH 2. Comenzará el asistente para la instalación. Siga las instrucciones del instalador. Haga clic en Finish (Finalizar) para completar la instalación. 3. En Windows, haga clic en Inicio > Todos los programas > ZyXEL NSA > NSA Discovery Utility para ejecutar la utilidad discovery. Si su ordenador tiene más de una tarjeta de red, se le pedirá...
- Page 80 ENGLISH 5. Haga clic en el icono Admin para ver la pantalla de inicio de sesión del configurador web (ver página 81). • Si necesita cambiar la dirección NSA IP, haga clic en el icono en Config. • Para mapear el NSA en una unidad de red de Windows, haga clic en el icono en Map (ver página 87).
- Page 81 ESPAÑOL ENGLISH Inicio de sesión NSA Esta sección le muestra cómo acceder al NSA y cambiar la contraseña de administrador. Si no puede ir a la página de inicio de sesión, consulte la sección solución de problemas al final de esta guía. 1.
- Page 82 ENGLISH 2. Se recomienda que cambie a una nueva contraseña (y la escriba). Haga clic en Apply (Aplicar) para guardar los cambios y vaya a la pantalla siguiente. 3. Aparecerá la pantalla My NSA.
- Page 83 ESPAÑOL ENGLISH Crear un volumen Esta sección le muestra cómo crear un volumen de intervalo en el NSA. Un volumen es un área de almacenamiento en una o más unidades de disco. 1. Haga clic en Administración.
- Page 84 ENGLISH 2. Si todavía no hay un volumen interno (área de almacenamiento), haga clic en Storage (Almacenamiento) en el panel de navegación y haga clic en Create an Internal Volume (Crear un volumen interno). Si su disco duro ya tiene un volumen que desea utilizar, salte a la sección 6. Si desea eliminar un volumen existente, consulte el capítulo Storage Screens en la Guía del usuario.
- Page 85 ESPAÑOL ENGLISH • RAID 0 (no recomendado) Tiene las velocidades de grabación más altas pero si un disco falla, pierde todos los datos en ambos discos. Utilice RAID 0 solamente para datos no críticos que necesitan una velocidad de grabación alta (como vídeo, gráficos y juegos).
- Page 86 ENGLISH 5. Espere mientras el volumen está siendo creado. 6. Puede usar el volumen tras el estado Healthy (Saludable). Para un volumen RAID, el estado es Resync hasta que el volumen está listo. 7. Si instala dos discos y ha creado un único volumen JBOD, repita los pasos para el segundo volumen en el otro disco.
- Page 87 ESPAÑOL ENGLISH Mapear el NSA en la unidad de red de su ordenador Los archivos son almacenados en NSA de forma compartida (es como las carpetas compartidas de Windows). Mapee NSA compartido en una unidad de red de Windows para poder utilizar Windows Explorer para transferir los archivos hacia y desde el NSA.
- Page 88 ENGLISH 3. La carpeta pública NSA aparece en Windows Explorer. 4. Haga clic en Tools > Map Network Drive (Herramientas > Mapear unidad de red). En el campo Drive (Unidad), seleccione una unidad para usar para el NSA. En el campo Folder (Carpeta), seleccione el NSA (puede que necesite examinar para encontrarlo).
- Page 89 ESPAÑOL ENGLISH Usar el NSA como servidor multimedia El NSA es también un servidor de medios. Por defecto, los ordenadores con el software cliente de medios instalado o dispositivos clientes de medios (como el DMA-1000) pueden reproducir archivos en las carpetas compartidas del NSA Public (Pública), Video (Vídeo), Music (Música) y Photo (Foto).
- Page 90 ENGLISH Instalación del software cliente de medios 1. Coloque el CD e su CD-ROM. Haga clic en Tools (Herramientas) en la pantalla que aparece. Luego haga clic en Media Client Software. Si esta pantalla no aparece, utilice Windows Explorer (Mi PC) para ir al CD-ROM (normalmente la unidad D).
- Page 91 ESPAÑOL ENGLISH 3. Escriba su información en esta pantalla. Escriba un nombre de usuario (hasta 64 caracteres ASCII recomendado). El nombre de la compañía es opcional (hasta 64 caracteres ASCII recomendado). El número de serie está en la solapa del CD incluido y también en la parte inferior del NSA. 4.
- Page 92 ENGLISH 5. La pantalla siguiente aparece si no tiene DirectX versión 9.0 instalada, haga clic en sí para instalarla. 6. Cierre cualquier otra aplicación y haga clic en Finish (Finalizar) para reiniciar su ordenador. Reproducir sus archivos de medios Utilice un cliente de medios (como el DMA-1000) o un ordenador con software cliente de medios compatible con DLNA (incluido en el CD del NSA) para reproducir vídeo, música y archivos de fotos almacenados en el NSA.
- Page 93 ESPAÑOL ENGLISH 1. Tras reiniciar su ordenador, haga clic en Inicio > Todos los programas > DigiOn > DiXiM Media Client para iniciar el cliente de medios. 2. El cliente de medios organiza los archivos compartidos de los servidores de medios de su red en los menús MUSIC (MÚSICA), VIDEO (VÍDEO) y PHOTO (FOTO).
- Page 94 ENGLISH 4. Haga doble clic en el archivo que desea reproducir. Los archivos con formatos o códecs no soportados pueden no aparecer apropiadamente. Consulte el apéndice con las especificaciones del producto en la Guía del usuario para más detalles sobre los formatos y códecs soportados. Puesto que el software de medios utiliza los códecs instalados en su ordenador, también es posible que el software cliente de medios soporte el códec de un archivo pero no está...
- Page 95 ESPAÑOL ENGLISH Copiar archivos utilizando Memeo Autobackup Utilice el software Memeo Autobackup incluido en el CD para copiar automáticamente los archivos seleccionados de su ordenador al NSA siempre que modifique los archivos. Requisitos Memeo Autobackup funciona con Windows 2000 Workstation con Service Pack 6, Windows XP Pro o Windows XP Home Edition.
- Page 96 ENGLISH 2. Inserte el CD incluido en la unidad de CD-ROM. Haga clic en el icono Tools (Herramientas) en la pantalla que aparece. Luego haga clic en Memeo Instant Backup Software. Si esta pantalla no aparece, utilice Windows Explorer (Mi PC) para ir al CD-ROM (normalmente la unidad D).
- Page 97 ESPAÑOL ENGLISH 4. Cuando vea la pantalla siguiente, seleccione Network Places (Lugares de la red) y haga clic en el enlace para seleccionar su carpeta de copia de seguridad. 5. Seleccione la unidad mapeada del NSA y haga clic en OK (Aceptar).
- Page 98 ENGLISH 6. En esta pantalla, seleccione los elementos que desea copiar. 7. Esta pantalla muestra los elementos seleccionados para realizar la copia de seguridad. Confirme las selecciones y haga clic en Next (Siguiente).
- Page 99 ESPAÑOL ENGLISH 8. Especifique un nombre para su plan de copia de seguridad (o simplemente utilice el predeterminado). Haga clic en Next (Siguiente) y luego en Done (Listo). Utilizar Memeo Autobackup tras la configuración inicial Tras haber instalado y configurado Memeo Autobackup, haga doble clic en el icono en la bandeja del sistema para abrir la pantalla inicial del programa.
- Page 100 ENGLISH Si el icono no aparece, puede hacer clic en Inicio > Programas > Memeo Autobackup > Memeo Autobackup para abrirlo.
- Page 101 ESPAÑOL ENGLISH Solución de problemas Intente lo siguiente si no consigue acceder a la pantalla de inicio de sesión del NSA. • Asegúrese de que el NSA esté encendido. • Compruebe las conexiones de cables del NSA. Compruebe que el LED del NSA LAN (situado en el puerto LAN) esté...
- Page 102 ENGLISH...
-
Page 103: Français
FRANÇAIS FRANÇAIS ENGLISH Introduction Le NSA vous permet de partager des fichiers et de sauvegarder des données sur votre réseau domestique. Vous pouvez aussi lire des fichiers vidéo, de musique et afficher des photos stockés sur le NSA en utilisant un client média comme le DMA-1000. - Page 104 ENGLISH • Accéder au NSA, • NSA Ouvrir une session, • Créer un volume, • Mappez le NSA sur votre ordinateur Lecteur réseau, • Utiliser le NSA comme un serveur multimédia, • Sauvegarder des fichiers à l’aide de Memeo Autobackup, Consulter le guide de l’utilisateur sur le CD inclus pour les instructions concernant la configuration de toutes les fonctionnalités du NSA.
- Page 105 FRANÇAIS ENGLISH Avant de commencer Vous avez besoin des éléments suivants avant de commencer : • NSA • CD inclus contenant l’utilitaire de découverte du NSA, le programme Memeo Autobackup, logiciel client média, et le guide de l’utilisateur • Cordon d'alimentation et alimentation (externe) •...
- Page 106 ENGLISH Installer les disques durs Une fois que vous avez installé un disque dur sur le NSA et créé un volume, toutes les données existantes sur le disque seront effacées. Si vous voulez installer deux disques durs et les configurer en volumes RAID (voir page 117), il est recommandé...
- Page 107 FRANÇAIS ENGLISH 3. Utilisez un tournevis pour retirer les vis de fixation d’un tiroir de disque. 4. Extrayez le tiroir de disque. 5. Placez le disque sur une surface plane avec les trous de vis dirigés vers le haut. Placez le tiroir du disque sur celui-ci et fixez-le à l’aide des vis comme indiqué.
- Page 108 ENGLISH 6. Replacez le tiroir en le faisant coulisser dans la baie du disque. Assurez- vous que le trou de vis se trouve au-dessus. Poussez le tiroir vers l’intérieur sur toute sa longueur de façon à ce que le trou de vis situé au- dessus soit aligné...
- Page 109 FRANÇAIS ENGLISH 9. Replacez le panneau arrière et serrez les vis papillon.
- Page 110 ENGLISH Connecter le NSA 1. Utilisez le câble Ethernet fourni pour connecter le port LAN situé au dos du NSA à un ordinateur, commutateur ou routeur sur votre réseau. 2. Connectez une extrémité du cordon d'alimentation à la prise POWER (Alimentation) située au dos duNSA et l'autre extrémité...
- Page 111 FRANÇAIS ENGLISH 3. Appuyez sur le bouton d’alimentation situé sur la façade du NSA pour l’allumer. Observez les voyants en façade. Si aucun voyant ne s’allume, vérifiez que le cordon d’alimentation est correctement branché et que la source d’alimentation est allumée.
-
Page 112: Accéder Au Nsa
ENGLISH Accéder au NSA Pour un ordinateur Windows, utilisez l’utilitaire Discovery (voir page 112). Pour un autre type d’ordinateur (comme Mac ou Linux), utilisez Direct Access (voir page 114). Utiliser l’utilitaire de découverte pour accéder au 1. Insérez le CD inclus dans votre lecteur de CD-ROM. Cliquez sur Setup (Installer) dans l’écran qui s’affiche. - Page 113 FRANÇAIS ENGLISH 2. L'assistant d'installation démarre. Suivez les instructions de l'installateur. Cliquez sur Finish (Terminer) pour terminer l'installation. 3. Dans Windows, cliquez sur Start (Démarrer) > All Programs (Tous les programmes) > ZyXEL NSA > NSA Discovery Utility (utilitaire de découverte NSA) pour exécuter l’utilitaire de découverte.
- Page 114 ENGLISH 4. L’utilitaire donne la liste des NSA dans votre réseau. 5. Cliquez sur l’icône Admin pour voir l’écran d’ouverture de session du configurateur web (voir page 115). • (Si vous devez changer l'adresse NSAIP du , cliquez sous l'icône sous Config.
-
Page 115: Nsa Ouvrir Une Session
FRANÇAIS ENGLISH NSA Ouvrir une session Cette section vous indique comment ouvrir une session dans le NSA et changer le mot de passe d’administrateur. Si vous n’arrivez pas à accéder à l’écran d’ouverture de session, consultez la section de dépannage à la fin de ce guide. 1. - Page 116 ENGLISH 2. Il est conseillé de choisir un nouveau mot de passe (et de le noter). Cliquez sur Apply (Appliquer) pour sauvegarder vos modifications et passer à l'écran suivant. 3. L’écran My NSA s’affiche.
-
Page 117: Créer Un Volume
FRANÇAIS ENGLISH Créer un volume Cette section vous indique comment créer un volume interne dans le NSA. Un volume est une zone de stockage sur un ou plusieurs disques durs. 1. Cliquez sur Administration. - Page 118 ENGLISH 2. S’il n’y a pas encore de volume interne (zone de stockage), cliquez sur Storage (Stockage) sur le panneau de navigation, et cliquez ensuite sur Create an Internal Volume (Créer un volume interne). Si votre disque dur comporte déjà un volume que vous voulez utiliser, passez à la section 6. Si vous voulez supprimer un volume existant, consultez le chapitre Storage Screens (Ecrans de stockage) dans le guide de l’utilisateur.
- Page 119 FRANÇAIS ENGLISH • RAID 0 (non recommandé) Présente les vitesses d’écriture les plus élevées, mais si un disque tombe en panne, vous perdez toutes les données sur les deux disques. Utilisez uniquement RAID 0 pour les données non critiques nécessitant des vitesses d’écriture élevées (comme la vidéo, les graphiques et les jeux).
- Page 120 ENGLISH 5. Patientez pendant la création du volume. 6. Vous pouvez utiliser le volume une fois que l’état est Healthy (Sain). Pour un volume RAID, l’état est Resync jusqu’à ce que le volume soit prêt. 7. Si deux disques sont installés et que vous avez créé un volume JBOD sur un seul disque, répétez les étapes pour créer un second volume sur l’autre disque.
-
Page 121: Mappez Le Nsa Sur Votre Ordinateur Lecteur Réseau
FRANÇAIS ENGLISH Mappez le NSA sur votre ordinateur Lecteur réseau Vous stockez les fichiers sur le NSA dans partages (semblables à des dossiers Windows partagés). Mapper unNSA partage sur un lecteur réseau Windows pour pouvoir utiliser Windows Explorer (Explorateur Windows) pour transférer des fichiers vers et à... - Page 122 ENGLISH 3. Le dossier public du NSA s’affiche dans Explorateur Windows. 4. Cliquez sur Tools (Outils) > Map Network Drive (Mapper le lecteur réseau). Dans le champ Drive (Lecteur), sélectionnez une lettre de lecteur à utiliser pour le NSA. Dans le champ Folder (Dossier), sélectionnez le NSA (vous devrez peut-être parcourir pour le trouver).
-
Page 123: Utiliser Le Nsa Comme Un Serveur Multimédia
FRANÇAIS ENGLISH Utiliser le NSA comme un serveur multimédia Le NSA est aussi un serveur média. Par défaut, les ordinateurs sur lesquels sont installés le logiciel client média inclus ou des périphériques client média (tels que DMA-1000) peuvent lire des fichiers média dans les partages Public, Video (Vidéo), Music (Musique) et Photo du NSA. - Page 124 ENGLISH Installation des logiciels client média 1. Placez le CD dans votre lecteur de CD-ROM. Cliquez sur Tools (Outils) dans l’écran qui s’affiche. Cliquez ensuite sur le logiciel Media Client Software (client média). Si cet écran n’apparaît pas, utilisez Windows Explorer (My Computer) (Poste de travail) pour accéder au CD-ROM (généralement lecteur D).
- Page 125 FRANÇAIS ENGLISH Voir la section Requirements (Configuration requise) si vous avez des difficultés à installer ou à utiliser le serveur média. 3. Entrez vos informations dans cet écran. Entrez un nom d'utilisateur (jusqu'à 64 caractères ASCII recommandé). Le nom de la société est facultatif (jusqu'à...
- Page 126 ENGLISH 5. L’écran suivant s’affiche si DirectX version 9.0 n’est pas installé sur votre ordinateur, cliquez sur Yes (Oui) pour l’installer. 6. Fermez toutes les autres applications et cliquez sur Finish (Terminer) pour redémarrer votre ordinateur. Lire vos fichiers média Utilisez un client média (comme le DMA-1000) ou un ordinateur avec le logiciel client média DLNA (inclus dans votre NSA CD) pour lire des fichiers vidéo, musique, et photo stockés sur le NSA.
- Page 127 FRANÇAIS ENGLISH 1. Après le redémarrage de votre ordinateur, cliquez sur Start (Démarrer) > All Programs (Tous les programmes) > DigiOn > DiXiM Media Client (Client média DiXiM) pour démarrer le client média. 2. Le client média trie les fichiers partagés sur les serveurs média de votre réseau dans les menus MUSIC (MUSIQUE), VIDEO (VIDÉO) et PHOTO.
- Page 128 ENGLISH 4. Double cliquez sur le fichier que vous voulez lire. Les fichiers ou codecs d'un format non pris en charge risquent de ne pas s'afficher correctement. Voir l’appendice sur les spécifications du produit du guide de l’utilisateur pour les informations concernant les formats et les codecs pris en charge.
-
Page 129: Sauvegarder Des Fichiers À L'aide De Memeo Autobackup
FRANÇAIS ENGLISH Sauvegarder des fichiers à l’aide de Memeo Autobackup Utilisez le logiciel Memeo Autobackup inclus sur le CD pour sauvegarder automatiquement les fichiers sélectionnés depuis votre ordinateur sur le NSA chaque fois que vous modifiez les fichiers. Configuration requise Memeo Autobackup fonctionne avec Windows 2000 Workstation avec Service Pack 6, Windows XP Pro, ou Windows XP Edition familiale. - Page 130 ENGLISH 2. Insérez le CD inclus dans votre lecteur de CD-ROM. Cliquez sur l’icône Tools (Outils) dans l’écran qui s’affiche. Puis cliquez sur le logiciel Memeo Instant Backup. Si cet écran n’apparaît pas, utilisez Windows Explorer (My Computer) (Poste de travail) pour accéder au CD-ROM (généralement lecteur D).
- Page 131 FRANÇAIS ENGLISH 4. Quand vous voyez l’écran suivant, sélectionnez Network Places (Emplacements du réseau) et cliquez sur link (Liaison) pour sélectionner votre dossier de sauvegarde. 5. Sélectionnez le lecteur mappé du NSA et cliquez sur OK.
- Page 132 ENGLISH 6. Dans cet écran, sélectionnez les éléments que vous voulez sauvegarder. 7. Cet écran donne la liste des éléments que vous avez sélectionnés pour être sauvegardés. Confirmez vos sélections et cliques sur Next (Suivant).
- Page 133 FRANÇAIS ENGLISH 8. Spécifiez un nom pour votre plan de sauvegarde (ou utilisez simplement le nom par défaut). Cliquez sur Next (Suivant) et ensuite sur Done (Fait). Utiliser Memeo Autobackup après l’installation initiale Après avoir installé et configuré Memeo Autobackup, double cliquez sur l’icône dans la barre d’état pour ouvrir l’écran de démarrage du programme.
- Page 134 ENGLISH Si l’icône ne s’affiche pas, vous pouvez cliquer sur Start (Démarrer) > Programs (Programmes) > Memeo Autobackup > Memeo Autobackup pour le démarrer.
- Page 135 FRANÇAIS ENGLISH Dépannage Procédez de la manière suivante si vous n’arrivez pas à obtenir l’écranNSA d’ouverture de session. • Assurez-vous que le NSA est allumé. • Vérifiez les connexions des câbles du NSA. Vérifiez que la LED LAN du NSA (située sur le port LAN) est allumée ou clignote. •...
- Page 136 ENGLISH...
-
Page 137: Italiano
ITALIANO ITALIANO ENGLISH Introduzione L'NSA consente di condividere file e di eseguire il backup di dati nella propria rete. È anche possibile riprodurre video, musica e visualizzare file fotografici memorizzati sull'NSA utilizzando un client multimediale come il DMA-1000. Come funziona L'illustrazione si riferisce all'NSA in una rete domestica. - Page 138 ENGLISH • NSA - Login, • Creazione di un volume, • Mappare l'NSA all'unità di rete del computer, • Utilizzo dell'NSA come server multimediale, • Eseguire il backup dei file tramite Memeo Autobackup, Fare riferimento alla Guida utente memorizzata sul CD fornito a corredo per i dettagli sulla configurazione di tutte le funzioni dell'NSA.
- Page 139 ITALIANO ENGLISH Prima di iniziare Prima di iniziare è necessario disporre di: • NSA • Il CD fornito a corredo contenente l'utilità di analisi NSA, il programma Memeo Autobackup, il software del client multimediale e la Guida utente • Il cavo di alimentazione e l'alimentatore (esterno) •...
- Page 140 ENGLISH Installazione delle unità a disco rigido Quando si installa un disco rigido sull'NSA e si crea un volume, tutti i dati esistenti sul disco vengono cancellati. Per installare due dischi rigidi e configurarli come volumi RAID (vedere pagina 151), per ottenere le prestazioni migliori è...
- Page 141 ITALIANO ENGLISH 3. Utilizzare un cacciavite per rimuovere la vite di sostegno da un vassoio. 4. Far scorrere fuori il vassoio del disco. 5. Appoggiare il disco su una superficie piana con i fori delle viti rivolti verso l'alto. Appoggiare il vassoio del disco su di esso e fissarlo con le viti (vedere la figura).
- Page 142 ENGLISH 6. Reinserire il vassoio nel bay del disco. Verificare che il foro della vite sia rivolto verso l'alto. Spingere il vassoio completamente in modo che il foro della vite superiore sia allineato con il telaio interno. 7. Ravviare la vite di sostegno del vassoio. 8.
- Page 143 ITALIANO ENGLISH 9. Reinstallare il pannello posteriore e avvitare le viti zigrinate.
- Page 144 ENGLISH Collegare l'NSA 1. Utilizzare il cavo Ethernet fornito a corredo per collegare la porta LAN sul retro dell'NSA a un computer, switch o router nella rete. 2. Collegare un'estremità del cavo di alimentazione alla presa POWER (alimentazione) che si trova dietro l'NSA e l'altra estremità all'alimentatore esterno.
- Page 145 ITALIANO ENGLISH 3. Premere il pulsante di accensione che si trova davanti all'NSA per accendere l'unità. Osservare le luci del pannello anteriore. Se nessuna spia è accesa, verificare che il cavo di alimentazione non sia lento e che sia presente corrente. •...
- Page 146 ENGLISH Accesso all'NSA Per un computer Windows utilizzare il programma Discovery Utility (vedere pagina 146). Per un altro tipo di computer (come ad esempio Mac o Linux), utilizzare Direct Access (vedere pagina 148). Uso dell'utilità di analisi per accedere all'NSA 1.
- Page 147 ITALIANO ENGLISH 2. Viene avviata l'installazione guidata. Seguire le istruzioni del programma di installazione. Fare clic su Finish (fine) per completare l'installazione. 3. In Windows, scegliere Start > Tutti i programmi > ZyXEL NSA > NSA Discovery Utility per avviare l'utilità di analisi. Se nel computer c'è più di una scheda di rete, viene richiesto di selezionarne una.
- Page 148 ENGLISH 5. Fare clic sull'icona Admin per visualizzare la schermata di accesso dello strumento di configurazione Web (vedere pagina 149). • Se occorre cambiare l'indirizzo IP dell'NSA, scegliere l'icona sotto Config. • Per mappare l'NSA a un'unità di rete Windows, fare clic sull'icona sotto Map (vedere pagina 156).
-
Page 149: Nsa - Login
ITALIANO ENGLISH NSA - Login In questa sezione viene illustrato come accedere all'NSA e come cambiare la password di amministratore. Se non si riesce a visualizzare la schermata di login, vedere la sezione sulla risoluzione dei problemi che si trova alla fine di questa guida. - Page 150 ENGLISH 2. Si consiglia di utilizzare una nuova password (e di annotarla). Scegliere Apply (applica) per salvare le modifiche e passare alla sezione successiva. 3. Viene visualizzata la schermata My NSA.
-
Page 151: Creazione Di Un Volume
ITALIANO ENGLISH Creazione di un volume Il questa sezione viene spiegato come creare un volume interno nell'NSA. Un volume è un'area di archiviazione sviluppata su uno o più dischi rigidi. 1. Fare clic su Administration (amministrazione). - Page 152 ENGLISH 2. Se non è già presente un volume interno (area di archiviazione), scegliere Storage (archiviazione) dal pannello di navigazione e quindi scegliere Create an Internal Volume (crea un volume interno). Se il disco rigido dispone già di un volume che si desidera utilizzare, saltare alla sezione 6. Per eliminare un volume esistente, vedere il capitolo Schermate di archiviazione nella Guida utente.
- Page 153 ITALIANO ENGLISH • RAID 0 (non consigliato) Consente di ottenere le velocità di scrittura più elevata, ma se uno dei dischi si guasta si perdono tutti i dati presenti su entrambi i dischi. Utilizzare RAID 0 solo per dati non critici che richiedono alte velocità di scrittura (come ad esempio video, grafica o giochi).
- Page 154 ENGLISH 4. Immettere un nome nel campo Volume Name (nome volume). Scegliere Apply (applica) per avviare la creazione del volume. 5. Attendere la creazione del volume.
- Page 155 ITALIANO ENGLISH 6. È possibile utilizzare il volume dopo che lo stato è passato su Healthy (pronto). Per un volume RAID, lo stato resta Resync (risincronizzazione) finché il volume non è pronto. 7. Se sono installati due dischi e viene creato un volume JBOD a disco singolo, ripetere i passi per creare un secondo volume sull'altro disco.
-
Page 156: Mappare L'nsa All'unità Di Rete Del Computer
ENGLISH Mappare l'NSA all'unità di rete del computer I file vengono archiviati sull'NSA in condivisioni (sono come cartelle condivise di Windows). Mappare una condivisione di NSA a un'unità di rete di Windows per poter utilizzare Esplora risorse di Windows per trasferire file da e per l'NSA. - Page 157 ITALIANO ENGLISH 3. In Esplora risorse di Windows viene visualizzata la cartella pubblica dell'NSA. 4. Scegliere Strumenti > Connetti unità di rete. Nel campo Unità, selezionare la lettera di unità da utilizzare per l'NSA. Nel campo Cartella, selezionare l'NSA (può essere necessario sfogliare il contenuto per trovarla).
- Page 158 ENGLISH 5. Se sul computer non è installata l'utilità di analisi è possibile aprire Esplora risorse di Windows e digitare due barre inverse (\\) seguite dal nome del server dell'NSA (nsa220 per impostazione predefinita) oppure dall'indirizzo IP.
-
Page 159: Utilizzo Dell'nsa Come Server Multimediale
ITALIANO ENGLISH Utilizzo dell'NSA come server multimediale Anche l'NSA è un server multimediale. Per impostazioni predefinita, i computer su cui è installato il software client multimediale fornito a corredo oppure dispositivi client multimediali (come ad esempio il DMA-1000) possono riprodurre i file multimediali presenti nelle condivisioni NSA? Public, Video, Music e Photo. - Page 160 ENGLISH • Consigliati 256 MB o quantità superiore Installazione del software del client multimediale 1. Inserire il CD nell'unità CD-ROM. Scegliere Tools (strumenti) nella schermata visualizzata. Scegliere Media Client Software. Se la schermata non viene visualizzata, aprire il CD (generalmente l'unità D) da Esplora risorse di Windows (Risorse del computer).
- Page 161 ITALIANO ENGLISH Fare riferimento alla sezione dei requisiti di sistema in caso di problemi nell'installazione o nell'uso del software Media Server. 3. Immettere le informazioni in questa schermate. Immettere un nome utente (massimo di 64 caratteri ASCII). Il nome della società è opzionale (massimo 64 caratteri ASCII).
- Page 162 ENGLISH 5. La schermata viene visualizzata se non è installato DirectX versione 9.0. Fare clic su Yes (sì) per installarlo. 6. Chiudere tutte le applicazioni e scegliere Finish (fine) per riavviare il computer. Riproduzione dei file multimediali Utilizzare un client multimediale (come il DMA-1000) o un computer dotato di un software client multimediale compatibile con DLNA (incluso nel CD dell'NSA) per riprodurre video, musica e foto archiviate sull'NSA.
- Page 163 ITALIANO ENGLISH 1. Una volta riavviato il computer, scegliere Start > Tutti i programmi > DigiOn > DiXiM Media Client per avviare il client multimediale. 2. Il client multimediale ordina i file condivisi sui server multimediali della rete nei menu MUSIC, VIDEO e PHOTO. Utilizzare il menu SERVER per visualizzare i file presenti su uno specifico server multimediale (come l'NSA).
- Page 164 ENGLISH 4. Fare doppio clic sul file da riprodurre. I file con formati o codec non supportati possono non essere visualizzati correttamente. Vedere l'appendice della Guida utente contenente le specifiche tecniche del prodotto per i dettagli relativi ai formati e ai codec supportati. Dato che il software multimediale utilizza i codec installati sul computer, è...
-
Page 165: Eseguire Il Backup Dei File Tramite Memeo Autobackup
ITALIANO ENGLISH Eseguire il backup dei file tramite Memeo Autobackup Utilizzare il software Memeo Autobackup incluso nel CD per eseguire automaticamente il backup dei file selezionati dal computer all'NSA ogni volta che si modificano i file. Requisiti Memeo Autobackup funziona con Windows 2000 Workstation con Service Pack 6, Windows XP Pro oppure Windows XP Home Edition. - Page 166 ENGLISH 2. Inserire il CD fornito a corredo nell'unità CD-ROM. Fare clic sull'icona Tools (strumenti) nella schermata visualizzata. A questo punto, scegliere Memeo Instant Backup Software. Se la schermata non viene visualizzata, aprire il CD (generalmente l'unità D) da Esplora risorse di Windows (Risorse del computer).
- Page 167 ITALIANO ENGLISH 4. Alla visualizzazione della schermata seguente, scegliere Network Places (percorsi di rete) e quindi fare clic sul collegamento che consente di selezionare la cartella di backup. 5. Selezionare l'unità connessa dell'NSA e fare clic su OK.
- Page 168 ENGLISH 6. In questa schermata, selezionare le voci di cui eseguire il backup. 7. In questa schermata vengono elencati gli elementi selezionati per il backup. Confermare la selezione e scegliere Next (avanti).
- Page 169 ITALIANO ENGLISH 8. Specificare un nome per il piano di backup (oppure utilizzare il nome predefinito). Scegliere Next (avanti) e quindi Done (fine). Utilizzo di Memeo Autobackup dopo la configurazione iniziale Una volta installato e configurato Memeo Autobackup, fare doppio clic sull'icona nell'area di notifica del sistema per aprire la schermata iniziale del programma.
- Page 170 ENGLISH Se l'icona non viene visualizzata, è possibile scegliere Start > Programmi > Memeo Autobackup > Memeo Autobackup per avviare il programma.
-
Page 171: Risoluzione Dei Problemi
ITALIANO ENGLISH Risoluzione dei problemi Se non si riesce a visualizzare la schermata di login dell'NSA, provare con le istruzioni seguenti. • Verificare che l'unità NSA sia accesa. • Controllare i collegamenti dei cavi dell'NSA. Verificare che il LED LAN dell'NSA (che si trova sulla porta LAN) sia acceso o lampeggiante. - Page 172 ENGLISH...
-
Page 207: Svenska
SVENSKA SVENSKA ENGLISH Introduktion NSA låter dig dela filer och säkerhetskopiera data på ditt nätverk i hemmet. Du kan även spela video, musik och visa fotofiler lagrade i NSA med användning av en medieklient som t.ex. DMA-1000. Så här fungerar det Ovanför är NSA i ett hemmanätverk. - Page 208 ENGLISH • Skapa en volym, • Mappa NSA till datorns nätverksenhet, • Använda NSA som multimediaserver, • Säkerhetskopiera filer med Memeo Autobackup, Se bruksanvisningen på den medföljande CD-skivan för information om alla funktioner hos NSA.
- Page 209 SVENSKA ENGLISH Innan du börjar Du behöver följande innan du kan komma igång: • NSA • Den medföljande CD-skivan innehåller NSA-upptäcktsverktyg, Memeo Autobackup-program, mediaklientprogramvara och bruksanvisning • Strömkabel och strömadapter (extern) • Medföljande Ethernet-sladd • En eller två SATA I eller SATA 3.0 Gbit/s (Serial Advanced Technology Attachment) –kompatibel(-la) hårddisk(ar) med 15-stifts SATA- strömanslutningar •...
- Page 210 ENGLISH Installera hårddiskenheter När du installerar en hårddiskenhet på NSA och skapar en volym, raderas alla befintliga data på disken. Om du vill installera två hårddiskenheter och konfigurera dem som RAID-volymer (se sida 221), rekommenderas du att använda samma diskstorlek och modell för bästa prestanda. Hårddiskenheter medger INTE utbyte under drift (hot swap).
- Page 211 SVENSKA ENGLISH 3. Använd en skruvmejsel för att ta bort fästskruven från diskfacket. 4. Dra ut diskfacket. 5. Placera disken på ett plant underlag med skruvhålen vända uppåt. Placera diskfacket ovanpå och fäst med skruvarna enligt bild.
- Page 212 ENGLISH 6. åt facket glida tillbaka in i diskfacket. Kontrollera att skruvhålet befinner sig överst. Tryck in facket helt så att skruvhålet ovanpå är i jämnhöjd med den inre ramen. 7. Sätt tillbaka diskfackets fästskruv. 8. Upprepa steg till om du har en andra hårddisk.
- Page 213 SVENSKA ENGLISH 9. Sätt tillbaka bakpanelen och spänn tumskruvarna.
- Page 214 ENGLISH Anslut NSA 1. Använd den medföljande Ethernet-sladden för att ansluta LAN-porten baktill på NSA till en dator, switch eller router i ditt nätverk 2. Anslut ena änden av strömkabeln till strömuttaget POWER baktill på NSA, och den andra änden till den externa strömadapter. Anslut den externa strömadaptern till ett eluttag.
- Page 215 SVENSKA ENGLISH 3. Tryck på strömknappen framtill på NSA för att sätta på den. Titta på frontpanelens lampor. Om ingen lampa tänds, kontrollera att strömkabeln är ordentligt ansluten och att strömadaptern är påslagen. • Strömlampknappen lyser blå. • Lampan SYS lyser grön efter lyckad start (det tar ungefär 50 sekunder). •...
- Page 216 ENGLISH Öppna NSA För en Windows-dator, använd Discovery Utility (se sida 216). För annan typ av dator (t.ex. Mac eller Linux), använd direkt åtkomst (se sida 218). Använda upptäcktsverktyget för att öppna NSA 1. Sätt in den medföljande CD-skivan i din CD-ROM-enhet. Klicka på Setup (inställning) på...
- Page 217 SVENSKA ENGLISH 2. Installationsguiden startar. Följ installationsprogrammets instruktioner. Klicka på Finish (slutför) för att slutföra installationen. 3. I Windows, klicka på start > All Programs > ZyXEL NSA > NSA Discovery Utility för att köra upptäcktsverktyget. Om din dator har fler än ett nätverkskort, uppmanas du att välja ett av dem.
- Page 218 ENGLISH 5. Klicka på ikonen Admin för att visa webbkonfiguratorns inloggningsskärm (se sida 219). • Om du vill ändra NSAs IP-adress, klicka på ikonen under Config. • För att mappa NSA till en Windows-nätverksenhet, klicka på ikonen under Map (se sida 225). •...
- Page 219 SVENSKA ENGLISH NSA Logga in Detta avsnitt beskriver hur du loggar in i NSA och ändrar administratörslösenordet. Om du inte kan komma till inloggningsskärmen, se felsökningsavsnittet i slutet av denna guide. 1. Ange standardanvändarnamn ‘admin’ och lösenord ‘1234’ och klicka på Login (logga in).
- Page 220 ENGLISH 2. Du rekommenderas att byta till ett nytt lösenord (och att skriva ner det). Klicka på Apply (verkställ) för att spara dina ändringar och gå till nästa skärm. 3. Skärmen My NSA (min NSA) visas.
-
Page 221: Skapa En Volym
SVENSKA ENGLISH Skapa en volym Detta avsnitt beskriver hur du skapar en intern volym i NSA. En volym är ett lagringsutrymme på en eller flera hårddiskenheter. 1. Klicka på Administration. - Page 222 ENGLISH 2. Om det inte redan finns en intern volym (lagringsutrymme), klicka på Storage (lagring) på navigationspanelen, och klicka sedan på Create an Internal Volume (skapa en intern volym). Om din hårddisk redan har en volym som du vill använda, gå direkt till avsnitt 6. Om du vill ta bort en befintlig volym, se kapitlet Storage Screens (lagringsskärmar) i bruksanvisningen.
- Page 223 SVENSKA ENGLISH • RAID 0 (rekommenderas inte) Har de högsta skrivhastigheterna men om en disk havererar, förlorar du alla data på båda hårddiskarna. Använd enbart RAID 0 för icke- kritiska data som kräver höga skrivhastigheter (som t.ex. video, grafik och spel). Totalt datalagringsutrymme är begränsat till den minsta hårddiskens dubbla kapacitet.
- Page 224 ENGLISH 5. Vänta medan volymen skapas. 6. Du kan använda volymen efter det att status blivit Healthy (frisk). För en RAID-volym blir statusen Resync (omsynkronisering) tills volymen är klar. 7. Om två diskar är installerade och du skapar en JBOD-volym för en enda disk, upprepa stegen för att skapa en andra volym på...
-
Page 225: Mappa Nsa Till Datorns
SVENSKA ENGLISH Mappa NSA till datorns nätverksenhet Du lagrar filer på NSA i kataloger (de är som delade Windows-mappar). Mappa en katalog från NSA till ett Windows-nätverk för att kunna använda Windows Explorer (utforskaren) för att överföra filer till och från NSA. När du har mappat en katalog kan du dra och släppa filer mellan din dator och NSA. - Page 226 ENGLISH 3. Den offentliga katalogen i NSA visas i Windows Explorer. 4. Klicka på Tools (verktyg), > Map Network Drive (mappa nätverksenhet). I fältet Drive (enhet), välj en enhetsbokstav som ska användas för NSA. I fältet Folder (mapp), välj NSA (eventuellt måste du söka efter den). 5.
-
Page 227: Multimediaserver
SVENSKA ENGLISH Använda NSA som multimediaserver NSA är även en mediaserver. Som standard kan datorer med den medföljande mediaklientprogramvaran installerad eller mediaklientenheter (som t.ex. DMA-1000) spela mediafiler i NSAs kataloger Public (offentlig), Video, Music (musik) och Photo (foto). Du kan även tillämpa multimediaserverfunktionen på... - Page 228 ENGLISH Installation av mediaklientprogramvara 1. Placera CD-skivan i din CD-ROM-enhet. Klicka på Tools (verktyg) på skärmen som visas. Klicka därefter på Media Client Software (mediaklientprogramvara). Om denna skärm inte visas, använd Windows Explorer (My Computer) (utforskaren-den här datorn) för att gå till CD-ROM (vanligtvis enhet D).
- Page 229 SVENSKA ENGLISH Se avsnittet Systemkrav om du får svårigheter med att installera eller använda mediaservern. 3. Ange dina uppgifter i detta fönster. Ange ett användarnamn (upp till 64 ASCII-tecken rekommenderas). Företagsnamnet är tillval (upp till 64 ASCII-tecken rekommenderas). Serienumret finns på fodralet till den medföljande CD-skivan samt undertill på...
- Page 230 ENGLISH 5. Följande skärm visas om du inte har DirectX version 9.0 installerat. Klicka på yes (ja) för att installera det. 6. Stäng alla andra program och klicka på Finish (slutför) för att starta om din dator. Spela mediafiler Använd en mediaklient (som t.ex. DMA-1000) eller en dator med DLNA- kompatibel mediaklientprogramvara (medföljer på...
- Page 231 SVENSKA ENGLISH 1. När din dator har startat om, klicka på Start > All Programs > DigiOn > DiXiM Media Client för att starta mediaklienten. 2. Mediaklienten sorterar de delade filerna på nätverkets mediaservrar med menyerna MUSIC (musik), VIDEO och PHOTO (foto). Använd menyn SERVER för att visa filer på...
- Page 232 ENGLISH 4. Dubbelklicka på den fil du vill spela. Filer med icke-understödda format eller codecs visas kanske inte på rätt sätt. Se bruksanvisningens bilaga med produktspecifikationer för information om vilka format och codecs som stöds. Eftersom mediaprogramvaran använder din dators installerade codecs, är det också...
-
Page 233: Autobackup
SVENSKA ENGLISH Säkerhetskopiera filer med Memeo Autobackup Använd programvaran Memeo Autobackup som medföljer på CD-skivan för att automatiskt säkerhetskopiera valda filer från datorn till NSA närhelst du modifierar filerna. Systemkrav Memeo Autobackup fungerar med Windows 2000 Workstation med Service Pack 6, Windows XP Pro eller Windows XP Home Edition. Installation och inställning av Memeo Autobackup Programmet Memeo Autobackup använder samma nätverksport... - Page 234 ENGLISH 2. Sätt in den medföljande CD-skivan i din CD-ROM-enhet. Klicka på ikonen Tools (verktyg) på skärmen som visas. Klicka därefter opMemeo Instant Backup Software. Om denna skärm inte visas, använd Windows Explorer (My Computer) för att gå till CD-ROM-enheten (vanligtvis enhet D). Dubbelklicka på...
- Page 235 SVENSKA ENGLISH 4. När du ser följande skärm, välj Network Places (nätverksplatser) och klicka på länken för att välja säkerhetskopieringsmapp. 5. Välj NSAs mappade enhet och klicka på OK.
- Page 236 ENGLISH 6. På denna skärm väljer du de poster som du vill säkerhetskopiera. 7. Denna skärm listar de poster du valt för säkerhetskopiering. Bekräfta dina val och klicka på Next (nästa).
- Page 237 SVENSKA ENGLISH 8. Ange ett namn för din säkerhetskopieringsplan (eller använd standardalternativet). Klicka först på Next (nästa) och därefter på Done (klar). Använda Memeo Autobackup efter grundinstallation När du har installerat och konfigurerat Memeo Autobackup, dubbelklicka på ikonen i aktivitetsfältet för att öppna programmets startskärm.
- Page 238 ENGLISH Om ingen ikon visas kan du klicka på Start > Programs > Memeo Autobackup > Memeo Autobackup för att starta det.
- Page 239 SVENSKA ENGLISH Felsökning Pröva följande om du inte lyckas komma till inloggningsskärmen för NSA. • Kontrollera att NSA är påslagen. • Kontrollera NSAs kabelanslutningar. Kontrollera att NSAs LAN-lampa (som sitter på LAN-porten) lyser eller blinkar. • Om du försökte logga in direkt genom att ange servernamn (standard nsa220) i webbläsarens adressfält, kontrollera att du skrev in det rätt.
- Page 240 ENGLISH...
-
Page 241: 繁體中文
繁體中文 繁體中文 ENGLISH 簡介 NSA 可讓您利用家用網路分享檔案及備份資料。您也可以使用例如 DMA-1000 的媒體用戶端,播放及顯示儲存在 NSA 的視訊、音樂、及相片檔案。 運作方式 以上所示是家用網路中的 NSA。使用者可以在 NSA 上備份及分享資料。DMA- 1000 可在電視上播放 NSA 媒體檔案。USB 硬碟提供額外的儲存空間,檔案直 接從 USB 記憶卡複製到 NSA。 將 NSA 置於防火牆及 / 或 IDP (Intrusion Detection and Prevention,入 侵偵測防護)裝置的後面,以防護免於網際網路的惡意攻擊。 使用者入門 • 安裝硬碟機,244 • 連接 NSA,248 •... - Page 242 ENGLISH • 將 NSA 對應至電腦網路磁碟機,259 • 使用 NSA 作為多媒體伺服器,261 • 使用 Memeo Autobackup 備份檔案,267 請參閱隨附光碟片中的 《使用手冊》 ,取得更多關於設定 NSA 所有功能的資 訊。...
- Page 243 繁體中文 ENGLISH 開始前注意事項 開始作業之前,您需要備妥下列項目: • NSA • 隨附的光碟片,其中內含 NSA 探索公用程式、Memeo Autobackup 程式、 媒體用戶端軟體以及 《使用手冊》 。 • 電源線與電源供應器 ( 外接 ) • 隨附的乙太網路線 • 一或兩個符合 SATA I 或 SATA 3.0 Gbit/s ( 序列式先進附加技術 ) 標準 的硬碟,及 15 接腳的 SATA 電源連接器。 • 十字螺絲起子,用以將硬碟安裝於磁碟槽中。 •...
- Page 244 ENGLISH 安裝硬碟機 一旦您在 NSA 上安裝了硬碟並建立磁碟區,磁碟上現有的全部檔案將被清 除。如果您想要安裝兩部硬碟,並將其設定為 RAID 磁碟區 (請參閱第 頁) ,建議使用相同磁碟大小及型號,以求得最佳性能。 硬碟機不支援熱抽換功能。因此移除或安裝硬碟機之前,必 須關閉 NSA。 建立磁碟區會格式化硬碟機。所有資料都將遺失。在您將磁 碟安裝在 NSA 上時,請先將磁碟上的所有檔案備份至其它位 置。 1. 確認電源線與乙太網路線都已自 NSA 拔除。 2. 鬆開後面板上的翼形螺釘,開啟後面板。...
- Page 245 繁體中文 ENGLISH 3. 使用螺絲起子卸下磁碟槽的固定螺絲。 4. 將磁碟槽滑出。 5. 將硬碟置於平坦的表面上,螺絲孔朝上。再將磁碟槽置於其上方,並用螺 絲加以固定,如圖所示。...
- Page 246 ENGLISH 6. 將磁碟槽滑回磁碟支架上。確認螺絲孔位於上方。將磁碟槽推到底,使位 於上方的螺絲孔完全沒入內部框架中。 7. 鎖回磁碟槽的固定螺絲。 8. 如果您有第二台硬碟機,請重複步驟 至 以安裝之。...
- Page 247 繁體中文 ENGLISH 9. 蓋回後面板並鎖緊翼形螺釘。...
- Page 248 ENGLISH 連接 NSA 1. 使用隨附的乙太網路線將 NSA 後方的 LAN 埠連接至網路上的電腦、交換 器或路由器。 2. 將電源線一端連接至 NSA 後方的 POWER 插槽,另一端則連接至外接的電 源供應器。將外接的電源供應器連接至電源插座。 務必使用隨附的電源供應器。...
- Page 249 繁體中文 ENGLISH 3. 按下 NSA 前方的電源按鈕,將其開啟。請檢視前面板的指示燈。 如果指示燈都沒有亮,請確認電源線是否鬆脫以及電源是否開啟。 • 電源按鈕指示燈會穩定亮著藍燈。 • 如果開機成功 ( 需時約 50 秒 ), SYS 指示燈會穩定亮著綠燈。 • 如果 NSA 偵測到磁碟支架上有硬碟機存在,HDD 指示燈會亮起。 • 如果乙太網路埠已正確連接至您的網路,後面板上的 LAN 埠便會亮燈。 當其傳送或接收流量時,指示燈便會閃爍。 若要關閉 NSA,按一下電源按鈕即可。...
- Page 250 ENGLISH 接取 NSA 如果是 Windows 電腦,請使用探索公用程式 (請參閱第 頁) 。 如果是其他類型電腦 (如 Mac 或 Linux) ,請使用直接存取 (請參閱第 頁) 。 使用探索公用程式接取 NSA 1. 將隨附的光碟片插入 CD-ROM 機。在顯示的畫面中按一下 Setup ( 設定 )。 然後再按一下 NSA-220 Discovery Utility (NSA-220 探索公用程式 ) 連 結。 如果電腦螢幕未顯示此畫面,請使用 Windows Explorer ( 我的電 腦...
- Page 251 繁體中文 ENGLISH 2. 安裝精靈啟動。依照安裝程式的指示作業。按一下 Finish ( 完成 ) 完成 安裝程序。 3. 在 Windows,按一下開始 > 所有程式 > ZyXEL NSA > NSA Discovery Utility,執行探索公用程式。如果您的電腦安裝一張以上的網路卡,畫面 會出現提示,請您選取一張網路卡。 4. 公用程式會列出網路內的 NSA。...
- Page 252 ENGLISH 5. 按一下 Admin ( 管理 ) 圖示,出現網頁設定介面的登入畫面 ( 請參閱第 頁 )。 • 如果需要變更 NSA 的 IP 位址,按一下 Config ( 設定 ) 下的圖示。 • 若要將 NSA 對應至 Windows 網路磁碟機 , 按一下 Map ( 對應 ) 下的圖示 ( 請參閱第 頁 )。 •...
- Page 253 繁體中文 ENGLISH NSA 登入 本節將說明如何登入 NSA 及變更管理員密碼。 如果無法進入登入畫面,請參閱本手冊最後的疑難排解一節。 1. 輸入預設使用者名稱 「admin」與密碼 「1234」再按一下 Login ( 登入 )。 使用者名稱與密碼皆區分大小寫。您可能需要確認 Caps Lock 鍵 並未啟用。 2. 建議變更為新的密碼 ( 並將其記下 )。按一下 Apply ( 套用 ) 儲存您所做 的變更並前往下一個畫面。...
- Page 254 ENGLISH 3. 顯示 My NSA ( 我的 NSA) 畫面。...
- Page 255 繁體中文 ENGLISH 建立磁碟區 本節將說明如何在 NSA 中建立內部磁碟區。磁碟區係指在一部或多部硬碟上 的儲存區。 1. 按一下 Administration ( 管理 )。...
- Page 256 ENGLISH 2. 如果尚無內部磁碟區 ( 儲存區 ),在導覽面板上按一下 Storage ( 儲存 ),然後按一下 Create an Internal Volume ( 建立內部磁碟區 )。如果硬 碟機已有您要使用的磁碟區,請跳至第 節。如果要刪除現有的磁碟區, 請參閱 《使用手冊》的儲存畫面一章。 建立磁碟區會格式化硬碟機。所有資料都將遺失。 3. 如果電腦安裝兩個硬碟,請選擇一種磁碟配置方式。 • JBOD ( 資料儲存空間最大 ) 充分利用每個磁碟的儲存空間,即使兩個硬碟的儲存容量不同亦不影 響。因為有兩個硬碟,所以您可以建立兩個磁碟區 ( 每個磁碟各一個 ),如此一來,任一硬碟故障都不會影響另一硬碟。如果兩個硬碟都位 於同一個 JBOD 磁碟區,只要其中一個磁碟故障,兩個磁碟內的資料都 會全部遺失。 • RAID 0 ( 不建議選用 ) 寫入速度最快,但只要其中一個磁碟故障,兩個磁碟上的資料都會全部...
- Page 257 繁體中文 ENGLISH • RAID 1 ( 建議選用 ) 第一個磁碟的資料會鏡射至第二個磁碟上,以確保資料安全。RAID 1 的寫入速度較 RAID 0 慢,但萬一磁碟故障,您可以復原所有資料。 資料儲存空間總計不超過最小磁碟的容量。 4. 在 Volume Name ( 磁碟區名稱 ) 欄位輸入一個名稱。按一下 Apply ( 套用 ) 開始建立磁碟區。...
- Page 258 ENGLISH 5. 磁碟區正在建立中,請稍候。 6. 只要狀態顯示為 Healthy ( 狀況良好 ),您就可以使用新建的磁碟區。如 果是 RAID 磁碟區,在磁碟區準備就緒之前,狀態都會顯示 Resync ( 重新 同步 )。 7. 如果安裝了兩個磁碟但只在單一磁碟上建立 JBOD 磁碟區,則請重複設定 步驟,在另一個磁碟上建立第二個磁碟區。...
- Page 259 繁體中文 ENGLISH 將 NSA 對應至電腦網路磁碟機 檔案以分享的形式儲存在 NSA 上 ( 如同 Windows 的分享檔案夾 )。將 NSA 的分享對應至 Windows 網路磁碟機,即可使用 Windows Explorer 將檔案傳 送至 NSA 或自該裝置傳送檔案。對應分享之後,就可以在電腦與 NSA 之間拖 放檔案。 1. 在 Windows,按一下開始 > 所有程式 > ZyXEL NSA > NSA Discovery Utility,即可執行探索公用程式。如果您的電腦安裝一張以上的網路卡, 畫面會出現提示,請您選取一張網路卡。 2. 公用程式會列出網路內的 NSA。按一下探索公用程式中的 MAP ( 對應 ) 圖 示。...
- Page 260 ENGLISH 3. NSA 的共用檔案夾出現在 Windows Explorer。 4. 按一下工具 > 連線網路磁碟機。在磁碟機欄位,選取 NSA 要使用的磁碟 機代號。在資料夾欄位,選取 NSA ( 您可能需要瀏覽搜尋 )。 5. 如果您的電腦未安裝探索公用程式,可開啟 Windows Explorer,鍵入兩條 反斜線再加上 NSA 的伺服器名稱 ( 預設值是 nsa220) 或 IP 位址。...
- Page 261 繁體中文 ENGLISH 使用 NSA 作為多媒體伺服器 NSA 亦是媒體伺服器。根據預設,凡內建媒體用戶端軟體或媒體用戶端裝置 ( 如 DMA-1000) 的電腦,都可以播放 NSA Public( 共用 )、 Video ( 視訊 )、 Music ( 音樂 ) 及 Photo ( 相片 ) 分享下的媒體檔案。您也可以將多媒體伺 服器功能應用至其他分享。 NSA 未對多媒體伺服器檔案提供安全措施。網路上任何與 DLNA 相容的媒體用 戶端都可以播放上述多媒體檔案。 將媒體用戶端軟體安裝至電腦 本節說明如何將隨附的 DLNA 相容媒體用戶端軟體安裝至電腦。如果您打算直 接使用媒體用戶端 ( 如 ZyXEL 的 DMA-1000),請跳至第 頁。...
- Page 262 ENGLISH 媒體用戶端軟體之安裝 1. 將 CD 放入 CD-ROM 機。在顯示的畫面中按一下 Tool ( 工具 )。然後再按 一下 Media Client Software ( 媒體用戶端軟體 )。 如果電腦螢幕未顯示此畫面,請使用 Windows Explorer ( 我的電 腦 ) 前往 CD-ROM 機 ( 通常是 D 磁碟 )。按兩下 setup.exe。 2. 出現安裝精靈。依照指示安裝軟體。 如果安裝過程或使用媒體伺服器時出現問題,請參閱需求一節。...
- Page 263 繁體中文 ENGLISH 3. 在此畫面輸入個人資訊。輸入使用者名稱 ( 建議最多 64 個 ASCII 字元 )。公司名稱可有可無 ( 建議最多 64 個 ASCII 字元 )。在隨附的光碟片 封套上,以及 NSA 的底面都可以看到序號。 4. 如果出現畫面詢問是否設定 Windows XP 防火牆,按一下 Yes ( 是 )。這 可讓 NSA 存取您在電腦上分享的檔案。 如果您的電腦使用其他防火牆 ( 如 ZoneAlarm ),需另作設定,請 參閱 《使用手冊》 。...
- Page 264 ENGLISH 5. 如果尚未安裝 DirectX 9.0 版,系統會顯示下列畫面,請按一下 Yes ( 是 ) 安裝 DirectX 9.0 版。 6. 關閉其他應用程式,再按一下 Finish ( 完成 ) 重新啟動電腦。 播放媒體檔案 使用媒體用戶端 ( 如 DMA-1000W) 或安裝有 DLNA 相容媒體用戶端軟體 (NSA 光碟片中隨附 ) 的電腦,可播放 NSA 所儲存的視訊、音樂或相片檔案。 用 戶端裝置必須透過網路連線至 NSA。執行下列步驟即可使用媒體用戶端軟體播 放檔案。至於其他用戶端,請參閱該用戶端之使用說明,了解使用方法。...
- Page 265 繁體中文 ENGLISH 1. 電腦重新啟動之後,按一下開始 > 所有程式 > DigiOn > DiXiM Media Client 啟動媒體用戶端。 2. 媒體用戶端會將網路媒體伺服器上的分享檔案分門別類列入 MUSIC ( 音樂 )、 VIDEO ( 視訊 ) 及 PHOTO ( 相片 ) 選單中。使用 SERVER ( 伺服器 ) 選單檢視特定媒體伺服器 ( 如 NSA) 上的檔案。選取內含欲播放內容的選 單。例如 VIDEO ( 視訊 ) 選單。 3.
- Page 266 ENGLISH 4. 按兩下您要播放的檔案。 系統若不支援檔案的格式或編碼,則可能無法正常播放。參閱 《使用手冊》的產品規格附錄,取得支援格式與編碼的詳細資訊。 由於媒體檔案係使用電腦安裝的編碼,因此也有可能是媒體用戶端 軟體支援檔案的編碼,但電腦卻未安裝該編碼,而導致播放不正 常。...
- Page 267 繁體中文 ENGLISH 使用 Memeo Autobackup 備份檔案 使用光碟片隨附的 Memeo Autobackup 軟體,不論何時修改檔案,系統都會自 動將電腦上的選取檔案備份至 NSA。 需求 Memeo Autobackup 搭配 Windows 2000 Workstation 作業,且工作站必須安 裝 Service Pack 6、Windows XP Pro 或 Windows XP Home Edition。 Memeo Autobackup 之安裝與設定 Memeo Autobackup 程式探索 NSA 所用的網路埠與探索公用程式相 同。為避免網路埠衝突,使用 Memeo Autobackup 之前請先關閉探 索公用程式。...
- Page 268 ENGLISH 3. 依照指示安裝軟體。 Memeo Autobackup 需使用 Microsoft.NET 1.1 版。如果您的電腦尚未安裝該 程式,安裝精靈會自動執行安裝。 4. 下列畫面出現時,請選取 Network Places ( 網路位置 ) 再按一下連結, 選取您的備份檔案夾。...
- Page 269 繁體中文 ENGLISH 5. 選取 NSA 的對應磁碟機,按一下 OK ( 確定 )。 6. 在此畫面,選取您要備份的項目。...
- Page 270 ENGLISH 7. 此畫面列出要即將備份的選取項目。確認選曲項目並按一下 Next ( 下一 步 )。...
- Page 271 繁體中文 ENGLISH 8. 指定備份計畫的名稱 ( 或直接使用預設名稱 )。按一下 Next ( 下一步 ), 再按一下 Done ( 完成 )。 完成初步設定後使用 Memeo Autobackup 安裝並設定 Memeo Autobackup 之後,按兩下系統工具列中的 圖示,開 啟該程式的啟動畫面。 如果沒有顯示該圖示,可以按一下開始 > 程式集 > Memeo Autobackup > Memeo Autobackup 加以啟動。...
- Page 272 ENGLISH 疑難排解 如果無法進入 NSA 登入畫面,請嘗試下列方法。 • 確認 NSA 已經開啟。 • 檢查 NSA 的纜線連接 。 確認 NSA 的 LAN LED 指示燈 ( 位於 LAN 埠 ) 是 穩定亮著或是閃爍。 • 如果您是在網頁瀏覽器的位址欄位鍵入伺服器名稱 ( 預設 nsa220) 藉此 嘗試直接登入,請確認鍵入名稱正確。如果仍然無效,改用探索公用網 路嘗試登入。 • 確認電腦的 IP 位址與 NSA 的 IP 位址位於同一個子網路中。您可以使 用探索公用程式搜尋...
- Page 273 ENGLISH ENGLISH DEUTSCH ESPAÑOL Viewing a Product’s Certification(s) Vorgehensweise zum Aufrufen einer Procedimiento para ver las Produktzertifizierung certificaciones de un producto • Go to www.zyxel.com. • Select your product from the drop-down list • Gehen Sie auf www.zyxel.com. • Vaya a www.zyxel.com. box on the ZyXEL home page to go to that •...
- Page 274 ENGLISH...