Sony UPX-C200 Operating Instructions Manual
Digital printing system
Hide thumbs
Also See for UPX-C200:
- Operating instructions manual (208 pages) ,
- Brochure & specs (16 pages) ,
- Operating instructions manual (33 pages)

Related Manuals for Sony UPX-C200


Summary of Contents for Sony UPX-C200
- Page 1 3-207-402-15(1) Digital Printing System Operating Instructions (Basic Operations) _____________________ GB UPX-C200 © 2003 Sony Corporation...
- Page 2 If you have any questions about this product, you may Sony dealer regarding this product. call: Sony’s Business Information Center (BIC) at Model No. __________________________________ 1-800-686-SONY (7669) or Sony Web site at Serial No. __________________________________ www.sony.com. WARNING Declaration of conformity...
- Page 3 1-800-822-8837, or Para clientes na Europa visit http://www.rbrc.org/. A Sony Corporation declara que os modelos DKC-C200X e UP-DX100 estáo em conformidade com Caution: Do not handle damaged or os requisitos essenciais e outras disposições importantes leaking Nickel Metal Hydride da Directiva 1999/5/CE.
- Page 4 Spanien, Sverige, Storbritannien, Island, Norge, Schweiz och Liechtenstein. For kunder i Europa Sony Corporation erklærer herved, at DKC-C200X og UP-DX100 er i overensstemmelse med de essentielle krav og andre relevante bestemmelser i direktiv 1999/5/ Åbn venligst den følgende URL angående detaljer: http://www.compliance.sony.de/...
- Page 5 • Windows® is a registered trademark of Microsoft Corporation in the United States and other countries. • All other companies and product names mentioned herein may be the trademarks or registered trademarks of their respective companies. Furthermore, “™” and “®” are not mentioned in each case in this manual.
-
Page 6: Table Of Contents
Adjusting the Printing Location (PRINT Table of Contents SETTING) ............54 If the Bluetooth lamp of the camera is off ..55 Bluetooth ...............55 System Overview ........... 7 Bluetooth wireless technology ......55 System Configuration ........7 The “Basic Imaging Profile” ......55 Printouts that Can Be Made with This Communication between the Camera and Printer System .............. -
Page 7: System Overview
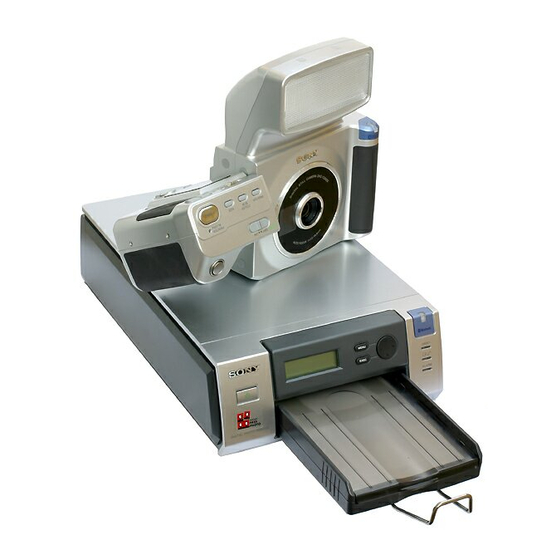
System Overview The Sony UPX-C200 digital printing system is designed Notice for the optional accessories to allow you to take pictures with a digital camera and to The following optional accessories may not be marketed print them on two types of paper: UPC-X46 series or in certain countries/regions. -
Page 8: Printouts That Can Be Made With This System
Printouts that Can Be Made with This System The system can print 22 types of printouts and two types of images. They do not show the exact sizes to be of guide print. When the UPC-X46 series is used, all printed. - Page 9 Guide print Guide Print-RGB Guide Print-DLGm When the UPC-X34 series is used 3. 95 × 70 mm 7. 60 × 40 mm 8. 54 × 54 mm 2×2inch 11. 45 × 35 mm 4. 80 × 60 mm 10. 47 × 37 mm 9.
-
Page 10: Flash Modes And Examples Of Shooting Conditions
No flash and auto exposure mode ( Flash Modes and Examples of The built-in flash does not light. This mode is suitable Shooting Conditions for shooting under stable light sources such as studio light, video light, fluorescent light, etc. The system offers five types of flash modes. Shooting examples in each mode are introduces here. -
Page 11: Supplied Accessories
Manual The supplied CD-ROM includes manuals (for basic operations and advanced operations) and utility instructions for the UPX-C200 (in Japanese, English, French, German, Spanish, Italian, Portuguese, Chinese, and Korea) and also the utility software. The copies of these manuals are created in PDF (Portable Document Format) files. -
Page 12: Preparations
CD-ROM System Requirements Preparations The followings are required to access the supplied CD- ROM. Computer: ® ® Preparation of the Camera • Intel Pentium processor or personal computer equipped with a 100% compatible processor • External or built-in CD-ROM drive Inserting batteries Operating system: Four NH-AA batteries and a lithium button battery CR-... - Page 13 Install the button battery CR-2025 in its case, and insert the case. Note on replacing batteries When replacing batteries, they may drop down if the battery compartment lid faces down. To avoid this, turn the grip so that the lid faces up. Role of the button battery The button battery supplies power to the built-in clock.
-
Page 14: Preparation Of The Printer
• The inserted NH-AA batteries cannot be charged with Preparation of the Printer the AC power adaptor connected to the camera. To charge them, see “Charging batteries” on page 35. Before using the printer for the first time, you need to install a print cartridge and the paper tray, as indicated Setting the clock, frame, and power save below. -
Page 15: Changing The Print Cartridge
Insert the print cartridge into the cartridge • Do not rewind the ink ribbon and use the rewound compartment firmly until it clicks into place. print cartridge for printing. Otherwise, proper printing result will not be obtained, or even a breakdown may occur. -
Page 16: Inserting The Print Paper
Push the paper holder into the stoppers firmly until Insert the tray to the printer. it snaps into place, making a click sound. H O P P U S Stoppers Removing the paper holder Push out the paper holder gently from the stoppers, and Note remove it, pinching the portions near the two ends. -
Page 17: Operation
products including vinyl chloride or plasticizer for an Operation extended period of time; color changes or deterioration of the printed image may occur. • When you are going to store partially-used print paper, This section describes the basic procedures for taking store it in its original bag. -
Page 18: Taking A Picture
If the problem still persists, refer to the Operating P LA Y C A M E Instructions (Advanced Operations) or contact your Sony dealer or your Sony service facility. M E N U Shooting conditions set at the factory M O N IT... -
Page 19: Compensating The Exposure
To take a new picture, press the release button or zoom the release button the rest of the way, and the shutter will lever to turn off the quick-review display, and then be released. repeat steps 1 and 2. Even if you press the release button fully instead of halfway, the auto focus function will be activated, and you can take a picture. -
Page 20: Printing A Picture
• Do not touch any button on the camera while the EXIT MENU 1. Sony UP-DX100 CANCEL button is gray. Once printing begins, “TRANSMISSION END. PUSH MENU KEY TO CONTINUE.” appears on the LCD of the camera. - Page 21 Printing multiple pictures on a single overlaying yellow, magenta, and cyan, so a perfectly achromatic picture may not be obtained. You can adjust sheet of paper the black tone using the color adjustment function of the Two or three different pictures can be printed on a single printer.
-
Page 22: Reprinting A Picture Stored In Memory Of The Printer (Copy Print)
Reprinting a Picture Stored in Viewing a Picture Memory of the Printer You can view pictures stored in memory on the LCD. (COPY PRINT) The data of the last picture printed are stored in memory of the printer. You can reprint the picture. Note If you press the on/standby button, the lamp goes out, and data stored in memory are deleted, and you cannot... -
Page 23: Deleting A Picture
Display on the LCD in PLAY mode Deleting a Picture An example of the display when the PLAY/CAMERA Pictures stored in the memory of the camera can be switch is set to PLAY is shown below. deleted one by one or all at once. Power source (Battery indicator or AC power adaptor) Deleting pictures one by one Resolution... -
Page 24: Protecting A Picture (Protect)
Deleting all pictures Press ENTER of the control button. The picture selected in step 7 is deleted, and the Set the PLAY/CAMERA switch to PLAY. Menu display is retrieved. Set the POWER switch to ON. To cancel deleting a picture Press any button to turn off the Bluetooth display. - Page 25 Select a picture to be protected by pressing b or B Press the MENU button. of the control button. The Menu display appears. Check that ON is selected, and press ENTER of the Select PROTECT by pressing v or V of the control control button.
-
Page 26: Turning Off The Power
Turning Off the Power When you finish your operation, set the printer to standby mode and turn the camera off. Setting the printer to standby mode Press the on/standby button. The lamp goes out, and the printer is set to standby mode. Turning the Camera Off Set the POWER switch to OFF. -
Page 27: Menu
Menu LOAD/SAVE SETTING LOAD SETTING SAVE SETTING CANCEL Menu Configuration AE AREA Center Weighted FACE Background Camera TRANSPORT SETTING CAMERA mode RETURN EXIT SETUP (For details, see “SETUP menu.”) HIGH: 2288 × 1712 RESOLUTION : Factory setting MID: 1280 × 960 STD: 832 ×... -
Page 28: Setup Menu
SETUP menu MEMORY FORMAT START The SETUP menu is common to CAMERA and PLAY CANCEL mode. Firmware Ver. RETURN STORAGE PRINT SIZE LIST RETURN ORIGINAL 1. 151 × 101.6 mm X46 (SIZE UNIT: mm) 2. 120 × 90 mm X46 Bluetooth PROPERTY 3. - Page 29 GAMMA (–7 to +7) SAVE SETTING (1/2/3) LOAD SETTING (1/2/3) Bluetooth SETTING Bluetooth ADDR PASSKEY INPUT PASSKEY INPUT [1:2:3:4] MY DEVICE NAME Sony UP-DX100 [NONE to 9] CONNECTION RECORD 1. Sony DKC-C200X 2. NONE 3. NONE MODULE POWER POWER: (ON/OFF) PRINT SETTING PRINT OFFSET: (–2/–1/0/1/2)
-
Page 30: Functions Of The Menu Items
Functions of the Menu Items CAMERA mode mark indicates the items whose setting can be saved by SAVE SETTING. Menu item Function Setting EXIT To exit Menu mode. — RESOLUTION To select the resolution for recording. Record Resolution HIGH: 2288 × 1712 MID: 1280 ×... - Page 31 Menu item Function Setting AE AREA To select the area for automatic AE Area photometry. Center Weighted: Weighting at the center The AE Area setting is enabled only FACE: Face area when Exposure Mode is set to PROGRM Background: Upper half of the background AUTO or APERTURE PRIORITY.
- Page 32 SETUP menu The SETUP menu is common to CAMERA and PLAY mode. Menu item Function Setting RETURN To exit SETUP mode, and retrieve the — Menu display. PRINT SIZE LIST To select the size shown on the LCD Print Size (SIZE UNIT: mm) Print Size (SIZE UNIT: inch) when the SIZE button is pressed.
- Page 33 Menu item Function Setting BATTERY REFRESH To refresh the NH batteries. Battery Refresh START: Refreshing of the batteries begins. CANCEL: Refreshing of the batteries is canceled. MEMORY FORMAT To format the built-in memory for image Memory Format (CAUTION! ALL IMAGES WILL BE data.
-
Page 34: Displaying The Setup Display
Displaying the Setup display Displaying the Menu display in CAMERA mode P LA Y C A M E P LA Y C A M E M E N U M O N IT E N TE O TR (P A L) LC D M E N U V ID E O... -
Page 35: Various Functions
Connect the battery charger to the wall outlet. Various Functions to wall outlet Using the Camera with Batteries A R G Y C H T T E R A S IZ H B A R A A N i- M A A O You can operate the camera with the inserted NH-AA batteries. - Page 36 Refreshing batteries Battery power indicator Batteries installed in the camera can be refreshed with Battery power is indicated on the LCD of the camera. the procedures below. The remaining level is indicated in four levels. Check the indicator and charge the battery as necessary. Display the Setup display.
-
Page 37: Setting The Clock (Clock)
Setting the Clock (CLOCK) Setting the Record Resolution (RESOLUTION) Set the appropriate record resolution for the size to be printed. For the appropriate resolution for each print size, see “Recommended record resolutions” on page 38. P LA Y C A M E M E N U M O N IT E N TE... -
Page 38: Setting The Zoom Range (Zoom)
Recommended record resolutions Setting the Zoom Range (ZOOM) The zoom range is set to 1.3× (f = 15.6 to 19.8 mm) at Print size Recommended the factory. This range can be changed to 2.6× (f = 7.50 resolution Size No. Height Width to 19.8 mm) with the procedures below. -
Page 39: Setting The Shooting Conditions
Setting the Shooting Conditions The shooting conditions are set at the factory so that you The shooting conditions that can be controlled manually can take pictures automatically. If necessary, you can set depend on the exposure control mode. The table below the conditions manually. - Page 40 Setting the flash mode (FLASH MODE) Select an appropriate aperture value by pressing v or V of the control button. When the exposure mode is set to PROGRAM AUTO or APERTURE PRIORITY, the exposure is automatically Press ENTER of the control button. adjusted, and three flash modes are available.
-
Page 41: Setting The Print Size To Be Displayed (Print Size List)
To revise the exposure easily Setting the Print Size to be The exposure can easily be changed by pressing v or V Displayed (PRINT SIZE LIST) of the control button. When the button is pressed, the value displayed on the LCD changes. The print size selectable with the SIZE button can be set Using this method, you can change the exposure even in the SETUP menu. -
Page 42: Setting The Frame (Frame)
The display of the size toggles between black and Setting the Frame (FRAME) gray each time you press ENTER. Guidelines for adjusting the size and position of the subject are helpful to decide on framing. This system Note offers six types of guidelines, four fixed types, one for The Guide Print-RGB and Guide Print-DLGm are upper and lower lines adjustable, and one for the width always displayed on the LCD. - Page 43 FRAME-[3] For details on displaying the Setup display, see The dimension between the head and chin lines is “Displaying the Setup display” on page 34. 28 mm when you select the print size 10. 47 × 37 mm or 11. 45 × 35 mm. Select FRAME by pressing v or V of the control button.
- Page 44 Size of printouts for FRAME-[1], FRAME-[2], FRAME-[3], FRAME-[4] When you take pictures using the guidelines, the size of printouts is as shown below according to the print size selected with the SIZE button. Tolerance: ±3% Print size FRAME-[1] FRAME-[2] FRAME-[3] FRAME-[4] Size No.
- Page 45 Adjusting the upper and lower guidelines Size of printouts for FRAME-[5] (FRAME-[5]) At the factory, LINE1 is set to 66, and LINE2 is set to 242. The values for (c) and (d) are obtained by The upper and lower guidelines of FRAME-[5] are set at multiplying the value in F with the values of LINE1 and the same position of FRAME-[1] at the factory.
- Page 46 Press ENTER of the control button. Print size Factory setting Size No. (a) mm (b) mm (c) mm (d) mm The Setup display is retrieved. (inches) (inches) (inches) (inches) 27.0 0.15 Size of printouts for FRAME-[6] 20 (D4/8) At the factory, WIDTH is set to 112. The print size is 33.0 0.19 obtained by multiplying the value in G with the values...
-
Page 47: Setting Power Save Mode (Power Save)
Print size Factory Setting Power Save Mode setting (POWER SAVE) Size No. (a) mm (b) mm (g) mm (inches) (inches) (inches) When the power save mode is set (3 MINUTES or 10 MINUTES), the camera is automatically turned off after 10, 19 (D6) 20.0 0.18... -
Page 48: Setting The Size Units (Size Unit)
Setting the Size Units (SIZE UNIT) Selecting the Format of the Output Signal (VIDEO OUT) You can select the units for the print size to be indicated on the LCD when the SIZE button is pressed, or shown When a video monitor is connected to the VIDEO OUT in the PRINT SIZE LIST on the Setup menu, as mm or jack to monitor images, select the format of the output inches. -
Page 49: Selecting Sound During Operation (Sound)
Selecting Sound During Operation Selecting the USB Class (USB) (SOUND) When the UPX-C200 is connected to a computer, and the supplied utility software is to be used or the camera’s When you operate the camera, you can be prompted or memory is to be accessed as a removable medium, notified with the sound if you wish. -
Page 50: Moving A Picture Displayed On A Nine-Picture Multiple Display (Move)
Select a picture to be moved by pressing b, B, v, Moving a Picture Displayed on a or V of the control button, then press ENTER of the Nine-Picture Multiple Display control button. (MOVE) The cursor stops blinking. A picture on a nine-picture multiple display can be moved to another position. -
Page 51: Locking The Menu Of The Camera
Locking the Menu of the Camera Setting the Lens for Transportation (TRANSPORT SETTING) The menu can be locked. Once locked, the Menu display does not appear even if you press the MENU button in You can move the lens to its lock-down position for CAMERA or PLAY mode. -
Page 52: Adjusting The Print Quality (Color Adjust)
Bringing the lens out of its transport Adjusting the Print Quality position (COLOR ADJUST) Set the PLAY/CAMERA switch to CAMERA, and start With the MENU function of the printer, you can adjust camera operation. The camera will return the lens to its the picture quality. - Page 53 MAG-GRN: Pressing b gives the picture more When the UPC-X34 series is used magenta, while pressing B makes the picture more greenish. YEL-BLU: Pressing b makes the picture more yellowish, while pressing B makes the picture more bluish. DARK: Contrast in the dark areas is adjusted. Pressing B increases the darkness.
-
Page 54: Adjusting The Printing Location (Print Setting)
Adjusting the Printing Location Note (PRINT SETTING) When you finish making adjustments, be sure to press the MENU button to retrieve the Ready display. If the Adjust so that a printed image is correctly located on the Ready display is not retrieved, “COMMUNICATION print paper when the UPC-X46 series is used. -
Page 55: If The Bluetooth Lamp Of The Camera Is Off
10 m (33 feet) without obstacles. 1) The trademark is owned by their proprietor and used by Sony Corporation under license. The word Bluetooth is printed in plain text throughout this document. The “Basic Imaging Profile” The “Basic Imaging Profile” (BIP) is the specifications used when sending or receiving still images between Bluetooth devices. -
Page 56: Communication Between The Camera And Printer Using The Bluetooth
For communication between the camera and printer with You can change the passkey as required. Bluetooth, the followings are required: On the UPX-C200 and separately available UP-DX100 • The same passkey set on the camera and printer Digital Photo Printer, the same passkey has been set at •... - Page 57 Press b or B of the control button to set the Press the EXEC button. POWER to ON. “REBOOTING” appears. Then the printer is Press the EXEC button. restarted, and the Bluetooth lamp goes dark. “REBOOTING” appears. Then the printer is Adding printers restarted, and the Bluetooth lamp lights.
-
Page 58: Locations Of Parts
Locations of Parts For details, see the pages shown in parentheses. Camera Front Bluetooth antenna (inside) F L A S H E L E A S O U T R V ID E O 8 .4 V D C IN A Flash (40) Note Lights according to the selection of FLASH MODE of... - Page 59 H Tripod screw hole (14) This button is enabled when the PLAY/CAMERA Used to attach the camera to the tripod. switch is set to CAMERA. I Lens (f = 7.5 to 19.8 mm, F-2.8 to F-4.8) Auto focus lens with optical zoom J Viewfinder You can see the subject through the viewfinder and can shoot a picture without using the LCD monitor.
- Page 60 Rear P L A Y C A M E M E N U M O N IT E N T E O T R (P A L ) L C D V ID E O O U T A PRINTER button To turn off the layout preview display, press the MENU Selects a printer when multiple printers are used.
- Page 61 Use this switch to toggle between playback and Lit in red: Some trouble has occurred. Contact your recording modes. Sony service facility or your Sony dealer. CAMERA: Set the switch at this position to take a Flashing in green: Memory full picture.
-
Page 62: Printer
Printer Front H O P P U S Bluetooth antenna (inside) A 1 (on/standby) button and lamp (17, 52) H Cartridge compartment cover (14) Press to turn on the printer, and the lamp lights. Pressing Open the cover to insert and remove the print cartridge. it again makes the lamp go out, and the printer enters the I Cartridge compartment (15) standby mode. - Page 63 Rear C IN 1 2 3 A Paper jam remove cover (70) When a paper jam occurs, remove this cover, and remove the jammed paper. B -AC IN connector (17) Connect to a wall outlet using the supplied AC power cord.
-
Page 64: Precautions
To subsequently use the printing pack, place it, in its and consult your Sony service facility or your Sony sealed package, in a warm room for several hours. dealer. -
Page 65: Operation
Using the batteries Operation • Charge before using. • Battery performance decreases in low-temperature Test shooting surroundings. So, the time that the batteries can be used is shorter in cold places. We recommend the Before shooting, you should always take a few test shots following to use longer: and review them to see that the camera is functioning –... -
Page 66: Specifications
F-value: F2.8 (at W) to F4.8 (at T) General Input/output connectors Power supply Supplied from Sony NH-AA VIDEO OUT 3.5 mm ø (phono jack) Batteries or from an AC power 1.0 Vp-p, 75-ohms unbalanced, sync adaptor (8.4 V DC) -
Page 67: Usb Interface
Maximum print size Storage temperature UPC-X46 series: 101.6 × 151.4 mm –20°C to +60°C (–4°F to +140°F) (4 × 6 inches) (no border) Dimensions (w/h/d) Approx. 100 × 31 × 56 mm UPC-X34 series: 70.1 × 95.3 mm × 3 (4 ×... -
Page 68: Troubleshooting
C200, use the following table as a guide to troubleshoot • The cord of the external flash is not connected to the camera. the problem. If the problem persists, contact your Sony tConnect the cord of the external dealer or local authorized Sony service facility. -
Page 69: Picture Quality
• The subject was too far away. If this does not solve the problem, tTake the picture within range of contact your Sony service facility the flash. or your Sony dealer. tCompensate the exposure. tFollow the instructions on the The ALARM indicator •... -
Page 70: If Paper Jams
Turn on the printer. Note If you cannot remove the jammed paper, contact your Sony dealer. Cleaning the inside of the printer If white lines or dots are printed on the pictures, clean inside the printer using the supplied cleaning cassette and the protective sheet contained in the printing pack. -
Page 71: Bluetooth Function
Symptom Possible causes/solution Bluetooth Function Even with the • The Bluetooth antenna portion of the distance between printer and/or the camera is covered with Symptom Possible causes/solution the printer and the a hand, etc. desired device tDo not cover the antenna portion. Data cannot be •... -
Page 72: Error Messages
Then press the EXEC button. PRINTER ERROR • Some trouble has occurred with the printer. SERVICE CALL tContact your Sony service facility or your Sony dealer. Bluetooth ERROR • Some trouble has occurred with the Bluetooth function. SERVICE CALL tContact your Sony service facility or your Sony dealer. -
Page 73: Index
COLOR/B/W button 60 Guide image 53 Index Control button 61, 62 Guideline 45 COPY PRINT 22, 33 Adjusting the upper and lower guidelines 45 Adjusting the width of the Symbols guidelines 46 Data transmission 20 @ lamp 62 Fixed guidelines 43 Cancel 20 @1 (on/standby) button and lamp 62 Date 23... - Page 74 Picture Utility software 7, 12 Cancel deleting 24 Quick-review picture 60 Deleting 19, 23 Finish deleting 24 VIDEO OUT 32, 48 Printing 20 VIDEO OUT jack 58 Protecting 24 Radio wave strength indicator 20 Viewfinder 59, 61 Taking 18 Record resolution 18, 37, 38 Viewing 22 Recording capacity 66 Picture protection function 24...
- Page 75 Sony Corporation...