Table of Contents
Available languages
Available languages
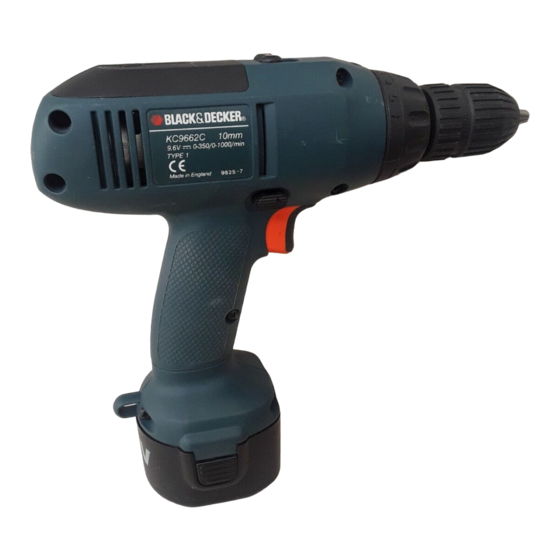
10mm Cordless Drills/Drivers
KC8482C/KC9682C/KC1282C Hammer Drill/Driver
KC8452C/KC8462C/KC9662C Drill/Driver
KC8402C Drill
Important!
On delivery your cordless drill/driver is not charged.
It must be charged for the appropriate time before
use. To prolong battery life, avoid leaving the tool on
charge for periods longer than two days.
Safety instructions
Warning! When using electric tools, the
following basic safety precautions should always be
taken to reduce the risk of fire, electric shock and
personal injury.
Read all these instructions before attempting to
operate this product and save these instructions.
For safe operation:
•
We recommend that you take appropriate
measures for the protection of hearing if the
sound pressure of 85 dB (A) is exceeded.
•
Keep the work area clean. Cluttered areas and
benches invite injuries.
•
Consider work area environment. Do not
expose power tools or chargers to rain. Do not
use power tools in damp or wet locations. Keep
work area well lit. Do not use power tools in the
presence of flammable liquids or gases.
•
Guard against electric shock. Avoid body
contact with earthed or grounded surfaces
(e.g. pipes, radiators, ranges, refrigerators).
•
Keep children away. Do not let visitors touch
the tool or extension cord. All visitors should be
kept away from work area.
•
Store idle tools. When not in use, tools and
batteries should be stored in a dry, high or locked
place, out of reach of children.
•
Do not force the tool. It will do the job
better and more safely at the rate for which it
was intended.
•
Use the right tool. Do not force small tools or
attachments to do the job of a heavy duty tool.
Do not use tools for purposes not intended;
for example, do not use a circular saw to cut tree
limbs or logs!
•
Dress properly. Do not wear loose clothing or
jewellery as they can be caught in moving parts.
Rubber gloves and non-skid footwear are
recommended when working outdoors. Wear
protective hair covering to contain long hair.
2
Instruction Manual
•
Use safety glasses. Use a face or dust mask if
the cutting operation is dusty or if using in
enclosed spaces.
•
Secure your work. Use clamps or a vice to hold
your work. It is safer than using your hand and it
frees both hands to operate the tool.
•
Do not overreach. Keep proper footing and
balance at all times.
•
Maintain tools with care. Keep tools sharp
and clean for better and safer performance.
Follow instructions for lubricating and changing
accessories. Keep handles dry, clean and free
from oil and grease.
•
Remove adjusting keys and wrenches.
Form the habit of checking to see that keys
and adjusting wrenches are removed from tool
before switching it on.
•
Avoid unintentional starting. Do not carry a
tool with a finger on the switch.
•
Stay alert. Watch what you are doing. Use
common sense. Do not operate when you are tired.
•
Check damaged parts. Before further use of
the tool, a guard or other part that is damaged
should be carefully checked to determine that it
will operate properly and perform its intended
function. Check for alignment of moving parts,
binding of moving parts, breakage of parts,
mounting and any other conditions that may
affect its operation. A guard or other part that is
damaged should be properly repaired or
replaced by an authorised service centre unless
otherwise indicated in this instruction manual.
Have defective switches replaced by an
authorised service centre. Do not use the tool if
the switch does not turn it on and off.
•
Warning! The use of any accessory or
attachment, other than recommended in this
instruction manual, may present a risk of
personal injury.
•
Have your tool repaired by a qualified person.
Repairs should only be carried out by qualified
persons using original spare parts, otherwise
considerable danger to the user may result.
•
This electrical appliance is in accordance with the
relevant standards.
Table of Contents

Related Manuals for Black & Decker KC9682C


Summary of Contents for Black & Decker KC9682C
-
Page 1: Safety Instructions
10mm Cordless Drills/Drivers KC8482C/KC9682C/KC1282C Hammer Drill/Driver KC8452C/KC8462C/KC9662C Drill/Driver KC8402C Drill Instruction Manual Important! • Use safety glasses. Use a face or dust mask if the cutting operation is dusty or if using in On delivery your cordless drill/driver is not charged. - Page 2 ENGLISH Charger plug and cable • Do not tug at the cable to pull the plug from the socket. • Make sure the cable is located so that it will not be stepped on, tripped over, or otherwise However, if the outer seal is broken and this subjected to damage or stress.
- Page 3 Mains plug replacement (UK only) 6. Storage for bit and key (bit only on keyless chuck models) Should your mains plug need replacing and you are 7. Clutch/hammer mechanism competent to do this, proceed as instructed below. (where applicable) If you are in doubt contact a Black & Decker service centre or a qualified electrician.
- Page 4 (Fig. C1). Combination percussion action and The forward/reverse lever is a three position torque adjustment collar (KC8482C, lever located over the trigger switch in the KC9682C & KC1282C) housing. • These units are equipped with a combination During charging, changing accessories percussion action and torque adjustment or storage, move the lever to the “Off”...
-
Page 5: Hints On Use
• To fasten all chucks Grasp the rear half of the chuck with one hand and use your other hand to rotate Put the chuck on the thread and turn it the front half clockwise (hold the tool clockwise till it stops. Tighten firmly. Put in pointing away from you) (Fig. - Page 6 ENGLISH Drilling in masonry Use carbide tipped masonry bits at high speeds. Keep an even force on the drill but not so much that brittle materials crack. A smooth, even flow of dust indicates the proper drilling rate. Black & Decker recommends the following: •...
-
Page 7: Technical Specifications
12.0V 0-400 0-1200 A9256 EC Declaration of Conformity We declare that units: KC8482C, KC9682C, KC1282C, KC8452C, KC8462C, KC9662C, KC8402C conform to 89/392/EEC, EN50144 A weighted sound pressure <70dB (A) A weighted sound power <85dB (A) Hand/arm weighted vibration 0.65m/s Brian Cooke... -
Page 8: Norme Antinfortunistiche
Trapani avvitatori a Batteria da 10mm KC8482C/KC9682C/KC1272C Trapani a Percussione/Avvitatori KA8452C/KC8462C/KC9662C Trapani Rotativi/Avvitatori Manuale d’Istruzioni KC8402C Trapano • Importante! Utilizzate un abbigliamento corretto. Non portate abiti svolazzanti o gioielli in quanto Alla consegna la batteria dell’utensile è scarica. potrebbero restare incastrati nelle parti mobili Deve essere correttamente caricata prima dell’uso. - Page 9 • • Fate eseguire le riparazioni da personale Non riponete l’utensile in luoghi dove la qualificato. Le riparazioni devono essere temperatura possa raggiungere o eccedere i 50°C. eseguite da persone qualificate. Utilizzate sempre • Non caricate l’utensile quando la temperatura parti originali.
- Page 10 ITALIANO 4. Leva controllo reversibilità 5. Selettore 2 velocità 6. Alloggiamento per chiave e punta (solo punta per modelli con mandrino auto-serrante) • Spostate il carica-batteria e la batteria in un 7. Meccanismo di controllo coppia/ luogo dove la temperatura dell’aria è di circa percussione (ove applicabile) 24˚C.
- Page 11 Mandrino e chiave serramandrino coppia di serraggio su collare Per inserire una punta o un’altro accessorio (KC8482C, KC9682C e KC1282C) nel mandrino procedete come segue: Questi modelli sono dotati di una • Posizionate la leva di controllo su combinazione di azione a percussione e di “Spento”...
- Page 12 ITALIANO di legno o un oggetto similare, colpite con forza la chiave in senso orario. Il mandrino sarà sganciato e potrà essere svitato dall’utensile (Fig. G2). Mandrino auto-serrante Inserite una chiave a brugola nel mandrino e Foratura in metallo stringete le ganasce. Date un colpo deciso Usate un lubrificante per forare metalli ferrosi.
-
Page 13: Garanzia
Dichiarazione di conformitá EC alla filiale di assistenza Black & Decker Si dichiara che i prodotti: più vicina. Se necessario contattate le KC8482C, KC9682C, KC1282C, KC8452C, autorità comunali per informazione. KC8462C, KC9662C, KC8402C Attenzione: Lei come cliente è responsabile sono conformi a 89/392/EEC, EN50144 per il corretto smaltimento e per il riciclaggio della batteria. - Page 14 10mm Akku-Bohrschlagbohr KC8482C/KC9682C/KC1282C Akku-Schlagbohr-maschine KC8452C/KC8462C/KC9662C Bohrschrauber KC8402C Bohrschrauber Bedienungsanleitung Wichtig! verschlossenen Räumen und für Kinder nicht erreichbar aufbewahrt werden. Beim Kauf sind die Akkus Ihres Akku-Bohrschraubers • Überlasten Sie Ihr Werkzeug nicht. Sie nicht voll aufgeladen. Deshalb ist es notwendig, den...
- Page 15 • • Ziehen Sie den Netzstecker. Nach der Achtung! Die Netzspannung muß mit der Benutzung, vor der Wartung und für den Angabe auf dem Typenschild übereinstimmen. Zubehörwechsel von - zum Beispiel - • Dieses Elektrowerkzeug ist entsprechend den Sägeblättern, Bohrern, Messern usw. Richtlinien 76/889/EWG + 82/499/EWG bzw.
-
Page 16: Elektrische Sicherheit
DEUTSCH • Lagern Sie das Gerät nicht an Orten, wo Temperaturen von 50°C/120°F erreicht oder überschritten werden. • Bei Temperaturen des Gerätes oder Außentemperaturen von unter 5°C/40°F oder oberhalb von 40°C/105°F darf das Gerät nicht Elektrische Sicherheit geladen werden. Versichern Sie sich, daß die örtliche Stromspannung •... - Page 17 • Betriebsschalter und Rechts-/ Drücken Sie die Entriegelungsknöpfe und entnehmen Sie den Akku-Pack aus Linkslauf-Umschalter (Abb. C1 - 4) dem Gerät (Abb. B1). Zur Inbetriebnahme des Gerätes drücken Sie • Schließen Sie anschließend den den Betriebsschalter (Abb. C1). Um es Ladestecker an eine 230V-Steckdose an.
- Page 18 2 angegeben. Schlagfunktion mit Drehmomentvorwahl-Lager Um das Schnellspannbohrfutter in gutem Zustand zu halten, sollten Sie gelegentlich (KC8482C, KC9682C & KC1282C) durch leichtes Klopfen den Staub Mit den oben genannten Maschinen können daraus entfernen. Schlagbohr-Arbeiten sowie Arbeiten mit Wichtig! Versuchen Sie nicht, Bohrer oder Drehmomentvorwahl ausgeführt werden.
- Page 19 Bohrfutterwechsel (Abb. G1 - 4) Holz • Verwenden Sie Holzspiralbohrer oder Öffnen Sie die Spannbacken des Bohrfutters spartenförmige Schrauberbits. vollständig. Im Bohrfutter ist dann der Kopf einer Schraube zu sehen. • Um Splittern des Materials beim Durchbohren Lösen Sie diese Schraube, indem Sie sie im von Holz zu vermeiden, sollten Sie ein weiteres Uhrzeigersinn drehen.
-
Page 20: Technische Daten
Black & Decker empfiehlt folgende Wir erklären hiermit, daß die folgenden Vorgehensweise: Elektrowerkzeuge: • KC8482C, KC9682C, KC1282C, KC8452C, Entladen Sie den Akku komplett, indem KC8462C, KC9662C, KC8402C Sie das Gerät bis zum Stillstand laufen lassen. der Richtlinie 89/392/EEC, EN50144 entsprechen •... -
Page 21: Consignes De Sécurité
Les Sans Fil 10mm KC8482C/KC9682C/KC1282C Perceuses combi-systeme KC8452C/KC8462C/KC9662C Visseuse devisseuse KC8402C Perceuse sans fil Notice d’Utilisation Important! • Utilisez l’outil qui convient. N’utilisez pas de petits outils ou accessoires pour faire le travail Au moment de l’achat votre perceuse n’est pas d’un outil de forte puissance. - Page 22 FRANÇAIS • Inspectez les pièces endommagées. Avant tout autre utilisation, une pièce de protection ou toute autre pièce endommagée doit être vérifiée soigneusement pour s’assurer qu’elle fonctionnera correctement et effectuera la tâche pour laquelle elle est conçue. Vérifiez l’alignement • Déconnectez toujours la source d’énergie avant et la tenue des pièces mobiles, leur montage, de brancher ou de débrancher la batterie.
-
Page 23: Rallonge Électrique
• • Vérifiez que vous utilisez le chargeur fourni avec Placez la batterie dans le chargeur votre perceuse, ou recommandé par le fabricant comme indiqué (Fig. B2). pour recharger votre batterie. Sinon, une Durant le temps de charge, le chargeur et la mauvaise manipulation pourrait occasionner une batterie peuvent être chauds au toucher, surchauffe, une électrocution, ou une fuite de... - Page 24 Attention! Ne cherchez pas à serrer les de couple + percussion (KC8482C, forets (ou tout autre accessoire) en tenant la partie avant du mandrin et en actionnant KC9682C, et KC1282C) l’outil. Vous risqueriez de vous blesser ou Ces perceuses sont équipées d’une d’abîmer l’outil.
-
Page 25: Conseils D'utilisation
Mandrins à clé Conseils d’utilisation Pour insérer un foret dans un mandrin sans Pour une meilleure durée de vie, ne forcez pas clé, suivez les étapes suivantes: sur votre outil! • Mettre la targette de contrôle en • Mettez votre perceuse sur “Arrêt” en poussant la position “Arrêt”. - Page 26 FRANÇAIS Perçage dans le métal Utilisez de l’huile comme lubrifiant. Avec de l’aluminium utilisez de la parafine ou de la térébenthine. Avec le cuivre, le laiton ou la fonte, ne pas utiliser de lubrifiant, mais retirez le foret Black & Decker vous recommande d’opérer fréquemment pour laisser refroidir.
-
Page 27: Spécifications Techniques
0-400 0-1200 A9256 Attestation de conformité EC Nous déclarons que les produits: KC8482C, KC9682C, KC1282C, KC8452C, KC8462C, KC9662C, KC8402C sont conformes aux 89/392/EEC, EN50144 Niveau de pression accoustique <70dB (A) Niveau de puissance accoustique <85dB (A) Niveau de vibration main-bras 0.65m/s Brian Cooke Directeur du développement... - Page 28 10mm Accu-Schroefboormachines KC8482C/KC9682C/KC1282C - Schroefboormachines met klopboorfunktie KC8452C/KC8462C/KC9662C - Schroefboormachines KC8402C - Boormachine Gebruiksaanwijzing Belangrijk! Gebruik gereedschap nooit voor andere toepassingen dan deze waarvoor ze Dit produkt is nog niet opgeladen. Het moet volledig bestemd zijn. opgeladen worden alvorens het te gebruiken. Om de •...
- Page 29 • • Let altijd goed op. Concentreer u steeds op het Probeer nooit twee laders op elkaar aan werk en ga zorgvuldig en met overleg te werk. te sluiten. Gebruik de machine niet wanneer uw aandacht • Haal altijd de stekker uit het stopkontakt alvorens van het werk wordt afgeleid.
- Page 30 NEDERLANDS • Gebruik alleen de voorgeschreven lader. Verkeerd gebruik kan een elektrische schok, oververhitting of lekkage van de accu tot gevolg hebben! Berg deze veiligheidsadviezen goed op! • Laat de accu in de oplader gedurende Verlengsnoeren 3 à 5 uur (in een 3uurs lader) of tot het U kan tot 30 meter (100 voet) van een twee-aderig rode lampje uitgaat (in een één uurs lader).
- Page 31 Beschadiging van de boorhouder en persoonlijke verwondingen kunnen het gevolg zijn.Boorhouder en sleutel Combi-ring voor klopboor-en koppel- • instelling (KC8482C, KC9682C & Zet de schakelaar in de uit-positie. • KC1282C) Draai de boorkop open. • Steek de boor tot helemaal achterin in de Deze produkten zijn voorzien van een boorkop.
- Page 32 NEDERLANDS Vervangen van de boorhouder (Fig. G1 - 4) Draai de klauwen van de boorhouder volledig open. In de boorhouder ziet u een schroef. Draai deze los door met de klok mee te • Houd de boor-schroevedraaier stevig vast, om draaien! Gebruik een schroevedraaier met de de draaibeweging onder controle te houden.
- Page 33 EC Verklaring van Conformiteit hulpstukken ter beschikking. We bevelen aan enkel Wij verklaren dat de types: en alleen Black & Decker-hulpstukken te gebruiken. KC8482C, KC9682C, KC1282C, KC8452C, Raadpleeg uw plaatselijke Black & Decker-dealer KC8462C, KC9662C, KC8402C voor meer informatie. voldoen aan 89/392/EEC, EN50144 Een gewogen geluidsdruk <70dB (A)
- Page 34 A9253 (807708) 3uur • KC8462C 8.4V 0-300 0-850 A9254 1uur • • KC8482C 8.4V 0-300 0-850 A9254 1uur • KC9662C 9.6V 0-350 0-1000 A9255 1uur • • KC9682C 9.6V 0-350 0-1000 A9255 1uur • • KC1282C 12.0V 0-400 0-1200 A9256 1uur...
-
Page 35: Normas De Seguridad
Taladros/Destornilladores de 10mm sin cable KC8482C/KC9682C/KC1282C Taladro percutor/atornillador KC8452C/KC8462C/KC9662C Taladro/atornillador KC8402C Taladro Manual de Instrucciones • ¡Importante! Use la herramienta adecuada. No fuerce las herramientas o accesorios pequeños utilizandolos Cuando lo adquiere, su taladro/atornillador no está en trabajos de herramientas pesadas. No use las cargado. - Page 36 ESPAÑOL Compruebe la alineación de las piezas móviles, si hay piezas atascadas, rotas, mal montadas o con cualquier otro defecto o signo de que no van a funcionar bien. Si no se indica otra cosa en el presente manual, siempre que un protector o cualquier otra pieza esté...
-
Page 37: Descripción (Fig. A)
Alargaderas Notas importantes para cargar la batería Podrá usar alargaderas Black & Decker de dos hilos y hasta 30 m sin pérdida de potencia. • Conseguirá que las baterías duren más y funcionen mejor si las carga a una temperatura Nota: No use una alargadera si no es absolutamente ambiente de unos 24˚C. - Page 38 Collarín combinado de percusión y ¡Atención! No intente sujetar las brocas o ajuste del par (KC84892C, KC9682C accesorios agarrando la parte delantera del y KC1282C) portabrocas y haciendo girar la herramienta. Podría sufrir daños personales y estropear Las unidades reseñadas están equipadas...
- Page 39 • • Haga siempre presión en la dirección de la Para quitar la broca, meta la llave en un broca. Haga presión suficiente hasta que la agujero y gírela a izquierdas hasta que se broca agarre, pero no tanto que patine el motor afloje el portabrocas.
- Page 40 Las baterías NiCad pueden ser dañinas para Declaramos que estas unidades: el medio ambiente y pueden explotar si se KC8482C, KC9682C, KC1282C, KC8452C, exponen al fuego. No incinerar. KC8462C, KC9662C, KC8402C Por lo tanto, cuando su herramienta o su cumplen con la directiva 89/392/EEC, EN50144 batería necesite ser reemplazada, piense en...
-
Page 41: Especificaciones Técnicas
A9253 (807708) 3horas • KC8462C 8.4V 0-300 0-850 A9254 1hora • • KC8482C 8.4V 0-300 0-850 A9254 1hora • KC9662C 9.6V 0-350 0-1000 A9255 1hora • • KC9682C 9.6V 0-350 0-1000 A9255 1hora • • KC1282C 12.0V 0-400 0-1200 A9256 1hora... -
Page 42: Instruções De Segurança
Berbequins/Aparafusadores sem fio de 10mm KC8482C/KC9682C/KC1282C Berbequins com Percussão/Aparafusadores KC8452C/KC8462C/KC9662C Berbequins/Aparafusadores KC8402C Berbequim Manual de Instruções Importante! secos, altos ou fechados, fora do alcance das crianças, quando não as utilizar. As baterias do berbequim/aparafusador não estão • carregadas quando são fornecidas. Antes de utilizá- Não force a ferramenta. - Page 43 • • Mantenha-se atento. Preste atenção ao que Não ponha o carregador a funcionar se ele tiver está a fazer. Seja sensato. Páre de trabalhar caido ao chão, sofrido uma pancada violenta, ou quando estiver cansado. se estiver danificado de qualquer outra maneira; leve-o a um centro de serviço Black &...
- Page 44 PORTUGUÊS • Não tente carregar baterias não-recarregáveis. • O cabo fornecido com o carregador não deve ser substituído pelo cliente; se o cabo estiver danificado, deverá ser substituído num centro de assistência técnica autorizado da Black & Decker. • Para carregar o berbequim, proceda da Certifique-se de que está...
- Page 45 Acção de percussão combinada com O selector de reversibilidade tem três ajuste da força de aperto ‘combi’ posições localiza-se acimado interruptor de (KC8482C, KC9682C & KC1282C) gatilho, no corpo do berbequim. • Mova o selector para a posição central Estas unidades vêm equipadas com um “OFF”...
-
Page 46: Conselhos De Utilização
PORTUGUÊS Para manter a bucha em bom estado, bata suavemente na bucha para remover qualquer tipo de poeira acumulada no seu interior. Atenção! Não tente apertar brocas ou qualquer outro tipo de acessório), segurando Conselhos de utilização na parte frontal da bucha e ligando a Para que a sua ferramenta tenha uma grande ferramenta. - Page 47 Furar metal Este simbolo indica que as baterias contendo (NiCad) devem ser alvo de Utilize um lubrificante de corte quando estiver a tratamento especial quando atingirem o fim perfurar metais ferrosos, excepto no caso do ferro e do seu ciclo de vida e não tratadas como do latão, que devem ser perfurados a seco.
-
Page 48: Especificações Técnicas
KC1282C 12.0V 0-400 0-1200 A9256 EC Declaração de Conformidade Declaramos que os produtos: KC8482C, KC9682C, KC1282C, KC8452C, KC8462C, KC9662C, KC8402C estão de acordo com 89/392/EEC, EN50144 Pressão sonora <70dB (A) Potência sonora <85dB (A) Vibração 0.65m/s Brian Cooke Engenheiro Responsável... - Page 49 á ·Ó·ÊÔÚÙȉÔÌÂÓ· ÑÚ· ·Ó·/ ú·ÙÛ·‚ȉȷ πˆÓ 10mm KC8482C/KC9682C/KC1282C ÑÚ· ·Ó·/ú·ÙÛ·‚ȉȷ KC8452C/KC8462C/KC9662C ÑÚ· ·Ó·/úú·ÙÛ·‚ȉȷ KC8402C ÑÚ· ·Ó· µ‰ËÁ›Â˜ †ÂÈÙÔ˘ÚÁ›·˜ ∂ÚÔÛÔ¯‹! • ÆËÓ È¤˙ÂÙ ÙÔ ÂÚÁ·Ï›Ô. ó· οÓÂÈ ÙË ‰Ô˘ÏÂÈ¿ ÙÔ˘ ηχÙÂÚ· Î·È Ì ÂÚÈÛÛfiÙÂÚË ·ÛÊ¿ÏÂÈ· ú·Ù¿ ÙËÓ ·Ú¿‰ÔÛË ÙÔ ‰Ú¿ ·ÓÔ/ηÙÛ·‚›‰È Û·˜...
- Page 50 E††HNIKA • ∞· ›ÛÙ ÚÔÛ¯ÙÈÎÔ›. ∞· ÎÔÈÙ¿˙ÂÙ ٛ οÓÂÙÂ. ΩÚËÛÈÌÔ Ôț٠ÙËÓ · Ï‹ ÏÔÁÈ΋. ÆË ÏÂÈÙÔ˘ÚÁ›Ù ÙÔ ÂÚÁ·ÏÂ›Ô fiÙ·Ó Â›ÛÙ ÎÔ˘Ú·Ṳ̂ÓÔÈ. • ∞· ÂÍÂÙ¿˙ÂÙ ٷ ÂÏ·Ùو̷ÙÈο ÂÍ·ÚÙ‹Ì·Ù·. ∂ÚÈÓ · fi ÂÚ·ÈÙ¤Úˆ ¯Ú‹ÛË ÙÔ˘ ÂÚÁ·Ï›Ԣ, • µ ÊÔÚÙÈÛÙ‹˜ Â›Ó·È Û¯Â‰È·Ṳ̂ÓÔ˜ ÁÈ· Ù˘¯fiÓ...
- Page 51 • áÍÔ˘‰ÂÙÂÚÒÛÙ ÙÔ Ì ̷ϷÎfi Ô͇, fi ˆ˜ 6. Å Ôı‹Î¢ÛË ÁÈ· ÙÔ ÂÚÁ·ÏÂ›Ô ‰Ú· ¿ÓÔ˘ ¯˘Ìfi ÏÂÌÔÓÈÔ‡ ‹ ͇‰È. Î·È ÙÔ ÎÏÂȉ› (ÙÔ ¿ÎÚÔ ‰Ú· ¿ÓÔ˘ ‚Ú›ÛÎÂÙ·È ÌfiÓÔ ÛÙ· ÌÔÓ٤Ϸ ÙۈΠ• á¿Ó ¿ÂÈ ˘ÁÚfi Ù˘ Ì ·Ù·Ú›·˜ ̤۷ ÛÙ· ¯ˆÚ›˜...
- Page 52 E††HNIKA • áÓÒ ÊÔÚÙ›˙ÂÙÂ. Ô ÊÔÚÙÈÛÙ‹˜ Î·È ÙÔ ·Î¤ÙÔ ÂÓÂÚÁ›·˜ Ì ÔÚ› Ó· Á›ÓÂÈ ˙ÂÛÙfi fiÙ·Ó ÙÔ ·ÁÁ›˙ÂÙÂ. Å˘Ù‹ Â›Ó·È Û˘ÓËıÈÛÌÓË Î·Ù¿ÛÙ·ÛË Î·È ‰ÂÓ ˘ Ô‰ËÏ› ηӤӷ Úfi‚ÏËÌ·. • á¿Ó ÙÔ ·Î¤ÙÔ ÂÓÂÚÁ›·˜ ‰ÂÓ ÊÔÚÙ›˙ÂÈ Î·ÓÔÓÈο, ÚÔ¯ˆÚ‹ÛÙ ˆ˜ ÂÍ‹˜: áËÈÏÔÁ·˜ ‰‡Ô Ù·¯˘Ù‹ÙˆÓ (áÈÎfiÓ· D) •...
- Page 53 ÙÂÌ¿¯ÈÔ ·ÚÈÛÙÂÚfiÛÙÚÔÊ·. ÉÈ· Ó· ÂÏ¢ıÂÚÒÛÂÙ ÙÔ ÂÍ¿ÚÙËÌ· Ú‡ıÌÈÛ˘ ÎÔÏÏ¿ÚÔ˘ ÚÔ ‹˜ ÛÙÚ¤„ˆ˜ (áÈÎfiÓ˜ F2),  ·Ó·Ï¿‚ÂÙ ÙÔ Ì¤ÙÚÔ KC8482C, KC9682C & KC1282C 2 Ô˘ ‰›ÓÂÙ·È ·Ú·Î¿Ùˆ. µÈ ÌÔÓ¿‰Â˜ ·˘Ù¤˜ Â›Ó·È ÂÍÔ ÏÈṲ̂Ó˜ ÉÈ· Ó· ‰È·ÙËÚ‹ÛÂÙ ÙÔ ÙۈΠ¯ˆÚ›˜ ÎÏÂȉ› ÌÂ Û˘Ó‰˘·ÛÌfi ‰Ú¿Û˘ ÎÚÔ‡Ûˆ˜ ηÈ...
- Page 54 E††HNIKA πÛˆÎ Î·È ÎÏÂȉ› Ç¿ÏÙ ÙÔ ÎÏÂȉ› ÙÔ˘ ÙۈΠÛ ̛· · fi ÙȘ Ô ¤˜ ÙÔ˘ ÙۈΠ‰›ÓÔÓÙ·˜ ¤Ó· Û‡ÓÙÔÌÔ ‰˘Ó·Ùfi ÎÙ‡ ËÌ· ›Ù Ì ¤Ó· ÛÊ˘Ú› ›Ù Ì ÙÔ ¯¤ÚÈ Û·˜. πÔ ÙۈΠı· ¯·Ï·ÚÒÛÂÈ Î·È Ì ÔÚ› Ó· Í‚ȉˆı› · fi ÙÔ ÂÚÁ·ÏÂ›Ô •...
- Page 55 Ì ·Ù·Ú›·˜ ¯ÚÂÈ¿˙ÂÙ·È ·ÓÙÈηٿÛÙ·ÛË, Ó· ыψÛË ∏˘ÌÌfiÚʈÛ˘ Ù˘ áK ÛΤÊÙÂÛÙ ÙËÓ ÚÔÛÙ·Û›· ÙÔ˘ ∫ ‡ı˘Ó· ‰ËÏÒÓÔ˘Ì fiÙÈ ÔÈ Û˘Û΢¤˜: ÂÚÈ‚¿ÏÏÔÓÙfi˜ Ì·˜. KC8482C, KC9682C, KC1282C, KC8452C, å Black & Decker Û·˜ Û˘ÓÈÛÙ¿ Ù· ·ÎfiÏÔ˘ı·: KC8462C, KC9662C, KC8402C • ʼnÂÈ¿ÛÙ ϋڈ˜ ÙȘ Ì ·Ù·Ú›Â˜...
- Page 56 A9253 (807708) 3ÒÚ˜ • KC8462C 8.4V 0-300 0-850 A9254 1ÒÚ· • • KC8482C 8.4V 0-300 0-850 A9254 1ÒÚ· • KC9662C 9.6V 0-350 0-1000 A9255 1ÒÚ· • • KC9682C 9.6V 0-350 0-1000 A9255 1ÒÚ· • • KC1282C 12.0V 0-400 0-1200 A9256 1ÒÚ·...
- Page 57 Belgique/België Black & Decker Belgium NV Tel: 02 719 07 11 Weihoek 1, Nossegem Tlx: 22749 BLADE BB 1930-Zaventem-Zuid Fax: 02 721 40 45 Deutschland Black & Decker GmbH Tel: 06126 210 Black & Decker Straße 40 Fax: 06126 212435 65510 Idstein España Black &...
- Page 58 English Italiano Deutsch Français Nederlands Español Português EÏÏËÓÈο...