Sony DSX-A40UI Operating Instructions Manual
Fm/am digital media player
Hide thumbs
Also See for DSX-A40UI:
- Operating instructions manual (40 pages) ,
- Operating instructions manual (108 pages) ,
- Service manual (32 pages)
Table of Contents
FM/AM
Digital Media
Player
Owner's Record
The model and serial numbers are located on the bottom of
the unit.
Record the serial number in the space provided below.
Refer to these numbers whenever you call upon your Sony
dealer regarding this product.
Model No. DSX-A40UI
Serial No.
To cancel the demonstration (DEMO) display, see page 12.
Pour annuler l'affichage de démonstration (DEMO),
reportez-vous à la page 12.
DSX-A40UI
4-468-988-21(1)
Operating Instructions
Mode d'emploi
GB
FR
Table of Contents

Related Manuals for Sony DSX-A40UI


Summary of Contents for Sony DSX-A40UI
- Page 1 The model and serial numbers are located on the bottom of the unit. Record the serial number in the space provided below. Refer to these numbers whenever you call upon your Sony dealer regarding this product. Model No. DSX-A40UI Serial No.
-
Page 2: Warning
Be sure to install this unit in the dashboard of Warning the car for safety. For installation and connections, see the supplied installation/connections manual. FOR UNITED STATES CUSTOMERS. NOT APPLICABLE IN CANADA, INCLUDING IN THE PROVINCE OF QUEBEC. POUR LES CONSOMMATEURS AUX ÉTATS- UNIS. -
Page 3: Table Of Contents
For the State of California, USA only Perchlorate Material – special handling may Table of Contents apply, See www.dtsc.ca.gov/hazardouswaste/perchlorate Warning ......2 Perchlorate Material: Lithium battery contains Guide to Parts and Controls. -
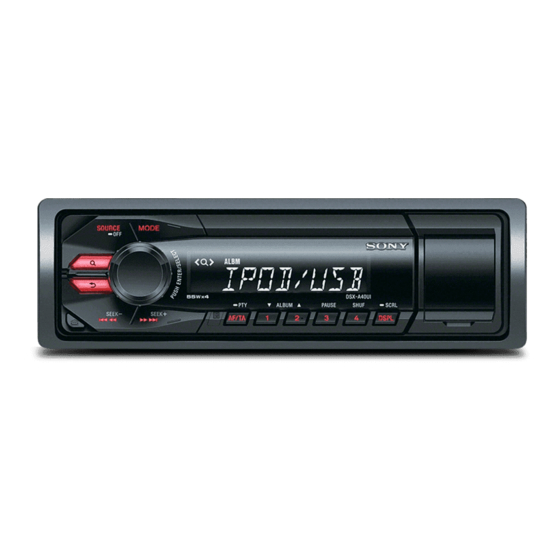
Page 4: Guide To Parts And Controls
Guide to Parts and Controls Main unit The number 2/ALBUM button has a tactile dot. Control dial (browse) (page 11) Enter the browse mode during playback. Rotate to adjust the volume. ENTER SOURCE Enter the selected item. Turn on the power. - Page 5 SEEK +/– RM-X211 Remote Tune in radio stations automatically. Press and hold to tune manually. / (prev/next), / (reverse/fast-forward) Receptor for the remote commander PTY (program type) Select PTY in RDS. Number buttons Receive stored radio stations. Press and hold to store stations.
-
Page 6: Getting Started
()/ (+)/ (–)/ ()/ENTER Setup items, etc. can be operated by / Getting Started //. VOL (volume) +/– Detaching the Front Panel You can detach the front panel of this unit to prevent theft. Press and hold OFF . The unit is turned off. -
Page 7: Setting The Clock
Connect the iPod/USB device to the Setting the Clock unit. To connect an iPod/iPhone, use the USB connection cable for iPod (not supplied). Press and hold SELECT. When connecting an iPhone The setup display appears. Rotate the control dial to select [CLOCK-ADJ], then press it. -
Page 8: Storing Automatically
To match the volume level of the connected device to other sources Listening to the Radio Start playback of the portable audio device at a moderate volume, and set your usual Listening to the Radio listening volume on the unit. Press SELECT, and rotate the control dial to select [AUX VOL] (page 14). -
Page 9: Using Radio Data System (Rds)
Type of programs Storing manually NEWS (News), INFORM (Information), SPORTS (Sports), TALK (Talk), ROCK (Rock), While receiving the station that you CLS ROCK (Classic Rock), ADLT HIT (Adult want to store, press and hold a Hits), SOFT RCK (Soft Rock), TOP 40 (Top 40), number button (1 to 6) until [MEM] COUNTRY (Country), OLDIES (Oldies), SOFT appears. -
Page 10: Playback
To stop playback Press and hold OFF for 1 second. Playback To remove the device Playing an iPod/USB Device Stop playback, then remove the device. In these Operating Instructions, “iPod” is Caution for iPhone used as a general reference for the iPod When you connect an iPhone via USB, phone functions on an iPod and iPhone, unless call volume is controlled by the iPhone, not... -
Page 11: Searching And Playing Tracks
Searching a track by name (Quick- Searching and Playing BrowZer™) Tracks During USB playback, press (browse)* to display the list of search categories. Repeat play and shuffle play When the track list appears, press (back) repeatedly to display the desired search category. -
Page 12: Settings
Press ENTER to return to the Quick- BrowZer mode. Settings The selected item appears. Canceling the DEMO Mode Rotate the control dial to select the desired item, then press it. You can cancel the demonstration display Playback starts. which appears while this unit is turned off. Press and hold SELECT. -
Page 13: General Setup
Rotate the control dial to select the REPEAT (page 11) options, then press it. LOUDNESS (dynamic loudness) Reinforces bass and treble for clear sound To return to the previous display at low volume levels: [ON], [OFF]. Press (back). BTM (page 8) General Setup CLOCK-ADJ (clock adjust) (page 7) CT (clock time) -
Page 14: Sound Setup
Sound Setup Additional Information EQ3 PRST (EQ3 preset) Precautions Selects an equalizer curve from 7 equalizer curves or off: [XPLOD], [VOCAL], [EDGE], Cool off the unit beforehand if your car has [CRUISE], [SPACE], [GRAVITY], [CUSTOM], been parked in direct sunlight. [OFF]. -
Page 15: Maintenance
About iPod Maintenance You can connect to the following iPod models. Update your iPod devices to the Replacing the lithium battery of the latest software before use. remote commander Made for When the battery becomes weak, the range iPod touch (5th generation) of the remote commander becomes shorter. -
Page 16: Specifications
Selectivity: 75 dB at 400 kHz Signal-to-noise ratio: 80 dB (stereo) Separation: 50 dB at 1 kHz Frequency response: 20 – 15,000 Hz Tuning range: 530 – 1,710 kHz Antenna (aerial) terminal: External antenna (aerial) connector Notes Intermediate frequency: For safety, turn off the ignition before cleaning 9,115 kHz or 9,125 kHz/5 kHz the connectors, and remove the key from the Sensitivity: 26 μV... -
Page 17: Troubleshooting
Mounting dimensions: Approx. 182 mm × 53 mm × 103 mm Troubleshooting in × 2 in × 4 in) (w/h/d) Mass: Approx. 0.7 kg (1 lb 9 oz) The following checklist will help you remedy Package contents: problems you may encounter with your unit. Main unit (1) Before going through the checklist below, Remote commander (1): RM-X211... - Page 18 OFF again. check the connection of the power If the error indication remains on in the antenna (aerial) control lead. display, consult your nearest Sony dealer. Preset tuning is not possible. NO MUSIC The broadcast signal is too weak.
- Page 19 When repeat play is not set, playback of the last track in album finished. The music application in the iPod/iPhone is terminated. Press PAUSE to start playback again. If these solutions do not help improve the situation, consult your nearest Sony dealer.
-
Page 20: Operating Instructions
Web suivant : http://esupport.sony.com http://www.sony.com/caraudio If you have any questions/problems regarding this product, try the following: Read Troubleshooting in these Operating Instructions. Please contact (U.S.A. only); 1-800-222-7669 Call http://www.SONY.com http://www.sony.net/ ©2013 Sony Corporation Printed in Thailand... -
Page 21: Parts List
× 2 Installation/Connections Digital Media Installation/Connexions × 4 Player ©2013 Sony Corporation Printed in Thailand DSX-A40UI Memory hold connection English Connection example ( ) When the yellow power supply lead is connected, power will always be supplied to the memory circuit even when the ignition switch is turned off. - Page 22 Equipment used in illustrations (not supplied) Appareils utilisés dans les illustrations (non fournis) Front speaker Rear speaker Power amplifier Haut-parleur avant Haut-parleur arrière Amplificateur de puissance from car antenna (aerial) à partir de l’antenne du véhicule Fuse (10 A) Fusible (10 A) RCA pin cord (not supplied).
- Page 23 Choose the installation location carefully so that the fuse blows, check the power connection and replace of Japanese cars. In such a case, consult your Sony unit will not interfere with normal driving operations. the fuse. If the fuse blows again after replacement, dealer.
- Page 24 Dans ce cas, Pour éviter tout problème de fonctionnement, utilisez uniquement la poussière, à la saleté, à des vibrations excessives consultez votre détaillant Sony le plus proche. les vis fournies pour le montage. ou à des températures élevées comme en plein soleil ou à...