Table of Contents
Quick Links
Table of Contents

Related Manuals for D-Link DSL-2740R


Summary of Contents for D-Link DSL-2740R
- Page 2 20cm between the radiator & your body. This transmitter must not be co-located or operating in conjunction with any other antenna or transmitter. IEEE 802.11b or 802.11g operation of this product in the U.S.A. is firmware-limited to channels 1 through 11. D-Link DSL-2740R User Manual...
-
Page 3: Table Of Contents
Use the Router for DHCP................32 TECHNICAL SPECIFICATIONS................. 62 Disable the DHCP Server................32 ....................33 IME AND ADVANCED ......................34 ..................34 ORWARDING ..................... 35 ETUP Wireless QoS ..................... 36 LAN QoS ....................37 .................... 38 UTBOUND ILTER D-Link DSL-2740R User Manual... -
Page 4: Package Contents
Section 1 - Product Overview Package Contents • DSL-2740R Wireless N ADSL2+ Modem Router • Power Adapter • CD-ROM with User Manual • One twisted-pair telephone cable used for ADSL connection • One straight-through Ethernet cable • One Quick Installation Guide Warning: The Router must be used with the power adapter included with the device. -
Page 5: Features
• Telnet Connection – The Telnet enables a network manager to access the Router’s management software remotely. • Easy Installation – The Router uses a web-based graphical user interface program for convenient management access and easy set up. Any common web browser software can be used to manage the Router. D-Link DSL-2740R User Manual... -
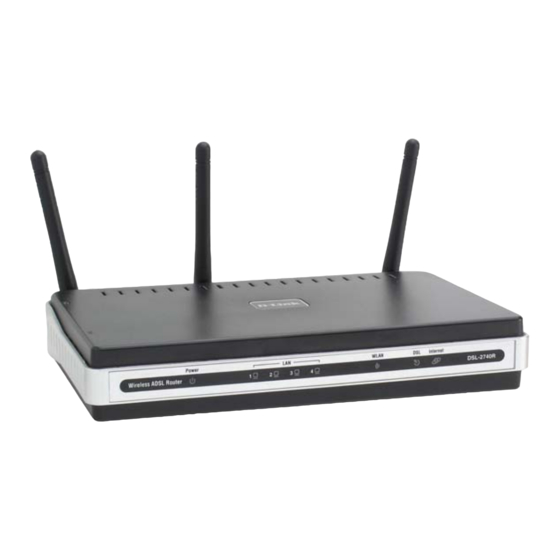
Page 6: Hardware Overview
To manually reset, depress button with Use the adapter shipped with the Use the ADSL cable to connect to the the power on for at least seven seconds. Router to connect to power source. your telephone line (RJ-11 port). D-Link DSL-2740R User Manual... -
Page 7: Leds
A solid green light indicates a valid link on startup. This light will blink when there is activity currently passing through the Wireless LAN. A steady green light indicates a valid ADSL connection. This will light after the ADSL negotiation process has been settled. A blinking green light indicates activity on the WAN (ADSL) interface. D-Link DSL-2740R User Manual... - Page 8 If the indicator blinks green, this means the Router is active. If the Router power is off, this remains dark. A solid red light indicates there is no DHCP response, no PPPoE response, PPPoE authentication has failed, and/or there is no IP. D-Link DSL-2740R User Manual...
-
Page 9: Installation
Operating Systems The DSL-2740R uses an HTML-based web interface for setup and management. The Web configuration manager may be accessed using any operating system capable of running web browser software, including Windows 98 SE, Windows ME, Windows 2000, Windows XP, and Windows Vista. - Page 10 LAN side of the bridge, such as a PC, a server, a gateway device such as a router or similar firewall hardware. The IP address can be assigned in a number of ways. Your network service provider will give you instructions about any additional connection software or NIC configuration that may be required. D-Link DSL-2740R User Manual...
- Page 11 ADSL2, and ADSL2+ modulation. Security Protocol This is the method your ADSL service provider will use to verify your Username and Password when you log on to their network. Your Router supports the PAP and CHAP protocols. D-Link DSL-2740R User Manual...
- Page 12 IP address used for DHCP service on the LAN when DHCP is enabled. LAN Subnet Mask for the DSL-2740R This is the subnet mask used by the DSL-2740R, and will be used throughout your LAN. The default subnet mask is 255.255.255.0. This can be changed later.
-
Page 13: Information You Will Need About Your Lan Or Computer
Ethernet NIC If your computer has an Ethernet NIC, you can connect the DSL-2740R to this Ethernet port using an Ethernet cable. You can also use the Ethernet ports on the DSL-2740R to connect to other computer or Ethernet devices. -
Page 14: Power On Router
Remember that this will wipe out any settings stored in flash memory including user account information and LAN IP settings. The device settings will be restored to the factory default IP address 192.168.1.1 and the subnet mask is 255.255.255.0, the default management Username is “admin” and the default Password is “admin.” D-Link DSL-2740R User Manual... -
Page 15: Network Connections
MDI-X ports (1x, 2x, etc.) with a crossed cable. Computer to Router Connection You can connect the Router directly to a 10/100BASE-TX Ethernet adapter card (NIC) installed on a PC using the Ethernet cable provided. D-Link DSL-2740R User Manual... -
Page 16: Setup
Section 3 – Configuration Setup This section will show you how to set up and configure your new D-Link Router using the Web-based configuration utility. Web-based Configuration Utility Connect to the Router To configure the WAN connection used by the Router it is first necessary to communicate with the Router through its management interface, which is HTML-based and can be accessed using a web browser. -
Page 17: Setup Wizard
Router including how to change IP settings and DHCP server setup. SETUP WIZARD Click the Setup Wizard button in the middle of the top of the window of the Router’s opening page to launch a series of setup windows. D-Link DSL-2740R User Manual... - Page 18 SETUP WIZARD – CHANGE YOUR ROUTER PASSWORD This window of the Setup Wizard is used to change the Router password. D-Link recommends to help secure your network, the user change the Current Password from the factory default “admin.” The New Password should be between 1 and 15 alphanumeric characters.
- Page 19 ISP and then click the Next button. Most users, however, will be sent directly to a Setup Wizard window for their specific Internet connection type based on the information entered in the previous Setup Wizard window. D-Link DSL-2740R User Manual...
- Page 20 Setup Wizard window. The available connection and encapsulation types are PPPoE LLC, PPPoE VC-Mux, PPPoA LLC, and PPPoA VC-Mux. Click Next to go to the last Setup Wizard window. D-Link DSL-2740R User Manual...
- Page 21 MAC address of your computer’s Ethernet adapter, click the Clone MAC Address button. This will copy the information to a file used by the Router to present to the ISP’s server used for DHCP. Click Next to go to the last Setup Wizard window. D-Link DSL-2740R User Manual...
-
Page 22: Bridge Mode
Select the specific Connection Type from the drop-down menu. The available connection and encapsulation types are 1483 Bridged IP LLC and 1483 Bridged IP VC-Mux. Click Next to go to the last Setup Wizard window. D-Link DSL-2740R User Manual... - Page 23 Finally you can confirm that the setup process is completed. If you are satisfied that you have entered all the necessary information correctly, click the Finish button to save the new configuration. If you need to change settings from a previous window, click the Back button. D-Link DSL-2740R User Manual...
-
Page 24: Adsl Setup
ADSL service. Enter the PCR, SCR and MBS values if you are instructed by your ISP. Click the PPPoE/PPPoA radio button to access the first Manual ADSL Connection Setup window: D-Link DSL-2740R User Manual... -
Page 25: Pppoe/Pppoa
7. IGMP is set to Disable by default. Select Enable to allow IGMP packets to go through the WAN interface in both directions. 8. Leave the Default Route enabled if you want to use the Router as D-Link DSL-2740R User Manual... - Page 26 9. When you are satisfied that all the WAN settings are configured correctly, click the Save Settings button to save the changes. 10. Click the Connect button at the bottom of this window to establish the WAN connection. D-Link DSL-2740R User Manual...
-
Page 27: Dynamic Ip Address
5. Leave the Default Route enabled if you want to use the Router as the default route to the Internet for your LAN. Whenever a computer on the LAN attempts to access the Internet, the Router becomes the Internet gateway to the computer. If you have an D-Link DSL-2740R User Manual... - Page 28 6. When you are satisfied that all the WAN settings are configured correctly, click the Save Settings button to save the changes. 7. Click the Connect button at the bottom of this window to establish the WAN connection. D-Link DSL-2740R User Manual...
-
Page 29: Static Ip Address
LAN attempts to access the Internet, the Router becomes the Internet gateway to the computer. If you have an alternative route for Internet traffic you may disable this without effecting the Router’s connection. D-Link DSL-2740R User Manual... -
Page 30: Bridge Mode
2. When you are satisfied that all the WAN settings are configured correctly, click the Save Settings button to save the changes. 3. Click the Connect button at the bottom of this window to connect to your ISP. D-Link DSL-2740R User Manual... -
Page 31: Wireless Setup
6. The Hide Wireless Network is not selected by default. To make the wireless network invisible, tick the Hide Wireless Network check box. To configure Wireless Security, select WEP or WPA-Personal in the Security Mode drop-down list. D-Link DSL-2740R User Manual... -
Page 32: Wep
(Key Length) of encryption selected. Only one key can be active. The active key is selected in the Default WEP Key drop-down list. Click the Apply Settings button to save the settings. D-Link DSL-2740R User Manual... -
Page 33: Wpa-Personal
Both methods require entry of a pre-shared key to allow association. Type a password from 8 to 64 characters long in the Pre-Shared Key field. Click the Apply Settings button to save the settings. D-Link DSL-2740R User Manual... -
Page 34: Lan Setup
The IP address pool can be up to 253 IP addresses. There are two options for DHCP service: • You can use the Router as a DHCP server for your LAN. • You can disable DHCP service and manually configure IP settings for workstations. D-Link DSL-2740R User Manual... -
Page 35: Use The Router For Dhcp
If you configure IP settings manually, make sure to use IP addresses in the subnet of the Router. You will need to use the Router’s IP address as the Default Gateway for the workstation in order to provide Internet access. D-Link DSL-2740R User Manual... -
Page 36: Time And Date
Saving by ticking the Enable Daylight Saving check box and then using the drop-down menus to configure the desired Daylight Saving starting and ending dates. When you are finished, click the Save Settings button to set the system time and date information. D-Link DSL-2740R User Manual... -
Page 37: Advanced
Apply button. Finally, click the Reboot button on the left panel to let your changes take effect. To remove a port forwarding entry in the table, click the corresponding button. To modify an entry, click the corresponding button, make the desired changes, and then click the Apply button. D-Link DSL-2740R User Manual... -
Page 38: Qos Setup
Large amounts of non-critical data can be scaled so as not to affect these prioritized sensitive real-time programs. Click the Wireless QoS to configure QoS on Wireless LAN. Click the LAN QoS to configure QoS on LAN. D-Link DSL-2740R User Manual... -
Page 39: Wireless Qos
This page allows you to configure the Wireless QoS. Enter the Traffic Class Name, select the transmit priority and protocol, enter the source and destination IP Address, subnet mask and port. Click the Add/Apply button to save this rule. D-Link DSL-2740R User Manual... -
Page 40: Lan Qos
This page helps you to set the priorities of LAN. Enter a name of the rule, select the Priority, Protocol and enter the Source and Destination IP Address range and their subnet mask. Click the Add/Apply button to save this rule. D-Link DSL-2740R User Manual... -
Page 41: Outbound Filter
Destination Subnet Mask Inbound or Outbound filter rule. The Destination Port is the TCP/UDP port on either Destination Port the LAN or WAN depending on if you are configuring an Outbound or Inbound Filter rule. D-Link DSL-2740R User Manual... -
Page 42: Inbound Filter
Destination Subnet Mask Inbound or Outbound filter rule. The Destination Port is the TCP/UDP port on either Destination Port the LAN or WAN depending on if you are configuring an Outbound or Inbound Filter rule. D-Link DSL-2740R User Manual... -
Page 43: Dns Setup
Internet. This is enabled to allow remote access to a host by clicking a hyperlinked URL D-Link DSL-2740R User Manual... - Page 44 Router. DDNS requires that an account be setup with one of the supported DDNS servers prior to engaging it on the Router. This function will not work without an accepted account with a DDNS server. Note D-Link DSL-2740R User Manual...
-
Page 45: Vlan
Select a number in the VLAN Index drop-down list, tick the Enable VLAN Group check box, and tick the Port number and the corresponding tagged check boxes. Click the Add/Apply button to create the VLAN group. D-Link DSL-2740R User Manual... -
Page 46: Firewall & Dmz
The Firewall Settings section allows the Router to enforce specific predefined policies intended to protect against certain common types of attacks. Tick the Enable Firewall check box, and click the Apply Settings button to active the function. D-Link DSL-2740R User Manual... -
Page 47: Advanced Adsl
Leave the Capability setting at the bottom of the window unchanged unless otherwise instructed by your ISP. Both Bitswap Enable and Seemless Rate Adaption (SRA) Enable deal with tests that determine the line condition between your Router and the ISP’s Central office. D-Link DSL-2740R User Manual... -
Page 48: Advanced Wireless
To access the Advanced Wireless window, click the Advanced Wireless button in the Advanced directory. In this page, you can configure more advanced settings of 802.11g wireless radio. However, it is recommended to remain as default unless your ISP requests to change it. D-Link DSL-2740R User Manual... -
Page 49: Wireless Mac Filter
Association or Allow Association in the Action drop-down list, and enter the MAC Address of the Wireless LAN station. Click the Apply Settings button to enable the function. Click Deactivated, and the Apply Settings button to disable the function. D-Link DSL-2740R User Manual... -
Page 50: Advanced Lan
Settings button. Click the Reboot button on the left panel to let your changes take effect. When “Enable Multicast Streams (IGMP)” is ticked, Multicast packets are allowed to pass in both directions on the WAN interface. Most users will want to leave this on. Click Apply Settings. D-Link DSL-2740R User Manual... -
Page 51: Remote Management
Use the Access Control section in the middle of the window to restrict a service from being accessed via the WAN interface. Click the Apply Settings button and then click the Reboot button on the left panel to let your changes take effect. D-Link DSL-2740R User Manual... -
Page 52: Maintenance
Click the Apply Settings button and then click the Reboot button on the left panel to let your changes take effect. The system User Name remains “admin,” this cannot be changed using the Web manager interface. D-Link DSL-2740R User Manual... -
Page 53: Save/Restore Settings
To reset the Router to its factory default settings, click the Restore Device button. You will be prompted to confirm your decision to reset the Router. The Router will reboot with the factory default settings including IP settings (192.168.1.1) and Administrator password (admin). D-Link DSL-2740R User Manual... -
Page 54: Firmware Update
Save As window that immediately opens. The default location is your desktop. Performing a Firmware Upgrade can sometimes change the configuration settings. Be sure to backup the Router’s configuration settings before upgrading the firmware. Note D-Link DSL-2740R User Manual... -
Page 55: Diagnostics
IP addresses. The diagnostics feature executes a series of tests of your system software and hardware connections. Use this window when working with your ISP to troubleshoot problems. D-Link DSL-2740R User Manual... -
Page 56: System Log
Section 3 – Configuration System Log To access the System Log window, click the System Log button in the Maintenance directory. This window displays the system log information of the Router. D-Link DSL-2740R User Manual... -
Page 57: Status
To access the Device Info window, click the Device Info button in the Status directory. Use this window to quickly view basic current information about the LAN and WAN interfaces and device information including Firmware Version and MAC address. D-Link DSL-2740R User Manual... -
Page 58: Connected Clients
Section 3 – Configuration Connected Clients To access the Connected Clients window, click the Connected Clients button in the Status directory. The Connected LAN Clients list displays active DHCP clients when the router is acting as a DHCP server. D-Link DSL-2740R User Manual... -
Page 59: Statistics
Section 3 – Configuration Statistics To access the Statistics window, click the Statistics button in the Status directory. Use this window to monitor traffic on the Ethernet or ADSL connection. This window also displays information concerning ADSL status. D-Link DSL-2740R User Manual... -
Page 60: Help
Section 3 – Configuration Help To access the Help window, click the Help directory. D-Link DSL-2740R User Manual... -
Page 61: Troubleshooting
Troubleshooting This chapter provides solutions to problems that might occur during the installation and operation of the DSL-2740R. Read the following descriptions if you are having problems. (The examples below are illustrated in Windows® XP. If you have a different operating system, the screenshots on your computer will look similar to the following examples.) - Page 62 There is a potential security issue if the firewall is disabled on your PC. Please remember to turn it back on once you have finished the whole installation procedure. This will enable you to be able to surf the Internet without any problem. D-Link DSL-2740R User Manual...
-
Page 63: Networking Basics
Check Your IP Address After you install your new D-Link adapter, by default, the TCP/IP settings should be set to obtain an IP address from a DHCP server (i.e. wireless router) automatically. To verify your IP address, please follow the steps below. -
Page 64: Statically Assign A Nip Address
Windows® 2000 - From the desktop, right-click on the My Network Places > Properties. Step 2 Right-click on the Local Area Connection which represents your D-Link network adapter and select Properties. Step 3 Highlight Internet Protocol (TCP/IP) and click on the Properties. -
Page 65: Technical Specifications
• RFC1058 RIP v1 • RFC2131 DHCP Client / • RFC1213 SNMP v1 & v2c DHCP Server • RFC1334 PAP • RFC2364 PPP over ATM • RFC1389 RIP v2 • RFC2516 PPP over RFC1577 Classical IP over Ethernet D-Link DSL-2740R User Manual...