
Related Manuals for Sony MDS-E11


Summary of Contents for Sony MDS-E11
- Page 1 2-346-664-12(1) MiniDisc Recorder Operating Instructions MDS-E11 © 1998 by Sony Sound Tec Corporation...
- Page 2 / TV technician for help. to rain or moisture. Welcome! To avoid electrical shock, do Precautions Thank you for purchasing the Sony not open the cabinet. Refer MiniDisc Recorder. Before operating servicing to qualified the recorder, please read this manual personnel only.
-
Page 3: Table Of Contents
Starting Recording With 6 Seconds of Prestored Audio Data (Time Machine Recording) ....................12 Synchro-Recording With Audio Equipment of Your Choice ........13 Synchro-Recording With a Sony CD Playe ..............14 Recording Using a Timer ....................15 Playing MDs Using the Display ......................16 Locating a Specific Track .................... -
Page 4: Getting Started
PC or similar equipment MDS-E11 When to replace batteries External controller With normal use, the batteries should last for about six months. When the remote no longer operates the recorder, replace all the batteries with new ones. - Page 5 Getting Started What cords will I need? Switch setting Output level • Audio connecting cords (pin type) +4dBu Signals having a metered level of –20 dB White White are generated at a +4 dBu level. –10dBu Signals having a metered level of –20 dB are generated at a –10 dBu level.
-
Page 6: Basic Operations
Basic Operations Basic Operations Recording on an MD Turn on the mixer and program source. Press U. Insert a recordable MD. With the label side up With the arrow pointing this way If the MD has a recorded material on it, the recorder will automatically start recording from the end of the last recorded track. - Page 7 Basic Operations Press r. The recorder stands by for record. When recording the analog input signal, adjust the recording level with REC LEVEL. The fourth dot is satisfactory for most purposes. For details, refer to “Adjusting the Recording Level” on page 11. Press ·...
-
Page 8: Playing An Md
Basic Operations Playing an MD Turn on the mixer and adjust the fader or level control of the corresponding channel. Press U. Insert an MD. With the label side up With the arrow pointing this way Press ·. You can locate and play back a track while the recorder is The recorder starts playing. -
Page 9: Recording On Mds
Recording on MDs Recording on MDs If “Cannot Copy” appears in the display Notes on Recording The recorder uses the SCMS (Serial Copy Management System). MDs recorded through digital input connector cannot be If “Protected” appears in the display copied onto other MDs or DAT tapes through the digital The MD is record-protected. - Page 10 Recording on MDs Monitoring the input signal (Input Monitor) If “Smart Space” appears in the display (Smart Space) Before starting recording, you can monitor the selected input signal through the recorder’s output connectors. When there has been an extended silence of up to 30 seconds in length, and the signal is input again, the Press §EJECT to remove the MD.
-
Page 11: Recording Over Existing Tracks
Recording on MDs Recording Over Existing Tracks Adjusting the Recording Level Follow the procedure below to record over existing When recording with INPUT set to ANALOG and the material just as you would on an analog cassette tape. signal input through LINE (ANALOG) IN jacks, use REC LEVEL to adjust the recording level before starting recording. -
Page 12: Marking Track Numbers While Recording (Track Marking)
Recording on MDs To Cancel Auto Track Marking Marking Track Numbers While 1 While the recorder is stopped, press EDIT/NO twice to display “Set up Menu”. Recording (Track Marking) 2 Turn AMS until “Level Sync” appears in the display, then press AMS. -
Page 13: Synchro-Recording With Audio Equipment Of Your Choice
Recording on MDs Synchro-Recording With Audio ≠ AMS ± Equipment of Your Choice Z By using the MUSIC SYNC button on the remote, you can automatically start a Synchronized recording with the signal input from the program source through the input jacks. -
Page 14: Synchro-Recording With A Sony Cd Playe
The track number and elapsed recording time of the track appear in the display. By connecting your recorder to a Sony CD player, you If the CD player does not start playing can easily dub CDs onto MDs using the CD synchro Some CD player models may not respond when you buttons on the remote. -
Page 15: Recording Using A Timer
Recording on MDs Recording Using a Timer A commercially available timer connected to the recorder allows it to start or stop recording at a preappointed time. For additional information, refer to the information manual for the timer. Turn on the timer. Perform steps 1 to 5 in “Recording on an MD”... -
Page 16: Playing Mds
Playing MDs Playing MDs Disc name Using the Display Z You can use the display to check disc and track information such as the total track number, total playing time of the tracks, remaining recordable time Total number of tracks Total disc playing time of the disc and disc name. -
Page 17: Locating A Specific Track
Playing MDs Playing MDs You can check the track name at any time while When you directly locate a track with a number over playing an MD Z 25 Z You must press >25 first, before entering the Press SCROLL on the remote. Since the display shows up to 12 characters at a time, corresponding digits. -
Page 18: Locating A Particular Point In A Track
Playing MDs Playing Tracks Repeatedly Z Locating a Particular Point in a Track You can play tracks repeatedly in any play mode. You can also use 0 and ) to locate a particular point in a track during playback or playback pause. REPEAT A˜B ·... -
Page 19: Playing Tracks In Random Order (Shuffle Play)
Playing MDs Playing MDs Repeating a specific portion (A-B Repeat) Playing Tracks in Random Order (Shuffle Play) Z You can play a specific portion of a track repeatedly. This might be useful when you want to memorize lyrics. You can have the recorder “shuffle” tracks and play Note that you can only repeat a portion within the them in random order. -
Page 20: Creating Your Own Program (Program Play)
Playing MDs You can program the same track repeatedly Creating Your Own Program Press the appropriate number button as many times as you want to repeat. (Program Play) Z The program remains even after Program Play ends You can specify the playback order of the tracks on an When you press ·, you can play the same program MD and create your own programs containing up to 25 again. -
Page 21: Useful Tips When Recording From Mds To Tape
Playing MDs Playing MDs Pausing after each track (Auto Pause) Useful Tips When Recording When the Auto Pause Function is on, the recorder From MDs to Tape Z pauses after playing each track. Auto Pause is convenient when recording single tracks or multiple, non-consecutive tracks. -
Page 22: Playing Using A Timer
Playing MDs Editing Recorded MDs Playing Using a Timer Notes on Editing A commercially available timer connected to the You can edit the recorded tracks after recording, using recorder allows it to start or stop playing at a the following functions: preappointed time. - Page 23 Editing Recorded MDs Playing MDs Erasing a single track Erasing all tracks on an MD You can erase a track simply by specifying the You can delete the disc name, all recorded tracks, and respective track number. When you erase a track, the titles of the recordable MD at once.
-
Page 24: Dividing Recorded Tracks (Divide Function)
Editing Recorded MDs While monitoring the sound, turn AMS to find the Dividing Recorded Tracks starting position of the new track. The starting portion of the new track is played (Divide Function) back repeatedly. “Rehearsal“ alternates with “Position OK?“ in the With the Divide Function you can assign a track display. -
Page 25: Combining Recorded Tracks (Combine Function)
Editing Recorded MDs To cancel the Combine Function Combining Recorded Tracks Press EDIT/NO or p . (Combine Function) You can undo a track combination Divide the tracks again (see “Dividing Recorded Use the Combine Function while the recorder is Tracks” on page 24), then repeat the combine function stopped, playing or in pause to combine consecutive with the correct tracks if necessary. -
Page 26: Moving Recorded Tracks (Move Function)
Editing Recorded MDs Moving Recorded Tracks Labeling Recordings (Move Function) (Title Function) Use the Move Function to change the order of any You can create titles for your recorded MDs and tracks. track. After you move a track, the track numbers Titles —... - Page 27 Editing Recorded MDs Turn AMS to select the character. Repeat Steps 4 to 5 until you have entered the entire title. If you entered the wrong character Press 0 or ) until the character to be corrected starts flashing, and repeat Steps 4 and 5 to enter the correct character.
- Page 28 Editing Recorded MDs Labeling tracks and MDs with the remote Z Repeat Steps 2 and 3 until you have entered the entire title. If you entered the wrong character Press 0 or ) until the character to be corrected starts flashing. Press CLEAR to erase the incorrect character, then enter the correct one.
-
Page 29: Undoing The Last Edit (Undo Function)
Additional Information Editing Recorded MDs Undoing the Last Edit Function of Control Terminal (Undo Function) Control terminal (CTRL-S) You can use the Undo Function to cancel the last edit Mini jack type and restore the contents of the MD to the condition that existed before editing was done. -
Page 30: Dimensions
Additional Information Dimensions Unit: mm Mounting the recorder This recorder can be attached to a standard 19 inch rack (type EIA). After detaching the four feet on the bottom of the recorder, mount the recorder on the rack. -
Page 31: Functions Of Remote Terminals
Additional Information Additional Information The first recorder starts playing. Functions of REMOTE Terminals When the first recorder finishes playing, the second recorder starts playing. RELAY REC/PLAY — Stereo mini-jack terminal The third and subsequent connected by cabling to their RELAY IN PLAY terminals start playing in Where multiple recorders are hooked up together, after sequence as soon as the preceding recorders in the the first recorder has finished recording or playing,... -
Page 32
(see page 16) during relay recording, a relay control signal is issued when the remaining recording time is MDS-E11 reduced to about 6 seconds, thereby making Input pins (pins 1 to 5) overlapped recording possible on the first and second recorders. - Page 33 Additional Information Additional Information With user settings (USER), PIN1 to PIN5 and POUT1 to POUT1 to POUT3 (Output pins) POUT3 in the Setup Menu can be assigned the POWER Grounded when the power is on. functions in the table below. Each pin has fixed I/O status.
-
Page 34: Display Messages
Additional Information Display Messages System Limitations The following table explains the various messages that The recording system in your MiniDisc recorder is appear in the display. radically different from those used in cassette and DAT recorders and is characterized by the limitations described below. -
Page 35: Troubleshooting
Move the you remedy the problem. Should any problem persist, recorder away from the source of strong magnetism. consult your nearest Sony dealer. Note The recorder does not operate or operates poorly. If the recorder does not operate properly even after you’ve The MD may be damaged (“Disc Error”... -
Page 36: Specifications
Additional Information General Specifications Power requirements Refer to warning letter. System MiniDisc digital audio system Power consumption European models: 15W Disc MiniDisc USA models: 14W Dimensions (approx.) (w/h/d) incl. projecting parts Laser Semiconductor laser (λ = 780 nm) 482 × 44 × 376 mm Emission duration: continuous (19 ×... -
Page 37: Index Of Parts And Controls
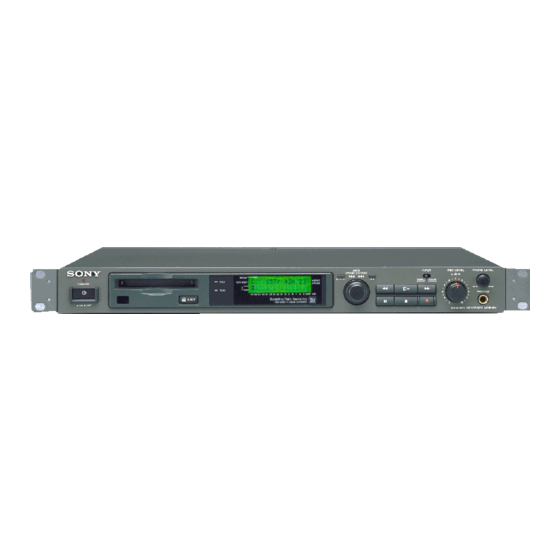
Additional Information Additional Information Index of Parts and Controls 1 U (power) switch !¡ PHONE LEVEL control 2 Disc compartment !™ Remote sensor 3 REC indicator !£ § EJECT button 4 TOC incicator !¢ AMS control 5 Display !∞ P (pause) button 6 EDIT/NO button !§... -
Page 38: Guide To The Serial Copy Management System
Additional Information 2 You can record the digital input signal of a digital satellite Guide to the Serial Copy broadcast onto a DAT tape or recordable MD via the digital input jack on the DAT or MD recorder which is Management System capable of handling a sampling frequeny of 32 kHz or 48 kHz. - Page 39 Additional Information Additional Information 3 You can record a DAT tape or MD recorded via the DAT or MD recorder’s analog input jack onto another DAT tape or MD via the DAT or MD recorder’s digital output jack. You cannot, however, make a second-generation DAT tape or MD copy via the DAT or MD recorder’s digital output jack.
- Page 40 Additional Information...