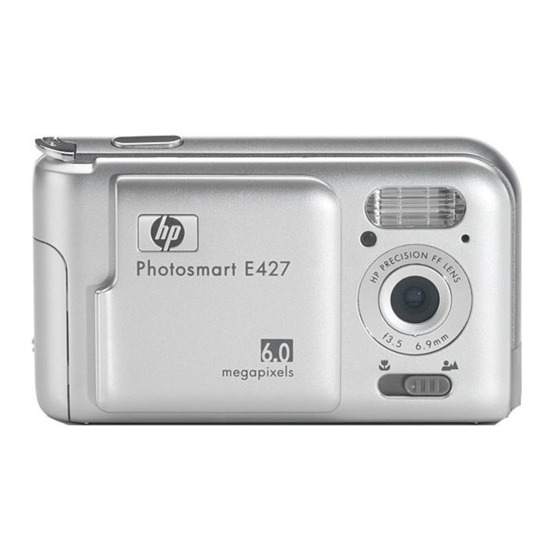
HP Photosmart E427 User Manual
Hewlett-packard photosmart digital camera user guide
Hide thumbs
Also See for Photosmart E427:
- User manual (140 pages) ,
- Quick start manual (64 pages) ,
- Warranty and regulatory information (72 pages)
Table of Contents
Table of Contents

Related Manuals for HP Photosmart E427


Summary of Contents for HP Photosmart E427
-
Page 1: User Guide
HP Photosmart E427 Digital Camera User Guide... - Page 2 Nothing herein should be construed as constituting an additional warranty. HP shall not be liable for technical or editorial errors or omissions contained herein. Windows® is a U.S. registered trademark of Microsoft Corporation.
-
Page 3: Table Of Contents
Viewing thumbnails...16 Magnifying images...17 Selecting images for printing...17 Recording audio...17 Transferring and printing images...18 Transferring images with HP Photosmart Software...18 Transferring images without HP Photosmart Software...18 Connecting to the computer...18 Using a memory card reader...19 Printing images from the camera...19 Using the Setup Menu...20... - Page 4 Managing batteries...26 Top points about batteries...26 Extending battery life...26 Safety precautions for using batteries...26 Power indicators...27 Number of shots per battery type...27 Battery performance...27 Recharging NiMH batteries...28 Specifications...29 Memory capacity...30 Image quality...30 Index...31...
-
Page 5: Getting Started
Getting started Use this section to get familiar with camera controls, set up your digital camera for use, and begin taking pictures. Camera top, back, and side Shutter button—Captures images (see records video clips (see Live View/Playback button—Switches between Live View and... -
Page 6: Camera Front, Bottom, And Side
Camera front, bottom, and side Self-Timer/Video light—See Flash. Microphone. Focus switch—Switches between the focus range settings on page Tripod mount. Battery/Memory card door. Lens cover/Power switch—Turns the camera on and off and protects the lens while the camera is off. Before taking pictures Complete the following procedures before taking pictures or recording video clips. -
Page 7: Turn On The Camera
To change the date and time later, use the Setup Menu (see Using the Setup Menu on page HP Photosmart E427 Digital Camera 20). again to confirm. 20). Using the... -
Page 8: Install And Format An Optional Memory Card
The HP Photosmart Software provides features for transferring images and video clips to your computer, as well as features for modifying stored images (remove red eyes, rotate, crop, resize, adjust image quality, and more). See the Help feature in the HP Photosmart Software. -
Page 9: Using Your Camera
Close all programs and temporarily disable any virus protection software. Insert the HP Photosmart Software CD into the CD drive and follow the on-screen instructions. If the installation screen does not appear, click Start, click Run, type D:\Setup.exe, where D is the letter of your CD drive, then click OK. -
Page 10: Taking Pictures And Recording Video Clips
Taking pictures and recording video clips Live View allows you to frame pictures and video clips in the Image Display. To activate Live View, press Display. The Live View display looks like this: Taking still pictures You can take a picture almost any time the camera is on and not in Video shooting mode. Press This indicates you are in Live View. -
Page 11: Instant Review
1 m (39.4 in) away. Macro—Use when taking close-up pictures of subjects between 600 mm and 1 m (23.6 to 39.4 in) away. HP Photosmart E427 Digital Camera Using the Capture Menu until the image you want to capture fills the until the yellow frame disappears. -
Page 12: Using The Capture Menu
Using the Capture Menu The Capture Menu allows you to adjust camera settings that affect the characteristics of the images and video clips you capture. While in Live View or Playback, press to highlight a menu option, then press sub-menu. to highlight a setting, then press Press Except as noted, Capture Menu settings remain in effect until they are changed or until... -
Page 13: Using The Self-Timer Mode
Set the camera on a tripod or stable surface. Frame the subject in the Image Display. Press and release the Shutter button. The camera begins the 10-second countdown, then takes the still image. HP Photosmart E427 Digital Camera Exposure Compensation on page White Balance on page to decrease... -
Page 14: Flash Setting-Red-Eye
Note To add audio to images taken with the Self-Timer setting, see audio on page The Self-Timer setting resets to the default Auto shooting mode after the picture is taken. Flash Setting—Red-Eye The red-eye phenomenon is caused when light from the flash reflects off the subjects' eyes, which can make human eyes appear red in the captured image. -
Page 15: Reviewing Images And Video Clips
During Playback, the Image Display also indicates additional information about each image or video clip. 0:15 1 of 30 HP Photosmart E427 Digital Camera until appears in the upper right corner of the Image Display. to stop the clip; press... -
Page 16: Deleting Images
Deleting images To delete a displayed image during Playback: Press to select an option, then press – Cancel—Returns to Playback without deleting the displayed image. – This Image—Deletes the image or video clip. – All Images (in Memory/on Card)—Deletes all stored images and video clips. –... -
Page 17: Magnifying Images
Delete Clip—Deletes the current audio clip and returns to the Playback Menu. Note To hear audio associated with still images or video clips, transfer them to your computer using the HP Photosmart Software (see images on page HP Photosmart E427 Digital Camera Magnify. -
Page 18: Transferring And Printing Images
Transferring and printing images You can transfer images and video clips with or without the HP Photosmart Software that came with your camera. However, the HP Photosmart Software has several features for transferring and managing your images and also guides you through the transfer process. -
Page 19: Using A Memory Card Reader
Using a memory card reader You can put your camera’s optional memory card into a (separately purchased) memory card reader. Some computers and HP Photosmart printers have built-in memory card slots which act as a memory card reader. For Windows computers: Insert your camera’s memory card into the memory card reader (or into your... -
Page 20: Using The Setup Menu
USB Configuration—Specifies how a computer recognizes the camera. See Connecting to the computer on page ● Digital Camera (Default)—Recognizes the camera as a digital camera using PTP (Picture Transfer Protocol). ● Disk Drive—Recognizes the camera as a disk drive using MSDC (Mass Storage Device Class). -
Page 21: Troubleshooting
● If you have not used the batteries for two months or longer, recharge them. ● If charging the batteries in the optional HP quick recharger does not work, replace the batteries. HP Photosmart E427 Digital Camera Resetting the camera on page Problems and solutions on page 6). - Page 22 The camera does not respond when I press a button. ● Turn on the camera. ● Most of the camera buttons do not respond when the camera is connected to a computer. ● Replace or recharge the batteries. ● Reset the camera (see ●...
- Page 23 Turn the camera off, then on again. If that does not fix the problem, reset the camera (see Resetting the camera on page ● If the problem persists, contact HP Support (see HP Photosmart E427 Digital Camera 12), or wait for natural lighting conditions to improve. 16).
- Page 24 Refer to the HP Customer Care website: www.hp.com/support. How can I get professional-quality prints if I don’t have a photo printer? ● Use the Buy prints online feature in the HP Photosmart Software (see the Help feature in the HP Photosmart Software for details). ●...
-
Page 25: Product Support
Customers with disabilities HP Total Care, driver and software updates, support information Getting assistance To get the best from your HP product, consult the following standard HP support offerings: Consult the product documentation. – Review Troubleshooting on page 21 –... -
Page 26: A Managing Batteries
Managing batteries Your camera uses two AA batteries, either Alkaline, Photo Lithium, or rechargeable Nickel Metal Hydride (NiMH). Alkaline batteries provide far less battery life than either Photo Lithium or NiMH batteries. Top points about batteries ● Fully charge NiMH batteries before using them for the first time. ●... -
Page 27: Power Indicators
Most economical if you take more than 30 pictures per month Most economical if you take fewer than 30 pictures per month HP Photosmart E427 Digital Camera Description Battery level is low. Camera will soon power down. Battery is depleted. Camera will power down. -
Page 28: Recharging Nimh Batteries
Want to recharge battery Recharging NiMH batteries You can recharge optional NiMH batteries with an optional HP quick recharger. For information about recharging NiMH batteries, as well as safety precautions when recharging, see the user's manual that came with your HP quick recharger. -
Page 29: B Specifications
32MB SDRAM ● Slot for memory card. ● This camera supports standard and high speed, HP-branded Secure Digital (SD) memory cards, 16MB to 1GB. ● The number of images or video clips that can be saved in memory depends on the Image Quality settings (see on page 30). -
Page 30: Memory Capacity
(continued) External body dimensions Weight Power Temperature range Memory capacity Not all 32MB of internal memory is available for storing images, because some memory is used for internal camera operations. The actual file sizes and number of still images that can be stored in internal memory or on a memory card will vary depending on the content of each still image and the length of any associated audio clip. -
Page 31: Index
11 dimensions 30 direct print 19 Display Brightness 20 Exposure Compensation 13, F-number 29 flash HP Photosmart E427 Digital Camera red-eye reduction 12, 14 working range 29 focal length 29 focus range settings Macro 11 Normal 11 format memory card 8... - Page 32 Setup Menu 20 Shutter button 5 shutter speed 29 software install 8 solving problems 21 sounds of camera 20 space remaining in memory specifications 29 storage 29 Sunset mode 12 support process 25 Thumbnails 16 Time & Date 7, 20 transfer images 18 troubleshooting 21 turn on/off power 7...