Frigidaire FHPC3660LSA Use & Care Manual
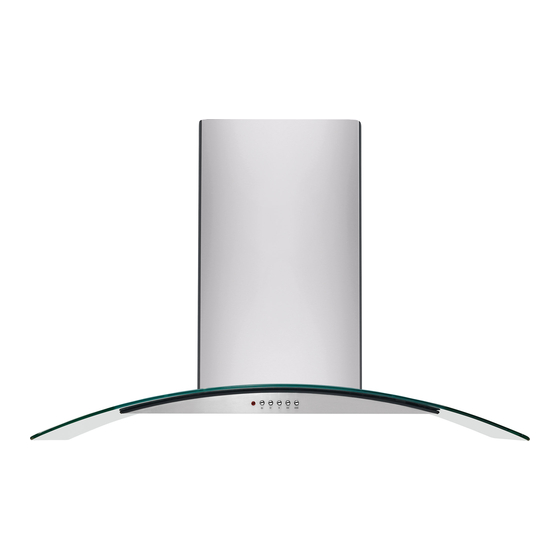
36" and 42" island range hood
Hide thumbs
Also See for FHPC3660LSA:
- Use & care manual (15 pages) ,
- Use and care manual (14 pages) ,
- Use and care manual (15 pages)

Related Manuals for Frigidaire FHPC3660LSA


Summary of Contents for Frigidaire FHPC3660LSA
- Page 1 Use _ care guide cuidado Guia de uso y Guide d'utilisation et d'entretien 36" and 42" Island Range Hood...
-
Page 2: Finding Information
1-800= 944=4044 or Canada: 1-800=265=8352 ......................Parts supplied ..............05 online support Internet production Installingthe hood ............06=12 information visit http://www.frigidaire.corn _mpo_ant safety instructions Operation................12 Do not attempt to install or operate this appliance _ii i Cleaningand maintenance ........... 12-13 until you have read the safety instructions in this Technicaldata.............. - Page 3 important safety instructions ..Impo_ant safety instructions Child safety Packing materials: Packing cartons covered with rugs, bedspreads, plastic sheets, or stretch wrap may become airtight chambers quickly cause Remove the protective film covering the appliance before putting it into suffocation. operation.
- Page 4 important safety instructions iiiiiiiiiiiiiiiiiiiiiiiiiiiiiiiiii E ectdca eq irements It is the customer's responsibility: • to contact a qualified electrical installer. assure that electrical installation adequate in conformance with National Electrical Code, ANSI/NFPA 70 - latest edition*, or CSA Standards C22.1-94, Canadian Electrical Code, Part 1 and C22.2 No.0-M91-latest edition** and all local codes and ordinances.
-
Page 5: Intended Use
intended use / Parts supplied iiiiiiiiiiiiiiiiiiiiiiiiiiiiiiiiiiiiiiiiiiiiiiiiiiiiiiiiiii iiiiiiiiiiiiiiiiiiiiiiiiiiiiiiiiiiiiiiiiiiiiiiiiiiiiiiiiiii iiiiiiiiiiiiiiiiiiiiiiiiiiiiiiiiiiiiiiiiiiiiiiiiiiiiiiiiiii iiiiiiiiiiiiiiiiiiiiiiiiiiiiiiiiiiiiiiiiiiiiiiiiiiiiiiiiiii iiiiiiiiiiiiiiiiiiiiiiiiiiiiiiiiiiiiiiiiiiiiiiiiiiiiiiiiiii iiiiiiiiiiiiiiiiiiiiiiiiiiiiiiiiiiiiiiiiiiiiiiiiiiiiiiiiiii iiiiiiiiiiiiiiiiiiiiiiiiiiiiiiiiiiiiiiiiiiiiiiiiiiiiiiiiiii iiiiiiiiiiiiiiiiiiiiiiiiiiiiiiiiiiiiiiiiiiiiiiiiiiiiiiiiiii iiiiiiiiiiiiiiiiiiiiiiiiiiiiiiiiiiiiiiiiiiiiiiiiiiiiiiiiiii iiiiiiiiiiiiiiiiiiiiiiiiiiiiiiiiiiiiiiiiiiiiiiiiiiiiiiiiiii iiiiiiiiiiiiiiiiiiiiiiiiiiiiiiiiiiiiiiiiiiiiiiiiiiiiiiiiiii iiiiiiiiiiiiiiiiiiiiiiiiiiiiiiiiiiiiiiiiiiiiiiiiiiiiiiiiiii iiiiiiiiiiiiiiiiiiiiiiiiiiiiiiiiiiiiiiiiiiiiiiiiiiiiiiiiiii iiiiiiiiiiiiiiiiiiiiiiiiiiiiiiiiiiiiiiiiiiiiiiiiiiiiiiiiiii iiiiiiiiiiiiiiiiiiiiiiiiiiiiiiiiiiiiiiiiiiiiiiiiiiiiiiiiiii iiiiiiiiiiiiiiiiiiiiiiiiiiiiiiiiiiiiiiiiiiiiiiiiiiiiiiiiiii iiiiiiiiiiiiiiiiiiiiiiiiiiiiiiiiiiiiiiiiiiiiiiiiiiiiiiiiiii iiiiiiiiiiiiiiiiiiiiiiiiiiiiiiiiiiiiiiiiiiiiiiiiiiiiiiiiiii iiiiiiiiiiiiiiiiiiiiiiiiiiiiiiiiiiiiiiiiiiiiiiiiiiiiiiiiiii iiiiiiiiiiiiiiiiiiiiiiiiiiiiiiiiiiiiiiiiiiiiiiiiiiiiiiiiiii iiiiiiiiiiiiiiiiiiiiiiiiiiiiiiiiiiiiiiiiiiiiiiiiiiiiiiiiiii Wire sizes must conform to the requirements (optional iiiiiiiiiiiiiiiiiiiiiiiiiiiiiiiiiiiiiiiiiiiiiiiiiiiiiiiiiii the National Electrical Code ANSI/NFPA 70 - latest accessories) edition", or CSA Standards... -
Page 6: Installing The Hood
Installing the hood • Wire nuts Tape to mount template 6" rounded metal duct, length to suit installation (5" optional) Measuring tape Pliers Gloves to protect against sharp edges 8to9 Kn ife Installation Safety glasses Electric drill with 5/32" bit height Strain relief Spirit level... - Page 7 Installing the hood Removing the packaging ® 7.48" EXAMPLEA Install cross-framin¢ syrnmetrically over •,- duct/cooktop ÷ centerline iiiiiiiiiiiiiiiiiiiiiiiiiiiiiiiiiiiiiiiiiiiiiiiiiiiiiiiiiii 16"joist spacing Ceiling Support Structures This vent hood is heavy. Adequate structure and support must be provided in all types of installations. Framing must support...
- Page 8 ® Recirculator Roof pitch with flashing and cap Desired range hood distance above 36" high cooktop Ceiling height Pipe 8 feet 9 feet 10 feet .1 6-25/32" 24 _ 25" 5-25/32" i!i'_,,,_J_!i,i _:0' installing range hood to the ceiling (Exhaust operation} 9-25/32"...
- Page 9 installing the hood step2: --i- • Mounttheupperbracket(4) ontotheceilingwith4 setsoflong screws (10) andwashers (11) (fig. C)). • Makesurethepowercablefortherangehood routed insidethe bracket. Step 4: • Attach the collar (6) to the range hood (1). Secure it with 2 short screws (19) (fig. O). •...
- Page 10 Installing the hood Step 6 : st_p 7: • Install the lower bracket (5)onto range • Loosen the 2 short screws from the unction box hood (1) and secure it with 4 sets of nuts (13), and remove the cover (fig. @). span washers (14) and washers (15) (fig.
- Page 11 Installing the hood iiiiiiiiiiiiiiiiiiiiiiiiiiiiiiiiiiiiiiiiiiiiiiiiiiiiiiiiiiii Step 8: • Lift the assembled range hood (1) and fix it to the upper bracket (4) with 8 short screws (19) and washers (12) [4 on each side] (fig. @). In assembling the upper bracket to lower bracket that Dimension A on page 8 should be reference to make the correct mounting height above the cooktop.
-
Page 12: Operation/Cleaning
Use low speed for normal use and higher speed Recirculation mode, a recirculator, model no. for strong odors or fumes. FHPRKT60LS, needs to be obtained. Please call Frigidaire at 1.800.944.9044 to order this kit. Cleaning and maintenance Fix the recirculation kit (7) to the upper bracket (4) with 2 short screws (20) (fig. -
Page 13: Troubleshooting
• NOTE" Charcoa f ters are not nc uded ii,!i_!_,;_iii_! • !!!!!!!!!!!!!!!!!!!!!!!!!!!! Troubleshooting iiiiiiiJiiiii with the range hood. Please call Frigidaire iiiiiiiiiiiiiiiiiiiiiiiiiiiiiiii at 1.800.944.9044 to order this kit. When iiiiiii_ii calling our customer service center, also :::::::::::::::::::::::::::: iiiiiiiiiiiiiiiiiiiiiiiiiiii!!i!ii!i!iiiiiii_i_i_ill... -
Page 14: Warranty
Warranty information '_iii Your appliance is covered by a one year limited DISCLAIMER OF IMPLIED WARRANTIES; warranty. For one year from your original date of _;_:i:i:i:i:i:i:i:i:i:i:i:i:i:i:i:i:i:i:i:i:i:i:i:i:i:i:i:i:i:i:_ purchase, Electrolux will pay all costs for repairing LIMITATION OF REMEDIES or replacing any parts of this appliance that prove CUSTOMER'S SOLE AND EXCLUSIVE REMEDY...