Table of Contents
Quick Links
See also:
Service Manual
Table of Contents

Related Manuals for Samsung ER-5100


Summary of Contents for Samsung ER-5100
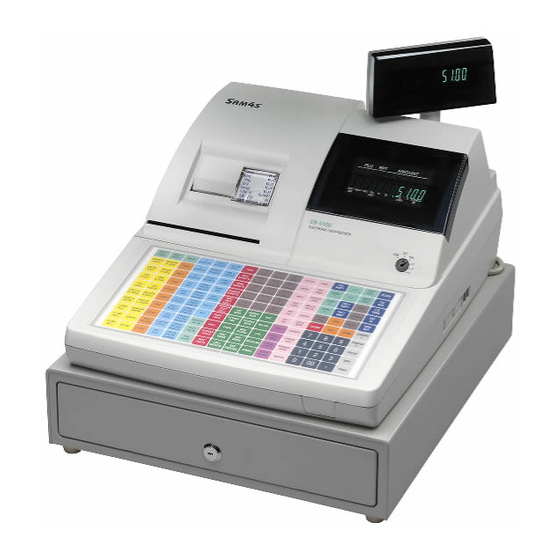
- Page 1 ER-5100 ELECTRONIC CASH REGISTER Programming & Operating Manual With Euro Conversion Options All specifications are subject to change without notice.
-
Page 2: Unpacking And Starting Up
UNPACKING AND STARTING UP STEP 1 UNPACKING THE CASH REGISTER ( 1 ) Unpack and unwrap your cash register. ( 2 ) The following items are in the packing. - 2 paper rolls - 1 rewind spindle - 1 ribbon cartridge ( 3 ) Remove cardboard protectors from the cash drawer. - Page 3 STEP 3 PUTTING THE PAPER IN THE PRINTER STEP 3.1 LOADING THE DETAIL PRINTER ( 1 ) Plug the cash register’ s power cord into the properly grounded wall socket. ( 2 ) Place the key marked ‘ REG’ into the control lock and turn to the “ REG” position.
- Page 4 < THE FABRICATION OF REWIND SPINDLE > ( 1 ) Locate the black plastic rewind spindle ( A ) in the Styrofoam. ( 2 ) Locate the black plastic rewind spindle ( B ) in the manual bag. ( 3 ) Fabricate the black plastic rewind spindle ( A ) and ( B ) as shown in the illustration. STEP 3.2 LOADING THE RECEIPT PRINTER ( 1 ) Place the other paper rolls into the small tray on the left.
- Page 5 STEP 4 CLEARING THE RAM ( RANDOM ACCESS MEMORY ) ( 1 ) Unplug the cash register. ( 2 ) Locate the control lock key marked ‘ C’ . ( 3 ) Insert the key into the control lock and turn clockwise , past the “ P” position to the “...
-
Page 6: Table Of Contents
TABLE OF CONTENTS UNPACKING AND STARTING UP ....................FEATURES ............................KEYBOARD LAYOUT ........................FUNCTION KEY DESCRIPTION ....................CONTROL LOCK ..........................CONTROL KEYS ..........................DISPLAY ............................DISPLAY SYMBOLS ........................PROGRAMMING NOTE ......................... 1 SERVICE MODE PROGRAMMING ..................1.1 RAM CLEARING .............................................. - Page 7 ................... 2.10.3 PLU PROGRAMMING SCAN ..................... 2.10.4 PLU LINK PROGRAMMING ................... 2.10.5 REMOVING OR DELETING A PLU 2.11 % KEY PROGRAMMING ........................................2.11.1 % KEY PROGRAMMING ................2.11.2 % CALCULATION ROUNDING FACTOR 2.12 CASH/TEND KEY PROGRAMMING ................2.13 CHEQUE KEY PROGRAMMING ..................2.14 CHARGE KEY PROGRAMMING ..................
- Page 8 9.3 PLU TO PLU CHAIN OPERATION ..................9.4 PLU ENTRIES BY CODE ....................10 SINGLE ITEM DEPARTMENT OR PLU ENTRIES ..............10.1 SINGLE ITEM PRESET ENTRIES ..................10.2 SINGLE ITEM OVERRIDE ENTRIES ................11 COMPUTATION OF VAT ( Value Added Tax ) ................11.1 INCLUSIVE VAT SYSTEM ....................
- Page 9 22.1 TRANSACTION ........................ 22.2 CONSOLIDATED RECEIPT PRINTING ................23 PRINTING A BUFFERED RECEIPT OPERATION ..............24 VALIDATION OPERATION ..................... 25 RECEIPT MESSAGE PRINTING OPERATION ............... 25.1 PREAMBLE MESSAGE ....................25.2 POSTAMBLE MESSAGE ....................26 TRAIN MODE ......................... REPORT AND BALANCING ......................
-
Page 10: Features
FEATURES * Two-station printer with one-line validation capability. * Front and rear ( pop-up ) displays. * 6-position control locks. * 24 hour time clock with automatic date change. * 321 departments ( 3 level system ). * 1000 open or preset PLUs. * 4 push-button clerks and 15 soft clerks with separate report totals. -
Page 11: Keyboard Layout
KEYBOARD LAYOUT 1 ER-5100 KEYBOARD LAYOUT Rcpt Detail Rcpt Valid Clerk Clerk Clerk Clerk Feed Feed on/off Rcpt Mdse Recd Paid Tndr Acct Void Chrg Level Cancl Conv Take Chrg Level #/NS Conv Drive Thru Level Clear Prset Time Cash... -
Page 12: Function Key Description
FUNCTION KEY DESCRIPTION DESCRIPTION 1, 2 ... 9, 0, 00 Use these numeric keys for all numeric entries on the cash register. ADD CHECK Use this key to combine individual guest checks that will be tendered together. CANCEL Use this key to cancel the present incomplete transactions without updating the departments, PLUs or function key totals. - Page 13 DESCRIPTION Use this key to register a Price Look Up ( PLU ). PAID OUT Use this key to register media removed from the cash drawer. ( = Paid Out ) PRESET CASH Use this key to finalize a sale paid with cash. These keys are preset amount cash tendering keys which have programmable values.
-
Page 14: Control Lock
CONTROL LOCK POSITION VOID Void outside of a sale. The cash register will not operate. All normal operations. To issue X level reports. Also used for manager control of voids & merchandise return. To issue Z level reports. To reset totals to zero. To program the ECR ( Electronic Cash Register ) CONTROL KEYS ‘... -
Page 15: Display Symbols
DISPLAY This cash register has a front ( or operator ) display and a pop up display. The front display has a indicator lights. These lights provide only the operator with information about the operation of the cash register. AMOUNT RCPT VOID SHIFT 1 VALID CLERK... - Page 16 Indicates that a clerk must be signed on for operating in the ‘ X’ or ‘ Z’ mode. Indicates that the maximum slip lines is reached. Please insert the new slip into the slip printer and press the “ CHECK TENDER” key.
-
Page 17: Programming Note
Please insert the paper to the slip printer and press the “ CLEAR” key. PROGRAMMING NOTE This ECR ( Electronic Cash Register ) ‘s programming is easy. In this manual, the programming steps are explained with flow chart boxes. Each box represents a key on the keyboard. The flow chart shows each key stroke you need to complete the programming. -
Page 18: Display
1.1.2 CLEARING TOTALS FROM MEMORY A. ALL MEMORY RAM CLEAR All programming and totals are cleared. Use this procedure the first time when the cash register is programmed. B. RESET ALL TOTALS & COUNTERS All totals and counters are cleared. ( Consecutive NO. , Z-Counter, Grand total ) This procedure will not effect register programming. -
Page 19: Setting The Departments Order
1.2 SETTING THE DEPARTMENTS ORDER The presence of shift keys for levels 1, 2 & 3 allow three “ stacking” department to a key position. This gives 107 department key locations three levels each, or 321 departments in all. The way that setting the department order is two. ( 1 ) X/TIME CASH/TEND... -
Page 20: Service Mode Programming
2 P MODE PROGRAMMING 2.1 DATE & TIME PROGRAMMING 2.1.1 DATE PROGRAMMING ( 1 ) Enter the date in the form of DD MM YY or MM DD YY or YY MM DD and week. ( The order of date is set by SYSTEM OPTION ADDRESS 25 : Page 24 ) ( 2 ) Press the “... -
Page 21: Tax Programming
2.3 TAX PROGRAMMING You can program 4 tax rates on this cash register. This cash register can calculate tax by two methods : A. VAT ( Value Added Taxes ) : Inclusive VAT B. Straight percentage taxes : Exclusive VAT IMPORTANT : To program tax as INCLUSIVE, set SYSTEM OPTION ADDRESS 4 to 0. -
Page 22: Default Level Programming
2.5 DEFAULT LEVEL PROGRAMMING The default level programming is the “ top” or “ surface” level returned to after each department when options are set for pop-up levels. ( Refer to SYSTEM OPTION ADDRESS 57, Page 26 ) EX ) LEVEL 2 LEVEL 2 2.6 CLERK SECRET CODE &... -
Page 24: Vat Rate Programming
2.7 SYSTEM OPTION PROGRAMMING X/TIME SUBTL ADDRESS STATUS NOTE : Address 1 ~ 9 should not be entered 01 ~ 09, enter single digit 1 ~ 9. The value “ 0” is default status. ADDRESS OPTION VALUE STATUS Subtotal without ADD ON tax to be printed on the receipt YES = 1 and journal. - Page 25 ADDRESS OPTION VALUE STATUS Disable department / PLU preset/HALO override YES = 1 NO = 0 Allow 8-digit DEPT. and PLU amount entry. = a + b YES = 2 NO = 0 Negative and zero sales total are not allowed. YES = 1 NO = 0 Inhibit printing of positive DEPT.
- Page 26 ADDRESS OPTION VALUE STATUS YES = 1 Print the “ CASH” when only SINGLE ITEM is registered. NO = 0 YES = 2 Print sale item no. = a + b + c NO = 0 YES = 4 Subtotal is printed when the “ SUBTL” key is pressed. NO = 0 Inhibit TIME print on receipt and journal.
- Page 27 Compulsory validation on ADD CHECK. YES = 2 NO = 0 = a + b + c YES = 4 Print the consolidated receipt automatically when finalising Check NO = 0 sale ADDRESS OPTION VALUE STATUS Compulsory drawer is disabled. YES = 1 NO = 0 Validation sensor is activated.
- Page 28 YES = 4 NO = 0 Validation on “ CASH/TEND” tendering is compulsory.
- Page 29 EPSON TM-300(D) = EPSON TM-T80 = CITIZEN iDP 3540/3541 = STAR SP200 = SAMSUNG SRP-100/200 = Feed line after printing on the roll printer : 0 ~ 99 ( Default = 7Line ) EAT-IN / TAKE-OUT / DRIVE-THRU procedure compulsory YES = 1 Before tendering.
- Page 30 NO = 0 Disable printing FOREIGN AMOUNT during Conversion operation YES = 1 NO = 0...
-
Page 31: Descriptor Programming
2.8 DESCRIPTOR PROGRAMMING You can program descriptors for each DEPARTMENT, PLU, CLERK, DEPARTMENT GROUP, SOME FUNCTION KEYS and RECEIPT MESSAGE using the following programming procedure. 2.8.1 PROGRAMMING CHARACTER PAID OUT CASH/TEND NOTE : Refer to “ ALPHA-NUMERIC KEYBOARD LAYOUT” ( Page 89 ) for entering characters. STANDARD ADDRESS NUMBER... -
Page 32: Descriptor Programming Examples
2.8.2 DESCRIPTOR PROGRAMMING EXAMPLES ( 1 ) DEPT.1 = APPLE 1 0 0 0 1 CASH/TEND PAID OUT ( 2 ) PLU 10 = RANG 2 0 0 1 0 PAID OUT CASH/TEND ( 3 ) CLERK 4 = JAMES 3 0 0 0 4 PAID OUT CASH/TEND... -
Page 33: Descriptor Programming Scan
2.8.3 DESCRIPTOR PROGRAMMING SCAN CASH/TEND PAID OUT... -
Page 34: Department Programming
2.9 DEPARTMENT PROGRAMMING * HASH Department * - Typically HASH department may be used to register items such as delivery charges or lottery sales that a merchant may not want to appear in accumulated sales totals. - Sales registered into HASH department do not add to the grand total, gross sales total and may also be programmed not to add to the net sales total. -
Page 35: Department Price Or Halo Programming
B. PROGRAMMING SUBTL LEVEL DEPARTMENT CASH/TEND STATUS EXIT DEPARTMENT DEPARTMENT 2.9.2 DEPARTMENT PRICE OR HALO PROGRAMMING A zero amount entry for open department will set the HALO ( High Amount Lock Out ) at the maximum seven digits ( 99999.99 ) for standard department, and five digits ( 99.999 ) for gallonage department. Zero preset departments are allowed. -
Page 36: Department Programming Examples
2.9.3 DEPARTMENT PROGRAMMING EXAMPLES A. DEPARTMENT STATUS PROGRAMMING EX 1 ) Program ‘ DEPT 1’ and ‘ DEPT 2’ . ‘DEPT 1’ and ‘DEPT 2’ are VAT 1 and KP items. 1 1 1 SUBTL LEVEL 1 DEPT 1 DEPT 2 CASH/TEND EX 2 ) Program ‘... - Page 37 B. DEPARTMENT PRICE OR HALO PROGRAMMING EX 1 ) Program ‘ DEPT 1’ and ‘ DEPT 2’ . ‘DEPT 1’ and ‘DEPT 2’ have a @99.99 HALO. 9 9 9 9 LEVEL 1 DEPT 1 DEPT 2 CASH/TEND EX 2 ) Program ‘ DEPT 3’ , ‘ DEPT 6’ and ‘...
-
Page 38: Department Programming Scan
2.9.4 DEPARTMENT PROGRAMMING SCAN ( 1 ) Press the “ CASH/TEND” key. ( 2 ) Press the first “ DEPARTMENT” key you want to scan. ( 3 ) Press the last “ DEPARTMENT” key you want to scan. If you want to scan only one department, press the same “ DEPARTMENT” key twice. -
Page 39: Plu Programming
2.10 PLU PROGRAMMING HASH PLU’s operation is the same as HASH department operation. PLU is registered by sequential index ( 1 ~ 1000 ) or by PLU code ( 1 ~ 99999999 ) that you program. ( SYSTEM OPTION ADDRESS 9, Page 22 ) Although you don’... - Page 40 B. PROGRAMMING A zero amount entry for open PLU will set the HALO ( High Amount Lock Out ) at the maximum seven digits ( 99999.99 ) for standard PLU, and five digits ( 99.999 ) for gallonage PLU. Zero preset PLUs are allowed. (0 ~ 99999999) PLU CODE PRICE...
-
Page 41: Plu Programming Examples
2.10.2 PLU PROGRAMMING EXAMPLES IMPORTANT : If PLU is not linked to department, PLU registration is not allowed. EX 1 ) Program ‘ PLU 10’ so it is VAT 1 and a KP item. It has a @99.99 HALO and linked to ‘ DEPT 1’... -
Page 42: Plu Programming Scan
2.10.3 PLU PROGRAMMING SCAN ( 1 ) Press the “ CASH/TEND” key. ( 2 ) Enter the number of the first PLU you want to scan, and press the “ PLU” key. ( 3 ) Enter the number of the last PLU you want to scan, and press the “ PLU” key. -
Page 43: Plu Link Programming
2.10.4 PLU LINK PROGRAMMING This programming is used to link two or more PLUs. The second PLU ( B ) will be automatically registered when the first PLU ( A ) is registered. X X X X X X X X #/NS CASH/TEND PLU NO. -
Page 44: Key Programming
2.11 % KEY PROGRAMMING This cash register has two % keys. 2.11.1 % KEY PROGRAMMING A. PROGRAMMING STATUS PROGRAMMING OPTION VALUE OPTION DIGIT % key is POSITIVE ( SURCHARGE ) NEGATIVE ( DISCOUNT ) N 1 = a + b OPEN PRESET % key is... -
Page 45: Cash/Tend Key Programming
2.12 CASH/TEND KEY PROGRAMMING CASH/TEND CASH/TEND Tendering HALO ( 0 ~ 999999, 0 for no HALO ) 2.13 CHEQUE KEY PROGRAMMING Change HALO ( 0 ~ 999999, 0 for no HALO ) CHEQUE #/NS CHEQUE Tendering HALO ( 0 ~ 999999, 0 for no HALO ) 2.14 CHARGE KEY PROGRAMMING This cash register has two charge keys. -
Page 46: Currency Conversion Key Programming
2.17 CURRENCY CONVERSION KEY PROGRAMMING This cash register has two conversion key. The foreign exchange rate is determined on a six-digit code entered. Numbers N1 ~ N5 are the numeric value of the exchange rate, number N6 sets the decimal point position ( 0 ~ 5 ). -
Page 47: Parameters Program Scan
2.19 PARAMETERS PROGRAM SCAN CASH/TEND SUBTL... -
Page 48: Operating Note
OPERATING NOTE This section shows you how to operate the cash register during normal use . The operating steps are explained with flow chart boxes. Each box represents a key on the keyboard that you should press to complete an operation. Unless the specified note, the flow charts use the “... -
Page 49: Secret Code Sign On
1.2.2 SECRET CODE SIGN ON To use this sign on method, SYSTEM OPTION ADDRESS 28 must be set to value ‘ b’ . The code will not be shown. ( 6 digits secret code ) CLERK 4 CLERK 4 2 CLERK SIGN OFF 2.1 IN CASE OF 4 CLERKS ( SYSTEM OPTION 28’... -
Page 50: No Sale Operation
5 NO SALE OPERATION A no sale operation is used to open the cash drawer outside of a sale. #/NS 6 NON-ADD NUMBER ENTRIES The “#/NS” key can be used to enter up to eight digits. This numeric entry will be added to non-add number total. #/NS 7 PRICE INQUIRY OPERATION If you want to know the price ( preset or HALO ) of DEPT. -
Page 51: Department Entries
8 DEPARTMENT ENTRIES NOTE : The present level is 1. 8.1 OPEN DEPARTMENT ENTRIES ( 1 ) Single open DEPARTMENT entry 1 0 0 0 DEPT 1 AMOUNT ( 2 ) Repeat open DEPARTMENT entry 5 0 0 DEPT 1 DEPT 1 ( 3 ) Multiple open DEPARTMENT entry 1 0 0 0... -
Page 52: Preset Department Entries
8.2 PRESET DEPARTMENT ENTRIES ( 1 ) Single preset DEPARTMENT entry DEPT 3 ( 2 ) Repeat preset DEPARTMENT entry DEPT 3 DEPT 3 ( 3 ) Multiple preset DEPARTMENT entry X/TIME DEPT 3 Q’ty ( 1 ~ 999 ) ( 4 ) Decimal multiplication 1 . -
Page 53: Gallonage Department Entries
8.3 GALLONAGE DEPARTMENT OPERATION NOTE : 1 ) Although gallonage departments are considered open departments, a price per gallon must be programmed on department programming. This price is calculated to three decimal points. 2 ) Although gallonage departments are programmed as a preset price, you must enter amount when gallonage department is registered. - Page 54 ( 5 ) Override HALO price entry 1 0 0 0 0 X/TIME Q’ty ( 1 ~ 999 ) ( 6 ) Split pricing on open PLU entry ( Triple multiplication : SYSTEM OPTION 41 = 1 ) 1 0 0 0 X/TIME X/TIME Q’ty ( 0.001 ~ 999.999 ) Basic Q’ty ( 0.001 ~ 999.999 )
-
Page 55: Preset Plu Entries
9.2 PRESET PLU ENTRIES ( 1 ) Single preset PLU entry PLU NO. ( 1 ~ 1000 ) ( 2 ) Repeat preset PLU entry 1 0 0 0 ( 3 ) Multiple preset PLU entry X/TIME Q’ty ( 1 ~ 999 ) ( 4 ) Decimal multiplication of preset PLU entry 1 . -
Page 56: Plu To Plu Chain Operation
9.3 PLU TO PLU CHAIN OPERATION All preset PLUs in the same chain ( PLU to PLU linking ) will be automatically registered when the first PLU of the chain is registered. If a PLU located in the middle of the chain is registered, the following preset PLUs will be automatically registered. -
Page 57: Single Item Department Or Plu Entries
10 SINGLE ITEM DEPARTMENT OR PLU ENTRIES Single item operation finalizes transaction without tendering key entry. But the transaction is not finalized when you register another department or PLU before entering single item department or PLU. 10.1 SINGLE ITEM PRESET ENTRIES DEPT 4 10.2 SINGLE ITEM OVERRIDE ENTRIES 1 0 0 0... -
Page 58: Exclusive Vat System
11.2 EXCLUSIVE VAT SYSTEM ( 1 ) Exclusive VAT is used when a tax amount is not included in the item price, and a tax amount is calculated by a tax rate. ( 2 ) TAX EXEMPT While the exclusive VAT system is in use, you can exempt a taxable department or PLU from tax. -
Page 59: Key Entries
12 % KEY ENTRIES The item discount or surcharge is that discount or surcharge is applied to one item, while the sale discount or surcharge is that discount or surcharge is applied to the entire sale. NOTE : If you want to sale discount or surcharge you must press the “ SUBTL” key before entering the “... -
Page 60: Amount Discount / Surcharge
12.2 AMOUNT DISCOUNT / SURCHARGE 12.2.1 ITEM DISCOUNT / SURCHARGE ( 1 ) Preset amount item discount / surcharge 1 0 0 0 DEPT 1 ( 2 ) Open amount item discount / surcharge 1 0 0 DEPT 3 AMOUNT 12.2.2 SALE DISCOUNT / SURCHARGE ( 1 ) Preset amount sale discount / surcharge 1 0 0 0... -
Page 61: Merchandise Return Operation
13 MERCHANDISE RETURN OPERATION A. Merchandise return of a single department or PLU entry 1 0 0 0 MDSE RETURN DEPT 1 B. Merchandise return of multiple department or PLU entry MDSE RETURN X/TIME C. Merchandise return of the discounted / surcharged item 1 0 0 0 MDSE RETURN DEPT 1... -
Page 62: Void Outside Of A Sale
14.3 VOID OUTSIDE OF A SALE If you want to void a number of items of incorrect entries that were not made void during a sale. ( 1 ) Turn the control lock key to the “ VOID” position. ( 2 ) Make all entries that you want to void in the normal sequence. ( 3 ) All these items will appear as alternative sign amount. -
Page 63: Add Check Operation
15 ADD CHECK OPERATION DEPT. or PLU Where multiple receipts are required for one puchase. ie: For admissions where people require separate entrance tickets. ADD CHECK DEPT. or PLU ADD CHECK TENDER 16 TENDERING OPERATION 16.1 CASH TENDERING DEPT. or PLU SUBTL CASH/TEND AMOUNT... -
Page 64: Preset Cash Tendering
16.2 PRESET CASH TENDERING You must program the “ PRESET CASH” key. If you don’ t program this key, an error will occur when you enter the “PRESET CASH” key. DEPT. or PLU SUBTL PRESET CASH AMOUNT 16.3 CHEQUE TENDERING DEPT. -
Page 65: Charge Tendering
16.4 CHARGE TENDERING The entering amount of charge must not be more than subtotal amount. DEPT. or PLU SUBTL CHARGE AMOUNT 16.5 SPLIT TENDERING You can tender any combination of media. DEPT. or PLU SUBTL CHEQUE AMOUNT CASH/TEND CHARGE AMOUNT... -
Page 66: Tendering With Currency Conversion
16.6 TENDERING WITH CURRENCY CONVERSION You must program the “ CONV” key. If you don’t program this key, an error will occur when you enter the “CONV” key. DEPT. or PLU SUBTL CONV CASH/TEND AMOUNT ( Foreign Currency ) 16.7 POST TENDERING NOTE : If you want to use post tendering function, you must set SYSTEM OPTION ADDRESS 13 to 1 ( Page 23 ). -
Page 67: Eat In / Take Out / Drive Thru Operation
17 EAT IN / TAKE OUT / DRIVE THRU OPERATION If you press the “ EAT IN” or “ TAKE OUT” or “ DRIVE THRU” key before tendering, each message is printed on the receipt and each total is added to that of the financial report. EAT IN DEPT. -
Page 68: Received On Account Operation
19 RECEIVED ON ACCOUNT OPERATION A. Use the “ RECD ACCT” key to register cash or cheque that is added to the cash drawer. RECD ACCT CASH/TEND RECD ACCT AMOUNT CHEQUE B. CHANGE BACK RECD ACCT CASH/TEND AMOUNT ( A ) AMOUNT ( B ) * ( A ) <= ( B ) CHEQUE... -
Page 69: Transaction
21 TABLE MANAGEMENT This cash register can support the table management up to 50 lines. ( 40 item lines + 10 tendering lines ). NOTE : If you want to use the table management, SYSTEM OPTION ADDRESS 46 must be 0. 21.1 TRANSACTION TRANSACTION CHECK #... - Page 70 EX ) STEP 1 1 0 0 0 CHECK # DEPT 1 DEPT 3 CHECK TENDER TABLE NO. STEP 2 CHECK # DEPT 3 X/TIME TABLE NO. CHECK TENDER STEP 3 CHECK # X/TIME DEPT 3 CHECK TENDER TABLE NO. STEP 4 CHECK # MDSE RETURN...
-
Page 71: Cashier Overlap
22 CASHIER OVERLAP NOTE : If you want to use the cashier overlap, SYSTEM OPTION ADDRESS 46 must be 1. If you set SYSTEM OPTION ADDRESS 29 to 1, clerk change can be made without clerk sign-off operation. 22.1 TRANSACTION CLERK X ! =>... - Page 72 NOTE : If you set the SYSTEM OPTION 47 to 0, the consolidated receipt is only printed on the receipt of ECR. If you set the SYSTEM OPTION 47 to 1, the consolidated receipt is printed on the receipt of ECR and the slip printer. you set the SYSTEM OPTION 47 to 2, the consolidated receipt is only printed on the slip printer.
-
Page 73: Printing A Buffered Receipt Operation
23 PRINTING A BUFFERED RECEIPT OPERATION If a customer requests a receipt after a sale has been finalized and the “ RECEIPT ON/OFF” was in the ‘ OFF’ position during a s ale, the press of the “ RECEIPT” key will issue a buffered receipt. -
Page 74: Validation Operation
24 VALIDATION OPERATION First of all, place a check or slip into the slot below the receipt / detail printer. Upon pressing of the “ VALID” key, validation will be performed on department and PLU entries, RECD ACCT & PAID OUT operation, % key entries, merchandise return, voids and tendering operations. -
Page 75: Receipt Message Printing Operation
25 RECEIPT MESSAGE PRINTING OPERATION 25.1 PREAMBLE MESSAGE If you want to print the receipt preamble messages on the receipt, you must program SYSTEM OPTION ADDRESS 43 ( Page 25 ) after programming the preamble message descriptors. * SYSTEM OPTION 43 = 0 * * SYSTEM OPTION 43 = 1 * * SYSTEM OPTION 43 = 2 * 25.2 POSTAMBLE MESSAGE... -
Page 76: Train Mode
26 TRAIN MODE If you want to operate the train mode, you must program SYSTEM OPTION ADDRESS 45. Refer to SYSTEM OPTION ADDRESS 45 ( Page 25 ) NOTE : All the amounts registered in the training mode are accumulated to the training mode report area and will not effect the normal report area. -
Page 77: Report And Balancing
REPORT AND BALANCING REPORT REPORT NO. REPORT TYPE KEY LOCK KEY SEQUENCE FINANCIAL 1 SUBTL 1 SUBTL 201 SUBTL 201 SUBTL TIME 2 SUBTL 2 SUBTL 202 SUBTL 202 SUBTL 3 SUBTL 3 SUBTL 203 SUBTL 203 SUBTL IN-DRAWER 4 SUBTL DAILY SALES 205 SUBTL 205 SUBTL... -
Page 78: Report Modes
1 REPORT MODES REPORT TYPE TOTALS Z Counter REMARKS Not reset Not advance Reset to ‘0’ Advance Not reset Not advance Period-to-date report Reset to ‘0’ Advance Period-to-date report NOTE : If you don’ t want to open the drawer when the reports are run, set SYSTEM OPTION ADDRESS 5 to value ‘... -
Page 79: Reports
3 REPORTS 3.1 OPEN TABLE ( or OPEN CLERK ) REPORT NOTE : If you operate table management ( SYSTEM OPTION ADDRESS 46 = 0 ), open table report will be issued, while if you operate cashier overlap ( SYSTEM OPTION ADDRESS 46 = 1 ), open clerk report will be issued. -
Page 80: Financial Report
3.2 FINANCIAL REPORT A. X financial report ( Key lock : ‘X’ ) SUBTL B. Z financial report ( Key lock : ‘Z’ ) C. X2 financial report ( Key lock : ‘X’ ) 2 0 1 SUBTL D. Z2 financial report ( Key lock : ‘Z’ ) -
Page 81: Time Report
3.3 TIME REPORT A. X time report ( Key lock : ‘X’ ) SUBTL B. Z time report ( Key lock : ‘Z’ ) C. X2 time report ( Key lock : ‘X’ ) 2 0 2 SUBTL D. Z2 time report ( Key lock : ‘Z’ ) -
Page 82: Plu Report
3.4 PLU REPORT A. X PLU report ( Key lock : ‘X’ ) SUBTL B. Z PLU report ( Key lock : ‘Z’ ) C. X2 PLU report ( Key lock : ‘X’ ) 2 0 3 SUBTL D. Z2 PLU report ( Key lock : ‘Z’ ) 3.5 FROM / TO PLU REPORT A. -
Page 83: In-Drawer Report
3.6 IN-DRAWER REPORT A. X in-drawer report ( Key lock : ‘X’ ) SUBTL 3.7 DAILY SALES REPORT A. X2 daily sales report ( Key lock : ‘X’ ) 2 0 5 SUBTL B. Z2 daily sales report ( Key lock : ‘Z’ ) -
Page 84: Individual Clerk Report
3.8 INDIVIDUAL CLERK REPORT 3.8.1 IN CASE OF 4 CLERKS ( SYSTEM OPTION 28’ s VALUE ‘ C’ = 0 ) A. X individual clerk report ( Key lock : ‘X’ ) SUBTL CLERK B. Z individual clerk report ( Key lock : ‘Z’ ) , 2, 3 or 4 C. -
Page 85: From / To Department Report
3.9 FROM / TO DEPARTMENT REPORT A. X from / to department report ( Key lock : ‘X’ ) LEVEL DEPT LEVEL DEPT 3.10 DEPARTMENT REPORT A. X department report ( Key lock : ‘X’ ) SUBTL B. Z department report ( Key lock : ‘Z’ ) C. -
Page 86: Trouble Shooting
TROUBLE SHOOTING Check the following items if the cash register does not work correctly !! * Is the power cord plugged into the main socket correctly ? * Is the wall outlet supplying power ? Try plugging in another appliance. * Is the control lock in the correct position ? * Did you change the position of the control lock during registration of the transaction ? If you set the control lock to another position while registration is in progress, an error will occur. -
Page 87: Appendix
APPENDIX 1 CHARACTER CODE TABLE á à â ä å Ä Å é è ê CHAR CODE ë É í ì î ï Í ñ Ñ ó CHAR CODE ò ô ö Ö ú ù ü û Ü æ CHAR CODE ß... -
Page 88: Alpha-Numeric Keyboard Layout
2 ALPHA-NUMERIC KEYBOARD LAYOUT & < > ‘ Caps Caps Bksp... -
Page 89: Communication Interface
3 COMMUNICATION INTERFACE 3.1 PIN DESCRIPTION FOR SERIAL INTERFACE SERIAL PORT SERIAL PORT PIN NO. SIGNAL Not connect Not connect Not connect Not connect Not connect 3.2 CABLE SPECIFICATION Ferrite core inserted and turned to 2 ( Core type : OP-18E ) 50mm CABLE SERIAL... -
Page 90: Communication With Pc
4 COMMUNICATION WITH PC This cash register can communicate with PC. The programming contents are downloaded from PC and uploaded to PC. The reports are uploaded to PC. To communicate with PC, ( 1 ) Turn the control lock key to the “ SERVICE MODE” . ( 2 ) Press the “... -
Page 91: Scale
6 SCALE If you want to operate the scale, set the SYSTEM OPTION ADDRESS 42 to 1. And then you can use the “PRICE INQ.” ”key as the “SCALE” ”key. 6.1 DIRECT SCALE ENTRY When product is placed on the scale and the “SCALE” key is pressed, the weight will be appear on the display. - Page 92 WIRING SPECIFICATION FOR PC & PRINTER Samsung ER-5100 to Personnel Computer. Computer 9 pin (male) 9 pin (female) 25 pin female RXD 2 ……………………………………..TXD 3…………………TXD 2 TXD 3 ……………………………………..RXD 2…………………RXD 3 GND 5……………………………………..GND 5…………………GND 7 Samsung ER-5100 to Kitchen/Slip Printer...