Table of Contents
Quick Links
See also:
Service Manual
Table of Contents

Related Manuals for Sharp MD-R3H


Summary of Contents for Sharp MD-R3H
-
Page 1
- Page 2 89/336/EEC och 73/23/EEC så som kompletteras av 93/68/EEC. US and forein patents licensed from Dolby Laboratories Li- censing Corporation. Dette produktet oppfyller betingelsene i direktivene 89/336/EEC og 73/23/EEC i endringen 93/68/EEC. Tämä laite täyttää direktiivien 89/336/EEC ja 73/23/EEC vaatimukset, joita on muutettu direktiivillä 93/68/EEC. MD-R3H...
- Page 3 I V ÄGG UT T AGE T . F ÖR A T T F UL L ST ÄN DI GT KO PP LA I F RÅ N AP PA RA T EN, V .G. DR AG U T STICKPROPPEN. MD-R3H SEEGSP02.CHP...
- Page 4 . Ma a k g e e n v e r a n d e ri n g e n i n d e interlockschakelaar of andere onderdelen, daar dit mogelijk blootstelling aan gevaarlijke stralingen veroorzaakt. Bij dit produkt zijn batterijen geleverd. Wanneer deze leeg zijn, moet u ze niet weggooien maar inleveren als KCA. MD-R3H...
- Page 5 VARNING - OM APPARATEN ANVÄNDS PÅ ANNAT SÄTT min. cycle 1,5 S ÄN I DENNA BRUKSANVISNING SPECIFICERAS. KAN Herhaling A NV ÄN DA RE N UT S ÄT T AS FÖR OSY NLI G LASERSTRÅLNING, SOM ÖVERSKRIDER GRÄNSEN FÖR LASERKLASS 1. MD-R3H...
- Page 6 SÄTT ÄN I DENNA BRUKSANVISNING SPECIFICERAS. Laser Diode Properties KA N AN VÄ ND AR EN UT SÄT TAS F ÖR OS YNL IG LASERSTRÅLNING, SOM ÖVERSKRIDER GRÄNSEN Material: GaAIAs FÖR LASERKLASS 1. Wavelength: 780 nm Emission Duration: continuous Laser Output: max. 0.6 mW MD-R3H...
-
Page 7: Table Of Contents
ENGLISH INTRODUCTION Thank you for purchasing this SHARP product. For the best performance, read this manual carefully. It will guide you in operating your SHARP product. CONTENTS Page Page ACCESSORIES ....... . 1 RECORDING . -
Page 8: Precautions
Using this product with a higher voltage than that which is specified is dangerous and may result in a fire or other type of accident causing damage. SHARP will not be held responsible for any damage resulting from use of this unit with a voltage other than that which is specified. -
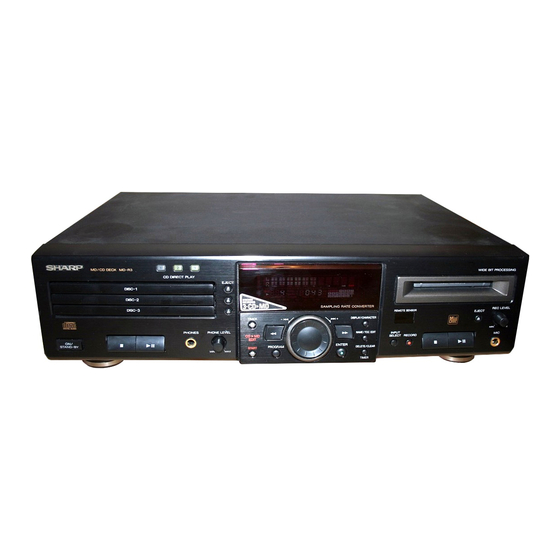
Page 9: Names Of Controls And Indicators
14. Monaural Long-Play Mode Indi- 29. Record Level Control cator 30. Microphone Socket 15. Programme Indicator 31. On/Stand-by Button Rear panel 1. AC Power Lead 2. Coaxial Input Socket (Digital) 3. Optical Input/Output Sockets (Digital) 4. Line Input/Output Sockets (Analogue) 5. Reset Button MD-R3H... -
Page 10: Remote Control
Change the lighting or the direction of the unit. Keep the remote control away from moisture, excessive heat, shock, and vibrations. The remote control’s usable range is between 0.2 m (8") and 6 m (20’) away from the sensor. MD-R3H... -
Page 11: Connections
Digital output etc. Commercially available video coaxial cable Pin plug Pin plug Analogue connection LINE OUT LINE IN Line input/output, Connecting cable included with this unit AUX input/output, etc. Stereo mini-plug Pin plug PHONES Commercially available audio Headphones etc. connecting cable MD-R3H... - Page 12 The coaxial connection is only an input to this unit. LINE IN COAXIAL Commercially available audio connecting cable Commercially available video coaxial cable To the digital output socket To the headphone Headphone stereo, radio socket cassette player, CD player, etc. MD-R3H...
- Page 13 When the dial is twisted harder, it has the same effect Track 1 2 3 4 5 6 7 8 9 10 11 12 13 REMAIN as pushing the button on the remote control number 15 16 17 18 19 20 repeatedly. (Track up/down) MD-R3H...
-
Page 14: Setting The Clock
Set the “month” repeating steps 4 and 5. CLOCK Date setting mode Set the “day” repeating steps 4 and 5. The unit will enter the time setting mode. Each time the button is pressed, the display will change. DATE CLOCK Time setting mode MD-R3H... -
Page 15: Setting The Clock
Once you have set the date and time, “TIME ADJUST” will not be displayed in step 2. Turn the jog dial to make the date and time appear. If you don’t need to change the settings, just press the ENTER button without turning the jog dial again. MD-R3H... -
Page 16: Minidisc Operation
Level meter When you listen to MiniDiscs near a radio or a TV set, the radio or the TV set may pick up noise. Keep the unit as far away as possible from tuners. E-10 MD-R3H... -
Page 17: Compact Disc Operation
8 9 10 11 point. tion Total number of Total playing Music schedule To stop playback: tracks time Press the CD button. To remove the CDs: Whilst in the stop mode, press the button. E-11 MD-R3H... - Page 18 CD DIRECT PLAY 1 - 1 - 3) buttons or the button is pressed when a disc tray is open, the disc tray will be automatically closed. Be careful not to catch your finger. E-12 MD-R3H...
-
Page 19: Cd And Md Operations
Every time the jog dial is turned (or each time the button on the remote control is pressed), the track number will go up or down by one. If you press the button, playback will begin from the track being displayed. E-13 MD-R3H... - Page 20 If you press any of the 3 buttons: Only tracks from the selected CD will be played repeatedly or randomly. When all of the tracks have been played in random order, the unit will stop. (None of the tracks is played twice.) E-14 MD-R3H...
- Page 21 It is not possible to insert an additional track between pro- The playing time will appear grammed tracks that have already been entered. about 2 seconds later. Programming and cancelling are not possible during playback or in the pause mode. E-15 MD-R3H...
- Page 22 Press the CLEAR button on the remote control to turn off DISC OVER "PRGM". When you use the DELETE/CLEAR button on the main unit, all PRGM of the programmed contents will be erased by holding it down for at least 2 seconds. The programme contents will be erased. E-16 MD-R3H...
- Page 23 It is not necessary to supply power to any other equipment, such as a stereo, which is connected to the unit. To adjust the headphone volume: Rotate the PHONE LEVEL control towards MAX to increase the volume, and towards MIN to decrease the volume. E-17 MD-R3H...
-
Page 24: Recording
When a DAT is recorded using the digital inputs and the DAT mode (sampling frequency) changes during the re- cording session, the track numbers will change. Very occasionally, some noise may be recorded. If this happens, you can edit out the noise after recording. (Page 27) E-18 MD-R3H... - Page 25 20, 22) When the “TOC FULL” message appears (Page 42) If a disc’s TOC has been damaged If you are trying to copy a digital signal that has been encoded with the SCMS signal (Serial Copy Management System) E-19 MD-R3H...
- Page 26 TOTAL manually. After you have made a recording in the monaural long-play mode, it is recommended that you return the unit “MONO LP” will disappear. to the stereo mode so that you won’t forget to do so later. E-20 MD-R3H...
- Page 27 The unit will enter the record stand-by mode. Press the CD button. To stop recording: Press the MD button. After the track number has been written on the MiniDisc, the recording will stop. However, CD playback will continue. E-21 MD-R3H...
- Page 28 If this happens, use manual recording. When recording tracks or sounds in which there are 3 seconds or more of very small continuous sounds that you want to record, use manual recording. E-22 MD-R3H...
- Page 29 This unit will be in the recording pause mode. 8 9 10 11 12 13 15 16 17 18 Select the recording source and start recording. OVER 1 2 3 4 5 OVER 1 2 3 4 5 E-23 MD-R3H...
- Page 30 To resume recording: Press the MD button. To resume sound synchro recording, press the SYNC REC button. Note: The track currently being recorded cannot be cancelled whilst you are making an APMS or random recording from a CD. E-24 MD-R3H...
-
Page 31: Editing
Track and disc names can use up to 100 Double-check the track number before erasing it. characters per name. (Page 31) (Page 30) DISC TOTAL 1 2 3 4 5 6 7 8 9 10 11 12 13 15 16 17 18 E-25 MD-R3H... - Page 32 During recording/ During When entering The total number Selection of in the pause in the recording playback a programme of tracks appears track numbers mode stand-by mode Disc name Track name Divide Combine Move Programme move Erase All erase E-26 MD-R3H...
- Page 33 ("RANDOM" is lit: Page 14). First, cancel the programme or random play mode before trying to use this function. TRACK 1 2 3 4 5 6 7 8 9 10 11 12 13 REMAIN 15 16 17 18 19 E-27 MD-R3H...
- Page 34 CDs or MDs using the digital inputs. Tracks recorded in the stereo mode cannot be combined with tracks recorded in the monaural long-play mode. Tracks where either track’s recording time is less than 15 seconds may not be combined. E-28 MD-R3H...
- Page 35 The tracks that are not included in the programmed selections will be put at the end of the new track numbers. When the same track has been entered into the programme twice or more, the last programmed position will have priority. E-29 MD-R3H...
- Page 36 This function cannot be used if a programme is being entered ("PRGM" is lit: Page 15) or whilst in the random play mode ("RANDOM" is lit: Page 14). First, cancel the programme or TOC DISC random play mode before trying to use this function. TOTAL E-30 MD-R3H...
- Page 37 Total number of characters per MiniDisc A total of approximately 1700 characters can be used for all of the disc and track names. If more than 1700 characters are entered, “TOC FULL 1” will appear. E-31 MD-R3H...
- Page 38 If you have selected capital letters (If you have selected "B") Disc name recorded TOC DISC 1 2 3 4 5 6 7 TOTAL 8 9 10 11 12 13 15 16 17 18 E-32 MD-R3H...
- Page 39 If the end of the recording is reached before you have entered the complete name, only the characters entered before the recording ended will be recorded. Track name recorded TRACK TOTAL 1 2 3 4 5 6 7 8 9 10 11 12 13 15 16 17 18 E-33 MD-R3H...
- Page 40 8 9 10 11 12 13 15 16 17 18 Within 5 seconds, press the ENTER button. The unit will enter the character input mode. To cancel this operation, press the MD button. Now you can erase or add characters. (Page 35) E-34 MD-R3H...
- Page 41 To erase disc names or track names After performing steps 1 to 3 on page 34, do the following: Press the DELETE/CLEAR button for at least 2 seconds, and then press the ENTER button. The disc or track name will be erased. E-35 MD-R3H...
-
Page 42: How To Use The Built-In Timer
Adjust the sound level of the equipment. If it has a timer function, set it so that the power will be turned on at the same time as the timer’s start time. (Timer standby mode) Adjust the playback volume. TIMER Timer playback indicator E-36 MD-R3H... - Page 43 Set it up so that music to be recorded will be played at the same time as the timer’s start time. When the digital optical input was selected (Timer standby mode) TIMER REC Timer recording indicator E-37 MD-R3H...
- Page 44 When a playback-only MiniDisc is inserted. When the MiniDisc you inserted is protected against acciden- tal erasure. When there is no recording space left on the MiniDisc you inserted (when the "TOC FULL" or "DISC FULL" messages appear). E-38 MD-R3H...
-
Page 45: What Is A Minidisc
1/5 of the original sound information. Sound data is analysed and filtered to take advantage of psycho acoustic masking. The acoustic quality of the sound is not impaired. E-39 MD-R3H... -
Page 46: Minidisc System Limitations
Therefore, the recording time will be reduced. An MD which has been recorded or edited repeatedly may If you fast reverse or fast forward over recorded tracks, skip during fast reverse or fast forward. the sound may skip. E-40 MD-R3H... -
Page 47: Troubleshooting
If this unit functions abnormally during operation, first check the following items. If the unit continues to function abnormally, or if an abnormality appears other than listed below, turn off the player’s power and disconnect the AC power plug, then consult your SHARP dealer or service personnel. General... - Page 48 (Remove any source of shock or vibration whilst writing.) ? DISC The data contains an error. Replace the disc with another disc. 0 0:00 Music is not being recorded. Replace the disc with a recorded disc. *: Number or symbol E-42 MD-R3H...
-
Page 49: Transporting The Unit
ON/STAND-BY button to turn the power on again. Press the ON/STAND-BY button to enter the stand-by mode. Make sure the message on the display has changed from "GOOD BYE!" to "TIME ADJUST", and then unplug the AC power lead from the AC socket. E-43 MD-R3H... -
Page 50: Maintenance
SPECIFICATIONS As a part of our policy of continuous improvement, SHARP reserves the right to make design and specification changes for product improvement without prior notice. The performance specification figures indicated are nominal values of production units. There may be some deviations from these values in individual units. - Page 51 MEMORANDUM E-45 MD-R3H...
- Page 52 MEMORANDUM/MÉMORANDUM/MEMORÁNDUM/ANTECKNINGAR /ANNOTAZIONI/MEMORANDUM/MEMO MD-R2H...
-
Page 53: Sharp Corporation
SHARP CORPORATION A9711.HK TINSZ0287AWZZ MD-R3H...