
Related Manuals for Panasonic NV-HS960


Summary of Contents for Panasonic NV-HS960
- Page 1 Video Cassette Recorder NV-HS960 Series Operating Instructions Bedienungsanleitung Before attempting to connect, operate or adjust this product, VQT8880 please read these instructions completely.
-
Page 2: Table Of Contents
Dear Customer May we take this opportunity to thank you for purchasing this Panasonic Video Cassette Recorder. We would particularly advise that you carefully study the Operating Instructions before attempting to operate the unit and that you note the listed precautions. -
Page 3: Controls And Components
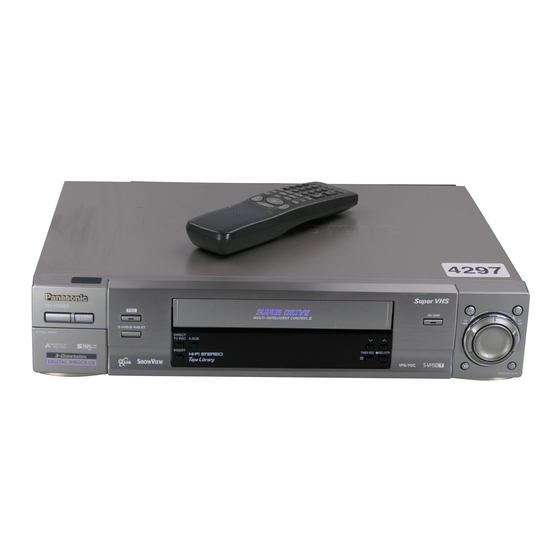
Controls and Components/Bedienungselemente und Anschlussbuchsen Keep this page open as you read through the Operating Instructions. Refer to it for the control and component names and numbers which appear in the text. Halten Sie diese Seite aufgeschlagen, während Sie die Bedienungsanleitung durchlesen. Auf diese Weise können Sie die Lage von Bedienungselemente, Anschlussbuchsen und Bauteilen, deren Bezeichnungen und Nummern im Text erwähnt werden, bequem überprüfen. -
Page 4: Vcr Operation
To enter numbers for various settings. Infra-red Remote Control Receiver window ° VCR 1/2 switch ° Set to the “VCR 2” position when using two Panasonic VCR display ° VCRs. (See page 56.) Video Input socket [VIDEO IN (AV4)] °... -
Page 5: Checking The Accessories/Preparing The Remote Control
ENGLISH Checking the Accessories/Preparing the Remote Control Check that you have the accessories shown below ∏ Operating ∏ S-Video cable ∏ Batteries for the Remote ∏ Remote Control Instructions Control ∏ Satellite Receiver List ∏ S-VHS ET Sticker (for cassette tape) ∏... -
Page 6: Cautions
Cautions Be sure to read the cautions carefully before you operate this Video head clogging VCR. The video heads record the picture signals on the tape during recording and read picture signals from the tape during Avoid sudden changes in temperature playback. -
Page 7: Warning And Important Information
Warning and Important Information As this equipment gets hot during use, operate it in a well ventilated place; do not install this equipment in a confined space such as a book case or similar unit. IMPORTANT Your attention is drawn to the fact that the recording of pre-recorded tapes or discs or other published or broadcast material may infringe copyright laws. -
Page 8: Setting The Remote Control To Operate Your Tv
VCR. to the AV Input on Your Panasonic TV ≥ Some TV models cannot be operated with this remote Your Panasonic TV uses one of three different methods for control. switching between TV reception and the AV input(s). Perform... -
Page 9: Remote Control
List of TVs Compatible with the VCR’s Remote Control Manufacturer Code Manufacturer Code Panasonic 01–04 SIEMENS AIWA SINUDYNE 05, 06, 33 AKAI 27, 30 SONY BLAUPUNKT TELEFUNKEN 10– 14 BRANDT 10, 15 THOMSON 10, 15 BUSH 05, 06 TOSHIBA CURTIS... -
Page 10: Connecting And Preparations For A Tv Equipped With The Q Link Function
Download) if you connect the VCR to your TV with a fully-wired 21-pin Scart cable (not supplied). Depending on the manufacturer, the equivalent of the Q Link function has a different name and may not work exactly the same. “Q Link” is a registered trademark of Panasonic. °... -
Page 11: To Simultaneously Set Up This Vcr With A New Tv
Hints: The Preset Download function automatically copies the tuning ≥ If you use a Panasonic TV and perform the operation step position of all available TV stations into the VCR’s memory 1, starting the downloading of the setup data will when you connect the VCR using a fully-wired 21-pin Scart automatically display the “Download”... -
Page 12: Connecting And Preparations For A Tv Not Equipped With The Q Link Function
Connecting and Preparations for a TV Not Equipped with the Q Link Function If you are connecting your VCR to a TV using RF coaxial cable and 21-pin Scart cable, then Method 1. follow the steps below. (AV Connection) Aerial (not supplied) Aerial Input socket 21-pin Scart... -
Page 13: Connecting And Preparations For A Tv Equipped With The S-Video Socket
Connecting and Preparations for a TV Equipped with the S-Video Socket Connections and preparations for a TV with S-Video socket. This VCR uses the S-VHS format that makes it possible to obtain high resolution and high picture quality by using the high- performance S-VHS video cassette tapes. -
Page 14: Auto Setup Function
Hint: If you are connecting your VCR to a TV using Method 1, ≥ If you select “Schweiz”, “Suisse” or “Svizzera” on the follow the operations explained below. Country setting menu, the Display setting menu appears automatically to let you set the item “Power save” to “ON”. In this setting, the VCR’s power consumption is minimised Auto Setup Function when it is off (Standby mode). - Page 15 Function See page 14. Select an unoccupied programme position (which is not tuned to a TV station). If you are using a Panasonic TV, select programme If the Picture on the TV’s Video Playback position “0”. Channel Is Distorted If, after setup, you select the video playback channel Set the VCR/TV switch to “VCR”.
-
Page 16: When You Insert A Video Cassette
When You Insert a Video Cassette The Tape Library System makes it easy to check what programmes are recorded on the inserted tape and lets you quickly select a programme for playback. For further details about the Tape Library System, see page 28. When you insert a cassette with an erasure prevention tab: When you insert a cassette without an erasure prevention tab:... -
Page 17: Playback
Playback Preparations Notes: ≥ Confirm that the VCR is on. ≥ Cue, review or slow playback will be automatically ≥ Confirm that the TV is on and the VCR viewing channel is cancelled after 10 minutes, and still playback after selected. - Page 18 To Play Back a Recorded Part Repeatedly ≥ Repeatedly pressing this button changes the indication in Press the Play button on the remote control for more than the following order: 5 seconds. Counter display The “R” indication appears on the On Screen Display. (normal playback mode) (min.) (min.)
-
Page 19: To Ensure High Playback Picture Quality (3D Dnr Function)
Recording To Ensure High Playback Picture Preparations ≥ Confirm that the VCR is on. Quality (3D DNR Function) ≥ Confirm that the TV is on and the VCR viewing channel is selected. To activate the 3-Dimensional Digital Noise Reduction ≥ Set the VCR/TV switch to “VCR”. -
Page 20: To Immediately Record The Same Tv Programme That You Are Viewing On The Tv (Direct Tv Recording)
To Immediately Record the Same To Make an S-VHS Recording on TV Programme That You Are a Video Cassette Viewing on the TV For recordings that you intend to play back on this VCR or another S-VHS VCR, we recommend that you record in the (Direct TV Recording) S-VHS format to take advantage of this system’s superior picture quality. -
Page 21: To Select The Recording Duration And Perform
To Select the Recording Duration ≥ If you record in the S-VHS ET format, the picture quality may not be very good with certain types of cassettes. and Perform Timer Recording To avoid negative surprises, we recommend that you make a trial recording and confirm that the quality of the recorded (OTR Recording) picture is satisfactory. -
Page 22: Linked Timer Recordings By External Equipments
Linked Timer Recordings by To Manually Adjust the Audio Recording Level external equipments This VCR adjusts the recording level automatically to prevent If an external equipment (for example a satellite receiver) with sound distortion due to excessive peaks. a timer function is connected to the AV2 socket of this VCR However, if you want to manually adjust the audio recording by a 21-pin cable, it is possible to control the recording of the level, perform the operation steps below before you start the... -
Page 23: Timer Recording
Timer Recording This function lets you programme the VCR for unattended automatic recording of desired TV programmes when you are Press the SP/LP button to set the desired tape not at home or sleeping. speed. You can programme timer recordings in two different ways: ≥... -
Page 24: To Programme With The Showview Function
To Programme with the ShowView Function Press the OK button again to conclude the settings. The ShowView numbers assigned to each TV programme Timer recording ≥ To programme additional and published alongside the TV programme listings in Start Stop SP VPS Name DATE ON OFF LP PDC Min timer recordings, repeat... -
Page 25: Other Timer Recordings And Convenient Functions
Other Timer Recordings and Convenient Functions Setting the Recording Date/Day(s) Condition for correct operation of the Auto SP/LP Change Perform this operation in operation step 3 when programming function: a timer recording with the On Screen Display, or in operation ≥... - Page 26 Programming a Timer Recording of a To Change a Timer Recording Satellite Programme Programming The programming of a timer recording of a satellite It is not possible to change a programming while the timer programme can be performed in the same way as for normal recording is being performed.
- Page 27 To Cancel the Programming of a Timer Recording It is not possible to cancel a programming while the timer recording is being performed. ≥ Display the VCR picture on the TV. ≥ Set the VCR/TV switch to “VCR”. Timer recording Press the PROG./CHECK button Start Stop SP VPS Name DATE...
-
Page 28: Tape Library System
Tape Library System This advanced system makes it quick and easy to check the contents of an inserted cassette. It can also be used to quickly find out which cassette in your collection contains a desired programme. Whenever a cassette with an intact erasure prevention tab is inserted, the VCR first performs a brief check and then shows the number of the cassette and its contents on the On Screen Display. -
Page 29: To Check The Tape Library Data
To Check the Tape Library Data Note: ≥ In the case of certain cassettes, for example cassettes recorded on another NV-HS960 model VCR or cassettes To Check What Programmes Are Recorded whose cassette number was deleted from the Tape Library... - Page 30 To Check the Tape Library’s Contents by To play back the desired programme, insert the corresponding cassette. Cassette Number, Title, Category, or If the cassette that contains the desired programme is Recording Date already in the VCR, this operation step 5 is not necessary.
-
Page 31: To Manually Enter Or Editing A Title Or Category
To Manually Enter or Editing a Press the Cursor buttons (34) to select the desired category and then press the OK button Title or Category Library Edit Library Edit If you press the LIBRARY button when no cassette is Tape 1 Tape 1 Category Movies... -
Page 32: To Delete The Tape Library Data
To Delete the Tape Library Data Hint: ≥ Even if you delete a cassette’s contents from the Tape Library while that cassette is in the VCR, this does not Caution: erase the actual programmes recorded on the cassette. The Tape Library system offers a convenient back-up option, in case you later regret having deleted the Tape Library data. -
Page 33: To Restore Deleted Tape Library Data
To Restore Deleted Tape Library Hint: ≥ If you press the Stop button while the Tape Library Data Data is being restored, the warning indication “Restore not successful!” appears. Caution: The Tape Library system offers a convenient back-up option, To Demonstrate the Tape Library in case you later regret having deleted the Tape Library data. -
Page 34: Search Functions
Search Functions VISSuVHS Index Search System Index signals are automatically recorded in the following cases: This VCR automatically records special index signals on the ≥ When you start a recording by pressing the REC button tape every time a recording is started. The Index search REC/OTR button or DIRECT TV REC button function makes use of these index signals to let you find the... -
Page 35: Editing
Editing Assemble Editing When that point is reached, press the Pause/Still button again to start recording the new picture and sound The assemble editing function makes it easy to record the from the playback unit. picture and sound of virtually any number of scenes or programmes in succession. -
Page 36: Album Function
Album Function To Change the Recording Time: After step 1 or 3, press the The album function lets you collect desired scenes (both INDEX L or INDEX K button moving and still pictures) and create the equivalent of a photo to change the recording time. -
Page 37: Insert Editing
Insert Editing Operations Press the Pause/Still button on this VCR and then The Insert Editing function lets you substitute a part of a use the Shuttle Ring or Jog Dial to search for the previously made recording by inserting one or several new tape position at which you want the insert recording to scenes together with new sound. -
Page 38: Audio Dubbing
Preparations Audio Dubbing ≥ Connect the audio equipment or a video movie camera to The audio dubbing function lets you record new sound onto this VCR with an audio cable. the normal (mono) audio track. Although this erases the ≥ Display the VCR picture on the TV. original sound on the normal audio track, the sound on the ≥... - Page 39 Audio Dubbing on a Panasonic Hi-Fi VCR General ≥ The VHS format allows audio dubbing only on the normal (mono) audio track, as the Hi-Fi audio tracks cannot be re-recorded without erasing the video signal. A. Audio Dubbing and then Playing Back the Audio-Dubbed Mono Sound Alone...
-
Page 40: One-Touch Editing From A Vhs-C, S-Vhs-C Or Digital Movie Camera Or Vcr
One-Touch Editing from a VHS-C, Operations Press the Pause/Still button on this VCR and then S-VHS-C or Digital Movie Camera use the Shuttle Ring or Jog Dial to search for the or VCR tape position from which you want to start recording. This editing function makes it very easy to perform repeated Press the REC/OTR button on this VCR to put it in the... -
Page 41: One-Touch Editing From A Video-8/Hi8 Video Movie Camera
One-Touch Editing from a Operations Press the Pause/Still button on this VCR and then Video-8/Hi8 Video Movie Camera use the Shuttle Ring or Jog Dial to search for the This editing function makes it very easy to perform repeated tape position from which you want to start recording. assemble editing, insert editing or audio dubbing as the connected source unit can also be controlled with this VCR’s Press the REC/OTR button... -
Page 42: Connecting The Vcr To A Decoder/Connecting The Vcr To A Stereo Amplifier
Connecting the VCR to a Decoder/ Connecting the VCR to a Stereo Amplifier To connect this VCR to a decoder or a stereo amplifier, make ≥ When you start playback on the VCR, the TV is the connections shown in the illustration below. automatically switched to the VCR mode. -
Page 43: Connecting The Vcr To A Satellite Receiver Or Digital Receiver
Connecting the VCR to a Satellite Receiver or Digital Receiver If the Satellite Receiver Is Not Equipped Satellite receiver here includes a digital receiver. with a 21-Pin Scart Socket The connection method differs depending on the type of your In case your satellite receiver is not equipped with a 21-pin satellite receiver. - Page 44 To Prepare the VCR for Remote-controlled Hint: ≥ If you select “RF” in step 3, “Satellite – Position” is set Operation of the Satellite Receiver automatically and it is not possible to change the satellite (Setting the Tuner Type) programme position here. If you want to change it, refer to This VCR lets you change the programme position on the page 46.
- Page 45 To Prepare the Satellite Receiver ≥ Some satellite receivers offer less than 99 channels. In To make it possible for the VCR to control the satellite this case, the number of the satellite channels that can be receiver, the satellite receiver must be left in a certain controlled from the VCR is the same.
-
Page 46: Tuning And Assigning The Tv Stations Available In Your Area To The Programme Positions (Manual Tuning)
Tuning and Assigning the TV Stations Available in Your Area to the Programme Positions (Manual Tuning) To Enter or Change the Name of a TV This VCR has 99 programme positions that can be preset to receive TV stations. Station Usually, if you switch the VCR on for the first time after making the necessary connections, the VCR will start the Press the MENU button... - Page 47 To Obtain the Best Tuning Condition To Enter Newly Available TV Stations Press the MENU button to display the Main menu on Press the MENU button to display the Main menu on the TV screen. the TV screen. Press the Cursor buttons (3421) to select Press the Cursor buttons (3421) to select...
-
Page 48: To Set The Subtitles
To Change the Type of Video System Press the Cursor buttons (3421) to select the TV station whose subtitle Teletext page number you want to (Colour TV system) change. Press the MENU button to display the Main menu on Press the OK button to display the Manual Tuning the TV screen. - Page 49 To Record the Title When Recording a Satellite TV or Pay- To Change the Title Teletext Page Number TV Programme: (Title page) After performing operation steps 1 to 3, perform the following TV stations broadcast the titles of their TV programmes on steps: special title Teletext pages.
-
Page 50: Screen Display
To Select the Type of Sound to Be To Facilitate the Following Operations with Recorded the Instruction Indications on the On (NV-HS960EC Series) Screen Display ≥ To delete a programme position Press the MENU button to display the Main menu on ≥... -
Page 51: Restarting The Auto Setup Or Download/Resetting The Vcr To The Shipping Condition
Restarting the Auto Setup or Download/ Resetting the VCR to the Shipping Condition To Return the VCR to the Shipping Performing Auto Setup or Download automatically tunes all TV stations available in your area for the VCR. Condition Restarting this function is convenient when you move to If you want to reset the VCR to the factory preset condition, another area and may need to set up the VCR again. -
Page 52: Setting The Vcr's Clock
Setting the VCR’s Clock To Activate the Automatic Time Correction Usually, the VCR’s Auto Setup or Download function automatically adjusts the clock to the correct time. Function Under some reception conditions, however, the VCR cannot If a TV station transmits a signal for time setting, performing set the clock automatically. -
Page 53: Other Convenient Functions (Various Settings)
Other Convenient Functions (Various Settings) Settings for the Main Menu Item Indications that Can Be Displayed on the TV Screen with This Function: “Display” At a press of the OSD/DISPLAY button , the following indications appear on the TV screen. For Automatic Display of the Channel Guide on the TV Screen Each Time You 1 TV station name... - Page 54 For Reduced the VCR’s Power 8 Present time/Tape counter/Remaining tape time/Index Search/One-Touch Recording (OTR)/Playback Off Consumption When the VCR Is Switched Timer Function Present time 17:24:31 Press the MENU button to display the Main menu on Tape counter j2:35.47 the TV screen. Remaining tape time REMAIN: 2:34 Main menu...
-
Page 55: Settings For The Main Menu Item "Functions
For Automatic Change of the Brightness To Set the Colour TV System Used During of the VCR Display When the VCR Is Playback or Recording from an External Switched Off Source Press the MENU button to display the Main menu on Press the MENU button to display the Main menu on the TV screen. - Page 56 The Hi-Fi sound track with remote control when using this VCR and the original sound and the normal sound another Panasonic VCR in the same place. track (mono) with the audio-dubbed sound This ensures that you can operate both VCRs...
-
Page 57: Language Setting
Language Setting To Play Back a Video Cassette in the Same Format as That Used for Recording Press the MENU button to display the Main menu on the TV screen. Press the MENU button to display the Main menu on Main menu the TV screen. -
Page 58: Glossary
Glossary VPS (Video Programme System)/ Programming ShowView Changes in Non- PDC (Programme Delivery Control) method program- ShowView ShowView The Video Programme System (VPS) or the Programme ming program- program- Delivery Control (PDC) is a very convenient system which Selected ming start ming assures that the TV programmes you have programmed for Country... -
Page 59: Pin Scart Socket
Q Link Function °The operations marked with asterisk are only available if the This function works only if the VCR is connected via a fully- VCR is connected to a TV featuring the Q Link or the DATA wired 21-pin Scart cable to a TV featuring the Q Link or LOGIC function. -
Page 60: Before Requesting Service
Before Requesting Service √ The VCR Does Not Work Correctly Before requesting service, please check the following points. The symptom descriptions are given between quotation marks “ ”. √ On Screen Display Messages The error messages are given in brackets [ “The VCR display is not illuminated.”... - Page 61 ≥ The inserted cassette was recorded on a model Set the starting time or ending time correctly. NV-HS960 VCR other than this unit. ‘ The VCR was not put in the timer recording standby ≥ The cassette number of the inserted cassette has mode.
-
Page 62: Adjusting The Playback Picture
√ The Titles of the TV Programmes Are Not Entered Correctly in the Tape Library Data The symptom descriptions are given between quotation marks “ ”. “The Titles of the TV Programmes Are Not Entered Correctly in the Tape Library Data.” ‘... -
Page 63: Specifications
Specifications NV-HS960EG-S NV-HS960EC-S Power Source: 220–240 V AC 50/60 Hz Power Consumption: 28 W Power Consumption When in Standby Mode: Approx. 3.5 W (When Power save function is activated) Video Recording System: 2 rotary heads, helical scanning system Video Heads: 4 heads Audio Heads: 2 heads (Hi-Fi) - Page 64 Printed in Japan F0900Ua0 (4500 A) Matsushita Electric Industrial Co., Ltd. Central P.O. Box 288, Osaka 530-91, Japan...