
Related Manuals for LG F8010P


Summary of Contents for LG F8010P
-
Page 1: Digital Photo Frame
OWNER’S MANUAL DIGITAL PHOTO FRAME Please read this manual carefully before operating your set and retain it for future reference. DIGITAL PHOTO FRAME MODELS F8010P www.lge.com... -
Page 2: Table Of Contents
Table of Contents Preparation and Important Safety Precaution ............1 Product Overview ................4 Installation / Package Contents Connection Identifying the Parts Remote Control Button Names and Functions Remote Control Sensor / Replacing the Remote Control Battery Product Installation and Connection ..........9 Using the Stand / Connecting the Power Adapter Connecting USB / Connecting Memory Card Menu and... -
Page 3: Important Safety Precaution
Digital Photo Frame Important Safety Precaution This unit has been engineered and manufactured to ensure your personal safety, however improper use may result in potential electrical shock or fire hazards. In order to allow the proper operation of all safeguards incorporated in this display, observe the following basic rules for its installation, use, and service. - Page 4 Some dot defects may appear as Red, Green or Blue spots on the screen. However, this will have no impact or effect on the display performance. Leaving a fixed image on the screen for a long time may cause damage to the screen and cause image burn-in. Make sure to use a screen saver on the product.
-
Page 5: Federal Communication Commission Interference Statement
Federal Communication Commission Interference Statement This equipment has been tested and found to comply with the limits for a Class B digital device, pursuant to Part 15 of the FCC Rules. These limits are designed to provide reasonable protection against harmful interference in a residential installation. This equipment generates, uses and can radiate radio frequency energy and, if not installed and used in accordance with the instructions, may cause harmful interference to radio communications. -
Page 6: Product Overview
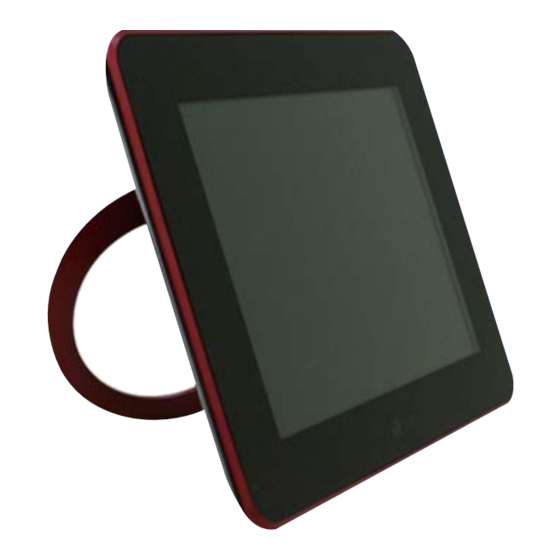
Digital Photo Frame Product Overview Package Contents Package Contents Check the package contents. Digital Photo Frame Digital Photo Frame Remote Control CD User's Guide / Cards USB Cable Power Adapter (for PC connection) Note The Digital Photo Frame and its accessories may look different from those shown here. -
Page 7: Identifying The Parts
The remote control sensor is located at the center of the product. Point at the Sensor remote control sensor when using remote control. LG Logo If connecting to the power, LG logo's light is on. Touch Key Button MENU Button Displays pop-up menu... - Page 8 Digital Photo Frame Product Overview Back POWER Button You can turn the power on and off. Connecting Part to External Device ( Page 10) Power Saving Button If pressing once, the screen goes to Power Saving mode, and if pressing once again, it goes back to original screen. DC 9 V IN Terminal You can connect the power adapter to the DC 9 V IN Terminal, and then plug the adapter into a power outlet.
-
Page 9: Remote Control Button Names And Functions
Digital Photo Frame Product Overview Remote Control Button Names and Functions Remote Control Button Names and Functions Turns the power ON/OFF Goes to Slide Show Goes to Home Menu Displays pop-up menu Goes up Goes down Goes left Goes right OK (The Play/Pause button is used to play Slide Show, Music, and Video files.) Goes to previous screen... -
Page 10: Remote Control Sensor / Replacing The Remote Control Battery
Digital Photo Frame Product Overview Remote Control Sensor / Replacing the Remote Control Battery Remote Control Sensor The remote control sensor is located at the center of the product. Point at the remote control sensor when using remote control. Replacing the Remote Control Battery Push the tab of the battery holder on the Pull the battery holder out. -
Page 11: Product Installation And Connection
Digital Photo Frame Product Installation and Connection Using the Stand / Connecting the Power Adapter Using the Stand Gently pull out the product stand You can place the product horizontally or vertically. until the product is firmly placed on a flat surface. Connecting the Power Adapter Connect the power adapter to the DC 9 V IN Terminal of the product as illustrated, and then plug the adapter into a power outlet. -
Page 12: Connecting Usb / Connecting Memory Card
Digital Photo Frame Product Installation and Connection Connecting USB / Connecting Memory Card Connecting USB / Connecting Memory Card SD/MS/xD/MMC Terminal Used to insert a memory card USB Flash Drive USB Terminal USB Extension Cable Used to insert a USB flash drive USB Flash Drive USB Terminal... - Page 13 Digital Photo Frame Product Installation and Connection PC connection 1. Please connect to product's USB terminal using a provided USB cable. 2. Please connect to PC's USB terminal. 3. If PC is read, a window pops up as below. Please select the mode you want use from Mass Storage and Mini Monitor.
-
Page 14: Getting Started
Digital Photo Frame Getting Started First-time Setup First-time Setup When turning on the power for the first time, the Setup wizard appears, which will guide you through the Language, Date and Time, Wi-Fi Configuration, and Power On Message settings step by step. Once the setup is completed, it won’t appear again. If you reset the product, the Setup wizard reappears. -
Page 15: Key-Help
Digital Photo Frame Getting Started Key-Help Key-Help Key-Help is located at the bottom right corner of each menu to show tips about how to use the buttons. Please refer to it for how to operate the buttons of the product. Key-Help... -
Page 16: Home Menu
Digital Photo Frame Home Menu Screen Display and Buttons Screen Display and Buttons Please select a desired menu. Slide Show You can display the photo. ( Page 15) Photo You can select and manage the photo. ( Page 21) You can play the music. ( Page 17) Music You can select and manage the music. -
Page 17: Using The Slide Show Menu
Digital Photo Frame Using the Slide Show Menu You can play photo files in Slide Show To start a slide show, press the button on the remote control or select Slide Show in Home Menu. If selecting Slide Show in Home Menu, it basically plays photo. If you want to play music or video, please begin at Music and Video Slide Show Menu Function... - Page 18 Digital Photo Frame Using the Slide Show Menu Clock/Calendar You can set up clock and calendar. • Photo + : Insert photo - : Delete photo • Clock/Calendar 1~4 : Select Theme - : Delete clock/calendar Copy It copies the photo being currently played. Delete It deletes the photo being currently played.
-
Page 19: Using The Music Menu
Digital Photo Frame Using the Music Menu Playing Music Playing Music If you want to play the music, please press to select Music in Home Menu, and then press Please select the file you want by button. If pressing button, it plays the music you selected. -
Page 20: Playing Screen Composition And Buttons
Digital Photo Frame Using the Music Menu Playing Screen Composition and Buttons Playing Screen Composition and Buttons Operating key Play Mode setup Playing previous song Playing next song Pause/play Volume adjustment File information indication It indicates file name, musician, and album title. Playing order It indicates the total number of the file to be played and order of the file being currently played. -
Page 21: Using The Video Menu
Digital Photo Frame Using the Video Menu Playing Video Playing Video If you want to play the video, please press to select Video in Home Menu, and then press Please select the file you want by button. If pressing button, it plays the video you selected. -
Page 22: Playing Screen Composition And Buttons
Digital Photo Frame Using the Video Menu Playing Screen Composition and Buttons Playing Screen Composition and Buttons Operating key Open/close play bar Rewind Fast rewind Pause / play Volume adjustment File information indication It indicates name of the file being currently played. Play bar It indicates playing state of the file being currently played. -
Page 23: File Management
Digital Photo Frame File Management Screen Composition and Buttons Screen Composition and Buttons You can separately manage each file at Photo , Music , and Video Below is an explanation by giving you an example of the Photo , and operation method of Music and Video is also identical. -
Page 24: File Management Menu
Digital Photo Frame File Management File Management Menu File Management Menu If pressing button at Photo , Music , and Video , it moves to each menu. The usable menu could be different according to the format of the selected file. Selected file Indicates the number and capacity of selected file. -
Page 25: File Copy / Delete
Digital Photo Frame File Management File Copy / Delete File Copy / Delete Selecting Copy/Delete menu Designating copy location (Delete menu not included.) Please assign the device to copy the file. Pressing the button in Photo , Music , or Video displays the menu. -
Page 26: Selecting All File / Unselecting All File
Digital Photo Frame File Management Selecting All File / Unselecting All File Selecting All File / Unselecting All File Select all files/Unselect all files within the device If pressing button at Photo , Music , or Video menu appears. Please select Select All or Unselect All. -
Page 27: Network Setup
Digital Photo Frame Network Setup Setting up Wi-Fi Connection Setting up Wi-Fi Connection To use the provided applications in the Network menu, you need to set up Wi-Fi connection first. Make sure a wireless access point (AP) is available nearby. Determine the type of wireless network you are connecting to, and use one of the appropriate connection methods below. - Page 28 Digital Photo Frame Network Setup Connecting to a WPS-enabled AP Press to select Setup Press to select Network in in Home Menu, and then press Setup, and then press Depending on how the Wi-Fi Protected In Wi-Fi Configuration, press Setup (WPS) AP was enabled, you can use Push Button Method or PIN Method.
- Page 29 Digital Photo Frame Network Setup Connecting to an AP Manually Press to select Setup Press to select Network in in Home Menu, and then press Setup, and then press Use the on-screen keyboard to enter the In Wi-Fi Configuration, press wireless network name in the SSID (Service set identifier) field, and then the security key to select Manual, and then press...
-
Page 30: Checking Connection Status
Digital Photo Frame Network Setup Connecting to an AP by Using IP Configuration In addition to using the 3 connection methods provided in Wi-Fi Configuration, you can use the options in IP Configuration too as follows. Go to Setup -> Network -> IP Configuration -> Static IP Address: In the Static IP Address page, use the on-screen keyboard to enter your IP address, subnet mask, gateway, and DNS server. -
Page 31: Using The Network Menu
Digital Photo Frame Using the Network Menu Once you have connected to a wireless network, you can use the provided applications in the Network menu as follows. Picasa: allows you to access public Picasa photo albums. ( Page 29) Flickr: allows you to access public Flickr photo albums. ( Page 29) YouTube: allows you to watch public YouTube video clips. - Page 32 Digital Photo Frame Using the Network Menu The product will display photo albums from Press to select the this Picasa/Flickr account. ( Page 31) account you entered, and then press In the pop-up menu that appears, you can: Select the desired photos by pressing •...
- Page 33 Digital Photo Frame Using the Network Menu Screen Composition of Picasa/Flickr Photo Screen Composition of Picasa/Flickr Photo Albums Albums Account name Indicates the Picasa/Flickr account you currently entered. Photo albums Indicates photo albums available from the Picasa/Flickr account. Press to switch among Picasa/Flickr photo albums. Current file number/ Indicates the currently selected file number/total number files in the current Total number of files...
- Page 34 Digital Photo Frame Using the Network Menu Searching Picasa/Flickr Photo Albums by Keyword Press to select Select Picasa/Flickr, and then press Network in Home Menu, and then press Select New Keyword under the Keyword Press to highlight the Username Search page, and then press Search page, and then press to move to the Keyword Search page.
-
Page 35: Using Youtube
Digital Photo Frame Using the Network Menu Using YouTube Using YouTube You can use YouTube in the Network menu to watch public YouTube video clips. Press to select Select YouTube, and then press Network in Home Menu, and then press By default, the Feature Videos page shows •... -
Page 36: Using Frameit
Digital Photo Frame Using the Network Menu Using FrameIT Using FrameIT You can use FrameIT in the Network menu to connect to FrameIT to display your Windows Live FrameIT collections. Before using FrameIT, a Windows Live ID is required. Sign up for a Windows Live ID on the Internet, if you do not have an existing one. -
Page 37: Using Internet Radio
Digital Photo Frame Using the Network Menu Using Internet Radio Using Internet Radio You can use Internet Radio in the Network menu to listen to the radio channels on the web. Press to select Select Internet Radio, and then press Network in Home Menu, and then press... -
Page 38: Using Home Network
Digital Photo Frame Using the Network Menu Using Home Network Using Home Network When the product and your PC have been both connected to the same wireless network, you can stream photos from your computer to the product by using Windows Media Player 11 media sharing. Press to select Select Home Network, and then press... - Page 39 Digital Photo Frame Using the Network Menu In the pop-up menu that appears, you can: If you have started a slide show, you can • Start a slide show of the selected photos press to use the Rotate, Zoom, List, by Slide show.
-
Page 40: Windows Media Player 11 - Media Sharing
Windows Media Player 11 - Media Sharing Note For Windows Media Player 11 download, please refer to http://www.microsoft.com/windows/windowsmedia/player/11/default.aspx In the [Library] menu, select [Add to On the [Add To Library] window, select [My Library]. folders and those of others that I can access]. - Page 41 Windows Media Player 11 - Media Sharing In the [Library] menu, select [Media On the [Media Sharing] window, select Sharing]. [Share my media]. If no [Available device] is displayed, proceed to step 5. If displayed, proceed to step 6. Click the [Networking] button and check If [Available device] is displayed, click the whether the current network is [Private [Settings] button.
- Page 42 Windows Media Player 11 - Media Sharing Click the [Settings] button to display the Select the device (your photo frame) to [Media Sharing - Default Settings] window. share, and then press the [OK] button. To add external devices or a PC to be connected automatically, select [Allow new devices and computers automatically].
-
Page 43: Using Bluetooth
5 meters. “LG DPF” is the default name of the product. If you want to change the name, go to Setup > Bluetooth > My DPF Name, and select Rename to use the on-screen keyboard to change the name. -
Page 44: Sending Files To The Photo Frame
Digital Photo Frame ® Using Bluetooth Sending Files to the Photo Frame Sending Files to the Photo Frame ® Once you have connected the photo frame to a Bluetooth -enabled device, you can send files from ® the Bluetooth -enabled device to the photo frame. ®... -
Page 45: Setup
Digital Photo Frame Setup The Setup menu allows you to configure the basic Properties of the product. Select Setup Home Menu. Brightness Set up the screen's brightness. The brightness level ranges from 1 to 5. Orientation Set the image display orientation of the product. (* This product reads the photo information and the orientation value and rotates the photo accordingly.) •... - Page 46 Digital Photo Frame Setup Alarm You can set up the alarm. Set up the time, repetition setup, sound, and so on. Music Auto Play If music file is detected at photo slide show, music playback automatically starts as background music for the slide show. Power Saving You can set up the time that power is turned on or off.
-
Page 47: Power On Message Function
Digital Photo Frame Setup Power On Message Function Power On Message Function Power On Message can show the message, photo, music, and video you have selected when turning on the power of the product. Selecting 'On' Selecting message Select On on the Power On Message menu. Select the message to display upon powering on the product. -
Page 48: Troubleshooting
Digital Photo Frame Troubleshooting Problems Solutions The screen does not • Check if the product is connected to the power adapter properly. work. • Check if the power adapter is connected to the power outlet properly. • Press the POWER button to turn the product on. The photo is not •... - Page 49 Digital Photo Frame Troubleshooting Problems Solutions The screen ratio is • Please adjust the aspect ratio of the screen. You can adjust it in the not normal. Setup -> Photo Aspect Ratio or Setup -> Video Aspect Ratio. The screen color is •...
-
Page 50: Specifications
Digital Photo Frame Specifications F8010P * Information in this document is subject to change without notice. Model F8010P Size 20.25 cm (8 inch) Dimension Fold Stand 221.8 mm x 178.3 mm x 29.5 mm (Width x Height x Depth) Unfold Stand 221.8 mm x 166.7 mm x 126 mm... -
Page 51: Service Information
Digital Photo Frame Service Information Service Center LG Electronics Service center web site: http://www.lgservice.com Software Update For software update, please refer to www.lge.com Product Registration Visit www.lge.com and register the Serial No. on the product package or the back of the product. - Page 52 Make sure to read the Important Precautions before using the product. Keep the User’s Guide(CD) in an accessible place for furture reference. The model and serial number of the SET is located on the back and one side of the SET. Record it below should you ever need service.