Table of Contents
Table of Contents

Related Manuals for Hitachi DZ-HV1079E


Summary of Contents for Hitachi DZ-HV1079E
-
Page 1: Instruction Manual
Instruction Manual D Z - H V 1 0 7 9 E... -
Page 2: Table Of Contents
Contents Section 1 Getting to Know Your Camera ..........3 Section 2 Getting Started ..............6 Section 3 Enjoying the Record Mode ..........8 Section 4 Enjoying the Playback Mode ..........20 Section 5 Setting Your Camera ............27 Section 6 Viewing Pictures and Movies on TV ........ 31 Section 7 Viewing Pictures and Movies on PC ........ -
Page 3: Section 1 Getting To Know Your Camera
Hitachi cannot compensate for any damages caused when recording is not made normally or recorded contents cannot be played back because of a defect in the digital camera device or memory card. -
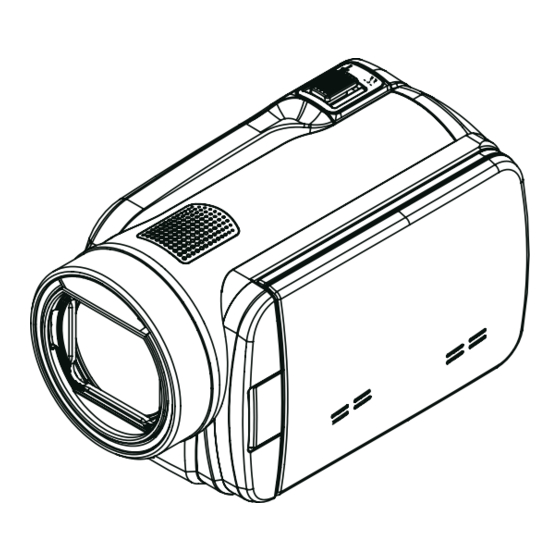
Page 4: Front View
Front View Tele/Wide Button Speaker Flash Microphone Lens Rear View Movie Mode LED Indicator Playback LED Indicator Picture Mode LED Indicator Playback Button Mode Button Rolling Wheel OK Button... -
Page 5: Side View
Side View SD card Slot Power Button Pre -Record/Internet Button LCD Touch Panel Mini USB 2.0 Port HDMI Port TV Port Bottom View Self Timer LED Safety latch Battery Cover Tripod Socket... -
Page 6: Section 2 Getting Started
Section 2 Getting Started Loading the Battery Before using the camera, users must load the Lithium-ion rechargeable battery come within the package. Slide the safety latch to the unlocked position and open the battery cover. Insert the battery according to the correct polarity marks ( + or -). -
Page 7: Turning The Camera Off
Turning the Camera On and Getting Started • To turn on the camera: Flip out the LCD panel; the camera will turn on automatically. Or press Power Button for one second to turn it on. • To record movies: Press Mode Button or touch on the screen to switch to the Movie Record mode .(The Movie Mode LED Indicator... -
Page 8: Section 3 Enjoying The Record Mode
Section 3 Enjoying the Record Mode Button Function Rolling Wheel: Rotate to move between the wheel menu options. Right Button: LCD Information ON/OFF. In Record menu, press to switch to the submenu. Left Button: Flash Auto/Red-Eye-Reduction/Digital Light/ Flash OFF. In Record menu, press to return to the main menu. -
Page 9: Lcd Monitor Information
LCD Monitor Information The indicators shown below may display on LCD when movies and pictures are recorded: Movie Resolution FHD (1080i 60) FHD (1080p 30) HD (720p 60) HD (720p 30) VGA (4:3) Slow Motion (Record movies at 320x240 resolution.) Picture Resolution High (16 MP) Standard (10 MP) - Page 10 Scene Skin Night Backlight Macro Position Focusing Manual White Balance Motion Detection Zoom meter: (10) 1X~100X (10X Optical zoom and 10X Digital zoom) (11) Record Menu (12) Playback Mode (13) Movie/Picture Record Mode Movie Mode Digital Light Picture Mode Flash Auto (14) Red Eye Reduction Digital Light...
-
Page 11: Movie Recording
Movie Recording • In Movie Record Mode (The Movie Mode LED Indicator lights up), press OK Button to start recording. When a movie is being recorded, a time indicator will display on the LCD monitor. To stop recording, press OK Button again. •... -
Page 12: Picture Recording
Picture Recording • In Picture Record Mode (The Picture Mode LED Indicator lights up), press OK Button halfway down until the focusing frame turns from white to green. Then, press it fully down to take a picture. • Press Playback Button to view the picture. •... -
Page 13: Options For Record Menu
Options for Record Menu Movie Record Mode Menu Movie Resolution White Balance Scene Effect • FHD (1080i 60) • Auto • Auto • Stabilization • FHD (1080p 30) • Daylight • Skin • Macro Mode • HD (720p 60) • Fluorescent •... -
Page 14: Movie Resolution
Movie Resolution Five resolution settings are available. • FHD(1080i 60): Record movies at 1920x1080i 60 resolution. • FHD(1080p 30) : Record movies at 1920x1080p 30 resolution. • HD(720p 60): Record movies at 1280x720p 60 resolution. • HD(720p 30): Record movies at 1280x720p 30 resolution. •... -
Page 15: White Balance
White Balance The camera adjusts the color balance of images automatically. Three manual white balance settings are available: • Auto: The camera automatically adjusts white balance. • Daylight: Under outdoor condition. • Fluorescent: Under fluorescent light condition. • Tungsten: Under tungsten light condition. Operation Display Screen In Movie/Picture Record Mode, touch... -
Page 16: Movie Effect
Movie Effect Operation Display Screen In Movie Record Mode, touch (on-screen icon) to show the wheel menu. Scroll and stop on [Effect]. The submenu of Effect pops up. Touch the desired Effect option to enter its option screen. The Movie Effect submenu contains 5 options-- Stabilization, Macro Mode, Motion Detection, Slow Motion, and Time Lapse --for you to adjust the camera’s settings. -
Page 17: Motion Detection
Motion Detection Record videos automatically when the camera detects a movement. Operation Display Screen In the Effect submenu, touch [ Motion Detect.] to enter the option screen. Touch the desired option. Touch [OK] to validate the setting. Camera will start to record video automatically if it detects a movement. -
Page 18: Picture Effect
Picture Effect Operation Display Screen In Picture Record Mode, touch (on-screen icon) to show the wheel menu. Scroll and stop on [Effect]. The submenu of Effect pops up. Touch the desired Effect option to enter its option screen. The Picture Effect submenu contains 3 options --Self Timer, Macro Mode, and ISO-- for you to adjust the camera’s setting. - Page 19 The camera adjusts the ISO sensitivity of its images automatically. Three manual ISO sensitivity settings are available. (800/1600/3200) The larger the number is, the higher the ISO sensitivity is set to. Select a small number to shoot a smoother image. Select a large number to shoot an image in a dark location or to shoot a subject moving at high speed.
-
Page 20: Section 4 Enjoying The Playback Mode
Section 4 Playback Mode Enjoying the Button Function The Buttons have the following functions in Playback Mode. Rolling Wheel: Rotate to move to the previous/next movie/ picture. Right Button: LCD Information ON/OFF; Fast forward. Left Button: Fast rewind. Down Button: Delete the current movie/picture or all movies/ pictures. - Page 21 LCD Monitor Information Indicators on the LCD screen while in Playback Mode: Playback Preview Screen Movie Playback Mode Picture Playback Mode Movie Resolution FHD (1080i 60) FHD (1080p 30) HD (720p 60) HD (720p 30) VGA (4:3) Slow Motion (320x240) Picture Resolution High (16 MP) Standard (10MP)
- Page 22 Current number/ Total number of picture/movie. Movie/Picture Preview Screen On Return to the previous screen/ Switch to Record Mode Movie playback time counter Delete Upload selected movies to Internet Volume Previous movie/picture (10) Movies fast rewind Movies Play (11) Movies Pause (12) Movies fast forward (13)
-
Page 23: Operations For Playback Mode
Operations for Playback Mode The Playback Mode is for viewing and managing movies and pictures on the built-in memory or on an SD Card. Operation Display Screen Press Playback Button ( ) or press on the screen to switch to the Playback mode. In the Playback preview screen, press Mode Button or touch... -
Page 24: Delete Movies
Delete Movies Operation Display Screen ouch to go to the Delete option screen. Touch [Yes] to delete the current movie or [No] to cancel the operation and to exit; touch [All] to delete all movies. Before all movies are about to be deleted, a confirmation screen will appear;... -
Page 25: Picture Playback
Picture Playback Operation Display Screen When in the Picture Playback mode, sweep to the left or touch to go to the previous picture; sweep to the right or touch to go to the next picture. While the picture is selected, press on the screen as well as go up to enter Magnification Mode.( The magnification Indicator appears on the screen) -
Page 26: Delete Picture
Delete Picture Operation Display Screen Touch to go to the Delete option screen. Touch [Yes] to delete the current picture or [No] to cancel the operation and to exit; touch [All] to delete all pictures. Before all pictures are deleted, a confirmation screen will appear;... -
Page 27: Section 5 Setting Your Camera
Section 5 Setting Your Camera Setting Menu Operation Display Screen Touch (on-screen icon) when in Record Mode. The Record menu wheel will show on the screen. Scroll and stop on [Setting]. The submenu of Setting pops up. The Setting submenu contains 6 options for configuring your camera setup. - Page 28 Ensure that the appropriate TV standard of your area is selected – either NTSC or PAL. Wrong TV system setting may cause image flickers. • NTSC(60Hz): USA, Canada, Japan, South Korea and Taiwan, etc. • PAL(50Hz): UK, Europe, China, Australia, Singapore and Hong Kong, etc. Operation Display Screen In the...
-
Page 29: Time Setting
Time Setting Operation Display Screen In the Setting submenu, touch [Time Setting] on the screen to go to the Time Setting menu. Touch Year, Month, Day, Hour, or Minute to set. Adjust the numeric value by touching Touch [OK] to validate the settings. Format Yes: Format the built-in memory ( When there is no SD card in the camera ) / SD Card (When there is an SD card in the camera). -
Page 30: Default Setting
Default Setting To restore the default factory setting, select this option. Operation Display Screen In the Setting submenu, touch [Default Setting] on the screen to go to the Default Setting confirmation screen. Touch [Yes] to execute the operation and [No] to cancel the operation. -
Page 31: Section 6 Viewing Pictures And Movies On Tv
Section 6 Viewing Pictures and Movies on TV Connecting to a High-Definition 16:9(Wide) TV Connect the HDMI cable to your camera’s HDMI Out port. Connect the other end of the cable to a television. Set the video input source of your TV to “ HDMI.” (16:9) Use the buttons to view the stored pictures and movies on the TV. -
Page 32: Section 7 Viewing Pictures And Movies On Pc
Section 7 Viewing Pictures and Movies on PC Installing Bundled Software The CD-ROM supplied with this camera contains 3 pieces of software. • ArcSoft MediaImpression is a user-friendly application that helps you managing your media, burning your video into DVD, and uploading your videos to YouTube easily. •... -
Page 33: Section 8 Burning The Recorded Clip Into A Dvd
Section 8 Burning the Recorded Clip into a DVD The bundled software CD contains ArcSoft MediaImpression which can be used to burn movie clips onto a DVD. You can share this DVD movie with your family or friends by using a regular DVD player. To create a DVD: Install ArcSoft MediaImpression (Refer to Section 7). - Page 34 The operation screen will appear: • Select the folder that contains the video files you want to burn. • Select the files in the display area. • Click on [Make Movie] at the bottom menu. Click on [Add Media] ( ) to add the files into slide.
- Page 35 Select [ Burn ] and click on [ Next ] to proceed. Click on [ Start ] to start the VCD/DVD burning. Note Please insert a blank, writable VCD or DVD into the CD/DVD Writer before clicking on [Start].
-
Page 36: Section 9 Uploading Video Files To Youtube/Internet
Section 9 Uploading Video Files to Internet The built-in Internet Direct application offers you an easy way to upload your video clips to Internet instantly. It helps you share them with your family and friends on the website. Also, the bundled software, ArcSoft MediaImpression, can be used to upload your video clips to Internet. - Page 37 Upload video clips: 1. Choose the website you want to upload. 2. Press Internet Button on the camera again. 3. The videos clips marked with will be uploaded to the website automatically. (You may be asked to fill in your account information before uploading or you can fill in the information firstly by click on 4.
- Page 38 To playback the video file: 1.Double click on the video clip on the thumbnail screen. 2.Click on the Play/Pause icon to play/pause. Click on the Return icon to return to the thumbnail preview screen. To setup your account information for the website: 1.
- Page 39 9.2 ArcSoft MediaImpression To upload video files to YouTube: Install ArcSoft MediaImpression (Refer to Section 7). Click on Windows [ Start ] g[ (All) Programs ] g[ ArcSoft MediaImpression ]. The ArcSoft MediaImpression main screen will appear on your desktop. Click on [ Videos ] .
- Page 40 Fill in your YouTube account information in the blanks, and then click on [Login] Fill in the information of the video clips in the blanks, and then click on [Upload]...
-
Page 41: Section 10 Video File Converter
Section 10 Video File Converter The bundled software CD contains ArcSoft MediaConverter that features video file converter to convert multiple video formats into compatible format with your camera. In this way, you can convert various video files formats and playback your favorite movies on your camera. To convert a video file: Install ArcSoft MediaConverter ( Refer to section 7). - Page 42 Select the video file you want to convert. Then, click on [Open] to convert the file. The converted files will be renamed “ IMAG0001.avi”, “ IMAG0002.avi”,and so on. Rename the converted file to “ IMAGXXXX. avi” before transferring the converted file to your camera.
-
Page 43: Section 11 Specifications And System Requirements
Section 11 Specifications and System Requirements Specification Image sensor 10 Mega pixel CMOS sensor Operation modes Movie record, Picture record Lens f=5.95~59.5mm F2.0~2.8 Focus range Macro mode: wide:1cm~Infinite, tele:60cm~Infinite Auto mode: wide:10 cm~Infinite, tele:100 cm~Infinite Zoom 1X~100X (10X Optical zoom and 10X Digital zoom) Shutter Electronic LCD monitor... -
Page 44: System Requirements
System requirements • Microsoft Windows XP/Vista/7 • Intel Pentium 4 2.4GHz or above • 512 MB RAM • CD-ROM Drive • 1 GB free HDD space • Available USB port • 16-bit Color Display Note The LCD screen is manufactured using extremely high-precision technology, so over 99.99% of the pixels are operational for effective use. However, some tiny black and/or bright dots (white, red, blue or green) may appear on the LCD screen. -
Page 45: Section 12 Troubleshooting
Section 12 Troubleshooting Troubleshooting If the LCD preview is not clear while shooting, how can the focus be adjusted? Try to switch between Macro and Auto Mode. The flash is not working. The battery power is low. The camera is in DC power mode. The files on the memory card do not display smoothly when the LCD shows the “!”... - Page 46 In the unlikely event of a problem developing, please contact the store where you purchased your equipment. We continually strive to improve our products; specifications may change with out prior notice. For advice on where to purchase accessories, please contact the store where you purchased your equipment.
- Page 47 DZ-HV1079E Warranty Hitachi Europe Ltd. If Something doesn’t seem to work If there is something about your appliance which you do not understand and you live in the UK, you can phone our helpline during normal hours on: 0844 8009595. (COMET HELPLINE) Calls are charged at standard rates.