Table of Contents
Table of Contents

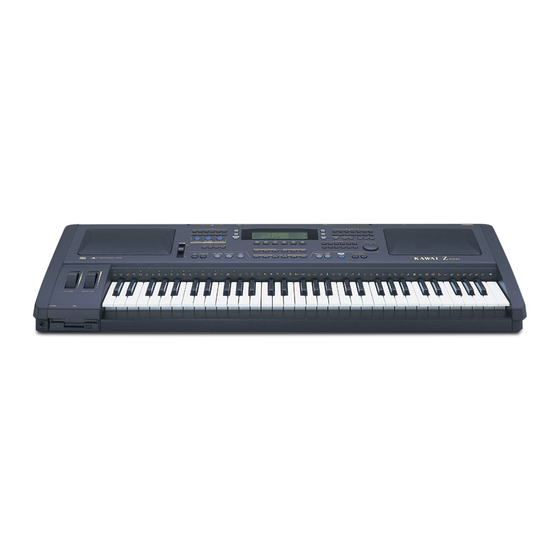
Related Manuals for Kawai Z1000


Summary of Contents for Kawai Z1000
- Page 1 Digital Keyboard Owner’s Manual...
- Page 2 IMPORTANT SAFETY INSTRUCTIONS (For Noth American Countries) WARNING - when using electric products, basic precautions should always be followed, including the following: 1. Read all the instructions before using the product. 2. To reduce the risk of injury, close supervision is necessary when a product is used near children. 3.
- Page 3 WARNING TO REDUCE THE RISK OF CAUTION FIRE ELECTRIC SHOCK, DO NOT EXPOSE RISK OF ELECTRIC SHOCK THIS PRODUCT TO RAIN DO NOT OPEN OR MOISTURE. AVIS : RISQUE DE CHOC ELECTRIQUE - NE PAS OUVRIR. TO REDUCE THE RISK OF ELECTRIC SHOCK, DO NOT REMOVE COVER (OR BACK). NO USER-SERVICEABLE PARTS INSIDE.
-
Page 4: Kawai Z1000 Introduction
General MIDI Standard in order to set up different formats for broad communication capabilities when exchanging songs between units. Looking to the future, Kawai has, by means of a conversion process, set up the Z1000 to allow access to other manufacturer's styles. We have also opened... -
Page 5: Important Safety Precautions
We wish you much fun and success in implementing your musical ideas using the Z1000. Important Safety Precautions The operating instructions contain important information which will enable you to make optimal use of the instrument's numerous functions. -
Page 6: General
Important Safety Precautions A. General 1. Humidity/Short Circuit Do not operate the instrument with wet hands, as you risk causing electrical shock or damage. - Keep foreign objects away from the instrument. Do not insert objects through openings in the instrument, since this may lead to high-voltage components being touched or parts being short- circuited. -
Page 7: Repairs
4. Accessories - Do not place this keyboard on an unstable or slanted surface (such as a rolling rack, stand, pedestal, cart or table). The Z1000 might may drop causing serious injury to persons and to the product. Use only with a stand recommended by Kawai, or sold with the product. -
Page 8: Power Supply
F) When the product exhibits a distinct change in performance - this indicates a need for service. - In case of necessary service use only Kawai authorized service technicians and replacement parts recommended by Kawai. Use of incorrect or inadequate replacement parts may lead to fire, shock or further damage or injury. -
Page 9: Cleaning
Important Safety Precautions - Power cables should be routed so that they are not likely to be walked on or pinched by items placed upon or against them, paying particular attention to cords at plugs, convenience receptacles, and the point where they exit from the product. . Do not connect the keyboard to an electrical line already overloaded or to the same AC outlet to which a noise-generating appliance is connected. -
Page 10: Parts And Names
Parts and names Front panel 1 Auto, ACC Setting, Intro/Ending, Start/Stop Sync. 6 Style Variation 2 System, Disk Sequencer, Sound 7 Fill In 3 Conductor Easy Style Edit 8 Display Advanced Style Edit Style Reset 4 Style Selection 5 L-Buttons L1 / L2 / Main Screen... - Page 11 Parts and names 15 Left, Right 2 / 1 9 F-Button F1-6 16 Selector Ziffernblock +/- Tasten 10 R-Button R1 / R2 / Exit 11 Sound Selection 17 Dial 12 More Sounds 13 Sustain/Duet 14 Registration One-Two Play, 3 D, Transpose...
-
Page 12: Rear Panel
MIDI OUT jack Audio output jack (L/MONO) MIDI IN jack Accessories The Z1000 are shipped with the following items: • AC Power Cable ( 1 pc.) • Music Rack ( 1 pc.) Used to hold the music sheets. Place the rack into the holes on the front panel of the... - Page 13 Used to install the system software. It is n n o o t t necessary to install every time you play the keyboard. Use this disk only when the Z1000 gives you a message for installation. (See page 122) There are some accessories sold separately from Kawai that will enhance the Z1000’s performance.
-
Page 14: Basic Operations
Basic Operations A. The Display/Multi-Function Monitor Screen The LCD display provides various information, largely through the use of function menus. These menus allow the user to select the R i g h t 1 desired item and alter values. Menus and functions are selected using the R i g h t 2 buttons located along the edges of the... -
Page 15: Input
"+" or "-" buttons. The keyboard may also be used to set the values contained within certain parameters. Choosing the most suitable input method depends on the required precision and your preferred routine in working with the Z1000. Multi-Function Dial When no function has been selected, the multi-... -
Page 16: Demos
Demos The on-board demos is included as a simple way to monitor the quality and variety of sounds in the Z1000. There are two types of demos: Song and Concert Magic. There are 5 preset songs included in the the Song demo and 100 well-known pieces in Concert Magic format. -
Page 17: Song Demo
Demos A. Song Demo You can opt to play a single song or a medley. Press the F1 button to alternate between a single demo (Normal) and chained sequence mode (Chain). Press the PLAY button (F5) to start the demo, and press STOP (F6) to quit the demo. B. -
Page 18: The First Steps
The First Steps A. Selecting a Sound You can select up to 3 different sounds and assign them to different keyboard sections: Left, Right 1 and Right 2. You must first decide which section you are going to select a sound for. To choose a section, press either L1 (Left), R1 (Right 1) or R2 (Right 2). -
Page 19: Quick Select (Last Used Preset)
Before providing a detailed description of the rhythmic accompaniments, we encourage you to experiment with the styles of the Z1000. You might start by pressing one of the style selection buttons, as you may wish to hear the variety of music available there. - Page 20 C major. If you have played a different chord with the left hand before pressing the START/STOP button, the music starts in accordance with your chord. The Z1000 is capable of chord recognition and begins to interpret the chords you play.
-
Page 21: Intro Start
C. Structure of the Styles The accompaniment styles available with the Z1000 consist of 6 instrumental tracks: the drum part, the bass part and 4 distinct accompaniment parts (ACC1 - 4), the latter for use with chord or obbligato phrasing. -
Page 22: Style Selection
Using Styles (Drum Kit, Latin Percussion etc.) may be combined, and Acc 1 can include an additional effect from the GM programs (such as sliding over the strings of a guitar). S t y l e : P o p s 1 C o n t e m p o r a r y L 0 1 E f f e c t P a n... - Page 23 Using Styles buttons. The User group allows you to select from among the accompaniment arrangements you have created yourself. Information on how to create your own styles is found in the chapters entitled "Conductor 1" and "Conductor 2". Style Variation/Fill-In 1-6 Each style is provided with 6 variations and 6 fill-ins.
-
Page 24: Control
Intro/Ending, Start/Stop Synchronization. Start/Stop As soon as the START/STOP button is pressed, the Z1000 provides a rhythmic pattern consisting of percussive instruments and/or drums. At this stage of the playback you can already switch between style and fill-in variations. The use of the new variation then begins either at the first metrically appropriate moment (i.e. - Page 25 Using Styles Hint: Pressing the START/STOP button again causes the rhythm to be interrupted immediately. If you want to end the accompaniment in this way, it is recommended that you wait for a metrically suitable moment. Intro/Ending The chosen style can also be started and stopped by pressing the INTRO/ENDING button.
- Page 26 Using Styles Auto When the Auto Mode is activated (the LED is lit), the complete instrumental arrangement is available for the accompaniment. The chord progression depends on what you specify with your playing. The auto accompaniment interprets the key in which you play by distinguishing between major and minor thirds and recognizing alterations between triadic or more complex chords.
-
Page 27: Auto Mode
Using Styles Auto/Split Setting (ACC SETTING) The function Auto/Split Setting offer access to a display page on which additional settings for the melody voice can be made. Refer to the chapter "Sounds in Practice" for details concerning Split Mode and Right Mode. F. - Page 28 Using Styles "Whole Key" activates the chord recognition for all active keyboard zones. In this mode at least 3 voices are required for the interpretation of a chord. "One Finger" uses the same Split conditions as the Fingered Mode does for chord recognition. It is sufficient in this mode to specify a single note or two with the left hand (Left keyboard) in order to cause a change in harmony.
-
Page 29: Memory
G. Memory The L2 button is used to select the Memory function. This can be considered a "chord memory". When it is on, the Z1000 will keep playing the accompaniment in the key that has been most recently recognized after releasing your fingers from the keys. It will stop when another chord is entered. -
Page 30: Split
Using Styles Normal: No fill-in is played when the variation is changed. Auto: By choosing the Auto setting you can determine that changing to a different style variation is always preceded by a fill- in. The start of the fill-in again depends on the metrical position at the time you made the change;... - Page 31 Using Styles Left/Right Point The button L1 is used to determine the split point between the Left and the two Right zones. You can make this setting by using the Tempo/Value dial, the "+" or "-" buttons, or by pressing the key of the corresponding note on the keyboard. The value indicates the lowest note of the Right zone.
-
Page 32: One-Two Play
Using Styles K. One-Two Play You are now acquainted with the basic functions in 2 separate areas: the Style page as a preset accompaniment arrangement, for which additional editing capabilities will be explained in detail later, and the Sound page, where you have learned about the setting of the 3 components for the melody voice. -
Page 33: Conductor (Part 1)
Conductor (Part 1) Easy Style Edit You will find the Easy Style Edit button in the CONDUCTOR section. When you press this button, the Style Edit page pops up, on which you see a matrix table of 7 rows and 7 columns. Press one of the STYLE VARIATION buttons and then another, noticing that cursors move up each column. - Page 34 Conductor (Part 1) S t y l e : R o c k 1 C o n t e m p o r a r y P h 6 P h 5 P h 4 P h 3 P h 2 P h 1 O f f D r u m B a s s...
- Page 35 Conductor (Part 1) 1) Temporary Start the style in the usual way and then press the Easy Style Edit button. Now you can change the composition of the variations in real time. These changes are reset to the previous settings after a style has been changed, that is they remain active until you select a different style.
- Page 36 Conductor (Part 1) Style Reset for Easy Edit Style Press the STYLE RESET button to restore style variations you have edited to their original settings. This function is available both for temporary changes and for stored changes. Because the settings are made separately for each of the 6 variations, it is necessary to select the desired variation before it can be reset.
-
Page 37: Concert Magic
Concert Magic A. Concert Magic Performance The Concert Magic function enables anyone, even those who have never touched a keyboard, to perform music. Concert Magic allows you control 2 elements of music: rhythm and dynamics. You simply press a key to indicate the tempo you like, controlling the force with which you strike a key. -
Page 38: Playing Mode
Concert Magic It is now prepared for performance. Just start pressing a key with a certain rhythm and hear the music play. If you are not sure what the song sounds like, it is a good idea to begin by rehearsing. -
Page 39: Playing A Song From A Concert Magic Disk
D. Playing a Song From a Concert Magic Disk In addition to 100 on-board Concert Magic songs, you can play additional Concert Magic songs from a floppy disk. The Z1000 companion learning materials, "Music to Go", contain 20 Concert Magic songs under the title "Appetizer". Other Concert Magic... - Page 40 Concert Magic format disks are available from Kawai and third party vendors. Concert Magic, however, may bring unexpected results when played back. For the best result, songs should be designed to conform to the Concert Magic data structure. Generally speaking, the songs in which each part has notes on the beat will perform better.
-
Page 41: Sounds In Practice
Sounds in Practice A. Assigning Sounds/Sound Effects to Keyboard Zones 3 separate sounds can be assigned to separate parts, or zones, of the keyboard. By using the Auto/Split Setting you can specify the way in which the sounds work together. The following 6 keyboard modes can be used to assign sounds/sound effects in distinct configurations: 1. - Page 42 Sounds in Practice LEFT 2 - RIGHT - 1 You can choose between the following options: 1. Activation of Right 1 or Right 2 for the entire keyboard 2. Simultaneous activation of Right 1 and Right 2 3. Activation of Left in addition to the 2 Right modes To change the sound assigned to a certain zone, select the desired zone with the corresponding S button (i.e.
- Page 43 Sounds in Practice MORE SOUNDS Sound Selection/Alternate Sounds You can choose from a total of 14 instrumental groups and the names of the sound categories are printed on the front panel (e.g. "Piano", "Organ/Accordion", "Mallet/Percussion", "Guitar). This division groups the timbres according to the General MIDI Standard (GM).
-
Page 44: Performance Modes Of Sounds
Sounds in Practice B. Performance Modes of Sounds When Right 1 or Right 2 contains the active timbre, you can play with that timbre on the entire keyboard. If the Left button is turned on as well, an additional timbre is added that is available in the form of a split. -
Page 45: Performance Effects
Transpose The Transpose function allows you to raise or lower the pitch of the Z1000 in half-tone steps within a range of two octaves. This function is activated by pressing 1 of the 2 Transpose... -
Page 46: Mixer
Performance Effects buttons: the message "Transpose 0" appears in the display. Each time the left button is pressed it transposes the key down by a half-tone, while pressing the right button raises the pitch by a half-tone. When the instrument is turned on, the Transpose function is automatically reset to "0". - Page 47 Mixer When you call up the Mixer using the F3 button, a new arrangement appears in the display: you can now access each of the 3 components of the melody voice as well as the volume of the accompaniment. In order to make changes, the F-buttons can be used to select directly: Left (F1), Right 2 (F2), Right 1 (F3) and ACC (F4).
-
Page 48: Style Mixer (F2)
Mixer B. Style Mixer (F2) With the F2 button you reach the Mixer function for the automatic accompaniment. You will notice that the basic functions for making settings are the same as those on the Mixer page for the sounds. 6 accompaniment instruments are assigned to the "channels"... -
Page 49: Effect Settings
Effect Settings A. Presets The basic settings determine the way in which the effects respond to program changes and you can choose between them. To make selections in the System category press button L1 then use the L2 button to highlight the desired effect. S Y S T E M S e t t i n g S Y S T E M T U N E P R O G R A M M O D E... -
Page 50: Global Effects
Effect Settings 2. Panel (current settings of the Z1000) Specifying Panel determines that the current effect settings are retained when changing to a different style/sound. B. Global Effects E F F E C T s e t t i n g... -
Page 51: Reverb
Effect Settings F4 button, and the Super 3D effect whose switch is located above the keyboard. Additional effects are available for sound and style. The switches used to control it are F2 for the 3 keyboard zones (L/R1/R2) and F3 for the style. A toggle function for the Rotary Speaker effect, also known as the "Leslie"... - Page 52 Effect Settings 2. Low Depth (F2) With the F2 button the Low setting, i.e. the lesser intensity, can be selected. This value appears on the Effect page of the Sound and Style Mixers as R: Lo. 3. Time (F3) Time allows you to set the reverb duration in seconds. 4.
-
Page 53: Effect/Equalizer
Effect Settings 5. High Dump (F5) High Dump causes the high frequencies of the reflections to be attenuated. Although this parameter works like a tone control (filtering) of the reverb effect, it also contributes to the defining of characteristics of the reverb space: the greater the degree of attenuation (high value), the more effectively the high reflections are absorbed, i.e. - Page 54 Effect Settings 2. EQ (L2) After you press the Exit button to return to the display page 3D/EQ Setting, the L4 button gives you access to the display page for the equalizer settings (EQ Setting). The equalizer offers you extensive possibilities for controlling the tone: a total of 7 E Q s e t t i n g POPS S E T...
-
Page 55: Efx R1/2L Settings (R1)
In this case a foot switch (e.g. Kawai model F1 foot switch) must be connected to the Foot Switch jack and the parameter Pedal Function of the system settings must be set to... -
Page 56: Effect Setting (Individual Effects)
Effect Settings G. Effect Setting (individual effects) The R1 button gives you access to the display page for setting effects for the 3 zones of your melody voice; pressing R2 button leads you to the edit page for the stylistic effect. On each display page called Setting there are 15 effect types available, each selected using the L2 button. - Page 57 Effect Settings 4. Chorus (doubling the signal by means of pitch modulation) F1 Length: Balance effect/original signal F2 Speed: Modulation rate (frequency) F3 Amount Effect intensity F4 Pre Delay: Pre-delay F5 Wave: Sine and triangle waveforms are available for amplitude modulation. 5.
- Page 58 Effect Settings 8. Rotary Speaker (Leslie effect) F1 Length: Balance effect/original signal F2 Slow Speed: Slow rotation F3 Fast Speed: Fast rotation F4 Acceleration: Starting up the Leslie F5 Slow/Fast: Setting the normal position (before pedal or switching in the display page Effect Setting take effect) 9.
- Page 59 Effect Settings 12. Cross Delay (crossing echo signal) F1 LengthBalance:Effect/original signal F2 Time: Time of echo duration F3 Feedback: Return of the mixed signal 13. Flanger (doubling the signal by means of delayed pitch modulation) F1 Length: Balance effect/original signal F2 Speed: Modulation rate (frequency) F3 Amount:...
-
Page 60: Effect Assignment
Effect Assignment A. Sound Effect From the Sound Mixer press the R1 button to reach the display page for effect assignment. This is where the path is determined by which each of the 3 sounds constituting the melody voice passes through the effects. Select the desired components: Left, Right 2, or Right 1 with buttons F1 through F3. - Page 61 Effect Assignment 2. R: Lo Reverb is the only effect used. The intensity corresponds to the preset Lo value. The setting applies to the degree of intensity determined for the reverb under Lo Depth. For further information about its assignment please refer to the section "Reverb Effect Setting".
-
Page 62: Style Effect
Effect Assignment B. Style Effect Here also, the basic functions correspond to the options of the sound effects: the path is determined by which each instrument comprising the style passes through the effects. Using the buttons F1 through F6 you select the corresponding part: Drums, Bass, Acc. - Page 63 Effect Assignment information about its assignment please refer to the section "Reverb Effect Setting". 3. E+R Reverb and the additional sound effect are used simultaneously. For further information about the sound effect please refer to the section "EFX R1/2/L Setting". On this page the display provides you with information about further assignments.
-
Page 64: Quick Play (Floppy Disk Operations 1)
Quick Play (Floppy Disk Operations 1) The playback of Standard MIDI song files (SMF formats 0 and 1) takes place directly from floppy disk. It is therefore not necessary to write the songs into internal memory. Insert a DOS-formatted disk into the disk drive. Press the Disk button. The explanations in this section will be confined to the Quick Play function. - Page 65 Hint: If you have purchased a song disk of SMF Format 1 and want to use it together with Quick Play, you can load the songs into the Z1000 sequencer and save them directly to floppy disk again as SMF. In this way the songs are converted...
-
Page 66: Registration
Registration In discussing One-Two Play we mentioned that the Z1000 manages several different musical environments: the important elements for the registration are styles, sounds and effects. You have already learned that these three areas are variable in the performance of any piece of music. The basic setup of the styles... -
Page 67: Storing
Registration R e g i s t r a t i o n REGIST 1 R i g h t 1 : G r a n d P i a n o R i g h t 2 : G r a n d P i a n o L e f t B a s s S t y l e :... -
Page 68: Conductor (Part 2)
The section Conductor offers access to the Advanced Style Edit function. The changes you can make here are primarily related to the capability of the Z1000 to let you create your own "style production". Several of the parameters available here are already familiar to you from the functions of the Style Mixer. -
Page 69: Groove (L1)
Conductor (Part 2) A. Groove (L1) Press the L1 button to call up the Groove display page. This function may be familiar to you if you have experience using a sequencer, where it is sometimes known as "Swing". Groove is related to the rhythmic feel during performance. -
Page 70: Pan/Volume
Conductor (Part 2) Please refer to the section "Quantize" for further details on the subject of Groove. It is possible to assign completely different sounds to each variation. To set sounds of a style variation, simply select the desired variation. B. - Page 71 Conductor (Part 2) accompaniment track. On the other hand, the command switches to the corresponding number when you want to transfer the accompaniment to an external MIDI tone generator. This may be a MIDI expander, such as the GMega, or a synthesizer; you can also transfer the song in which you are using the accompaniment to an external sequencer (a hardware sequencer, such as the Q-80, or a software sequencer running on a personal...
-
Page 72: Write (F1)
Conductor (Part 2) E. Write (F1) The store command (F1) allows you to reach a submenu in which you can determine details concerning the memory location and name of the new Conductor style. The number of the memory location appears in the display. Use the dial or the Selector buttons to select a free memory location or one whose data are no longer required. -
Page 73: Recording
Conductor (Part 2) the entire accompaniment. The length set applies to all 6 variations, which you can then call up using the Style Variation buttons. The maximum number of bars here is 32. A maximum length of 5 bars is available for the introduction. In effect, you are programming the INTRO/ENDING button, with which you can then start your style. - Page 74 Conductor (Part 2) 2) Part This function allows selection of the track you want to edit. At this point a closer look at the individual tracks is in order: 1. Drum 1 With regard to future changes made in the Conductor it is recommended that you consider this track the main track for the drum kit.
- Page 75 Conductor (Part 2) main track. It can be used for simultaneous recording of the effects for the main track. For example, the sliding on the strings of a guitar (main: Steel Guitar1/Sub: Gt.FretNoise). 6. Acc 2, 3 and 4 With the 3 remaining parts you select the other tracks for accompaniment instruments.
- Page 76 It is necessary to record the arrangements for style variations and fill-ins in a major key. During playback of the accompaniment the Z1000 automatically converts the corresponding minor harmonies. 7) Delete The F3 button can be used to erase a style from the User bank.
- Page 77 Conductor (Part 2) purposes: in the left box you input the source for the arrangement to be copied from, while in the right box you define the work area of the target. As usual, you can scroll through the options using the buttons L1 and L2. The following individual sections are available for defining the source: 1.
- Page 78 Conductor (Part 2) 9) Write The store command of the F5 button takes you to a submenu in which you can define details concerning the memory location and the name of the new user style. The number of the current memory location appears in the display.
- Page 79 Conductor (Part 2) Part: Bass In this submenu you can define the limit for the lowest bass note. If the arrangement reaches a point in the harmony where the bass line goes below this limit, the corresponding notes are automatically transposed upward by one octave. Part: Acc.
- Page 80 Conductor (Part 2) If you want to use phrases with notes not found in the chord (such as diatonic or chromatic notes) for the instruments Acc. 1 through 4, it is necessary to specify Scalic for the corresponding track. Within this subdivision four different voicing modes are available: Chordal Close The first specification voices chord in close harmony, also known...
- Page 81 Conductor (Part 2) Scalic Phrase Use the phrase-related scale setting to voice diatonic or chromatic lines in the accompaniment for harmonic changes of the style. In this case you let the automatic accompaniment interpret existing melody lines (e.g. string melodies) in a way that is largely identical to the chords played on the keyboard.
-
Page 82: Starting The Recording
Conductor (Part 2) 3. Starting the Recording The recording begins after the countdown in the display has finished (the countdown indication appears next to the tempo indication). 4. Erase (F1) Using F1 you can make corrections in the recorded phrase in real time (during the recording). -
Page 83: Style Convert (Floppy Disk Operations 2)
Style Convert (Floppy Disk Operations 2) The style conversion function is a unique feature which enable the Z1000 to play the style data made not only for Kawai's other instruments, but for many other manufacturers' keyboards as well. The Style Convert Software was developed for the personal computers by EMC Software company, which has been the recent leader in this type of technology. -
Page 84: Sound Edit
The name of the converted style is used as is. In most cases the conversion of the styles of other manufacturers will lead to sounds on the Z1000 that are slightly different from the ones you are familiar with from the original unit, since the components are designed for different system requirements. -
Page 85: Cutoff
Sound Edit Use the Sound button to call up the Editor when you want to modify existing sounds or create your own melody voices. On the left side of the display you can select the waveform for a sound you want to create from scratch by using the L1 button (Reference). -
Page 86: Attack
B. Attack On the Z1000 the parameter Attack applies to both the filter and the amplitude. When set to a positive value this parameter causes a delay in the attack. -
Page 87: Note Off
Sound Edit D. Release The final parameter pertains to the characteristics of the sound after the key is released: in the positive range the sound is sustained and provided with a type of reverb, while in the negative range the sound is muted. E. -
Page 88: Sequencer
Sequencer The Sequencer button takes you to the display page with the recording functions. You will also find these recording functions on the pages Mixer and Track, so you can operate them from those pages as well. As you will notice, these functions work in the same way as the operating buttons of a tape recorder. -
Page 89: Recording Functions
Sequencer A. Recording functions 1) Record (F 1) In the same way as a tape recorder, the Record button can be pressed simultaneously with the Play button, but also activates the recording function when pressed alone. All function boxes are used for selecting the operating mode. The actual recording is started with the Start/Stop button or the operating buttons, which also control the functions of the styles. -
Page 90: Track (L1)
Sequencer 7) = Tempo (dial) Tempo indications appear above these boxes. You can change the tempo by using the Dial or the "+" and "-" buttons 8) Position Display The indication L (Location) of the position of the sequencer's current bar appears next to the tempo indication. The indication "L:002-03", for example, would inform you that the sequencer is on the third quarter-note of the second bar. -
Page 91: Setup (R2)
Sequencer make the setting for the respective function, you move through the tracks using the corresponding L and R buttons as follows: with L1 and R1 you select the desired track for creating Panorama settings, with L2 and R2 you select the track for the Volume settings to be made. - Page 92 Z1000 in order to play back the corresponding style in parallel. OFF - The default setting OFF allows unrestricted use of all tracks.
-
Page 93: Setup Input Quantize (L2)
Sequencer turn off the metronome during a recording with automatic accompaniment, because the style affords sufficient rhythmical orientation. 4) Record Bar/Measure Here you can select the time signature for recording. By using the dial to make the selection, you can scroll continuously through all values available for time signatures in units of quarter notes, eighth notes and sixteenth notes. -
Page 94: Setup Effect (R1)
Sequencer 3. Setup Effect (R1) The page for assigning effects is an extension of the Mixer page. Here you can determine for each track the way in which the effects are applied to the respective sequencer track. E+R specifies both effect types for the track: the sound effect for the respective track and the reverb effect. -
Page 95: Bar Edit
Sequencer S E Q U E N C E R B A R E D I T 1 . D e l e t e 7 . Q u a n t i z e 2 . I n s e r t 8 . - Page 96 Sequencer The following operations are available in Bar Edit: 1) Delete: deleting data (cut and paste) The first specification applies to the range. Using the dial or the "+" or "-" buttons you can delete each of the 16 tracks (Trk01 through Trk16), the tempo track (TEMPO), the accompaniment (CHORD), the pattern (PTN), or the entire sequence (ALL).
- Page 97 Sequencer indication Bar/Measure (B/M=4/4) informs you of the current time signature. 4) Erase: erasing data (preserving the remaining contents of the track) As in the Delete function, the beginning and end positions of the range to be erased must be defined. Using the dial or the "+" or "-"...
- Page 98 Sequencer 7) Quantize The Quantize function is used to change the quantization of the recorded track. The quantization adjusts the timing of rhythmically imprecise notes to their adjacent ("straight") count based on the selected adjustment unit. The type of quantization you choose determines the type of adjustment unit used to round off the notes.
- Page 99 Sequencer 10. 64 1/64ths 11. 96 This is the adjustment unit with the highest resolu- tion (1/96ths); this quantization comes closest to the recorded original (real time mode). The Range parameter provides you with a function for determining the step width, in which you can specify the sensitivity of the quantization unit.
- Page 100 Sequencer The parameter Velocity comprises 128 steps in accordance with the MIDI specifications. Therefore you can decrease the velocity in the negative range by the specified value or increase it in the positive range by the corresponding amount. This setting causes changes both in the volume and in the timbre of the corresponding instrumental voice.
- Page 101 Sequencer 10) Clock Move Each of the 16 tracks can be delayed or advanced separately in order to achieve an exact timing in the case of sounds with widely differing responses or in order to compensate for differences in the responses of different devices in synchronized operation.
-
Page 102: Event Edit
Sequencer can be converted afterwards. You can reserve in advance the sequencer tracks required for this subsequent operation for all ACC tracks. Use the ACC Reserve function in the Sequencer Setup as preparation. The Reserve setting is not a necessary requirement for converting the accompaniment events into track data. - Page 103 Sequencer S E Q U E N C E R E V E N T E D I T ( I n s e r t ) T R K B a r B t C l k e v e n t - - V a l u e - - <...
- Page 104 Sequencer Control = MIDI Controller Any controller according to MIDI specifications. This requires specification of the controller number for the value on the left and a specification of the controller value for the value on the right. Program = Program Change number Values between 0 and 127 can be specified for changing sounds.
-
Page 105: The Sequencer In Practice
"spontaneous" recording method. After the Z1000 is turned on, the sequencer can be used immediately, for example for quick recording of a musical idea. For the current sound settings the first three tracks are activated (Record F1) for Right 1, Right 2, and Left, as soon as the recording function is selected. -
Page 106: Playback Of The Recording
The sequencer in practice 3. Playback of the recording By pressing F3 you can play back the recorded sequence. If you interrupt the playback and then press Play again, playback of the sequence continues from the current position. If you want to continue from a certain position, you can use Rewind (F4) and Forward (F5) to move through the recorded sequence. -
Page 107: Merge Mode During Recording
(or events) are not overwritten, but are combined on the track with the newly recorded data. After turning on the Z1000 the default setting for the sequencer's recording mode is "Erase". Proceed as follows to change the recording mode: 1. -
Page 108: Recording With Accompaniment
The sequencer in practice B. Recording with accompaniment During a recording with automatic accompaniment the operation of the style functions is recorded first: Start/Stop, Intro/Ending, switching the style variation, and calling up fill-ins. 1. Preparing the tracks Make the following preparations for a recording with automatic accompaniment: Select a style by pressing any key in Style Selection and using the dial to select the... -
Page 109: Transferring Midi Events
A volatile memory is available for recording with the sequencer; the recorded sequencer song must be saved to floppy disk before the power of the Z1000 is turned off; otherwise the data are lost. You will be reminded of this fact, however, before you exit the sequencer. -
Page 110: Track Assignment/Track Management
The sequencer in practice C. Track assignment/track management At the start of the first recording of a sequencer session the first three tracks are automatically activated. To ensure the most convenient recording procedure, this default setting takes into consideration the most complex assignment for the melody voice, namely the activation of all three components: Right 1 for track 1, Right 2 for track 2, and Left for track 3. -
Page 111: System/Midi
To create the setting please use the Tempo/Value dial or the "+" and "-" buttons . 1. Setting 1 1) System Tune This parameter is used to adjust the overall pitch of the Z1000. You can raise or lower the pitch in 63 half-tone steps. - Page 112 System / MIDI 2) Program Mode You can specify here whether the Z1000 works in its own mode or according to the General MIDI specifications. This setting pertains primarily to the program changes of the 128 defined sounds and of the standard drum kit. The setting GM is effective only for the defined instruments in order to ensure compatibility with other formats or tone generators.
-
Page 113: Setting 2
Expression can be used to assign the function of an expression pedal to the wheel when no expression pedal is connected to the Z1000. Reverb Depth allows you to control the reverb intensity using the wheel. This function applies to the global reverb effect located in the main menu next to the mixer functions. - Page 114 Z1000's internal clock is used for controlling the timing of sequencer or styles. The Z1000 operates in the control or master mode and indicates the clock speed. If it is necessary to match the Z1000 as the receiving (or slave unit) to an external...
-
Page 115: Midi (L2)
System / MIDI timing pulse, such as for synchronized reception of sequences, please select the External mode. 5) Bender Range Using the pitch bend wheel, you can specify how many half-tone steps may be varied. The maximum control range is one octave, while the most convenient value is usually considered to be the interval of a major second (2 half-tones, setting "2"). -
Page 116: Setting 2
On the last display page you activate (or deactivate) the transmission and reception of program change data and of the MIDI controllers which the Z1000 can transmit to external units. The setting "off" is used to filter out the respective data type,... - Page 117 System / MIDI As a result of the assignment options for hand wheels and pedals, the data type generated during reception and transmission is the effective factor here, not the controller, i.e. lever, pedal or wheel used to generate the data. When information for a volume change (Volume) is transmitted or received, the effect of these events is the same regardless of whether the data were generated with a slider control, a wheel...
-
Page 118: Floppy Disk Operations 3
3.5" floppy disk for the data format of the Z1000, so that its different file types files can be saved there and recognized later. If your floppy disks are already formatted in the DOS format, new formatting is not necessary because the disk format of the Z1000 corresponds to the DOS format. -
Page 119: Load (L1)
Floppy Disk Operations 3 Caution! If you are working with disks already containing data, make sure that the previous data are no longer required before formatting the disk in question, since all existing data will be erased during the process! After formatting has been completed, the Execute message displayed during the process disappears. -
Page 120: Delete (R1)
E. File types As you can see from the lists of each individual function, the Z1000 generates a maximum of 8 file types, which you can deal with individually or in conjunction with the floppy disk. Identical procedures are used for the commands Load, Save, and Delete. - Page 121 The Q-80 format allows you to load songs of the hardware sequencer KAWAI Q-80 into the sequencer of the Z1000. 8. All To save or load all data that can be stored in the Z1000 please use the All function by pressing the R1 button.
-
Page 122: System Updates
System Disk that comes with the Z1000. Turn off the power of the Z1000. Insert the System Disk into the floppy-disk drive and keep the Style Selection button "Pops" depressed while you turn on the power again. -
Page 123: Table Of Contents
Table of Contents 1. Kawai Z1000 Introduction......4 2. Important Safety Precautions ..... . . 5 A. - Page 124 Table of Contents H. Right Mode ..........29 I.
- Page 125 Table of Contents 16. Registration........66 A.
- Page 126 Table of Contents E. Edit (L2) ..........94 1.
- Page 127 Table of Contents 24. System updates....... . 122 A. System data management ........122 B.
-
Page 128: Index
Index Distortion 58; 62 3D Effect 51; 53; 54 DOS (Disk Operation System) 64 Drive 62 Drum - Drums, Drumkit 21; 22; 24; 27; 29; Accompaniment 21; 22; 33; 47; 48; 58; 62; 33; 34; 48; 62; 71; 74; 78; 79; 82; 73; 112; 75;... - Page 129 Index High, Hi 51; 53; 57; 59; 60; 62; 63; 82; Pan (Stereo-Panorama) 47; 48; 85; 90; 91 94; 118 Part 74; 75; 76; 78; 79; 80 High Dump 53 Pattern 73 Percussion 71 Program (Program number) 22; 34; 47; 61; 70;...
- Page 130 Index Style 14; 18; 19; 20; 21; 22; 23; 24; 25; 32; 33; 34; 45; 47; 48; 50; 51; 56; 62; 68; 70; 71; 72; 73; 74; 75; 76; 77; 78; 82; 83; 83; 84; 85; 90; 91; 93; 94; 112; 113; 114; 115;...
-
Page 131: Appendix
Appendix A. Chord Form Chart C Maj C ∆7 C sus4 C aug C b5 C6 9 C add9 C7 sus4 C7 #5 C7 b5 C7 b9... - Page 132 Appendix Cm∆7 Cm#5 Cm6 9 Cm add9 Cm7 11 Cm9 11 C7 #9 C7 b9 11 C7 #11 C7 b9 #11 C7 #9 #11 C9 13 C9 11 13 C9 #11 13 C7 b9 13 C7 b9 11 13 C7 #9 13 C7 b13 C9 b13 C7 b9 b13...
- Page 133 Appendix Cm7 b5 Cm7 b5 9 Cm7 b5 b9 Cm7 b5 11 Cm7 b13 Cm7 11 b13 C ∆9 13 C ∆7 #5 C ∆9 #11 C ∆7 b5 C ∆9 C ∆7 13 C∆7 #11 13 C∆ 9 #11 13 C∆9 #11 13 Cm∆9 C dim...
-
Page 134: Concert Magig Song List
Appendix B B . . C C o o n n c c e e r r t t M M a a g g i i c c S S o o n n g g L L i i s s t t CHILDREN’S SONGS ARRANGEMENT NO. - Page 135 Appendix CLASSICAL SONGS ARRANGEMENT NO. An Die Freude ....Melody Play Blue Danube Waltz ....Skillful Claire De Lune .
-
Page 136: Style List (Intros & Endings)
Appendix C C . . S S t t y y l l e e L L i i s s t t ( ( I I n n t t r r o o s s & & E E n n d d i i n n g g s s ) ) GROUP STYLE NAME INTRO ENDING... - Page 137 Appendix GROUP STYLE NAME INTRO ENDING GROUP STYLE NAME INTRO ENDING Bossanova1 STAN- WORLD1 March1 Bossanova2 March2 DARD Tango1 Jamaican Tango2 Pop_Reggae1 Chacha1 Pop_Reggae2 Chacha2 Rhumba Vienna_Waltz English_Waltz Foxtrot Slow_Fox Jive Quick_Step WORLD2 Polonaise Paso_Double French_Waltz Flamenco Polka LATIN Samba1 Irish Folk Samba2 Oriental...
-
Page 138: Specifications
Appendix Specifications K K e e y y b b o o a a r r d d 61 Touch sensitive, Weighted keys S S o o u u n n d d 200 Presets, 10 Drum Kits, General MIDI compatible, 10 User Memory, 16 bit PCM Samples P P o o l l y y p p h h o o n n y y S S t t y y l l e e s s... -
Page 139: Midi Implementation Chart
Appendix MIDI Implementation Chart Date: July 1996 MODEL: KAWAI DIGITAL KEYBOARD Z1000 Version: 1.1 Function ... TRANSMITTED RECOGNIZED REMARKS Basic Default 1—16 1—16 Channel Changed 1—16 1—16 Default Mode Message Altered Note 0—127 0—127 Number True Voice Velocity Note On... - Page 140 Digital Keyboard Z1000 OM936E-L Printed in Japan...