GE Monogram ZGU385L Installation Instructions Manual
36" stainless steel gas cooktops natural and lp gas model
Hide thumbs
Also See for Monogram ZGU385L:
- Installation instructions manual (36 pages) ,
- Owner's manual (36 pages) ,
- Installation instructions manual (36 pages)
Table of Contents
Available languages
Available languages
Quick Links
Installation
Instructions
Instructions
d'installation
Questions?
Call 800.GE.CARES
or Visit our Website at:
www.monogram.com
Appelez le Centre de réponse 1.800.561.3344
ou visitez notre site Web à l'adresse :
www.electromenagersge.ca
31-10634-3
11-08 JR
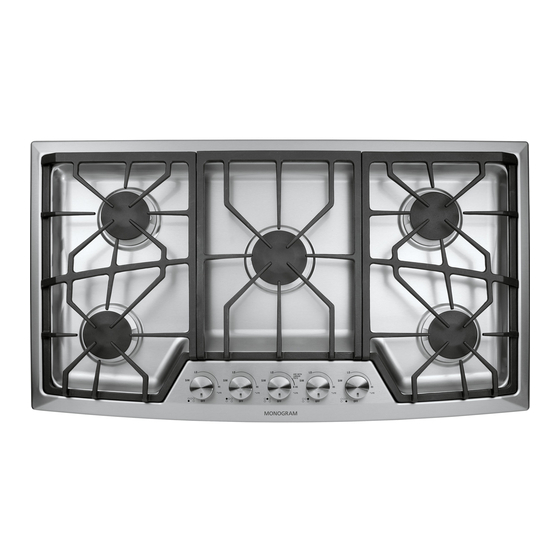
36 Stainless Steel
Gas Cooktops
Natural Gas Model:
ZGU385N
LP Gas Model:
ZGU385L
Surfaces de cuisson
au gaz de acier
inoxydable de 36 po
(91 cm)
Modèle à gaz naturel :
ZGU385N
Modèle à gaz PL :
ZGU385L
La section française commence
à la page 19.
Chapters
Table of Contents

Related Manuals for GE Monogram ZGU385L


Summary of Contents for GE Monogram ZGU385L
- Page 1 31-10634-3 11-08 JR 36 Stainless Steel Gas Cooktops Natural Gas Model: ZGU385N LP Gas Model: ZGU385L Surfaces de cuisson au gaz de acier inoxydable de 36 po (91 cm) Modèle à gaz naturel : ZGU385N Modèle à gaz PL : ZGU385L La section française commence...
-
Page 2: Safety Information
National Fuel Gas Code, ANSI Z223.1/NFPA 54– Latest Edition. • Be sure your cooktop is installed properly by a qualified installer or service technician. • To eliminate reaching over surface burners, cabinet storage above burner should be avoided. -
Page 3: Table Of Contents
Installation Over a Single Oven ..14 Safety Information result in a hazardous condition. If there are no codes, your cooktop must be wired and fused to meet the requirements of the National Electrical Code, ANSI/NFPA No. 70—Latest Edition. You can... -
Page 4: Installation Preparation
MODELS AVAILABLE ZGU385N 36 natural gas cooktop ZGU385L 36 LP gas cooktop These models are factory set for either natural gas or LP gas operation. Be sure to order the correct model for the installation situation. PARTS INCLUDED 2 Screws... -
Page 5: Advance Planning And Installation Options
Monogram cooktop. • Installation must conform with local codes. In the absence of local codes, the gas cooktop must comply with the National Fuel Gas Code, ANSI Z223.1, latest edition. • Gas supply should be located near the opening for this cooktop (see Preparing the Opening and Gas Connection sections of this manual). -
Page 6: Pre-Installation Checklist
(See section on preparing the opening.) 2. Slide the cooktop out of the end of the box. Remove packaging materials, grate boxes, regulator and literature package from the cooktop before beginning installation. -
Page 7: Dimensions And Clearances
2-1/2 min. from cutout to front of countertop Installation Preparation 3. Make sure the wall coverings, countertop and cabinets around the cooktop can withstand heat (up to 200°F) generated by the cooktop. 21-3/16 13 max. deep at center 12 min. -
Page 8: Gas Supply Locations
These cooktops are shipped from the factory set for either natural gas or LP gas. Check to be sure you have the correct cooktop for the type of gas being used. • The pressure regulator must be connected in series... -
Page 9: Installation Instructions
Installation Instructions INSTALL THE COOKTOP A. Remove the screws on the sides of the cooktop burner box. Use those screws to attach the side mounting brackets. B. Insert the cooktop centered into the cutout opening. Make sure the front edge of the countertop is parallel to the cooktop. - Page 10 ASSEMBLE BURNERS, CHECK IGNITION (cont.) D. Check igniters. Operation of the electric igniters should be tested after the cooktop and supply line have been carefully checked for leaks and the cooktop has been connected to the electrical power. • Push and turn a burner valve to the LITE position.
-
Page 11: Operation Checklist
OPERATION CHECKLIST 1. Make sure all controls are left in the OFF position. 2. The serial plate for your cooktop is located on the bottom of the burner box. In addition to the model and serial numbers, it tells you the... -
Page 12: Installation Options
COOKTOP INSTALLATION WITH A 36 MONOGRAM DOWNDRAFT VENT, MODEL ZVB36 The installation of the downdraft vent with this cooktop requires careful consideration. Both the cooktop and the vent must be installed according to each specific installation instruction. 21-11/16 cutout depth... - Page 13 2-1/2 min. 19-1/8 NOTE: When installing a Monogram Warming Drawer below a cooktop, a solid barrier must be installed at least 1 from the lowest point of the bottom of cooktop burner box to the top of cutout. See Warming Drawer Installation Instructions for details.
- Page 14 MODEL ZET1 OR ZET938 These cooktops may be installed over the Monogram ZET1 or ZET938 single oven. Both the cooktop and the oven must be installed according to each specific installation instruction. – Allow 4 Min. clearance from the top of the countertop to the top of the oven cutout.
- Page 15 ADJUST THE REGULATOR A. Disconnect all electrical power, at the main circuit breaker or fuse box. B. Shut off the gas supply to the cooktop by closing the manual shut-off valve. C. Adjust the pressure regulator by the following instructions: •...
-
Page 16: Installation Instructions For Natural To Lp Gas Conversion
The 34SL and flame at first, but this will soon disappear. 51SN are for all B. Turn the cooktop burner knob to “LO” while observing five burners. the flame. Adjust the setting of the upper row of flames using the... -
Page 17: Tools You Will Need
Natural Gas Operation A. Disconnect all electrical power, at the main circuit breaker or fuse box. B. Shut off the gas supply to the cooktop by closing the manual shut-off valve. C. Adjust the pressure regulator by the following instructions: •... -
Page 18: Adjusting Burner Flames
Foreign particles in the gas line may cause an orange flame at first, but this will soon disappear. The 34SL and B. Turn the cooktop burner knob to “LO” while observing 51SN are for all the flame. five burners. - Page 19 Information de la sécurité AVANT DE COMMENCER Avant de commencer, lisez attentivement la totalité de ces instructions. IMPORTANT • — Conservez ces instructions pour votre inspecteur local. IMPORTANT • — Respectez toutes les ordonnances et les codes locaux. • Note à l’installateur – Assurez-vous de laissez ces instructions au consommateur.
- Page 20 Information de la sécurité AVERTISSEMENT tout courant électrique au niveau du disjoncteur de la maison ou de la boîte à fusibles avant d’installer. La conception de votre table de cuisson a été approuvé par Underwriters Laboratories. Vous trouverez des précautions à prendre en matière de sécurité...
-
Page 21: Préparation À L'installation
MODÈLES DISPONIBLES ZGU385N Surface de cuisson au gaz naturel de 91 cm (36 po) ZGU385L Surface de cuisson au gaz PL de 91 cm (36 po) Ces modèles sont programmés en usine pour un fonctionnement au gaz naturel ou au gaz PL. -
Page 22: Options D'installation Et De Planification
Préparation à l’installation PLANIFICATION AVANCÉE • Consultez «Préparation de l'installation» pour des informations sur l’emplacement et les dégagements adéquats lorsque vous planifiez une installation. • Autant que possible, évitez de placer les armoires de cuisine directement au-dessus de la surface de cuisson. •... -
Page 23: Liste De Vérification De Pré-Installation
Préparation à l’installation LISTE DE VÉRIFICATION DE PRÉ-INSTALLATION 1. Lorsque vous préparez l’ouverture de la surface de cuisson, assurez-vous que l’intérieur de l’armoire et la surface de cuisson ne se nuisent pas. (Consultez la section «Préparation de l’ouverture»). 2. Glissez la surface de cuisson hors de la boîte. Retirez les matériaux d’emballage, les boîtes de grilles, le régulateur et la documentation avant de débuter l’installation. -
Page 24: Dimensions Et Dégagements
Préparation à l’installation DIMENSIONS ET DÉGAGEMENTS 1. Dimensions globales de la surface de cuisson : 93,3 cm (36-3/4 po) 51,6 cm (20-5/16 po) 9,5 cm (3-3/4 po) de profondeur au centre 2. Utilisez une armoire de base de 91,4 cm (36 po) de largeur ou plus. -
Page 25: Emplacements De L'alimentation De Gaz
Préparation à l’installation EMPLACEMENTS DE L’ALIMENTATION DE GAZ Alimentation de gaz : Ces surfaces de cuisson sont expédiée de l’usine prêtes à être utilisées avec le gaz naturel ou le gaz PL. Vérifiez que votre surface de cuisson est celle qui est appropriée au type de gaz utilisé. - Page 26 Instructions d’installation INSTALLEZ LA SURFACE DE CUISSON A. Retirez les vis des côtés de la boîte de brûleur de la surface de cuisson. Utilisez ces vis pour attacher les supports de fixation latéraux. B. Insérez la surface de cuisson centrée dans l’ouverture découpée.
- Page 27 Instructions d’installation ASSEMBLEZ LES BRÛLEURS, VÉRIFIEZ L’ALLUMAGE L’électrode du système d’allumage électronique se trouve au-dessus de la surface de la base du brûleur. Ne retirez pas un capuchon de brûleur et ne touchez pas l’électrode d’un brûleur lorsqu’un autre brûleur est allumé. Cela pourrait causer un choc électrique ou des dommages.
- Page 28 Instructions d’installation ASSEMBLEZ LES BRÛLEURS, VÉRIFIEZ L’ALLUMAGE (suite) F. Allumez chaque brûleur. Sur les modèles PL, les flammes doivent être de couleur bleue, mais les extrémités pourraient être jaunes. Les modèles au gaz naturel devraient présenter de douces flammes bleues. Les flammes du brûleur ne doivent pas trembloter ou s’éteindre.
- Page 29 INSTALLATION DE LA SURFACE DE CUISSON AVEC UN ÉVENT MONOGRAM DE 36 PO (91 CM) À COURANT DESCENDANT, MODÈLE ZVB36 Un grand nombre de facteurs sont à considérer si vous choisissez d’installer un évent à courant descendant pour cette surface de cuisson. L’installation tant de la surface à...
- Page 30 INSTALLATION DE LA SURFACE DE CUISSON AU-DESSUS D’UN TIROIR CHAUFFE-PLATS MONOGRAM, MODÈLE ZTD910 OU ZKD910 Ce type de surface de cuisson s’installe au-dessus d’un tiroir chauffe-plats de 76 ou 68,6 cm (30 ou 27 po). Tant la surface de cuisson que le tiroir sont à installer selon les instructions spécifiques du fabricant.
- Page 31 INSTALLATION DE LA SURFACE DE CUISSON AU-DESSUS D’UN FOUR SIMPLE MONOGRAM DE 76 CM (30 PO), MODÈLE ZET1 OU ZET938 Ces surfaces de cuisson doivent être installées selon les instructions spécifiques à chaque modèle, et ce, au-dessus du four simple Monogram ZET1 ou ZET938.
-
Page 32: Instructions D'installation
Instructions d’installation RENSEIGNEMENTS SUR LA SÉCURITÉ L’orifice de l’élément et le régulateur de pression sont établis en fonction d’une alimentation au gaz. Pour convertir la fonction du gaz naturel vers une fonction au propane liquide (PL) de la surface de cuisson, vous devrez changer l’orifice de l’élément ainsi que le régulateur de pression. -
Page 33: Instructions D'installation Pour
Instructions d’installation pour la conversion du gaz naturel au PL CHANGEZ LES ORIFICES DES BRÛLEURS (suite) IMPORTANT : Les orifices doivent être situés tels qu’indiqués sur le schéma. Veuillez lire attentivement et observer chaque orifice afin de les repositionner correctement. ORIFICES DU BRÛLEUR POUR... - Page 34 Instructions d’installation RENSEIGNEMENTS SUR LA SÉCURITÉ Le régulateur de pression ainsi que les orifices des brûleurs sont conçus pour fonctionner au propane liquide (PL). Pour convertir cette surface de cuisson du propane au gaz naturel, les orifices des brûleurs et le régulateur de pression devront être changés pour accepter le gaz naturel.
-
Page 35: Instructions D'installation Pour
Instructions d’installation pour la conversion du gaz PL au gaz naturel CHANGEZ LES ORIFICES DES BRÛLEURS (suite) IMPORTANT : Les orifices doivent être situés tels qu’indiqués sur le schéma. Veuillez lire attentivement et observer chaque orifice afin de les repositionner correctement. ORIFICES DU BRÛLEUR POUR... - Page 36 NOTE: While performing installations described in this book, safety glasses or goggles should be worn. For Monogram 1.800.444.1845. NOTE: Product improvement is a continuing endeavor at General Electric. Therefore, materials, appearance and specifications are subject to change without notice. REMARQUE : Portez toujours des lunettes de sécurité lorsque vous procédez aux opérations décrites dans ce manuel.