Table of Contents

Related Manuals for Mitsubishi Electric Mr.Slim Zuba Central


Summary of Contents for Mitsubishi Electric Mr.Slim Zuba Central
-
Page 1: Heat Pump
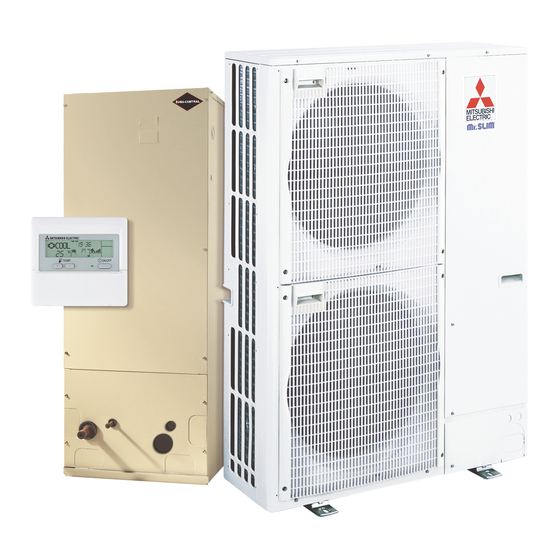
Zuba Central Heat Pump User Manual English Page 1 of 23... - Page 2 Introduction The Zuba-Central is a Heat Pump using Hyper Heat technology. The Zuba-Central consists of outdoor unit and multi position ducted air handling indoor unit which are connected together and controlled by a PAR 21MAA controller. Application Constant energy price increases in Canada and around the globe is increasing the consumer’s requirements to source more efficient ways to cool and heat their homes.
-
Page 3: Table Of Contents
Contents Safety Precautions Zuba-Central controller --PAR21MAA Screen Configuration Setting the Day of the Week and Time Operation Timer Error Codes indication User maintenance Safety Precautions • Before installing the unit, make sure you read all the “Safety Precautions”. • The “Safety Precautions” provide very important points regarding safety. Make sure you follow them. - Page 4 Warnings: • For appliances when installed should not be accessible to the general public. • The unit must not be installed by the user. Ask the dealer or an authorized company to install the unit. If the unit is installed improperly, water leakage, electric shock or fire may result.
-
Page 5: Zuba-Central Controller --Par21Maa
Zuba-Central controller Page 5 of 23... -
Page 6: Screen Configuration
How to use the Zuba-Central controller Screen Configuration Page 6 of 23... - Page 7 Screen Types For details on setting the language for the remote controller display, refer to section 8. Function Selection. The initial language setting is English. • Function Selection of remote controller: Set the functions and ranges available to the remote controller (timer functions, operating restrictions, etc.) •...
-
Page 8: Setting The Day Of The Week And Time
4. Setting the Day of the Week and Time Note: The day and time will not appear if clock use has been disabled at Function Selection of remote controller. 1. Press the or Set Time button (11) to show display [2]. 2. -
Page 9: Operation
5. Operation 5.1. Turning ON/OFFPress the ON/OFF button. • The ON lamp [1] and the display area will light up or come on. Note: When the unit is restarted, initial settings are as follows. Remote Controller settings Mode Last operation mode Temperature setting... -
Page 10: Temperature Setting
5.2. Mode select Press the operation mode ( ) button and select the operation mode displays in [2] above. Cool Mode Drying mode Fan mode Heating mode Automatic (cooling/heating) modeVentilation mode Only indicated on Wired remote controller when LOSSNAY connected 5.3. -
Page 11: Timer
6. Timer 6.1. For Wired Remote-controller You can use Function Selection of remote controller to select which of three types of timer to use: (1) Weekly timer, (2) Simple timer, or (3) Auto Off timer 6.1.1. Weekly Timer The weekly timer can be used to set up to eight operations for each day of the week. -
Page 12
1. Be sure that you are at a standard control screen, and that the weekly timer indicator [1] is shown in the display. 2. Press the Timer Menu button (12), so that the “Set Up” appears on the screen (at [2] ). - Page 13 Note: By setting the day to “Sun Mon Tues Wed Thurs Fri Sat”, you can set the same operation to be carried out at the same time every day.(Example: Operation 2 above, which is the same for all days of the week.) Page - 13 - of 23...
-
Page 14
5. Press the appropriate Set Time button (11) as necessary to set the desired time (at [5]). * As you hold the button down, the time first increments in minute intervals, then in ten- minute intervals, and then in one-hour intervals. 6. -
Page 15
1. Be sure that the weekly timer indicator is visible on the screen (at [1]). 2. Press the Timer Menu button (12) so that “Monitor” is indicated on the screen (at [8]). 3. Press the Timer On/Off (Set Day) button (9) as necessary to select the day you wish to view. - Page 16 The time setting is made in hour increments. Note: *1. Weekly Timer/Simple Timer/Auto Off Timer cannot be used at the same time. *2. The simple timer will not operate when any of the following conditions is in effect. The timer is off; the system is in malfunction state; a test run is in progress;...
- Page 17 2. Press the Timer Menu button (12), so that the “Set Up” appears on the screen (at [2]). (Note that each press of the button toggles the display between “Set Up” and “Monitor”.) 3. Press the ON/OFF button (1) to display the current ON or OFF simple timer setting.
-
Page 18
Press the Timer On/Off button (9) so that the timer setting no longer appears on the screen (at [7]). Press the Timer On/Off button (9) so that the timer setting becomes visible at [7]. Examples When ON and OFF times have both been set at the simple timer then, operation and display are as indicated below... - Page 19 Example 2: Start the timer with OFF time set earlier than ON time ON Setting: 5 hours OFF Setting: 2 hours This timer begins countdown when the air conditioner starts and shuts the air conditioner off when the set time has elapsed. Available settings run from 30 minutes to 4 hours in 30-minute intervals.
- Page 20 4. Press the Filter button (4) to lock in the setting. Note: Your entry will be cancelled if you press the Mode (Return) button (2) before pressing the Filter button (4). 5. Press the Mode (Return) button (2) to complete the setting procedure and return to the standard control screen.
-
Page 21
Hold down the Timer On/Off button (9) for 3 seconds. The “Timer Off” indication disappears (at 6), and the timer setting comes on the display (at 7). Alternatively, turn on the air conditioner. The timer value will appear at 7. Page - 21 - of 23... -
Page 22: Error Codes Indication
7 Error Codes indication If the ON lamp and error code are both blinking: This means that the system is out of order and operation has been stopped (and cannot resume). Take note of the indicated unit number and error code, then switch off the power to the system and call your dealer or service provider. -
Page 23: User Maintenance
User maintenance Clean or replace filter monthly during heating and cooling season Replace the filter annually. Caution • Before you start cleaning, stop operation and turn OFF the power supply. Cleaning the filters • Clean the filters using a vacuum cleaner. If you do not have a vacuum cleaner, tap the filters against a solid object to knock off dirt and dust.