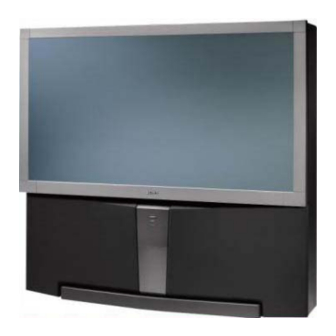
Sony KD-34XBR2 Operating Instructions Manual
Digital high definition tv
Hide thumbs
Also See for KD-34XBR2:
- Service manual (342 pages) ,
- Training manual (113 pages) ,
- Operating instructions manual (86 pages)
Table of Contents

Related Manuals for Sony KD-34XBR2


Summary of Contents for Sony KD-34XBR2
- Page 1 SON_. 4_o83_27 ©_00_ by sooy co_po_o,_ KD-34XBR2...
- Page 2 WARNING Note on Cleaning the W Clean the TV with a soft dry cloth. Never use strong solvents such To reduce tile risk of fire or shock hazard, do not expose the TV to as thinner or benzine, which might damag_ the finish of the rain moisture.
- Page 3 The model and serial numbers are provided on the front of this instruction manual and at the rear of the TV. Refer to them whenever you call upon your Sony dealer regarding _his product. Trademark Information Trugurround is a trademark of SRS l'l_Sltll_"...
- Page 4 Use only a cart or stand recommended For the set with a three-wire grounding type AC plu g by Sony for the specific model of TV. No part of This plug will only fit into a grounding-type...
- Page 5 Power-CordProtection Lightning Do not allow anything to rest on or roll over the For added protection for fi_is television receiver during a lightning power cord, and do not place the set where storm, or when it is left unattended and unused for long periods power cord is subject...
-
Page 6: Table Of Contents
Contents Introducing the Digital TV (DTV) Using the DTV Features Overview ............Overview ............. Presenting the FD Trinitron Wega ..... 1 Using the Program Guide ......34 Features ............Using the Scrolling Index ......35 Package Contents ......... Using Favorite Channels ...... -
Page 7: Overview
Overview This chapter gives an overview of the DTV features, defines package contents, describes the remote control, and provides answers to frequently asked questions. Topic Page Presenting the FD Trinitron Wega Features Package Contents Using the Remote Control Frequently Asked Questions Presenting the FD Trinitron Wega... - Page 8 Introducing the Digital TV (DTV) Features Some of the features that you will enjoy with your newDTV include: Built-in Digital Television (DTV) Receiver: You can watch digital television programs and enjoy the improved audio/video quality that these programs offer. Wide Screen Mode: Watch...
- Page 9 Introducing the Digital TV (DTV) Package Contents Along with your new digital TV, the package contains a remote control and two AA batteries. No additional cables are included. These items are all you need to set up and operate the DTV in its basic configuration.
- Page 10 Introducing the Digital TV (DTV) Button Descriptions The following table describes the buttons on the remote control's outside and inside panels. Outside Panel Button Description restore the sound. minutes (15, 30, 45, 60, or 90) that you want the DTV to remain on before shutting off automatically.
- Page 11 Introducing the Digital TV (DTV) Button Description Sound (MTS) options: Stereo, Auto SAP,and Mono. Also available in the Audio menu. For details, see page 51. _ _N _iii_i_; ..(GREEN) equipment you have programmed into the remote control. For instructions, see "Programming the Remote Control"...
- Page 12 0oo® Buttons Play "S op............... _1_ Fast-forward II Pause (press again to resume normal playback) ..exit from the menus. non-Sony video equipment. For details, see "Programming the Remote Control" on page 64. 0gWER ....Pi'es; _Mum on an8 equipment...
- Page 13 VHF/UHF programming via cable, you will need to install a VHF/UHF antenna in order to receive digital programming. Your Sony DTV, however, is also equipped with connectors that may allow you to connect DTV-compatible cable boxes when they become available.
- Page 14 Introducing the Digital TV (DTV) Can this TV receive Yes. This TV is designed to receive conventional analog broadcasts, conventional analog cable TV, as well as all formats of digital broadcasts. Of course, you broadcasts that are can also connect VCRs, DVD players, digital broadcast (satellite) receivers, and other audio/video components.
-
Page 15: Overview
Overview This chapter includes illustrated instructions for setting up your DTV. Topic Page Basic Connections Connecting a VCR and Cable Connecting a VCR and Cable Box Cmmecting Two VCRs for Tape Editing Connecting a gatellite Receiver Connecting a Satellite Receiver with a VCR Connecting an Audio Receiver Connecting... - Page 16 Connecting and Setting Up the D TV DTV Controls and Connectors Front Panel Controls The front panel provides convenient inputs for audio/video components you plan to connect temporarily, such as a camcorder digital camera. It includes several buttons that you'll also find on the remote control.
- Page 17 PB, PR) and audio (L/R) jacks. VIDEOIN 516 C6_iTFI6L S ........Aiiows remote controi signais b ..IN/OUT other Sony infrared-controlled audio or video components. DIGITAL AUDIO Com_ect to the optical audio input of an audio component that is Dolby OPTICAL OUTPUT Digital and PCM compatible.
- Page 18 Connecting and Setting Up the D TV Basic Connections This section describes how to connect a VHF/UHF antenna, CATV cable, CATV cable box. Connecting The connection you choose depends on the type of VHF/UHF VHFIUHF Antenna antenna you have in your home.
- Page 19 Connecting and Setting Up the D TV CATVCable Connecting a CATV CABLE Cable or a 75-ohm coaxial CATV Cable Box Bea_of DTV cable CATVCable Box Cable CABLE IN _OUT Cable Box...
- Page 20 Connecting and Setting Up the D TV Connecting a VCR and Cable Use this hookup if you have cable TV that does not require a cable box. Connect the cable TV cable to the VCR's IN jack. Using a coaxial cable, connect the VCR's OUT jack to the DTV's CABLE jack.
- Page 21 Connec_ng andSet_ngUpthe Connecting a VCR and Cable Box Use this hookup if Your cable TV company scrambles some channels, but not all of them (pay channels vs. regular cable channels), so you need use a cable box You want to use the Twin View or Scrolling Index feature.
- Page 22 Connecting and Setting Up the D TV (Continued from the previous page) Coaxial cable A/V cable 3 _ Ceaxia, cable VHFslJHF I GABLE CATV _UDIC Coaxial cable Splitter (not included) AUDIO-R (red)= AUDIO=L(white)= VIDEO (yellow)=...
- Page 23 Connecting and Setting Up the D TV Connecting Two VCRs for Tape Editing Connecting two VCRs together, then into the DTV, allows you to switch between the two to be sure that what you are playing on one is recording on the other.
- Page 24 Connecting and Setting Up the D TV Connecting a Satellite Receiver Connect the satellite antenna cable to the satellite receiver's SATELLITE IN jack. Using an A/V cable, connect the satellite receiver's Audio Video OUT jacks to the DTV's Audio and Video IN jacks.
- Page 25 Connecting and Setting Up the D TV Connecting a Satellite Receiver with a VCR Connect the satellite antenna cable to the satellite receiver's SATELLITE IN jack. Connect the CATV cable to the VCR's VHF/UHF IN jack. Using a coaxial cable, connect the VCR's OUT jack to the DTV's...
- Page 26 (Continued from the previous page) Connecting and Setting Up the D TV TOwatch satellite TV,or the VCR Press TVNIDE0 on the remote control to select the video input. (The DTV must be turned on.) To watch cable W Press TV/VIDE0on the remote control to select Cable.
-
Page 27: Connecting An Audio Receiver
Connecting and Setting Up the D TV Connecting an Audio Receiver For better sound quality, you may want to com_ect your DTV to your stereo system's audio receiver. To connectto an audio receiver Use audio cables to com_ect the DTV's Audio OUT jacks to the... - Page 28 Connecting and Setting Up the D TV Connecting a DVD Player with Component Video Connectors This is the preferred hookup to use if your DVD player has component video out jacks. Using three separate component video cables, connect the DVD player's Y, PB and PR jacks to the Y, PB and PR jacks...
-
Page 29: With A/V Connectors
Connecting and Setting Up the D TV Connecting a DVD Player with A/V Connectors Use this hookup if your DVD player does not have component video out jacks (as shown on page 22). Using audio cables, connect the DVD player's Audio OUT jacks to the DTV's Audio IN jacks. -
Page 30: Connecting A Camcorder
Connecting and Setting Up the D TV Connecting a Camcorder For easy connection of the camcorder, the DTV has front Audio Video inputs (shown below). If you prefer, you can connect camcorder to the DTV's rear Audio and Video IN jacks. _3 Using A/V cables, connect the camcorder's Audio and Video OUT jacks to the DTV's Audio and Video IN jacks. -
Page 31: Connecting A Device With
Connecting and Setting Up the D TV Connecting a Device with an Optical IN Connector You can use the DTV's DIGITAL AUDIO OPTICAL OUTPUT jack to connect an audio device that is Dolby Digital and PCM compatible, such as an audio amplifier. Using an optical cable, connect the device's OPTICAL IN jack to the DTV's DIGITAL AUDIO OPTICAL OUTPUT jack. - Page 32 "About i.LINK" on page Using i.LINK Cables This DTV has two 4-pin $200 i.LINK terminals. You can use any of the following i.LINK cables with the DTV: &pin i.LINK cable Sony Model Number Length VMC-IL4415 1.5 meters VMC-IL4435 3.5 meters...
- Page 33 Video OUT jacks to the DTV's Audio and Video IN jacks. Using an i.LINK cable (see page 26), connect the device's i.LINK jack to either of the DTV's i.LINK jacks. cable Sony digital cable set-top box AUDIO-R AUDIO-L VIDEO (...
- Page 34 Connecting and Setting Up the D TV Notes on Connecting To connect two or more i.LINK-capable devices, use i.LINK L LINK Devices cables to connect them as shown bebw. I,UNK iiINK You can connect up to 63 i.LINK devices. However, maximum number of cables...
- Page 35 Connec_ng andSet_ngUpthe Comple_ng LLINK Before you can use an i.LINK device with the DTV, you need to Setup register the device as follows. After you've connected the cables (as described on page 26), first turn on the DTV, and then turn on the i.LINK device(s). following screen automatically appears.
-
Page 36: Using The Controls Feature
Connecting and Setting Up the D TV Using the CONTROL S Feature CONTROL S allows you to control your system and other Sony equipment with one remote control. In addition to allowing you to control multiple devices with one remote control, the CONTROL... -
Page 37: Setting Up The Dtv Automatically
Connec_ng andSet_ngUpthe Setting Up the DTV Automatically The first time you turn on the DTV, a series of screens guide you through the initial setup of the DTV. During this setup, you are prompted to set the clock and start Auto Program, which searches for and stores a list of analog and digital channels you are receiving... - Page 39 Overview This chapter describes how to use feat,.ires of your DTV. Topic Page ih_'_ ................ _ .................._ ..........
-
Page 40: Using The Dtv Features
Using the DTV Features Using the Program Guide The Program Guide lets you select digital channels and subchannels and review program information from an on-screen list. Subchannels are additional channels of programming broadcast simultaneously. For example, channel 4 might include six subchannels (4.1, 4.2, 4.3, 4.4, 4.5) that are showing... -
Page 41: Using The Scrolling Index
Using the DTV Features Using the Scrolling Index The Scrolling Index lets you select programs from a scrolling index video pictures. Press INDEX. The Scrolling Index appears, with the currently selected program in the main (left) window, and four scrolling video pictures in the right. -
Page 42: Using Favorite Channels
Using the DTV Features Using Favorite Channels You can store up to 16 of your favorite channels in the Favorite Channels list. You can use the Surf Favorites feature to preview select channels directly from the list. You can also edit the Favorite Channels list to change the channels... - Page 43 Using the DTV Features SURE Press Surfing the Favorite Channels List The Surf Favorites screen appears, with the currently selected program in the main (left) window. D TheIetter"C" indicatesthat the FavoriteChannelis a cable channel Main Window Window Channels To see a preview of a program on your Favorite Channels,...
- Page 44 Using the DTV Features MENU. Press Editing the Favorite Channels List Move the joystick to highlight the Channel Setup icon _ press Move the joystick to highlight Favorite Channels and press The Favorite Channels list appears. [he Ietter "C" indicates that the Favorite Channelis a cable channel.
-
Page 45: Using Wide Screen Mode
Using the DTV Features Using Wide Screen Mode Wide Screen mode lets you watch 4:3 normal broadcasts in several Wide Screen modes (16:9 aspect ratio). _1_Youcan also access the Press WiDE MODE repeatedly to toggle through the following Wide Mode settings. Wide Modesettingsinthe ScreenModemenu,Fordetails, Wide Zoom enlarges... -
Page 46: Using Twin View
Using the DTV Features Using Twin View Twin View lets you see two pictures from two sources -- from an antenna, VCR, DVD, etc., -- on the screen at the same time. (You hear the sound from only one of the sources at a time. You choose which source's sound is selected.) You can change the relative size of each of the pictures. - Page 47 Using the DTV Features Activating With Twin View, the picture highlighted in blue is active. In the active Picture picture, you can: Change channels. Adjust the volume. Switch the input sources (to go from UHF/VHF to cable, example, press ANTor W/VIDE0 on the remote control).
- Page 48 Using the DTV Features Changing The zoom feature lets you vary the relative size of the left and right Picture Size pictures. Activate the picture whose size you want to change. Move the joystick tt to enlarge the picture. Move the joystick I_ to make the picture smaller.
-
Page 49: Using The Freeze Function
Using the DTV Features Using the Freeze Function The FREEZE b utton allows you to temporarily capture a program's picture. You can use this feature to write down information such as phone numbers, recipes, etc. When the program information you want to capture is displayed, press the FREEZE button. - Page 50 Using the DTV Features Using the LLINK Control Panel The i.LINK Control Panel lets you see a list of i.LINK devices that are connected to and communicating with the DTV. _I_ Youcan also access the To display the i.LINK Control Panel, press the _ button. LLINKControIPanelusingthe the !, buttonon the DTV's front The i.LINK Control Panel appears,...
-
Page 51: Using The Timer
Using the DTV Features Using Timer You can use the Timer to program the DTV to turn on and off and tune to a specific channel at two scheduled viewing times. The first time you turned on the DTV, a setup screen prompted you to set the clock (see "Setting Up the DTV Automatically"... - Page 52 Using the DTV Features Move the joystick tt and 4 to set the day(s), time (hour, minute, AM/PM), duration, and channel number. Press O or ,_ to confirm each setting and move to the next setting. Press _, to go back to the previous setting.
- Page 53 Overview Toopenandchoose a menu Press MENUto display the ment_ screen. Move the joystick It or It to highlight the icon of the menu you want to select and press G. Move the joystick tt or 4 to scroll through the options. See the specific menu page for instructions on moving through...
-
Page 54: Using The Dtv Menus
Using the D TV Menus Using the Video Menu TOselect the Video menu Press MENU. Move the joystick tt or It to highlight Video icon _ and press Move the joystick It or It to scroll through the features. Press @ to select a feature. That feature's adjustment appears. - Page 55 Using the D TV Menus Option Description Adjust to increase or decrease the green tones. Sharpness Adjust to sharpen or soften the picture. Color Choose from three color temperatures: Cooi ........ geiecl: i _o give mewi_ii_e c olorsaglue _ini: ....Temperature White Neutral...
-
Page 56: Using The Audio Menu
Using the D TV Menus Using the Audio Menu To select the Audio menu Press MENU. Move the jo_ck 4"or _1, t o highlight Audio icon _ and press @. Move the joystick tt or _1, t o scroll through the options. - Page 57 Using the D TV Menus Option Description TO changefrom one MTS M:rS ......Stei:eo ....... Mode to another, use the Enjoy stereo, program broadcast in stereo. MTS/SAP button on the remote bilingual and Auto SAP..........control, mono programs second audio programs when a signal is received.
-
Page 58: Using The Screen Mode Menu
Using the D TV Menus Using the Screen Mode Menu To select the Screen Mode menu Press MENU. _WBUtWWm Move the joystick tt or It to highlight Screen Mode icon _ and press 0. Move the joystick It or It to scroll through the features. - Page 59 Using the D TV Menus Option Description Vertical Center Allows you to move the position of the picture up and down in the window. (Available only in Wide Zoom and Zoom modes.) Move the joystick tt or t_,to choose a position and press ®.
-
Page 60: Using The Channel Setup Menu
Using the D TV Menus Using the Channel Setup Menu TOselect the ChannelSetup menu Press MENU. Move the joystick _t o1"• to highlight Channel Setup icon _ and press Q. Move the joystick tt or _!,to scroll through the features. Press Q to select a feature. - Page 61 Using the D TV Menus Option Description Channel Allows you to customize the channel list that appears Skip/Add when using the CH+/- buttons on the remote control. The DTV maintains separate channel lists for digital and analog channels. Digital Select to add or skip digital channels.
-
Page 62: Using The Parental Control Menu
Using the D TV Menus Using the Parental Control Menu The Parental Control menu allows you to set up the DTV to block programs according to their content and rating levels. These ratings are assigned by a federal rating board. Not all programs are rated. - Page 63 Using the DTV Menus The Parent menu includes the following options. Using the Parent Menu Option Description Parental Lock Parental lock is off. No programs _'_1_ If you arenot familiar with Turn ratings blocked from viewing. the Parental G uidelinerating system, y ou shouldselect(hi}d, on/offandselecta Child...
- Page 64 Using the D TV Menus United States: For the United States, the Custom Rating Menu includes Selecting Custom following options. (For Canada, see page 59.) Rating Options Option Description Movie Rating All children and General Audience. Parental Guidance suggested. PG-13 Parental Guidance for children...
- Page 65 Using the D TV Menus Canada: For Canada, the Custom Rating Menu includes the following options. Selecting Custom (For the US, see page 58.) Rating Options Option Description EnglishRating All children. Children 8 years and older. General programming. Parental Guidance. Viewers 14 and older.
-
Page 66: Using The Setup Menu
Using the D TV Menus Using the Setup Menu To select the Setup menu Press MENU. Move the joystick tt or It to highlight Setup icon _ and press O" Move the joystick It or It to scroll through the features. Press @ to select a feature. -
Page 67: Using The I.link Control Panel
Using the D TV Menus Option Description Video Input Allows you to select labels to help you recognize devices _l_ Youcan atso usethe connected to the audio/video jacks on the DTV. For VideoInput optionto assign example, if you have a DVD player connected to the video inputsto LLINKdevices. - Page 68 Using the D TV Menus Youcan alsoaccess the Timer Opt!on ......DeScdpti°n ....................using the TIMERbutton on the Set Clock/Timers Select to set the clock and to program your DTV to turn on remote control, and off at two scheduled viewing times.
- Page 69 Overview This chapter ilacl_des the following topiCS: ..........Topic .......... :_ _rol ........to' ra_i_ the Re_ote'_O_ ......_;t_e_ 4o6p_,nentS with...
-
Page 70: Other Information
Other Information Programming the Remote Control The remote control is preset to operate Sony brand video equipment. Sony Switch Position Programmable Equipment on Remote Control Code Number Beta, ED Beta VCRs 8 mm VCR VHS VCR DVD Player If you have video equipment... - Page 71 In some cases, you may not be able to operate your component with the Sony remote control. In such cases, use the component's own remote control unit. Whenever you remove the batteries...
- Page 72 Other Information Manufacturer's Codes Ma_ii_ac_ii_-_code ..........DVD Players ......_? ........Maliiifa_ttire_ Cb¢le......VCRs P_ifi_ik;n_c ....308, 309_3063 ..S_n); ........73i......... Magii{a(:NNi: Cgde ......GE ........755 ........ S_i_) ..........30i ............i_en}ax ........303 3()4........}:ili:a_{ ......... 758 .........
-
Page 73: Operating Other Components With Your Dtv Remote Control
Other Information Operating Other Components with Your DTV Remote Control Operating a VCR Move the slide switch to the position you programmed for the VCR. To Do This ... Press Turn on/off POWER Select VCR W/VIDEO Change channels CH +l- Record II_ and RECsimultaneously. - Page 74 Other Information Operating a Cable To Do This ... Press SATICABLE ( green POWER button) Turn on/off Select Cable Box SATICABLE ( white FUNCTION button) Select a channel 0-9 buttons, ENTER Change channels CH +I- Back to previous channel JUMP Operating a Satellite Receiver...
-
Page 75: About I.link
About the Name i.LINK is Sony's term for the IEEE 1394 data transport bus, and is a L LINK trademark approved by many corporations. IEEE 1394 is an international... -
Page 76: Troubleshooting
No picture If your DTV does not turn on, and a red light keeps flashing, your DTV (screen not lit), may need service. Call your local Sony Service Center. no sound Make sure the power cord is plugged Push the power button on the front of the DTV. - Page 77 If, after reading these operating instructions, you have additional questions related to the use of your Sony television, please call our Customer Information Services Center at 1-800-222-SONY (7669) (U.S. residents only) or (416) 499-SONY (7669) (Canadian residents only).
-
Page 78: Specifications
Other Information Specifications Picture ...................... Tube FD Tr{n{tron ®tulle ..............................Antenna 75 ohm external terminal for VItF/UHF Television System NTSC, American TV Standard, ATSC Channel Coverage 1-99 2-13 14-69 CATV 1-125 Power Requirements 120V, 60 Hz Inputs/Outputs Vide<) (IN) 4 total (1 on front panel) 1 Vp-p, 75 ohms unbalanced, sync negative S Video (IN) -
Page 79: Index
Index 0 - 9 buttons Channel Logo, setting 3-D sound, setting Channel Setup menu 47, 54 4:3 aspect ratio 39 Channel Skip/Add, setting 4:3 Default settings channels, changing clock, setting closed caption modes 47, 60 ADD FAVORITE button 4, 36 CODE SET button Alternate... - Page 80 Index Fast-forward button Favorite Channel labels, assigning to video inputs clearing Language, setting editing logos, assigning to channels exiting using 36-38 features MDP, using with TV remote control Fixed, Audio Output setting MENU button 4, 6, 10 FREEZE button 4, 43 menus Freeze, using...
- Page 81 Index Pro,Picture Modesetting 48 Stereo setting 51 problems, troubleshooting 70-71 Stop button Program Guide, s ee Guide SURF FAVORITE button SURF FAVORITES button ratings, setting 56--59 ratings, viewing blocked programs tape-to-tape editing rear panel connectors, described Tilt Correction, setting Record buttons tilt, correcting remote...
- Page 82 Index Wega, described Welcome screen what is digital TV? 7 Wide Wide Mode WIDE MODE button Wide Screen mode Wide Screen, described Wide Zoom mode, setting zoom feature, with Twin View Zoom mode, setting...