Table of Contents
Quick Links
Table of Contents

Related Manuals for GE VG4065


Summary of Contents for GE VG4065
- Page 1 LIBRARY: Received Copied Entered LIS _ NRPD Received Scanned Batch #...
- Page 2 WARNING REMOVE COVER (OR BACK). NO USER SERVICEABLE To reduce risk of fire or TO REDUCE THE RISK OF ELECTRIC SHOCK, DO NOT PARTS INSIDE. REFER SERVICING TO QUALIFIED SERVICE PERSONNEL. shock hazard, do not This symbol indicates "dangerous expose this product to rain or moisture.
-
Page 3: Table Of Contents
First Things First ............. Using the QuickSet Guide ..........Setting ............Using On-screen Menus to Set up Features ....Language Selection ............ Cable Box Setup ............VCR Channels List ............. Auto Channel Search ..........Changing the Signal Type ........Adding or Removing Channels ...... - Page 4 Program Remote ........... Controlling Other Devices ..........Programming the Remote to Control a -IV ..... Operating the IV ............Other Features ............... Picture Search Options ........... Forward and Reverse Search ........Slow Motion .............. Frame Advance ............Index Search .............. Zero Search ...............
-
Page 5: First Things First
Welcome to Your New VCR... FIRST THINGS FIRST To help you get started using your VCR with as little reading as possible, we've put all the basic information needed in the first three sections. To help you along, there's even a QuickSet Guide first time you turn... - Page 6 Step 1: What's in the Box? The following items come packed in the box: Remote control RF coaxial cable Step 2: Install Batteries in the Remote Control Follow these steps whenever you need to install or change the batteries in your VCR's remote. Remove the cover of the battery compartment.
-
Page 7: Using The Quickset Guide
Step 5: Tune the TV Tune the TV to the VCR viewing channel. The VCR viewing channel is channel 3 or 4 or the TV's video input, If you connect your VCR using the IN (FROM ANT.) and OUT (TO TV) jacks with RF coaxial cable, set the 3 CH 4 switch to channel 3 or channel 4 -- the channel you want to use on your TV. - Page 8 if the menu does not appear: Make sure the TV is tuned to the same channel as the 3 CH 4 switch or its video input (see page 55 for more information). Make sure the VCR indicator is on in the VCR display if you connected your VCR using the IN (FROM ANT.) and OUT (TO TV) jacks.
-
Page 9: Setting Up The Vcr
Additional Set-up Features Below is a list of features that need to be set up before using your VCR for the first time. Many of these menus are covered during the initial up, but if you ever want to change a menu, refer to this section. -
Page 10: Using On-Screen Menus To Set Up Features
Using On-screen Menus to Set up Features You can set up your VCR's features by using the remote control's buttons to enter your choices from on-screen instructions. Each menu.item is explained in this section. For each numbered selection on the menus, use the same numbered button on the remote control to select it. -
Page 11: Cable Box Setup
Cable Box Setup This set up applies only when all channels are received through a cable box. In this case, the VCR will automatically enter the channel used to view cable box programming. Your VCR will use this channel for all future timer recordings. Press MENU to display the VCR MAIN MENU. -
Page 12: Vcr Channels List
CABLE BOX SETUP CABLE SETUP On what channel does what channel does receive signals receive signals from cable box? from cable box? (usually Video) (usually video) Press CLEAR correct Enter 01-13 INPUT Press MENU continue Press MENU cancel Once you complete the setup, the VCR confirms that the VCR will now receive all signals on the designated... - Page 13 CHANNELS Auto Channel Search Add/Remove Channels Signal Type: CABLE PLus+ Channel list Cable Setup Exit Press 1 to display the AUTO CHANNEL SEARCH menu. AUTO CHANNEL SEARCH What type signal using? Cable 2 Antenna 3>Detect Automatically Cancel Select one of the three AUTO CHANNEL SEARCH options, your choice will be marked with an arrow symbol at the left: Cable TVsearches...
-
Page 14: Changing The Signal Type
Changing the Signal Type Press MENU to display the VCR MAIN MENU. Press 4 to display the CHANNELS menu. Press 3 to change the Signal Type between CABLE and ANTENNA. Adding or Removing Channels You may want to add or remove channels after you Auto Channel Search, especially if some of the channels have weak signals or you don't want to watch them. -
Page 15: Auto Clock Set Feature
Auto Clock Set Feature The Auto Clock Set feature is set to ON at the factory. In the ON setting, the VCR looks for a channel carrying XDS (Extended Data Services) information. XDS updates the clock using the Coordinated Universal ]]me. -
Page 16: Setting Daylight Saving Time
If "Automatic" is selected for the time zone, the VCR sets the clock using the first Coordinated Universal Time information finds. If the time is not correct, select another time zone or set the time and date through the menu system. Setting Daylight Saving... - Page 17 TIME Time Date Auto Clock Set: Time Zone Daylight Savings Time Data found Exit Press 1 to display the SET TIME AND DATE menu. TIME DATE Time --:-- (hh:mm) Date --/--/-- Press MENU cancel Enter the data using the number buttons.
-
Page 18: Vcr Plus+ System Channels
VCR Plus+ ® System Channels Using the VCR Plus+ system makes programming timer Two-Digit VCR Plus+ System recordings for cable or off-air antenna easier, but you Channel Numbers have to put in a little time right now to set up a channel list. Cable TV (Canadian List) -
Page 19: Vcr Plus+ System Worksheet
VCR Plus+ System Worksheet Channel Number Broadcastor Two-Digit VCR Plus+ System VCRPlus+ You Receive the Cable-TV Station Name Channel Number** Channel Numbers Station On* Cable TV (Canadian List) ESPN Allarcom Pay Television/ Superchannel Arts & Entertainment Cable News Network- Headline News Cable News... -
Page 20: Additional Set-Up Features
Remote VCRI/VCR2 Option If you own a compatible GE, RCA, or PROSCAN remote that has a VCR2, VCR2oLD, or VCR2.DVD button, this feature allows you to set this VCR to respond to that button. Press 1 to select the Remote Control item. Then press the VCR2, VCR2°LD, or VCR2°DVD button to change. -
Page 21: Auto Play
The VCR will only respond to the compatible remote's VCR2, VCR2oLD, or VCR2°DVD button. If you change the remote setting to VCR2, the remote that came with your VCR will no longer control it. Use the compatible remote to change the remote setting back to VCRI. -
Page 22: Energysaver
EnergySaver By default, this VCR automatically turns off after two hours of PREFERENCES inactivity. Press 4 to change the time delay, or to disable the Remote Control: VCR1 Auto Play: feature. Auto TV/VCR: EnergySaver: 2:00 Front Panel: AUTO OFF: The VCR will remain turned on until you shut it off. -
Page 23: Vcr Basics
Learning Basics to Get Started These VCR basics should be enough for you to begin enjoying your VCR. Learning the remote control functions, playing a recorded tape, and recording program should do just that. This section shows you the basics of using your VCR. -
Page 24: Remote Buttons
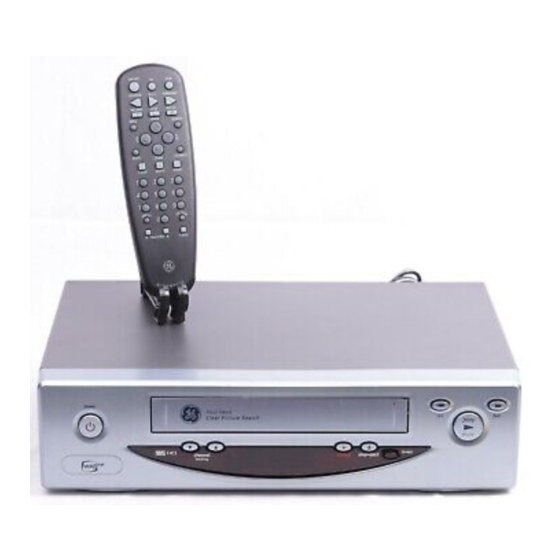
Buttons The remote control is capable of controlling your VCR and many (2) 00 brands of televisions. If you have a GE, RCA or PROSCAN "iV, you may be able to control it without having to program remote. REVERSE PLAY FORWAR[ <]DE>... -
Page 25: Tv Function Buttons
INPUT Selects between the TV's input channel or tuner, Press The TV buttons may not control all to see the VCR signal if you connected your VCR using the features of all models of GE, RCA, AUDIO/VIDEO jacks. TV Buttons or PROSCAN TVs. -
Page 26: Playing A Tape
Playing a Tape Tune the TV to your VCR viewing channel (3, 4, or TV's video input- see page 55 for more about the video input channel). Insert a tape in the VCR. If the Auto Play feature is set to ON, the tape automatically begins playback (if the safety tab on the cassette is removed). -
Page 27: Tape Eject
Tape Eject Press STOP,EJECT on the VCR or press and hold STOP on remote for three seconds when the VCR is in stop mode to eject the tape. A tape can be ejected even when the VCR is off. Recording If you want to record something that you're watching, you can... -
Page 29: Recording
Several Recording Options Now that you've gone through the necessary steps to operate your VCR, it's time to explain the different recording features available to suit your needs including: Recording (explained VCR Basics section) ¥ Express Recording • Timer Recording ¥... -
Page 30: Recording Features
Recording Features There are four ways to record programs: Recording press RECORD to start recording a program. (See VCR Basics section.) Express Recording (XPR) starts recording a program are watching. You can then set the VCR to automatically stop recording after a designated period of time. -
Page 31: Timer Recording
Timer Recording You can set up as many as eight timer recording programs. Press MENU to display the VCR MAIN MENU. MA1N MENU 1VCR Plus+ Timer Recordings Time Channels 5 Setup Preferences Language Exit Press 2 to display the TIMER RECORDINGS menu. TIMER RECORDINGS Create... -
Page 32: Timer Recording With The Vcr Plus+ System
The data includes the channel number (press INPUT to select the line input), start time and end time (including AM or PM). The start date is automatically entered based on the VCR clock. The date and/or speed can be changed when flashing. Review the information to make sure it is correct, and then press MENU to save. - Page 33 PLUS+ Enter PtusCode Number (from Listing) Press MENU cancel Enter the PlusCode ® programming number shown in your local television guide. PLUS+ Enter PLusCode Number (from Listing) 12876 Press CLEAR correct Press NENU when done Press MENU to enter the VCR PlusCode system number. often should this...
-
Page 34: Stopping A Timer Recording
Press MENU to save the program. Program 1 has been saved Remember insert recordabLe tape turn before program start time. Remember Leave your cable tuned desired channel Stopping a Timer Recording To stop or cancel a timer recording in progress (even an express recording): Press and hold the STOP button for a few seconds. -
Page 35: Copying And Editing Tapes Using Two Vcrs
Copying and Editing Tapes Using Two VCRs Use one VCR as the playback VCR and the other as the recording VCR. 1. Connect the VCRs using the diagram below. 2. Turn on both VCRs and TV. 3. Tune the TV to the VCR viewing channel (either 3, 4, or TV's video input). -
Page 37: Program The Remote
Control your Television The remote can be programmed to control a television. ¥ It is programmed to control a GE, RCA, or PROSCAN TV. Other manufacturer's brands need to be programmed. PROGRAM THE REMOTE... -
Page 38: Controlling Other Devices
TVs. It is already programmed to operate most GE, RCA, and PROSCAN televisions. Programming the Remote to Control a TV If the TV does not turn on when you press the TV button, remote needs to be programmed. - Page 39 EIectrohome ....06,12 Radio Shack .... 01,05,13 Emerson ......RCA ......01,06,12 Envision ....... 05,06 Realistic ......Fisher ......05,08 Sampo ....... GE ...... 00,01,06,11 Samsung ....06,09,12 Goldstar ....... 06,12 Hallmark......Sanyo ......05,08 Sears ....01,05,06,07, Hitachi ......06,14 08,10,12 Infinity ......
-
Page 41: Other Features
Features to Enhance VCR Operation Picture Search Options Commercial Scan Tracking ¥ Pro-Tect Plus Locking Time Counter On-Screen Displays ¥ OTHER FEATURES ¥... -
Page 42: Picture Search Options
Picture Search Options The most basic way to search during playback is using the FORWARD or REVERSE button on the remote control. This section contains several other options available for searching tape. Forward and Reverse Search You can search a tape during playback. Sound is turned off during picture search. -
Page 43: Index Search
Index Search The VCR has a "VHS Index Search System" that automatically records an index mark on the tape every time you start a recording. INDEX SEARCH During playback you can locate the program you want to play Press by the number of index marks or by scanning. -
Page 44: Commercial Scan (Search Button)
Press STOR ZERO SEARCH Press SEARCH on the remote twice to display the ZERO Current tape counter 2:17:25 SEARCH menu. Press Press REVERSE to return to 0:00:00 on the tape. 0:00:00 Press SEARCH exit Commercial Scan (Search Button) ZERO SEARCH This is useful for skipping commercials or short program... -
Page 45: Time Counter
Time Counter The time counter shows the actual time it takes to record a program or play back a segment of a recorded tape. It helps locate the beginning or end of programs you taped. The time counter resets to 0:00:00 whenever the tape is ejected from the VCR. -
Page 47: Connections
Things to Know Before Connecting Components Protect Your Components from Power Surges Connect all components before plugging power cords into the wail outlet. Always turn offthe TV and other components before you connect or disconnect any cables. Position Cables Correctly to Avoid Audio Hum or Interference Insert all cable plugs firmly... -
Page 48: Connecting The Vcr
Connecting the VCR Refer to these pages to help you connect your VCR. Jacks and Cables RFJacks and Coaxial Cables (F-type) jacks The RF provide good picture and menu sound quality, and must be used if audio/video connections are not available for your TV. -
Page 49: Choosing A Vcr Connection
Choosing a VCR Connection There are several different ways to connect your VCR, depending on whether or not you have cable service, and if you have a cable box, and whether some of the channels are scrambled, and maybe you have a satellite receiver along with cable (but no cable box), or a satellite receiver and no cable... -
Page 50: Tv With Rf Jack Only
TV with RF Jack Only This connection assumes: You are connecting antenna, cable, or cable box system. Your television has only an RF input jack. This connection provides: Menu sound playback from VCR. Record one channel while watching another (except when using a cable box for all channels). -
Page 51: Tv With Audio/Video Jacks
TV with Audio/Video Jacks This connection assumes: You are connecting an antenna, cable, or cable box system. Your television has audio/video jacks. This connection provides: Mono sound playback from VCR. Record one channel while watching another (except when using a cable box for all channels). To me this connection, must... -
Page 52: Used To Unscramble Pay Channels Only
TV with Audio/Video Jacks and Cable Box Used to Unscramble Pay Channels Only This connection assumes: You are using a cable box only to unscramble premium channels. Your TV has audio/video input jacks. This connection provides: Mono sound playback from VCR. Recording a scrambled or unscrambled... -
Page 53: Reference
References This section gives you some additional information ¥ about the VCR, including a description of the unit's controls and display. You also will find a Troubleshooting Tips section this Appendix, which might help to resolve some ¥ those simple problems. -
Page 54: Front Panel
Front Panel Remote Sensor CHANNEL TRACKING Up or Down Selects next higher or lower channel in the VCR's charmer memory. Adjusts tracking when e tape is praying. Press both together to recenter tracking. Forwards the tape when the VCR is stopped. Searches the picture forward during playback. -
Page 55: Display Panel
Display Panel Channel Number or Line Input Indicator The channel number appears when the VCR is tuned to a channel. The line indicator (L) appears when the VCR's line input is selected. Status Indicators Show what the VCR is doing. •... -
Page 56: Back Panel
Back Panel (FROM ANT.) AUDIO CH 3<>4 Switch Selects the channel to which you will tune the TV to see the VCR picture if you connect the VCR using one of the basic hookups. AUDIO and VIDEO IN Jacks Receives signals from another component, like a VCR or camcorder, when it is connected to these jacks. -
Page 57: How To Find Your Tv's Video Input Channel
Below are some steps to try: If your TV brand is GE, RCA, or PROSCAN, press the TV button on the remote control that came with the VCR. Then press the INPUT button on the remote. If you have another... -
Page 58: Troubleshooting -Iqps
Troubleshooting Tips No power Check to make sure it is plugged into an operating outlet. Check to make sure your connections are correct. VCR does not respond to remote Check to make sure there are no objects between the VCR and remote. - Page 59 Time counter not working or time counter not working in search modes The time counter does not advance during unrecorded portions tape. When an unrecorded segment of tape is encountered, time counter will hold its count until recorded material is detected again.
- Page 60 Wgl not record Check to make sure the safety tab is intact. Check to make sure the VCR is not in the line mode. Press INPUT on the remote. Internal clock shows incorrect time or date Power interruption. Make sure cable box or VCR is tuned to channel carrying the XDS information.
- Page 61 TIMER indicator flashes Clock is not set. Check to make sure there is a cassette in the VCR when a timer recording is set. Time counter disappears during searching This is normal. On-screen menus appear in English, French, or Spanish Check LANGUAGE feature.
-
Page 62: Specifications
Specifications Format: Record/Playback Video: 4-head System: Audio: Mono record/playback system Video Signal System: EIA standard: NTSC color Antenna: 75-ohm external VHF/UHF combined antenna terminal Tuner: USA: 181 channels capability* (125 cable channels) Canada: 178 channels capability* (122 cable channels) Type: AutoProgramming frequency synthesis... -
Page 63: Limited Warranty
What we will do: Pay any Authorized GE VCR Service Center the labor charges to repair your VCR. Pay any Authorized GE VCR Service Canter for the new or, at our option, refurbished replacement parts required to repair your VCR. -
Page 64: Index
Commercial scan Component buttons Accessories Connecting components included Connecting the VCR 4, 46 Adding/removing channels Connections Audio/video cables 45, 47, cables AUDIONIDEOjacks 5, 9, 22, 46, 47, 49, 54, 55 TV with jacks Auto channel search TV with RF jack only Auto clock feature 12, 13... - Page 65 PLAY button 23, 24, 40, 43, 48, 49, 50, 52 PLAY PAUSE button IN (FROM ANT.)jack 4, 19, 46, 54 Playing a tape Included accessories Plugging in the VCR 4 Index search POWER button 5, 24, 52 INFO button 22, 41, 43 Power surges INPUT button...
- Page 66 Status indicators (Cont.) SAFE 53 SAFE display SRCH and SRCH- 53 Safety STOP 53 Search STOP button 23, 25, 28, 41 commercial scan STOPoEJECT button 25, 52 forward and reverse frame advance index slow-motion Tape eject zero Tape, playing SEARCH button 23, 41 Tape speed Time and date...
- Page 67 Plus+ (Cont.) menu recording system channel numbers worksheet for channels VCR viewing channel VCR1 button VCR2 button VHS index search system VOL buttons 24, 36 Warranty XPR (Express Recording) Y-adapter Zero search...
- Page 68 If your VCR needs service, please contact your dealer or the nearest Servicenter from the yellow pages• Please do not send any products to the Indianapolis address listed in this manual or on the carton. This will only add delays in service for your product.