Table of Contents
SLUDENG COMPOUND
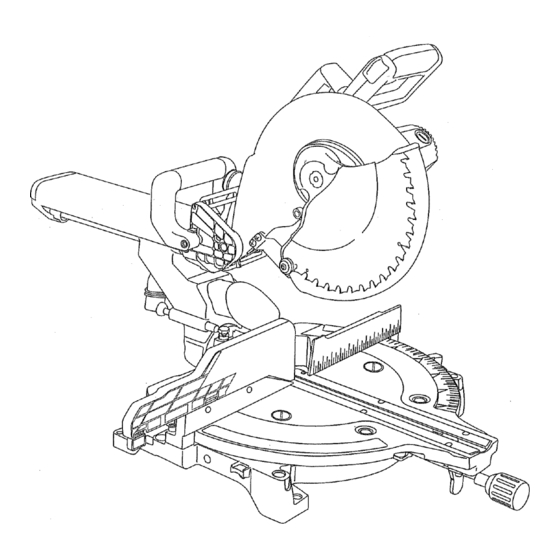
M_TER SAW
E82443
C@US
37J2 LISED
CAUTION:
Before using this Sliding Miter Saw,
read this manual and follow all its
Safety Rules and Operating
Instructions.
o Safety Instructions
o Installation
o Operation
o Maintenance
o Parts List
o EspaSol
Customer
Help
Line
1 o800o843o1682
Sears,
Roebuck
and Co., Hoffman
Estates,
IL 60179
USA
Part No. 137212920002
Table of Contents

Related Manuals for Craftsman 137.212920


Summary of Contents for Craftsman 137.212920
- Page 1 SLUDENG COMPOUND M_TER SAW E82443 C@US 37J2 LISED CAUTION: o Safety Instructions o Installation Before using this Sliding Miter Saw, o Operation read this manual and follow all its o Maintenance Safety Rules and Operating Instructions. o Parts List o EspaSol Customer Help Line...
- Page 2 SECTION PAGE GENERAL SAFETY mNSTRUCT_ONS W_ARYOUR ALWAYS WEAR EYE PROTECTION. Any miter saw Warranty ......BEFORE USING THE SUD_NG _TER can throw foreign objects into Product Specifications ....I_l==l_l==l======_lu_==_=.J==om=j the eyes which could cause Safety instructions ...... Safety is a combination of common sense, staying alert permanent eye damage.
-
Page 3: Troubleshooting
3"1 • NEVER PULL THE SAW toward you during a cut. SMOOTH, solid movement of sliding assembly. 24. DO NOT operate the tool if you are under the KEEP HANDS out of the path of the saw blade. If the The blade can suddenly climb up on Iop of the influence of any drugs, alcohol or medication that OTHER conditions that may affect the way the... - Page 4 To reduce the risk of electrical shock, this saw has a 47. USEEXTRA CAUTION withlarge,verysmallor 54. BEFORE LEAVING THE SAW: MOST motor troubles may be traced to loose or polarized plug (one blade is wider than the other). This awkward workpieces: incorrect connections, overload, low voltage (such as NEVER LEAVE the tool running unattended.
-
Page 5: Prohibited Accessories
UNPACKING YOUR COMPOUND SLIDING MBTER SAW PROHiBiTED ACCESSORIES UNPACKING AND CHECKING CONTENTS To avoid injury: To avoid injury: • Do not plug the power cord into a power source ° Use only accessories recommended for this sliding receptacle during unpacking and assembly. This cord miter saw. -
Page 6: Bevel Adjustment
CRAFTSMAN SLiDiNG COMPOUND MUTER MITER SCALE - Measures the miter angle of the saw SAW TERMS blade. Positive stop index points have been provided at 0, 15, Dust bag 22.5, 31.6, and 45 ° right and left. ARBOR LOCK - Allows the user to keep the blade from... -
Page 7: The Miter Saw
ASSEIVlBLING THE MITER SAW THE AUXILIARY FENCE (FIG. E) THE DUST COLLECTION SYSTEM (FIG. C, D) Installing The Dust Collection Chute And Elbow (FIG. C) For your safety, never connect the plug to the power ASSEMBLY INSTRUCTIONS source outlet until all assembly and adjustment steps are Place the dust chule (1) into the exhaust port (2) below LOCKING THE CUTTING HEAD (FIG. - Page 8 Power Cord (FIG, G) Fig. H REMOVING OR iNSTALLiNG TNE BLADE (FIG, J,J, K) NOTE: The arbor lock can be damaged by improper use. If For convenience and to prevent damage to the power cord the arbor lock will not hold, lower the blade down on to a when the miter saw is not in use or is being transpor[ed, scrap of wood positioned against the fence.
-
Page 9: Bevel Stop Adjustments
45 ° Beve_ Adjustment (F1G. O) REMOVING AND iNSTALLiNG TABLE INSERT (FIG. L) 0° Adjustment (FIG. M) Miter Sca_e _ndicator (F_G, P) Loosen the bevel lock handle (2) and tilt the cutting Rotate the table to the 0 ° position and lock into Move the control arm to the 0 °... -
Page 10: Cutting Depth Adjustment
BEVEL AND COMPOUND CUTS (FIG. T, U) CUTTING DEPTH ADJUSTMENT (FIG, R) Maximum Cutting Depth (FIG. R) Other Bevel and Compound Cuts (FIG. U) The maximum depth travel of the cutting head was set at Setting Cutting Depth (FIG. R) the factory. -
Page 11: Basic Saw Operations
BEFORE LEAVING THE SAW To make a miter cut, move the cutting head to the Never leave the tool running unattended. Turn the power desired position by turning the miter lock handle (1) OFF. Wait for all moving parts to stop and unplug the counterclockwise. -
Page 12: Bevel Cuts
BEVEL CUTS (FIG. The 33.9 ° Bevel Lock (FIG. AA) CHOP CUTTING NARROW BOARDS - 90 ° CROSSCUT COMPOUND CUTS (FIG. BB) (FIG. CC) NOTE: Positive stops enable you to position the blade at Slide the carriage (1) to the rear position as far as it exact bevel angles to the table. -
Page 13: Workpiece Support
SLIDE CUTTING WiDE BOARDS - ANY ANGLE - 12o518" ROUGH CUTTING A DADO (FIG. FF) WORKPIECE SUPPORT (FIG. GG) MAXIMUM CUT (FIG. DD) Long pieces need extra support. The support should be placed under the workpiece. Keep your hand holding the workpiece position 6 1/2"... - Page 14 CUTTING A DIMENSIONAL 4 X 4 (3-1/2" X 3-1/2") AUXILIARY WOOD FENCE (FIG. HH) Fig. KK Bevel/Miter Settings for standard crown molding lying WITH ONE CUT (FIG. II) flat on compound miter saw table (Fig. MM) A dimensional 4 x 4 may be cut in half with one cut by attaching an auxiliary wood fence of 7/8"...
-
Page 15: Maintenance
MADNTENANCE SAWDUST TROUBLESHOOTING GUIDE Periodically, sawdust will accumulate under the work table and base. This could cause difficulty in the movement of the worktable when setting up a miter cut. Frequently blow To avoid personal injury: To avoid injury from an accidental start, turn the switch OFF and always remove timeplug from the power source before out or vacuum up the sawdust. - Page 16 COMPOUND MITER SAW t37.212920 When servicing use only CRAFTSMAN replacement parts. Use of any other parts may create a HAZARD or cause product damage. Any attempt to repair or replace electrical parts on this miter saw may create a HAZARD unless repair is done by a qualified service technician.
- Page 17 CRAFTSMAN 12" SLIDING COMPOUND MITER SAW CRAFTSMAN 12" SLIDING COMPOUND MITER SAW 137.212920 137.212920 SCHEMATIC B PARTS LIST FOR SCHEMATIC Part No. Description Size 19504001 Locating pin 12710401 Shaft sleeve 19510201 Torsion spring 2617BBLD27 Hex. soc. hd. cap bolt M10X1.5-10 26018BDA58 Hex.
- Page 18 CRAFTSMAN 12" SLIDING COMPOUND MITER SAW 137.212920 CRAFTSMAN 12" SUDING COMPOUND MITER SAW 137.212920 SCHEMATIC C PARTS LIST FOR SCHEMATIC C Part No. Description Size 2607BBLW55 Hex. washer hd. bolt M8X1.25-20 16213201 Arbor collar 19520304 Blade 16213401 Arbor collar 2668BBDA49 Pan hd.
- Page 19 CRAFTSMAN 12" SLIDING COMPOUND MITER SAW 137.212920 MOTOR 137.212920 SCHEMATIC D PARTS LIST FOR SCHEMATIC D - MOTOR Part No. Description Size 2668BBDA24 Pan hd. screw M5X0.8-12 83770021 Bearing retainer 2001ZZ6203 Ball bearing 6203ZZ 2570ABN140 C-ring B-40 83770051 Cutter shaft...