Epson MovieMate 25 User Manual
Portable, lightweight home cinema system
Hide thumbs
Also See for MovieMate 25:
- User manual (68 pages) ,
- Quick setup manual (6 pages) ,
- Brochure & specs (4 pages)
Table of Contents
Quick Links
Table of Contents

Related Manuals for Epson MovieMate 25


Summary of Contents for Epson MovieMate 25
- Page 1 Epson MovieMate ® ™ User’s Guide...
- Page 2 Epson is not responsible for any use of this information as applied to other products. Neither Seiko Epson Corporation nor its affiliates shall be liable to the purchaser of this product or third parties for dam- ages, losses, costs, or expenses incurred by purchaser or third parties as a result of: accident, misuse, or abuse of this product or unauthorised modifications, repairs, or alterations to this product, or (excluding the U.S.) failure to strictly...
-
Page 3: Table Of Contents
Replacing the air filter and lamp ... 57 Specifications and Notices Projection Distance and Screen Size ... 60 Specifications / Compliant Resolutions... 61 Safety Instructions ... 63 Use and Storage... 66 About Discs ... 68 Glossary... 70 Epson America, Inc. Limited Warranty ... 71... -
Page 4: Introduction
Your Epson MovieMate 25 is a portable, lightweight home cinema system that delivers high-quality, big-screen enter- tainment anywhere you want. In less than two minutes, you can set up MovieMate and watch a DVD, play a video game, or view your favorite photos on an 80-inch screen in the comfort of your own home. -
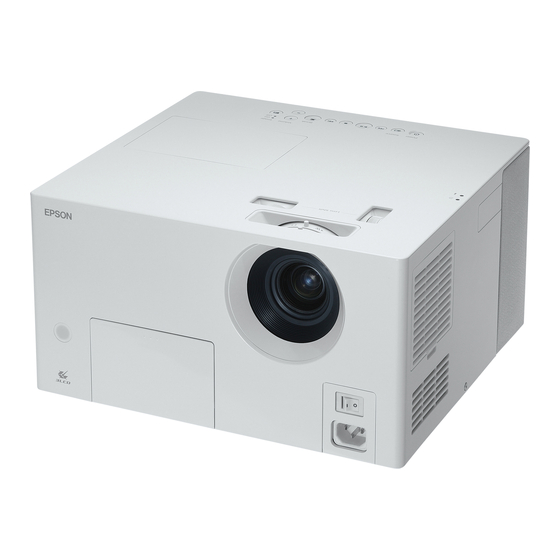
Page 5: Parts
Parts Front Subwoofer output port S-Video input port Audio input port Remote control receiver Press here to open Video input port Optical audio-out port Back Display window Speaker Headphone jack Disc tray Lens Lens cover Lamp cover latch Open/close Speaker button Remote control receiver Air intake... -
Page 6: Moviemate Controls
MovieMate Controls Focus ring Zoom ring Vertical lens shift dial Status display indicator Source button Power button Horizontal lens shift dial Skip buttons Volume Stop button adjustment buttons Play/Pause button Break button Lamp cover Image On indicator Image Off indicator Image On/Off button... -
Page 7: Remote Control
Remote control Power button Playback buttons DVD video butons Remote control light- emitting area Function/numerics toggle switch DVD Tray Open/ Close button Audio buttons Projector adjustment buttons... -
Page 8: Setting Up The Remote Control
Setting Up the Remote Control Inserting the batteries Remote control usage range Horizontal range Approx. 30° Approx. 30° Vertical range Approx. 15° Approx. 15° Push in the tab and lift up the cover. Insert the batteries as shown. Close the battery cover. If the remote control response slows down or stops working, change the batteries. -
Page 9: Using This Guide
Getting More Information Need additional help? Take advantage of Epson’s automated support services 24 hours a day at http://support.epson.com. Use this site to download FAQs or product information and e-mail your questions to Epson support. -
Page 10: Quick Start
Quick Start Playing DVDs You can enjoy your DVDs on the big screen by following these four easy steps. Position MovieMate in front of the screen or a blank wall. Connect the power cable and turn on Insert a DVD. the main power switch. -
Page 11: Setting Up Moviemate
Setting Up MovieMate Projection distance and image size Place MovieMate in a position to project the best size image onto the screen. The further you place MovieMate away from the screen, the larger the projected image becomes. You can project on a wall if you want an image larger than the size of the screen. -
Page 12: Disc Playback
Disc Playback Inserting and playing a disc Press to open the disc tray. A beep sounds and the power comes on. You can also press Place the disc in the disc tray with the label facing up. Press to close the disc tray. For all discs except comes on automatically, and projection begins. -
Page 13: Adjusting The Picture And Sound
Adjusting the picture and sound Adjust the image and sound as follows: Adjusting the size of the projected image (Zoom ring) To decrease the size, turn towards [T]. To increase the size, turn towards [W]. Adjusting the image position (lens shift) You can move the position of the pro- jected image up, down, left and right, using the lens shift. -
Page 14: Stopping Playback
Stopping playback Press press Things to note when using resume • Even if you press back resumes when you press • Resume cannot be used in the following situations. - The disc is removed from the disc tray. - After pressing to turn off the power and pressing to turn the power back on. -
Page 15: Basic Operations During Playback
Basic Operations During Playback From here on, operations are explained primarily using the buttons on the remote control. If the same button is available on the MovieMate control panel, you can also use it. Make sure the switch is set to the [Function] position Pausing playback Press during playback. -
Page 16: Replaying A Scene
Make sure the switch is set to the [Function] position Replaying a scene Press during playback. MovieMate replays the previous 10 seconds. • Depending on the type of disc, this operation may not be possible. • You cannot return to the previous chapter. Skipping Press during playback. -
Page 17: Playing In Slow Motion
After waiting a few seconds, the color mode name disappears and the picture quality changes. • When you select theater or theater black, the flashes in the Epson cinema filter operates automatically and provides more natural skin tones. Temporarily stopping the audio (Mute) Press •... -
Page 18: Advanced Operations
Advanced Operations Controlling Playback Changing the brightness of the display window (Dimmer) Make sure the switch is set to the [Function] position. Press When you press the brightness of the display window and the indi- cators on the main unit change as shown below. DIMMER AUTO is the default setting. -
Page 19: Using Dvd Menus
Using DVD menus Some have one or both of the following types of menus. Top menu: When multiple titles (video and audio) have been recorded, the top menu lets you select them. Menu: You can use menus to select chapters and playback settings such as angle, audio, and subtitles. -
Page 20: Using Pbc (Playback Control)
Using PBC (playback control) When you insert a Video CD with PBC (playback control) enabled, a menu screen is displayed. You can select the scene or information you wish to see from this menu. Insert a Video CD that includes PBC. The following type of menu is displayed. -
Page 21: Playing Mp3/Wma And Jpeg Files
Playing MP3/WMA and JPEG files Make sure you set the switch to the [Function] position. When playing a disc that contains both MP3/WMA files and JPEG files, you see the following kind of group/track (file) name list. Press to select the group. Press to move the pointer to the track (file) name list. - Page 22 Make sure you set the switch to the [Function] position. To play MP3/WMA audio (Image Off) Once menu selection is complete and the audio begins, press beeps and the projection lamp turns off so you can enjoy just the music being played.
- Page 23 Notes on playback • Depending on the recording and the characteristics of the disc it is possible that the disc may not be readable, or that reading the disc may take some time. • The time it takes to read a disc differs depending on the number of groups or tracks (files) recorded on the disc.
-
Page 24: Selecting The Chapter Or Track Number
Selecting the chapter or track number Playing from a designated time (time search) Make sure the switch is set to the [Function] position. During playback, select the chapter or track number you wish to play by pressing the numeric buttons. For details on using the numeric buttons, see page 19. - Page 25 Entering the time To play a disc from 0 hours, 23 minutes, and 45 seconds, for example, Set the Function/Numerics toggle switch to the [123] position. Press the numeric buttons in the order of → If you make a mistake, press enter the correct number.
-
Page 26: Looping Playback Of A Favorite Scene (A-B Repeat Playback)
Looping playback of a favorite scene (A-B repeat playback) Make sure the switch is set to the [Function] position. You can set the playback range (start point to end point) from the menu bar dur- ing playback. Press twice during playback. The following menu bar is projected. -
Page 27: Looping Playback (Repeat Play)
Looping playback (repeat play) Make sure the switch is set to the [Function] position. • You cannot specify a range which includes multiple titles or tracks. • “A-B repeat” cannot be performed at the following times. - During program play - During repeat play •... - Page 28 Canceling repeat play • Press repeatedly until “ ” is displayed on the screen. • Turn off the power switch on the main unit. • You cannot use the “Title repeat” function with some DVDs. • To cancel repeat, press •...
-
Page 29: Playing In The Order Of Your Choice (Program Play)
Playing in the order of your choice (program play) Make sure the switch is set to the [Function] position. You can set titles, chapters, and tracks to play in the order of your preference. Press when stopped. Each time you press , the display window on the main unit changes as follows. -
Page 30: Playing Back At Random (Random Play)
Playing back at random (random play) Set to the [Function] position before performing operations You can choose to play titles or chapters/tracks at random. The playback order always changes when using random play. Press when stopped. Whenever you press the display window changes in the following way. -
Page 31: Changing The Audio Language
Changing the audio language When a disc has been recorded with multiple audio signals or languages, you can switch to the audio signal or language of your preference. Press during playback. The current audio settings are displayed. While the audio settings are displayed, press edly and select the desired setting. -
Page 32: Changing The Subtitle Display
Changing the subtitle display Changing the camera angle You can choose whether or not to display subtitles for discs that have been recorded with subtitles. When a disc has been recorded with multiple language subtitles, you can switch to the available language of your preference. Press during playback. -
Page 33: Using The Menu Bar
Using the menu bar Make sure the switch is set to the [Function] position. Press twice during playback. The following status bar and menu bar are projected. Press until the pointer reaches the item you wish to use. Press • Press once to cancel the menu bar. -
Page 34: Selecting Auto-Standby And Sleep Timer Settings
Selecting Auto-standby and Sleep timer settings Make sure the switch is set to the [Function] position Auto standby: When playback has finished or has been stopped, or an opera- tion has not been performed for about 3 minutes, the power switches off auto- matically. -
Page 35: Changing From Progressive To Interlaced Mode
Changing from Progressive to Interlaced mode Make sure the switch is set to the [Function] position. Locking the tray For the best image quality, MovieMate uses the Progressive video display mode. You can change to the Interlaced mode if necessary. When there is no disc loaded in the disc tray (or when a video is stopped), press Whenever you press... -
Page 36: Using External Video Equipment
Using External Video Equipment Connecting to other video equipment You can connect your MovieMate to devices that have a video output port, such as: - VCRs - Game consoles - Video cameras If the video equipment you are connecting supports both S-Video and composite video formats, you can enjoy higher quality images by using the S-Video connection. -
Page 37: Projecting Images From External Video Equipment
Using the S-Video connection Output To Audio out port Audio S-Video To S-Video out port Projecting images from external video equipment Functions available in external video mode The following functions are available when you are using external video equipment: Color Mode (page 17) Wide/Normal (page 57) Sound Mode (page 40) DVD level (page 41, 42) -
Page 38: Using External Audio Equipment
Using External Audio Equipment Listening with headphones • When listening with headphones, make sure the volume is not too high. You can damage your hearing when listen- ing to sounds at high volume over an extended period of time. • Don’t set the volume too high from the outset. A sudden loud sound may cause damage to your headphones or your hearing. -
Page 39: Connecting To Audio Equipment With An Optical Digital Input
You can enjoy more powerful bass by connecting to the optional subwoofer. For connection and usage instructions, refer to the User’s Guide provided with the subwoofer. Optional Epson powered subwoofer (actual product may look slightly different) When connecting the cable, remove the protective cap, align the shape, and insert firmly. -
Page 40: Selecting The Sound Mode
Selecting the Sound Mode Make sure the switch is set to the [Function] position. Adjusting high-pitched tones raises lowers You can obtain enhanced audio from the speakers by activating the JVC origi- nal sound system function. Press Each time you press , the display window display changes as fol- lows. -
Page 41: Adjusting The Audio Playback Level
Adjusting the audio playback level Make sure the switch is set to the [Function] position. The default audio setting plays DVDs at a higher volume than other discs. You can adjust this default setting if necessary. Press during playback. Each time you press , the display window changes as follows. -
Page 42: Adjusting The Audio Input Level Of External Audio Equipment
Adjusting the audio input level of external audio equipment Make sure the switch is set to the [Function] position. You can adjust the audio input level of equipment connected to the Audio port. Press and switch to the external video mode. Press and hold for approximately 2 seconds. -
Page 43: Fine-Tuning Your Moviemate
Fine-Tuning Your MovieMate Settings Menu You can adjust the MovieMate settings to suit your viewing environment. Using the settings menu The Settings menu allows you to change the language, audio and video options, and more. This section describes how to use the menu. When a video is stopped, or when there is no disc loaded in the disc tray, press The following settings menu is displayed. -
Page 44: Settings Menu Options
Settings menu options Boldface indicates the default. Language settings menu Item Menu Language Select the language for the DVD video menu. Audio Language Select the language for the DVD video soundtrack. Subtitle Language Select the language for the DVD video subtitles. - Page 45 Audio settings menu Item Digital Audio Output Select the output signal according to the equipment connected to the Optical Audio- Out port. For detailed signal information, see page 46. Downmix Toggles the signal from the Optical Audio- Out port between [Digital Audio Output] and [PCM only].
-
Page 46: Language Codes
Language codes Code Language Afar Abkhazian Afrikaans Ameharic Arabic Assamese Aymara Azerbaijani Bashkir Byelorussian Bulgarian Bihari Bislama Bengali Bangla Tibetan Breton Catalan Corsican Czech Welsh Danish Bhutani Greek Esperanto Estonian Basque Persian Finnish Fijian Faroese Frisian Irish “Digital Audio Output” settings and output signals Playback Disc 48 kHz, 16/20/24 bit Linear PCM DVD video... -
Page 47: Country (Area) Code List
Country (area) code list AD Andorra ET Ethiopia AE United Arab Emirates Finland AF Afghanistan FJ Fiji AG Antigua and Barbuda Falkland Islands AI Anguilla (Malvinas) AL Albania Micronesia AM Armenia (Federated States of) AN Netherlands Antilles FO Faroe Islands AO Angola FR France AQ Antarctica... -
Page 48: Picture Quality Menu
Picture Quality Menu You can adjust the brightness, contrast, and other values of the projected image. Using the Picture Quality menu Press during projection. The following menu is displayed. Press repeatedly until the item that you want to change is displayed. The menu item changes as follows whenever Brightness →... -
Page 49: Picture Quality Menu Settings
Picture Quality menu settings Setting Item Brightness Adjusts the image brightness. Contrast Adjusts the difference between light and shadow in the image. Color Saturation Adjusts the color saturation for the image. Tint Only displayed when an NTSC signal is being input. Adjusts the image tint. -
Page 50: Video Information Menu
Video Information Menu You can view status information and select “Video Signal,” “High Altitude Mode,” and “Lamp-Hours Reset.” Using the video Information menu Press during projection. The following Information is displayed. Press repeatedly until the item that you want to confirm or change is displayed. -
Page 51: Video Information Menu Settings
Video Information menu settings Setting Item Information Lamp Hours: Accumulated usage time of the lamp. 0H is displayed for 0-10 hours. Displayed in Displays the units of 1 hour for 10 hours and above. The display changes to yellow text when it current status. -
Page 52: Troubleshooting And Maintenance
Troubleshooting and Maintenance Solving problems Reading the indicator lights You can check MovieMate’s status using the indicators on the top panel. Check the following table and follow the steps to rem- edy the problem. If all indicators are switched off, make sure the power cable is connected correctly and the main power switch is turned on. - Page 53 If you continue using MovieMate, it is possible that the lamp may explode. See page 58. Green Error Disconnect the power cable from the electrical outlet and contact Epson as described on page 56. • Place MovieMate at least 8 inches away from the wall.
-
Page 54: Solving Problems
Green Solving problems If MovieMate is not functioning normally, check the following notes before requesting repairs. If MovieMate fails to improve, contact Epson as described on page 56. When this happens . . . Power does not turn on No images appear... - Page 55 The remote control does not Is the Function/Numerics toggle switch in the [1 2 3] (numerical input) work position? Depending on the disc, certain operations are prohibited. Are the batteries dead, or have the batteries been inserted correctly? No sound can be heard or Has the volume been adjusted to the minimum setting? the sound is faint.
-
Page 56: Where To Get Help
To use the Epson PrivateLine Support service, call (800) 637-7661 and enter the PIN on the Epson PrivateLine Support card that came with your MovieMate. This is the fastest way of speaking to a live representative, and it’s free. -
Page 57: Maintenance
• Depending on the characteristics of the lamp and on the way it has been used, the lamp may become darker or stop working before the lamp warning message appears. You should always have a spare lamp ready in case it is needed (part # V13H010L33). • Contact Epson for a spare lamp. Do not use volatile substances such as wax, alcohol, or thinner to clean MovieMate’s surface. -
Page 60: Specifications And Notices
Specifications and Notices Projection Distance and Screen Size Refer to the following tables and place MovieMate in a position which allows the best possible projection for your screen size or the projected image size you want. 16:9 Screen Size (inches) 4:3 Screen Size (inches) Minimum (Zoom Adjustment Wide) - (Zoom Adjustment Tele) -
Page 61: Specifications / Compliant Resolutions
Focus adjustment Manual Zoom adjustment Manual (approx. 1:1.5) Lens shift Manual (vertical maximum approximately 50%, horizontal maximum approximately 25%) Lamp (light source) UHE lamp, 135 W, Model No. ELPLP33 100-240 VAC 50/60 Hz 2.6 - 1.2 A Power consumption Power supply... - Page 62 Composite Video/S-Video Signal TV (NTSC) TV (PAL, SECAM) Safety Safety UL60950 Third Edition UL60065 Seventh Edition Canada CSA C22.2 No.60950 CSA C22.2 No.60065 Resolution Normal 640 × 480 640 × 480 (4:3) 640 × 480 768 × 576 (4:3) FCC Part 15B Class B (DoC) Canada ICES-003 Class B Aspect Mode...
-
Page 63: Safety Instructions
Safety Instructions Important information Read the following important information about your MovieMate. Important safety information Warning: To reduce the risk of fire or electric shock, do not expose this apparatus to rain or moisture. Warning: Never look into the projector lens when the lamp is switched on as the bright light can damage your eyes. - Page 64 • The internal projector components consist of many glass parts such as the lens and projection lamp. The lamp is fragile, and can easily break. If the lamp breaks, handle the projector with extreme care to avoid injury from broken glass, and contact Epson for a replacement.
- Page 65 − If the lamp breaks and needs to be replaced with a new lamp, contact Epson to carry out the replace- ment. If the lamp breaks, pieces of broken glass may get scattered around inside the projector.
-
Page 66: Use And Storage
Make sure the lens cover is securely in place when not in use. • Epson will not be held responsible for damage arising from projector or lamp failure outside the range of that which is covered in your warranty terms. - Page 67 When moving this unit • Make sure the lens cover is securely in place. • Remove any discs and close the disc tray. • Hold the projector as shown in the following illustration. Be careful not to damage the mesh covering the speakers.
-
Page 68: About Discs
About Discs Readable disc types The following discs can be played. DVD video Video CD/SVCD (Super Video CD) PBC (Playback control) equipped Video CD (version 2.0 compliant). CD-R/CD-RW Only discs recorded in the following formats can be repro- duced. • Audio format (finalized) •... - Page 69 Changes or modifications not expressly approved by the manufacturer could void the user’s authority to operate the equipment. DECLARATION of CONFORMITY According to 47CFR, Part 2 and 15 Personal Computers EPSON AMERICA, INC. 3840 Kilroy Airport Way MS: 3-13 Long Beach, CA 90806 562-290-5254...
-
Page 70: Glossary
Glossary JPEG A file format used for saving image files. Most photographs taken with digital cameras are saved in the JPEG format. The abbreviated form of “MPEG1 Audio Layer-3,” a standard for audio compression. It enables the size of the data to be greatly reduced, while maintaining a high sound quality. -
Page 71: Epson America, Inc. Limited Warranty
What Epson Will Do To Correct Problems: Should your Epson projector require service during the warranty period, Epson will, at its option, exchange or repair the projector without charge for parts or labor. If Epson authorizes an exchange for the defective unit, Epson will ship a replacement projector to you, freight prepaid, to an address in Canada or the U.S. - Page 72 To locate the Authorized Epson Servicer nearest you, call the Epson Connection at (800) 637-7661 + PIN or (562) 276-4394 in the U.S. and (905) 709-3839 in Canada, or write to: Epson America, Inc., P.O. Box 93012, Long Beach, CA 90809-3012.
- Page 73 12 tray, 5, 35 Display window, 5, 12, 18 Dolby Digital, 45 Downmix, 45 DVD level, 41, 42 DVD menus, 19 Epson accessories, 4 Home Service, 4 PrivateLine Support, 56 technical support, 56 warranty, 71 External equipment audio, 38 to 39, 42...
- Page 74 Stopping playback, 14 Subtitles, 32 Subwoofer, connecting, 39 SVCD, 68 S-Video input port, 5, 37 Technical support, 56 Time search, 24 to 25 Tint setting, 49 Track, selecting, 24 Transporting MovieMate, 67 Tray lock, 35 Treble, adjusting, 40 Turning off, 14...
- Page 76 Epson MovieMate 25...