Table of Contents
Printed in Mexico
www.GEAppliances.ca
Safety Instructions
. . . . . . . . . . . . . .2–5
Operating Instructions
Clock and Timer . . . . . . . . . . . . . . . . .15
Convenience Outlet . . . . . . . . . . . . . .11
Oven . . . . . . . . . . . . . . . . . . . . . . . .12–14
Broiling Guide . . . . . . . . . . . . . .13, 14
Oven Controls . . . . . . . . . . . . . . . .10, 11
Sabbath Feature . . . . . . . . . . . . . .18, 19
Self-Cleaning . . . . . . . . . . . . . . . . .22, 23
Special Features . . . . . . . . . . . . . . . . . .17
Surface Units . . . . . . . . . . . . . . . . . . 6–9
Temperature Conversions . . . . . . . . .11
Thermostat Adjustment—
Do It Yourself . . . . . . . . . . . . . . . . . . . .19
Timed Baking and
Roasting Features . . . . . . . . . . . . . . . .16
Warming Drawer . . . . . . . . . . . . .20, 21
Care and Cleaning
. . . . . . . . . . 24–29
Troubleshooting Tips
. . . . . . . . 30–34
Accessories
. . . . . . . . . . . . . . . . . . . . . 37
Consumer Support
Consumer Support . . . . . . . . . . . . . . 39
Product Registration . . . . . . . . . . 35, 36
Warranty . . . . . . . . . . . . . . . . . . . . . . . 38
Write the model and serial
numbers here:
# ______________
Model
# ______________
Serial
You can find them on a label
behind the storage drawer
on the range frame.
Owner's Manual
ECBP82
JCBP62
JCBP65
JCBP66
JCBP67
JCBP68
JCBP70
JCBP71
JCBP78
JCBP80
JCBP81
JCBP83
JCB710
183D6379P050 29-5650 10-08 JR
Table of Contents

Related Manuals for GE JCBP66SPSS


Summary of Contents for GE JCBP66SPSS
- Page 1 www.GEAppliances.ca Safety Instructions ....2–5 Owner’s Manual Operating Instructions Clock and Timer ....15 ECBP82 Convenience Outlet .
-
Page 2: Important Safety Information
IMPORTANT SAFETY INFORMATION. READ ALL INSTRUCTIONS BEFORE USING. WARNING! For your safety, the information in this manual must be followed to minimize the risk of fire, electric shock, or to prevent property damage, personal injury, or loss of life. ANTI-TIP DEVICE To reduce the risk of tipping the range, the range must be secured by a properly installed anti-tip bracket. - Page 3 www.GEAppliances.ca SAFETY PRECAUTIONS Do not operate the oven or cooktop controls if the glass is broken. Food splatter or cleaning solution may penetrate a broken control panel or cooktop and create a risk of electrical shock. Contact a qualified technician immediately should your glass control panel or cooktop become broken. ■...
-
Page 4: Radiant Surface Units
IMPORTANT SAFETY INFORMATION. READ ALL INSTRUCTIONS BEFORE USING. WARNING! RADIANT SURFACE UNITS Use proper pan size—select cookware having flat bottoms large enough to cover the surface unit heating element. The use of undersized cookware will expose a portion of the surface unit to direct contact and may result in ignition of clothing. -
Page 5: Self-Cleaning Oven
www.GEAppliances.ca OVEN Stand away from the range when opening the oven door. Hot air or steam which escapes can cause burns to hands, face and/or eyes. ■ ■ Do not heat unopened food containers. Pressure could Pulling out the rack to the stop-lock is a convenience in build up and the container could burst, causing an lifting heavy foods. -
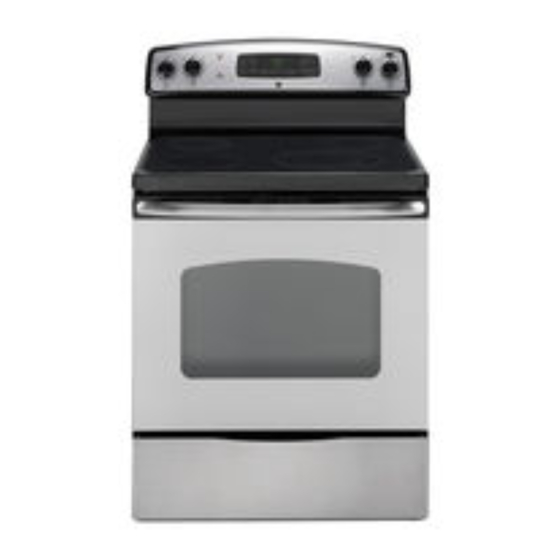
Page 6: About The Radiant Surface Units
About the radiant surface units. NOTE: Throughout this manual, features and appearance may vary from your model. About the Radiant Surface Units SURFACE NOTE: On models with light-colored glass COOKING WARNING: The surface cooktops, it is normal for the cooking zones to units are automatically disabled during change color when hot or cooling down. -
Page 7: Glass-Ceramic
www.GEAppliances.ca The following information will help you choose cookware which will give good performance on glass cooktops. Stainless Steel: Porcelain Enamel Covered Cast Iron: recommended recommended As long as the cookware is covered completely with porcelain enamel, this Aluminum: cookware is recommended. Caution is recommended for cast iron cookware heavy weight recommended that is not completely covered with... -
Page 8: Using The Surface Units
Using the surface units. How to Set Push the knob in and turn in either WARNING: The surface direction to the setting you want. units are automatically disabled during At both OFF and MAX the control clicks the self-clean cycle. Make sure that all into position. -
Page 9: Using The Warming Zone
www.GEAppliances.ca Using the Warming Zone (on some models) The WARMING ZONE is located in the Food Type Control Setting back center of the glass surface. Always Sauces start with hot food. Do not use to heat Soups (cream) Medium cold food. Placing uncooked or cold food Stews Medium on the WARMING ZONE could result in... -
Page 10: Using The Oven Controls
Using the oven controls. (on some models) Throughout this manual, features and appearance may vary from your model. Oven Control, Clock and Timer Features and Settings BAKE Pad TIMER Pad Touch this pad to select the bake function. Touch this pad to select the timer feature. Then touch the + and –... -
Page 11: Temperature Conversions
www.GEAppliances.ca Oven Control, Clock and Timer Features and Settings AUTOMATIC OVEN Light (on some models) OFF Pad Touch this pad to cancel ALL oven This lights anytime the oven has been programmed using the COOK TIME or operations except the clock and timer. START TIME functions. -
Page 12: Using The Oven
Using the oven. To avoid possible burns, place the racks in the desired position before you turn the oven on. Before you begin… The racks have stops, so that when placed CAUTION: When you are using correctly on the supports, they will stop a rack in the lowest position (A), you will need before coming completely out, and will to use caution when pulling the rack out. -
Page 13: Aluminum Foil
www.GEAppliances.ca Aluminum Foil Do not use aluminum foil on the bottom A smaller sheet of foil may be used to of the oven. catch a spillover by placing it on a lower rack several inches below the food. Never entirely cover a rack with aluminum foil. - Page 14 Using the oven. Broiling Guide – 4 Pass Broil Element The size, weight, thickness, Quantity and/ Rack* First Side Second Side starting temperature Food or Thickness Position Time (min.) Time (min.) Comments and your preference of Ground Beef 454 g (1 lb.) (4 patties) 7–10 Space evenly.
-
Page 15: Using The Clock And Timer
Using the clock and timer. www.GEAppliances.ca Not all features are on all models. To Set the Clock The clock must be set to the correct time setting. If this happens, touch the CLOCK of day for the automatic oven timing pad twice and reenter the time of day. -
Page 16: Using The Timed Baking And Roasting Features
Using the timed baking and roasting features. (on some models) Do not lock the oven door with the latch during timed cooking. The latch is used for self-cleaning only. NOTE: Foods that spoil easily—such as milk, eggs, fish, stuffings, poultry and pork—should not be allowed to sit for more than 1 hour before or after cooking. -
Page 17: Special Features Of Your Oven Control
Special features of your oven control. www.GEAppliances.ca Your new touch pad control has additional features that you may choose to use. The following are the features and how you may activate them. The special feature modes can only be activated while the display is showing the time of day. They remain in the control’s memory until the steps are repeated. -
Page 18: Using The Sabbath Feature
Using the Sabbath Feature. (Designed for use on the Jewish Sabbath and Holidays) The Sabbath feature can be used for baking/roasting only. It cannot be used for broiling, self-cleaning or Delay Start cooking. NOTE: The oven light comes on automatically (on some models) when the door is opened and goes off when the door is closed. -
Page 19: The Type Of Margarine Will Affect Baking Performance
Using the Sabbath Feature. (Designed for use on the Jewish Sabbath and Holidays) www.GEAppliances.ca How to Exit the Sabbath Feature Touch the OFF pad. off after 12 hours. OFF indicates that the oven will not automatically turn If the oven is cooking, wait off. -
Page 20: Using The Warming Drawer
Using the warming drawer. (on some models) The warming drawer will keep hot, cooked foods at serving temperature. Always start with hot food. Do not use to heat cold food other than crisping crackers, chips or dry cereal. To Use the Warming Drawer Push and turn the control knob to any desired setting. - Page 21 www.GEAppliances.ca Temperature Selection Chart To keep several different foods hot, Food Type Control Setting set the control to the food needing the Bacon highest setting. Breads ■ The temperature, type and amount Casserole Medium of food, and the time held will affect Chicken, fried the quality of the food.
-
Page 22: Using The Self-Cleaning Oven
Using the self-cleaning oven. Never force the latch handle. Forcing the handle will damage the door lock mechanism. Before a Clean Cycle We recommend venting your kitchen Do not clean the gasket. The fiberglass with an open window or using a material of the oven door gasket cannot ventilation fan or hood during the withstand abrasion. - Page 23 www.GEAppliances.ca How to Delay the Start of Cleaning Make sure the clock shows the correct The display will show the delay start set time of day. time. It will not be possible to unlatch the oven door until the temperature drops Latch the door.
-
Page 24: Care And Cleaning Of The Range
Care and cleaning of the range. Be sure all controls are off and all surfaces are cool before cleaning any part of the range. WARNING: If your range is removed for cleaning, servicing or any reason, be sure the anti-tip device is re-engaged properly when the range is replaced. -
Page 25: Cleaning The Oven Door
www.GEAppliances.ca Cleaning the Oven Door To clean the inside of the door: To clean the outside of the door: ■ ■ Because the area inside the gasket is cleaned Use soap and water to thoroughly clean the during the self-clean cycle, you do not need to top, sides and front of the oven door. -
Page 26: Oven Light Replacement
Care and cleaning of the range. Oven Light Replacement Replace bulb with a 40-watt CAUTION: Before replacing your appliance bulb. oven light bulb, disconnect the electrical power To replace the cover: to the range at the main fuse or circuit breaker panel. - Page 27 www.GEAppliances.ca Removable Warming Drawer Pan (on some models) ■ Never place, use or self-clean the NOTE: For models with an electric warming warming drawer pan in the oven. drawer, before performing any adjustments, ■ cleaning or service, disconnect the range Warming drawer has a removable pan electrical power supply at the household for easy cleaning.
-
Page 28: Cleaning The Glass Cooktop
Cleaning the glass cooktop. Normal Daily Use Cleaning ONLY use Ceramic Cooktop Cleaner on Shake the cleaning cream well. Apply a few drops of Ceramic the glass cooktop. Other types of cleaners Cooktop Cleaner directly to the may not be as effective. cooktop. -
Page 29: Glass Surface-Potential For Permanent Damage
www.GEAppliances.ca Metal Marks and Scratches Be careful not to slide pots and pans If pots with a thin overlay of across your cooktop. It will leave aluminum or copper are allowed metal markings on the cooktop to boil dry, the overlay may leave surface. - Page 30 Before you call for service… Troubleshooting Tips Save time and money! Review the charts on the following pages first and you may not need to call for service. Problem Possible Causes What To Do Surface units will not • Use pans which are flat and match the diameter of Improper cookware maintain a rolling boil the surface unit selected.
- Page 31 www.GEAppliances.ca Problem Possible Causes What To Do Pitting (or indentation) • Call a qualified technician for replacement. Hot sugar mixture spilled of the cooktop on the cooktop. Frequent cycling • Use only flat cookware to minimize cycling. Improper cookware off and on of being used.
-
Page 32: Troubleshooting Tips
Before you call for service… Troubleshooting Tips Problem Possible Causes What To Do Oven temperature too • See the Adjust the oven thermostat—Do it yourself! Oven thermostat hot or too cold needs adjustment. section. Oven will not work • Make sure electrical plug is plugged into a live, Plug on range is not completely inserted in properly grounded outlet. - Page 33 www.GEAppliances.ca Problem Possible Causes What To Do “F – and a number • Press the OFF pad. Put the oven back into You have a function or letter” flash error code. operation. in the display • Disconnect all power to the range for at least 30 If the function code repeats.
- Page 34 Before you call for service… Problem Possible Causes What To Do Oven racks are The shiny, silver-colored • Apply a small amount of vegetable oil to a paper difficult to slide racks were cleaned in a towel and wipe the edges of the oven racks with self-clean cycle.
- Page 35 Please place in envelope and mail to: Veuillez mettre dans une enveloppe et envoyez à : OWNERSHIP REGISTRATION P.O. BOX 1780 MISSISSAUGA, ONTARIO L4Y 4G1 (FOR CANADIAN CONSUMERS ONLY)
- Page 37 Accessories. Looking For Something More? To inquire about purchasing a part or an accessory for your appliance, call our National Parts Centre at 1.800.661.1616. Oven Racks Broiler Pan Oven Elements Light Bulbs Knobs Cleaner Cleaning Pads Scraper...
-
Page 38: Warranty
Electric Range Warranty. All warranty service provided by our Factory Service Centres, Staple your receipt here. or an authorized Customer Care technician. To schedule ® Proof of the original purchase service, on-line, visit us at www.geappliances.ca, or call date is needed to obtain service 1.800.561.3344. -
Page 39: Consumer Support
Consumer Support. GE Appliances Website www.GEAppliances.ca Have a question or need assistance with your appliance? Try the GE Appliances Website 24 hours a day, any day of the year! For greater convenience and faster service, you can now download Owner’s Manuals on-line. - Page 40 l’utilisateur. Manuel dans trouve qu’on formulaire détacher l’appareil, avec fournie pré-imprimée d’enregistrement carte poste envoyer nous également pouvez Vous nécessaires. garantie sous services rapide plus l’obtention communications meilleures permettra appareils L’enregistrement quand! ligne—n’importe appareils enregistrer pouvez Vous appareils Enregistrement www.electromenagersge.ca Nouveau-Brunswick Moncton, Lane...
- Page 41 Ontario Burlington, Inc., Canada Mabe Garant région. votre consommateurs avec relations bureau avec communiquez province, votre dans bénéficiez vous dont droits connaître Pour l’autre. à province d’une varient droits, d’autres bénéficier pouvez Vous spécifiques. juridiques droits confère vous garantie présente cas.
- Page 42 Grattoir nettoyage Tampons Nettoyant Boutons électriques Ampoules four Éléments Lèchefrite four Grilles 1.800.661.1616. pièces national centre notre appelez appareil, votre pour accessoire d’un pièce d’une l’achat renseigner vous Pour chose? autre cherchez Vous Accessoires.
-
Page 43: Dépannage
s’enclenche. qu’il jusqu’à tiroir Poussez fermé. complètement Tiroir • aluminium. garde-chaud tiroir dans papier couvercle d’un l’aliment Recouvrez s’échappe. l’humidité • dessèche nourriture élevé. température. réglage Réduisez trop température Réglage • aluminium. papier couvercle d’un l’aliment Recouvrez couverts. Aliments • tiroir dans liquide. - Page 44 courant. prise basculé. courant près placé commutateur appuyant courant prise commutateur modèles) certains (sur remettez puis protection, dosseret refroidir Laissez chaud trop dosseret • protection dosseret courant. prise dans haut trouvent courant. prise dans électoménager bien n’entre électroménager courant prises dans appareil petit...
- Page 45 durée. d’augmenter sales, très fours l’autonettoyage recommencer nécessaire être peut l’autonettoyage. démarrer avant importants renversements Enlevez sale. très était four • l’autonettoyage section Voyez réglées. four Commandes • après propre Four autonettoyant four Utilisation verrouillage. température verrouille dessous température jusqu’à refroidir four Laissez...
- Page 46 réglé. d’être vous-même! froide trop chaude section Voyez besoin four thermostat four—Faites-le thermostat Réglage • trop four Température dans gril cuisson Guide recommandée période longue plus pendant griller Faites • bas. être peut courant minutes. pendant gril l’élément Préchauffez régions, certaines Dans •...
- Page 47 chaude. cuisson surface placé plastique section à avec contact entrée verre cuisson surface Nettoyage surface Voyez chaude cuisson surface permanents dommages verre—possibilités Surface • fondu Plastique refroidit. verre mesure à claire. couleur disparaît temporaire changement chaude. elle cuisson surface dont quand décolorée paraître...
- Page 48 WX10X350 .nº . . . vitrocéramique cuisson surfaces pour nettoyage Tampons grattoir) nettoyante crème comprenant (Nécessaire www.electromenagersge.ca WB64X5027 .nº ....Nécessaire 1.800.661.1616 pièces national Centre WX10X302...
- Page 49 essuie-tout. papier ébréchée. émoussée vitrocéramique cuisson lame N’utilisez REMARQUE surfaces pour nettoyant Mabe. pièces magasins dans avec surface toute polissez détaillants chez disponibles enlevés, résidus tous fois sont recommandées fournitures protection, grande plus Pour toutes vitrocéramique résidus. enlever pour cuisson surfaces pour grattoir...
- Page 50 vinaigre. peintes. surfaces agressifs abrasifs d’eau solution avec savon produits d’acier laine tampons l’eau à Nettoyez-les tiroir. façade récurer, à poudres fours nettoyage commande tableau haut côtés, commerciaux produits N’utilisez comprennent peintes surfaces peintes Surfaces inoxydable. acier surface nettoyer www.electromenagersge.ca pour nettoyant produit...
-
Page 51: Entretien
fermer. pour ensuite poussez-le bas, vers tiroir devant Laissez l’insérer. facilement fourneau. sous Nettoyez pour nécessaire, tiroir Soulevez enlevez-le. tiroir, devant Inclinez four. rainures stops au-delà tiroir tiroir. complètement Tirez derrière sont rainures Insérez d’entreposage tiroir enlever Pour d’entreposage tiroir remplacer Pour modèles) - Page 52 nettoyage. après même matte, tâche causer pourraient surface. tarte) garniture fruits sauerkraut, tomates, lait, (tel d’acide sucre taux haut ayant nourriture débordements laisser changer. devriez vous porte, déplacé utilisé. être aussi peuvent s’est s’il façon, quelle n’importe d’acier laine savon remplis endommagé, effiloché...
- Page 53 doux. linge avec à Polissez pure. l’eau utilisez rincer, Pour vinaigre. d’eau 50/50 surface. endommageront contrôle—ils solution légère savonneuse d’eau panneau four à nettoyant solution utiliser nettoyer, Pour rincer. plastique matière récurage nettoyer pour humide linge Utilisez tampon fort, liquide nettoyant four.
- Page 54 aérosol. grasse matière d’autre pulvérisez ® grilles. bords passez-le essuie-tout papier végétale d’huile recommencez. quantité petite appliquez glisser, cycle, après propre n’est four ■ faire à difficiles deviennent grilles l’autonettoyage. CUISSON) pendant enlevés être peuvent touche (TEMPS TIME COOK résidus général sont dépôts...
- Page 55 four. votre saleté degré selon heures, entre nettoyage durée changer pouvez Vous heures. normalement nettoyage durée nettoyage. durée qu’apparaisse porte. déverrouillez jusqu’à touches Appuyez – s’éteint, porte (VERROUILLÉ) lumineux voyant Quand LOCKED (NETTOYAGE) touche Appuyez CLEAN s’éteigne. lumineux (VERROUILLÉ) LOCKED voyant verrouillage celle...
- Page 56 plats. enlever pour mitaines maniques Utilisez chauds. très être ATTENTION vont plats tiroir. préchauffage pendant vides service ■ plats réchauffer pouvez Vous porcelaine. maximale thermique tolérance connaître pour fabricant, avec vérifiez fine, porcelaine ■ réchauffer désirez vous chaleur. ■ craignant plats N’utilisez niveau...
- Page 57 réchaud. tiroir dans contenants mettre ■ avant etc., service, cuillères Enlevez garantie. couvert n’est ceci s’enlever peut fondu plastique chaud. ustensile tiroir, avec direct contact sont s’ils fondent plastique emballages préchauffe. réchaud ATTENTION contenants tiroir minutes environ Attendez intérieur. fini endommager pourrait chaleur.
- Page 58 végétale. d’huile moins contenant bâtonnets gras produits beurre margarine, servez-vous favorites, recettes avec résultats meilleurs obtenir Pour four. cuits aliments goût texture affecte teneur haute Cette d’eau. davantage graisse moins contiennent grasse matière teneur faible à tartiner à produits côté, autre D’un grasses.
- Page 59 cuits. aliments Retirez sabbat. mode toujours mais touche Appuyez (DÉPART) START/ON ⊃ four indiquant ⊃, à ⊃ ARRÊTÉ rôtissage. cuisson/ mode affichée. sera réglée avez vous cuisson passe l’afficheur terminée, cuisson Lorsque ⊃ ⊃ four , le indique l’afficheur durée minutes.
- Page 60 spéciales. indique caractéristiques mode dans réglée l’afficheur jusqu’à secondes commande cette laissez automatique pendant (GRIL) BROIL (CUIRE BAKE l’arrêt désactiver pour (DÉPART) touches simultanément Appuyez touche Appuyez START/ON ci-dessous. étapes suivez automatique). d’arrêt (pas caractéristique, cette voulez vous ARRÊTER indique l’afficheur (ARRÊT) jusqu’à...
-
Page 61: Caractéristiques
four. l’arrêt après cuire à continueront four dans laissés aliments automatiquement, s’éteint four (DÉPART) START/ON touche Appuyez même Souvenez-vous four. aliments Retirez cuisson. nécessaire. l’affichage, effacer commence marche mette four pour touche Appuyez (ARRÊT) voulez vous laquelle à l’heure régler entendre. - Page 62 (MINUTERIE) TIMER touche fois deux Appuyez minuterie annuler Pour souhaitée. durée nouvelle entrer pour touches appuyant puis – touche appuyant l’afficheur. à apparaître voir voulez (MINUTERIE) TIMER restante durée à revenez l’afficheur), vous touches appuyant – à sont cuisson durée différée puis touche...
- Page 63 grilles. position trouver pour l’illustration *Voir environ cuit Bien d’épaisseur) ⁄ (3,8 point À gras. à à environ cuit Bien dans fentes Faire d’épaisseur), (2,5 point À d’agneau Côtes environ gras. d’épaisseur), (2,5 cuit Bien dans fentes Faire d’épaisseur) ⁄ (1,25 porc Côtes...
- Page 64 four. dans récipients Centrez fondu. beurre avec environ steaks Brossez d’épaisseur) (2,5 casserole. Graissez 7–8 d’épaisseur) (2,5 Saumon Steaks environ gras. d’épaisseur), (2,5 cuit Bien dans fentes Faire d’épaisseur) ⁄ (1,25 porc Côtes goût. selon cuisson, durant avant citronné beurre avec Badigeonner soin.
- Page 65 autre. d’un au-dessus directement trouve qu’aucun sorte faire pour grille four. sole directement d’aliments mettez récipients Répartissez grille deux grille deux mettez-en temps, même gâteau couches quatre cuire faites vous lui. autour libre d’espace ⁄ à moins récipient chaque sorte telle placez-les four,...
- Page 66 (DÉPART) touche Appuyez – . touche START/ON appuyant heure bonne Inscrivez (HORLOGE) l’horloge. nouveau à Réglez courant. touche appuyez l’horloge, régler Pour CLOCK panne subi avez vous l’afficheur, dans clignote l’heure d’électricité Panne surface. l’unité allumant d’alimentation cordon endommagerez Vous surface.
- Page 67 droite. à possible loin aussi verrou pousser Assurez-vous verrouillée. position partir à activée. été fonction légèrement, même déplacée, s’être peut verrou poignée quand allumé Reste là. moment à choisie four. porte verrou vérifiez d’autonettoyage, différée marche mise l’heure changer cycle pendant apparaît fonction...
- Page 68 cuisson. éléments contraire rouge, devient RÉCHAUFFAGE ZONE REMARQUE marche. l’élément lorsque s’allume pour voyant RÉCHAUFFAGE ZONE s’allume. CHAUDE surface lumineux voyant pour verre surface suffisamment chauffer susceptibles sont plus réglages touchée. être pouvoir pour froide suffisamment cuisinière. d’une soit qu’elle jusqu’à...
- Page 69 BRÛLEUR) (GRAND BURNER position à LARGE montre d’une aiguilles commande bouton sens dans mettez élément, grand utiliser Pour BRÛLEUR) (PETIT BURNER SMALL position à montre d’une aiguilles inverse sens commande bouton mettez surface, élément petit utiliser Pour modèle. selon 22,9 15,2 po]) 20,3...
- Page 70 plat. fond à woks seulement Utilisez soutien. d’anneaux munis woks N’utilisez renversait. détail. magasins plupart dans graves brûlures subir pourriez procurer vous pouvez Vous plat. fond à woks Vous bombé. fond à woks N’utilisez seulement d'utiliser recommandons vous Nous d’un Utilisation pouvez Vous...
- Page 71 ■ l’élément. récipient n’y l’élément. ■ centre posé n’est récipient ■ plat. n’est récipient fond complètement. surchauffer. verre cuisson surface ■ empêche température limiteur s’évapore bout récipient liquide temps température. limiteur d’un muni certain pour unités éteindre peut surface radiant élément Chaque température...
- Page 72 INSTRUCTIONS CONSERVEZ SÉCURITÉ. CONSEILS ATTENTIVEMENT SUIVEZ LISEZ four. dans garde-chaud tiroir ■ l’autonettoyage à passez utilisez jamais, placez intérieur. heures. deux fini endommager pourrait tiroir performance ■ plus pendant four dans d’aliments réchauffez modifierait Ceci dessous. chaleur emprisonne isolant excellent aluminium papier tiroir.
- Page 73 brisé. cuisson surface verre qualifié technicien avec immédiatement Communiquez électrique. décharge risque créer brisée cuisson surface dans pénétrer peuvent enlever. à difficile très être surface nettoyage liquide débordements brisé. fondre pourrait plastique aliments. ■ verre surface radiants éléments N’utilisez ■ couvrir pour plastiques...
- Page 74 alimentaire. d’origine maladies contre habituellement protège températures à cuisson °F). (180 °C moins d’au INTERNE température jusqu’à volaille °F) (160 °C moins d’au INTERNE température jusqu’à viande volaille—la viande bien Cuisez VOLAILLE… VIANDE BIEN CUISEZ cuisinière. votre distance bonne à combustibles tentures rideaux...
- Page 75 blessures. graves qualifié. technicien à réparations ainsi causant basculer, faire l’appareil autres toutes Confiez manuel. présent endommager pourrait Cela accrocher. s’y dans recommandé spécifiquement soit cela tenir s’y cuisson, surface rangement moins à cuisinière, votre pièce toute ■ tiroir porte, monter personne laissez...
- Page 76 10-08 29-5650 183D6379P050 Mexique Imprimé cuisinière. cadre rangement, tiroir derrière étiquette trouvent ________________ série N° modèle________________ N° série modèle numéros ci-dessous Inscrivez clientèle à Service Garantie clientèle à Service Accessoires 30–34 Dépannage nettoyage Entretien 24–29 JCB710 Ustensiles JCBP83 .20–21 réchaud Tiroir JCBP81 vous-même...