HP ML110 - ProLiant G5 2TB Storage Server NAS User Manual
Hp proliant storage server user guide (440584-004, february 2008)
Hide thumbs
Also See for ML110 - ProLiant G5 2TB Storage Server NAS:
- User manual (72 pages) ,
- Release notes (13 pages) ,
- Installation instructions (3 pages)

Related Manuals for HP ML110 - ProLiant G5 2TB Storage Server NAS


Summary of Contents for HP ML110 - ProLiant G5 2TB Storage Server NAS
- Page 1 HP ProLiant Storage Server user guide Part number: 440584-004 First edition: February 2008...
- Page 2 Legal and notice information © Copyright 1999, 2008 Hewlett-Packard Development Company, L.P. Confidential computer software. Valid license from HP required for possession, use or copying. Consistent with FAR 12.211 and 12.212, Commercial Computer Software, Computer Software Documentation, and Technical Data for Commercial Items are licensed to the U.S.
-
Page 3: Table Of Contents
Contents About this guide ................. 13 Intended audience ........................13 Related documentation ......................13 Document conventions and symbols ..................... 13 Rack stability ..........................14 HP technical support ......................... 15 Customer self repair ........................15 Product warranties ........................15 Subscription service ........................15 HP websites .......................... - Page 4 DL585 G2 hardware components ....................44 SAS and SATA hard drive LEDs ....................46 Systems Insight Display LEDs and internal health LED combinations ..........48 3 Storage management overview ............51 Storage management elements ....................51 Storage management example ..................... 51 Physical storage elements ....................
- Page 5 Managing shadow copies ....................70 The shadow copy cache file ..................71 Enabling and creating shadow copies ................72 Viewing a list of shadow copies ..................73 Set schedules ......................73 Viewing shadow copy properties ................... 73 Redirecting shadow copies to an alternate volume ............74 Disabling shadow copies ....................
- Page 6 Print drivers ......................... 96 User-mode vs. kernel-mode drivers .................. 96 Kernel-mode driver installation blocked by default ............96 HP Jetdirect firmware ....................96 Printer server scalability and sizing ..................97 Backup ..........................97 Best practices ........................... 97 Troubleshooting ........................98 Additional references for print services ..................
- Page 7 Extend Virtual Disk Wizard ..................123 Schedule Snapshot Wizard ..................123 Hardware provider ......................124 Cluster support ......................... 124 9 Cluster administration ..............125 Cluster overview ........................125 Cluster terms and components ....................126 Nodes ..........................126 Resources ........................126 Cluster groups .........................
- Page 8 Non cluster aware file sharing protocols ................140 Adding new storage to a cluster ..................140 Creating physical disk resources .................. 141 Creating file share resources ..................141 Creating NFS share resources ..................141 Shadow copies in a cluster ....................141 Extend a LUN in a cluster ....................
- Page 9 Korean notice A&B ......................158 Class A equipment ..................... 158 Class B equipment ..................... 158 Safety ........................... 159 Battery replacement notice ....................159 Taiwan battery recycling notice ..................159 Power cords ........................159 Japanese power cord notice ....................160 Electrostatic discharge ....................... 160 Preventing electrostatic discharge .................
- Page 10 Figures Internet options screen ..................... 24 HP Storage Server Management console ..............25 ML110 G5 front panel (bezel on) ................33 ML110 G5 front panel (bezel off) ................34 ML110 G5 rear panel ..................... 35 DL160 G5 front panel ..................... 36 DL160 G5 rear panel .....................
- Page 11 Accessing MSNFS from HP Storage Server Management console ........ 101 File and Print Services for NetWare dialog box ............113 New User dialog box .................... 114 NetWare Services tab ................... 115 iSCSI Initiators Identifiers page ................121 Advanced Identifiers page ..................122 Add/Edit Identifier page ..................
- Page 12 Tables Document conventions ..................... 13 Network access methods ..................18 Installation and configuration checklist ............... 19 HP ProLiant RAID configurations ................21 Server configuration worksheet ................. 30 ML110 G5 front panel components (bezel on) ............35 ML110 G5 front panel components (bezel off) ............34 ML110 G5 rear panel components ................
-
Page 13: About This Guide
About this guide This guide provides information about installing, configuring, managing, and troubleshooting the following HP ProLiant Storage Servers: • HP ProLiant ML110 G5 Storage Server • HP ProLiant DL160 G5 Storage Server • HP ProLiant ML350 G5 Storage Server •... -
Page 14: Rack Stability
Convention Element • File and directory names • System output Monospace text • Code • Commands, their arguments, and argument values • Code variables text Monospace, italic • Command variables text Emphasized monospace text Monospace, bold WARNING! Indicates that failure to follow directions could result in bodily harm or death. CAUTION: Indicates that failure to follow directions could result in damage to equipment or data. -
Page 15: Hp Technical Support
WARNING! To reduce the risk of personal injury or damage to equipment: • Extend leveling jacks to the floor. • Ensure that the full weight of the rack rests on the leveling jacks. • Install stabilizing feet on the rack. •... -
Page 16: Hp Websites
HP websites For additional information, see the following HP websites: • http://www.hp.com • http://www.hp.com/go/storage • http://www.hp.com/service_locator • http://www.hp.com/support/manuals • http://www.hp.com/support/downloads Documentation feedback HP welcomes your feedback. To make comments and suggestions about product documentation, please send a message to [email protected]. All submissions become the property of HP. About this guide... -
Page 17: Installing And Configuring The Server
1 Installing and configuring the server Setup overview Your HP ProLiant Storage Server comes preinstalled with either the Windows® Storage Server™ 2003 R2 operating system (32-bit or 64-bit version) or the Microsoft® Windows® Unified Data Storage Server 2003, Enterprise x64 Edition operating system. Microsoft Windows Storage Server 2003 R2 extends the Windows Storage Server 2003 operating system, providing a more efficient way to manage and control access to local and remote resources. -
Page 18: Planning A Network Configuration
NOTE: The direct attachment method requires a display, keyboard, and mouse. Table 2 Network access methods Access method I.E. 5.5 or Storage server HP ProLiant Rapid Notes later desktop Startup Wizard required? accessible? access Requires a monitor, Directly from the storage Direct attachment mouse, and server desktop. -
Page 19: Configuration Checklist
Configuration checklist Use the following checklist to make sure you have completed all configuration tasks for your HP ProLiant Storage Server. The steps for each task are explained in more detail in subsequent chapters of this guide. Table 3 Installation and configuration checklist Steps Reference 1. -
Page 20: Checking Kit Contents
Checking kit contents Remove the contents, making sure you have all the components listed below. If components are missing, contact HP technical support. • HP ProLiant Storage Server (with operating system preloaded) • Power cord(s) • Product Documentation and Safety and Disposal Documentation CD •... -
Page 21: Physical Configuration
Physical configuration The logical disks reside on physical drives as shown in “HP ProLiant RAID configurations” on page 21. The DON'T ERASE volume contains an image that is deployed onto the OS partition during system installation. Table 4 HP ProLiant RAID configurations Server model Logical Disk 1 Logical Disk 2... -
Page 22: Default Boot Sequence
NOTE: The hardware RAID configuration information listed for the DL380 G5 applies to all DL380 G5 models except for the DL380 G5 1.16 TB SAS model. NOTE: In the HP Array Configuration Utility (ACU), logical disks are labeled 1 and 2. In Microsoft Disk Manager, logical disks are displayed as 0 and 1. -
Page 23: Using The Direct Attach Method
Remote management To establish a browser-based connection from a remote client using the HP Lights-Out 100 (LO100) or HP Integrated Lights-Out 2 (iLO 2) interface. For more information, see “Planning for installation” on page 17. IMPORTANT: An IP address can be substituted for a storage server's serial number and hyphen when using either remote browser or Remote Desktop methods to access the HP Storage Server Management console. -
Page 24: Internet Options Screen
On the remote client machine, open the Internet Explorer web browser and select Tools > Internet Options > Security. Figure 1 Internet options screen On the Security screen, select Internet or Local intranet Web content zone, then click Custom Level. Scroll down to locate the ActiveX Controls and plug-ins settings. -
Page 25: Using The Remote Desktop Method
Log on to the HP ProLiant Storage Server Management console with the default user name administrator and the password hpinvent. NOTE: You can change the administrator name and password when you configure the server using the Rapid Startup Wizard. To complete network configuration using the Rapid Startup Wizard, see “Configuring the server on the network”... -
Page 26: Logging Off And Disconnecting
Enter the serial number of the storage server followed by a hyphen (-) in the Computer box and click Connect. For example: D4059ABC3433-. NOTE: If you are able to determine the IP address from your DHCP server, you can substitute the IP address for the serial number and hyphen (-). -
Page 27: Enabling Telnet Server
Enabling Telnet Server The Telnet Server service needs to be enabled prior to its access. The service can be enabled by opening the services MMC: Select Start > Run, and then enter services.msc. Locate and right-click the Telnet service and then select Properties. Choose one of the following: •... -
Page 28: Using The Integrated Lights-Out 2 Method
Ensure that a network cable is connected to the LO100 port located on the back of the storage server. NOTE: This connection method is easiest when the connection is to a DHCP and DNS supported network. If you are using DHCP (IP addressing), you will need to input a static IP address by using the direct attach method and the IPMI section of the BIOS to read the DHCP address. - Page 29 The Integrated Lights-Out port on the storage server can be configured through the Rapid Startup Wizard or through the iLO 2 ROM-Based Setup Utility (RBSU). SNMP is enabled and the Insight Management Agents are preinstalled. The HP iLO 2 management processor provides multiple ways to configure, update, operate, and manage servers remotely.
-
Page 30: Configuring The Server On The Network
and select Server management. In the ProLiant Essentials Software section, select HP Integrated Lights-Out 2 (iLO 2) Standard Firmware. Configuring the server on the network Before you begin When first powering on the storage server you need to have some configuration data readily available to complete the Running the Rapid Startup Wizard. -
Page 31: Running The Rapid Startup Wizard
Configuration Worksheet Network Interfaces (to be completed for non-DHCP configurations) A local area connection is automatically created for each network Local area connection 1 adapter that is detected. An Internet Protocol (IP) address is assigned to the server. If it is not IP address automatically assigned, enter the IP address that you want to assign to this server. -
Page 32: Completing System Configuration
Completing system configuration After the storage server is physically set up and the basic configuration is established, you must complete additional setup tasks. Depending on the deployment scenario of the storage server, these steps can vary. These additional steps can include: •... -
Page 33: Server Components
2 Server components This chapter provides illustrations of the storage server hardware components. NOTE: Connecting the storage server power cord illuminates the LEDs on the front of the unit, the Systems Insight Display LED (if applicable), and the LEDs on the NIC connector (rear panel). The Lights-Out NIC LED (rear panel) illuminates if the Lights-Out port is connected. -
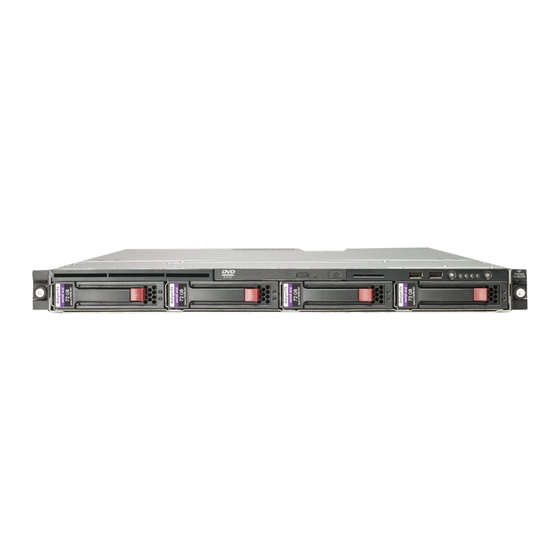
Page 34: Ml110 G5 Front Panel (Bezel Off)
Item Description Status 2nd removable media drive bay cover Power button Green = Power on mode System power Amber = Standby mode Green = Ongoing HDD activity HDD activity USB 2.0 ports Figure 4 ML110 G5 front panel (bezel off) Table 7 ML110 G5 front panel components (bezel off) Item Description... -
Page 35: Ml110 G5 Rear Panel
Figure 5 ML110 G5 rear panel Table 8 ML110 G5 rear panel components Item Description Status Kensington lock notch Access panel thumbscrew System fan Cable lock provision notch PCI slot cover retainer PCI slot cover retainer thumbscrew One slot populated with HP Smart Array E200 controller PCI slot covers (excluding the 2HDD 320 GB SATA model) Management NIC activity and link... -
Page 36: Dl160 G5 Hardware Components
Item Description Status PS/2 mouse port Power supply cable socket PSU fan DL160 G5 hardware components The following figures show components, controls, and indicators located on the front and rear panels of the DL160 G5 storage server. Figure 6 DL160 G5 front panel Table 9 DL160 G5 front panel components Item Description... -
Page 37: Dl160 G5 Rear Panel
Item Description Status Flashing = Network link and activity Off = No network connection Green = System on Power button Amber = System off Green = HDD install ready Flashing green = Data access HDD LED Off = No access Hard disk drive (HDD) bays “SAS and SATA hard drive LED combinations”... -
Page 38: Ml350 G5 Hardware Components
Item Description Status Off = Deactivated VGA port Flashing green = Ongoing network activity HP LO100i Management LAN Port Green = Existing network link USB 2.0 ports Green = 10/100 Mbps connection GbE LAN port for NIC1/Management Orange = 1000 Mbps connection PS/2 keyboard port (purple) ML350 G5 hardware components The following figures show components, controls, and indicators located on the front and rear panels... -
Page 39: Ml350 G5 Rear Panel
Item Description Status Green = Normal External health LED (power Amber = Power redundancy failure supply) Red = Critical power supply failure Green = Network link Flashing = Network link and activity NIC 1 activity LED Off = No network connection Blue = Activated Flashing = System remotely managed UID LED... -
Page 40: Dl380 G5 Hardware Components
Item Description Status Blue = Activated Flashing blue = Remote inquiry UID LED and button Off = Deactivated Power cord connector Video connector Serial connector USB connectors (2) RJ-45 Ethernet connector (iLO 2 management) RJ-45 Ethernet connector (data) PCI Express x* slots (x4 routed) PCI-X slots (100–MHz) PCI-X slot (133–MHz) Green or flashing = Network activity... -
Page 41: Dl380 G5 Front Panel
15681 Figure 10 DL380 G5 front panel Table 13 DL380 G5 front panel components Item Description Status Quick release lever DVD-RW drive Video connector USB connectors (2) LEDs off = Normal LEDs amber = Failure Systems Insight Display “Systems Insight Display LEDs and internal health LED combinations”... -
Page 42: Dl380 G5 Rear Panel
Item Description Status Green = Normal External health LED (power Amber = Power redundancy failure supply) Red = Critical power supply failure Green = Network link Flashing = Network link and activity NIC 1 link/activity LED Off = No link to network. If power is off, view the rear panel RJ-45 LEDs for status. - Page 43 Item Description Status / Definition Power supply bay 1 Power cord connectors (Black) Blue = Activated Flashing = System being remotely managed UID LED button Off = Deactivated iLO 2 connector Video connector (Blue) USB connectors (2) (Black) Serial connector Mouse connector (Green) Keyboard connector (Purple) Expansion slot 1 (32–bit models)
-
Page 44: Dl585 G2 Hardware Components
NOTE: The following specifications apply to expansion slots. x4 slots: x8 cards are supported, but will run at x4 speeds. x8 slots: x16 cards are supported, but will run at x8 speeds. All slots are non-hot-plug. Expansion slots 1 and 2 support half-length low profile cards. DL585 G2 hardware components The following figures show components, controls, and indicators located on the front and rear panels of the DL585 G2 storage server. -
Page 45: Dl585 G2 Rear Panel
Item Description Status Green = Normal (system on) Flashing amber = System health degraded Internal system health LED Flashing red = System health critical Off = Normal (system off) Green = Normal (system on) Flashing amber = System health degraded External system health LED Flashing red = System health critical Off = Normal (system off) -
Page 46: Sas And Sata Hard Drive Leds
Item Description Status PCI Express and PCI-X non-hot-plug expansion slots Hot-plug power supply (primary) T-15 Torx screwdriver NIC connector 2 NIC connector 1 iLO 2 connector Serial connector USB connectors (two) Mouse connector Keyboard connector Video connector Blue = Activated Flashing blue = Server remotely managed Rear UID button and LED Off = Deactivated... -
Page 47: Sas/Sata Hard Drive Leds
Figure 14 SAS/SATA hard drive LEDs Table 17 SAS and SATA hard drive LED combinations 1. Fault/UID LED 2. Online/activity LED Status (amber/blue) (green) The drive has failed, or a predictive failure alert has Alternating amber and blue On, off, or flashing been received for this drive;... -
Page 48: Systems Insight Display Leds And Internal Health Led Combinations
1. Fault/UID LED 2. Online/activity LED Status (amber/blue) (green) Amber, flashing regularly (1 A predictive failure alert has been received for this drive. Replace the drive as soon as possible. The drive is offline, a spare, or not configured as part of an array. - Page 49 Systems Insight Internal health LED Status Display LED and color color Online spare Green Online spare memory enabled and not failed. memory (green) Mirrored memory Amber Bank(s) X failed over to the mirrored memory bank(s). (amber) Mirrored memory Invalid mirrored memory configuration. (flashing (amber) Mirrored memory Green...
- Page 50 Server components...
-
Page 51: Storage Management Overview
3 Storage management overview This chapter provides an overview of some of the components that make up the storage structure of the HP ProLiant Storage Server. Storage management elements Storage is divided into four major divisions: • Physical storage elements •... -
Page 52: Physical Storage Elements
Physical Disks Single Server Cluster Implementation RAID Arrays Storage Elements Logical Drives Selective Storage Presentaion Visible Disks Logical Partitioning Storage Elements NTFS Volumes File \Engineering \Users \Sales \Engineering \Users \Sales \Customers File Folders System \Marketing \Marketing Elements from 02/10/03 09:30 \snapshot.0 from 02/10/03 09:30 \snapshot.0 Shadow Copy Shadow Copies... -
Page 53: Arrays
• Include the appropriate number of physical drives in the arrays to create logical storage elements of desired sizes. Arrays Figure 16. With an array controller installed in the system, the capacity of several physical drives (P1–P3) can be logically combined into one or more logical units (L1) called arrays. When this is done, the read/write heads of all the constituent physical drives are active simultaneously, dramatically reducing the overall time required for data transfer. -
Page 54: Fault Tolerance
Fault tolerance Drive failure, although rare, is potentially catastrophic. For example, using simple striping as shown Figure 17, failure of any hard drive leads to failure of all logical drives in the same array, and hence to data loss. To protect against data loss from hard drive failure, storage servers should be configured with fault tolerance. -
Page 55: Partitions
It is important to note that a LUN may span all physical drives within a storage controller subsystem, but cannot span multiple storage controller subsystems. gl0045 Figure 18 Two arrays (A1, A2) and five logical drives (L1 through L5) spread over five physical drives NOTE: This type of configuration may not apply to all storage servers and serves only as an example. -
Page 56: File System Elements
is important. The same performance characteristics on numbers of reads and writes apply when using fault-tolerant configurations, as is the case with controller-based RAID. These volumes can also be assigned drive letters or be mounted as mount points off existing drive letters. The administrator should carefully consider how the volumes will be carved up and what groups or applications will be using them. -
Page 57: Using Storage Elements
Using storage elements The last step in creating the element is determining its drive letter or mount point and formatting the element. Each element created can exist as a drive letter, assuming one is available, and/or as mount points on an existing folder or drive letter. Either method is supported. However, mount points cannot be used for shares that will be shared using Microsoft Services for Unix. -
Page 58: Management Agents
For additional information, refer to the Management CD in the HP ProLiant Essentials Foundation Pack or the HP SIM website (http://www.hp.com/go/hpsim). Management Agents Management Agents provide the information to enable fault, performance, and configuration management. The agents allow easy manageability of the server through HP SIM software, and thirdparty SNMP management platforms. -
Page 59: File Server Management
4 File server management This chapter begins by identifying file services in Windows Storage Server 2003 R2. The remainder of the chapter describes the many tasks and utilities that play a role in file server management. File services features in Windows Storage Server 2003 R2 Storage Manager for SANs The Storage Manager for SANs (also called Simple SAN) snap-in enables you to create and manage the LUNs that are used to allocate space on storage arrays. -
Page 60: Windows Sharepoint Services
administrators can place quotas on volumes, actively screen files and folders, and generate comprehensive storage reports. By using File Server Resource Manager, you can perform the following tasks: • Create quotas to limit the space allowed for a volume or folder and to generate notifications when the quota limits are approached and exceeded. -
Page 61: Configurable And Pre-Configured Storage
Configurable and pre-configured storage Certain storage servers ship with storage configured only for the operating system. The administrator must configure data storage for the storage server. Other storage servers ship with pre-configured storage for data. Depending on the type of storage server purchased, additional storage configuration is required. -
Page 62: Array Configuration Utility
NOTE: The ACU is used to configure and manage array-based storage. Software RAID-based storage servers use Microsoft Disk Manager to manage storage. You need administrator or root privileges to run the ACU. Array Configuration Utility The HP ACU supports the Smart Array controllers and SCSI hard drives installed on the storage server. To open the ACU from the storage server desktop: NOTE: If this is the first time that the ACU is being run, you will be prompted to select the Execution Mode for... -
Page 63: Disk Management Utility
Disk Management utility The Disk Management tool is a system utility for managing hard disks and the volumes, or partitions, that they contain. Disk Management is used to initialize disks, create volumes, format volumes with the FAT, FAT32, or NTFS file systems, and create fault-tolerant disk systems. Most disk-related tasks can be performed in Disk Management without restarting the system or interrupting users. -
Page 64: Disk Quotas
Defragmentation for a volume can be scheduled to occur automatically at convenient times. Defragmentation can also be done once, or on a recurring basis. NOTE: Scheduling defragmentation to run no later than a specific time prevents the defragmentation process from running later than that time. -
Page 65: Adding Storage
NOTE: When enabling disk quotas on a volume, any users with write access to the volume who have not exceeded their quota limit can store data on the volume. The first time a user writes data to a quota-enabled volume, default values for disk space limit and warning level are automatically assigned by the quota system. -
Page 66: Expanding Storage For Eva Arrays Using Command View Eva
• Increase raw data storage • Improve performance by increasing the number of spindles in a logical drive volume • Change fault-tolerance (RAID) configurations For more information about RAID levels, see the Smart Array Controller User Guide, or the document titled Assessing RAID ADG vs. -
Page 67: Volume Shadow Copies
Volume shadow copies NOTE: Select storage servers can be deployed in a clustered as well as a non-clustered configuration. This chapter discusses using shadow copies in a non-clustered environment. The Volume Shadow Copy Service provides an infrastructure for creating point-in-time snapshots (shadow copies) of volumes. -
Page 68: Allocating Disk Space
NOTE: Shadow copies should not be used to provide access to previous versions of application or e-mail databases. Shadow copies are designed for volumes that store user data such as home directories and My Documents folders that are redirected by using Group Policy or other shared folders in which users store data. -
Page 69: Identifying The Storage Area
CAUTION: To change the storage volume, shadow copies must be deleted. The existing file change history that is kept on the original storage volume is lost. To avoid this problem, verify that the storage volume that is initially selected is large enough. Identifying the storage area To store the shadow copies of another volume on the same file server, a volume can be dedicated on separate disks. -
Page 70: Mounted Drives
NOTE: To check the cluster size of a volume, use the fsutil fsinfo ntfsinfo command. To change the cluster size on a volume that contains data, back up the data on the volume, reformat it using the new cluster size, and then restore the data. Mounted drives A mounted drive is a local volume attached to an empty folder (called a mount point) on an NTFS volume. -
Page 71: The Shadow Copy Cache File
Figure 19 System administrator view of Shadow Copies for Shared Folders The shadow copy cache file The default shadow copy settings allocate 10 percent of the source volume being copied (with a minimum of 350 MB), and store the shadow copies on the same volume as the original volume. (See Figure 20). -
Page 72: Enabling And Creating Shadow Copies
cache file cache file cache file Figure 21 Shadow copies stored on a separate volume The main advantage to storing shadow copies on a separate volume is ease of management and performance. Shadow copies on a source volume must be continually monitored and can consume space designated for file sharing. -
Page 73: Viewing A List Of Shadow Copies
NOTE: After the first shadow copy is created, it cannot be relocated. Relocate the cache file by altering the cache file location under Properties prior to enabling shadow copy. See “Viewing shadow copy properties” on page 73. Viewing a list of shadow copies To view a list of shadow copies on a volume: Access Disk Management. -
Page 74: Redirecting Shadow Copies To An Alternate Volume
CAUTION: Use caution when reducing the size limit for all shadow copies. When the size is set to less than the total size currently used for all shadow copies, enough shadow copies are deleted to reduce the total size to the new limit. -
Page 75: Managing Shadow Copies From The Storage Server Desktop
Managing shadow copies from the storage server desktop To access shadow copies from the storage server desktop: The storage server desktop can be accessed by using Remote Desktop to manage shadow copies. On the storage server desktop, double-click My Computer. Right-click the volume name, and select Properties. -
Page 76: Smb Shadow Copies
NOTE: Shadow Copies for Shared Folders clients are not available for HTTP, FTP, AppleTalk, or NetWare shares. Consequently, users of these protocols cannot use Shadow Copies for Shared Folders to independently retrieve previous versions of their files. However, administrators can take advantage of Shadow Copies for Shared Folders to restore files for these users. -
Page 77: Nfs Shadow Copies
Figure 23 Client GUI When users view a network folder hosted on the storage server for which shadow copies are enabled, old versions (prior to the snapshot) of a file or directory are available. Viewing the properties of the file or folder presents users with the folder or file history—a list of read-only, point-in-time copies of the file or folder contents that users can then open and explore like any other file or folder. -
Page 78: Recovery Of Files Or Folders
Access to NFS shadow copy pseudo-subdirectories is governed by normal access-control mechanisms using the permissions stored in the file system. Users can access only those shadow copies to which they have read access at the time the shadow copy is taken. To prevent users from modifying shadow copies, all pseudo-subdirectories are marked read-only, regardless of the user's ownership or access rights, or the permissions set on the original files. -
Page 79: Recovering An Overwritten Or Corrupted File
Figure 24 Recovering a deleted file or folder Recovering an overwritten or corrupted file Recovering an overwritten or corrupted file is easier than recovering a deleted file because the file itself can be right-clicked instead of the folder. To recover an overwritten or corrupted file: Right-click the overwritten or corrupted file, and then click Properties. -
Page 80: Backup And Shadow Copies
Backup and shadow copies Shadow copies are only available on the network via the client application, and only at a file or folder level as opposed to the entire volume. Hence, the standard backup associated with a volume backup will not work to back up the previous versions of the file system. To answer this particular issue, shadow copies are available for backup in two situations. -
Page 81: Folder And Share Management
Folder and share management The HP ProLiant Storage Server supports several file-sharing protocols, including DFS, NFS, FTP, HTTP, and Microsoft SMB. This section discusses overview information as well as procedures for the setup and management of the file shares for the supported protocols. Security at the file level and at the share level is also discussed. -
Page 82: Properties Dialog Box, Security Tab
Click Properties, and then click the Security tab. Figure 25 Properties dialog box, Security tab Several options are available on the Security tab: • To add users and groups to the permissions list, click Add. Follow the dialog box instructions. •... -
Page 83: Advanced Security Settings Dialog Box, Permissions Tab
To modify ownership of files, or to modify individual file access level permissions, click Advanced. illustrates the properties available on the Advanced Security Settings dialog box. Figure 26 Figure 26 Advanced Security settings dialog box, Permissions tab Other functionality available in the Advanced Security Settings dialog box is illustrated in Figure 26 and includes: •... -
Page 84: User Or Group Permission Entry Dialog Box
Enable or disable permissions by selecting the Allow box to enable permission or the Deny box to disable permission. If neither box is selected, permission is automatically disabled. Figure 27 illustrates the Edit screen and some of the permissions. Figure 27 User or group Permission Entry dialog box Another area of the Advanced Security Settings is the Auditing tab. -
Page 85: Advanced Security Settings Dialog Box, Auditing Tab
Figure 28 Advanced Security Settings dialog box, Auditing tab Click Add to display the Select User or Group dialog box. Figure 29 Select User or Group dialog box NOTE: Click Advanced to search for users or groups. Select the user or group. HP ProLiant Storage Server... -
Page 86: Auditing Entry Dialog Box For Folder Name Ntfs Test
Click OK. The Auditing Entry dialog box is displayed. Figure 30 Auditing Entry dialog box for folder name NTFS Test Select the desired Successful and Failed audits for the user or group. Click OK. NOTE: Auditing must be enabled to configure this information. Use the local Computer Policy Editor to configure the audit policy on the storage server. -
Page 87: Share Management
Figure 31 Advanced Security Settings dialog box, Owner tab The current owner of the file or folder is listed at the top of the screen. To take ownership: Click the appropriate user or group in the Change owner to list. If it is also necessary to take ownership of subfolders and files, enable the Replace owner on subcontainers and objects box. -
Page 88: Defining Access Control Lists
The content of shares should be carefully chosen to avoid two common pitfalls: either having too many shares of a very specific nature, or of having very few shares of a generic nature. For example, shares for general use are easier to set up in the beginning, but can cause problems later. Frequently, a better approach is to create separate shares with a specific purpose or group of users in mind. -
Page 89: Managing Shares
• Standard shares are shares that do not end in a $ character. Standard shares are listed whenever a CIFS client browses for available shares on a CIFS server. The storage server supports both administrative and standard CIFS shares. To create an administrative share, end the share name with the $ character when setting up the share. -
Page 90: File Screening Management
• Define quota templates that can be easily applied to new volumes or folders and that can be used across an organization. File screening management On the File Screening Management node of the File Server Resource Manager snap-in, you can perform the following tasks: •... -
Page 91: Hp Storageworks Library And Tape Tools
HP StorageWorks Library and Tape Tools HP StorageWorks Library and Tape Tools (L&TT) provides functionality for firmware downloads, verification of device operation, maintenance procedures, failure analysis, corrective service actions, and some utility functions. It also provides seamless integration with HP hardware support by generating and e-mailing support tickets that deliver a snapshot of the storage system. - Page 92 File server management...
-
Page 93: Print Services
5 Print services Microsoft Print Management Console Print Management in the Microsoft Windows Server 2003 R2 operating system is a Microsoft Management Console (MMC) snap-on that system administrators can use to perform common print management tasks in a large enterprise. It provides a single interface that administrators can use to perform printer and print server management tasks efficiently with detailed control. -
Page 94: Network Printer Drivers
Network printer drivers Updated print drivers for HP network printers are preinstalled on the storage server. If a Service Release DVD has been run on the server, there are updated HP network print drivers in the C:\hpnas\PRINTERS folder. Print services management Print services information to plan, set up, manage, administer, and troubleshoot print servers and print devices are available online using the Help and Support Center feature. -
Page 95: Planning Considerations For Print Services
• Web-based printer management with the ability to administer, connect to, and view printers through a web browser. • Internet printing enabling users to connect to a printer using the printer's URL. A Microsoft white paper discussing the uses of both components can be obtained at http:// www.microsoft.com/windowsserver2003/techinfo/overview/internetprint.mspx. -
Page 96: Sustaining Print Administration Tasks
be created on the print server. The utility is located on the storage server in the C:\hpnas\Components\Install Network Printer Wizard folder. Sustaining print administration tasks Tasks that need to be performed regularly to support the print services include: • Monitoring print server performance using the built-in performance monitoring tool in the Windows Server operating system. -
Page 97: Printer Server Scalability And Sizing
Internet is required, or the utility can be pointed to a local location where the firmware images are stored. For more information on upgrading HP Jetdirect print server firmware, see http:// h20000.www2.hp.com/bizsupport/TechSupport/Document.jsp?objectID=bpj06917. Printer server scalability and sizing A Microsoft technical paper overviews several key factors that influence the capacity of a given print server configuration. -
Page 98: Troubleshooting
• Stop and restart the spooler service, or restart the print server. Troubleshooting The online help or Help and Support Center feature should be used to troubleshoot general and common print-related problems. Printing help can be accessed by selecting Start > Help and Support, then the Printers and Faxes selection under Help Contents. -
Page 99: Microsoft Services For Network File System (Msnfs)
6 Microsoft Services for Network File System (MSNFS) This chapter discusses networking features in Microsoft Services for Network File System (MSNFS). MSNFS Features MSNFS is an update to the NFS components that were previously available in Services for UNIX 3.5. MSNFS includes the following new features: •... -
Page 100: Msnfs Use Scenarios
• Administration components • Password synchronization • Server for NIS The UNIX Identity Management component is not enabled by default on the storage server. To install this component: Access Add/Remove Programs. Select Add/Remove Windows Components > Active Directory Services > Details. Install Identity Management for Windows. -
Page 101: Administering Msnfs
• Client for NFS Normally, a Windows-based computer cannot access files on a UNIX computer. A computer running Windows Server 2003 R2 and Client for NFS, however, can access files stored on a UNIX-based NFS server. The Client for NFS feature of the Microsoft Services for NFS component is not preinstalled on the storage server although information about this feature appears in the online help. -
Page 102: Authentication Table
UNIX computers follow advisory locking for all lock requests. This means that the operating system does not enforce lock semantics on a file, and applications that check for the existence of locks can use these locks effectively. However, Server for NFS implements mandatory locks even for those locking requests that are received through NFS. - Page 103 To install the Authentication software on the domain controllers: From the SFU 3.5 files, locate the directory named SFU35SEL_EN. On the domain controller where the Authentication software is being installed use Windows Explorer to: Open the shared directory containing setup.exe. Double-click the file to open it.
- Page 104 In the console tree, right-click the domain for which you want to raise functionality, and then click Raise Domain Functional Level. In Select an available domain functional level, click Windows Server 2003. Click Raise. Server for NFS administration The Server for NFS administration online help contains information for the following topics: •...
- Page 105 Managing access using the .maphosts file The User Name Mapping component of MSNFS acts as an intermediary between NFS servers and NFS clients on a network containing UNIX hosts and Windows-based computers. To maintain the implicit trust relationship between NFS client and host computers, administrators can control which computers can access User Name Mapping by editing the .maphosts in the %windir%\msnfs directory of the storage server.
-
Page 106: User Name Mapping
Assign the Everyone group the appropriate permissions on the NFS Share. Enable anonymous access to the share. To enable anonymous access to an NFS share, do the following: Open Windows Explorer by clicking Start > Run, and entering Explorer. Navigate to the NFS share. Right-click the NFS Share, and then click Properties. - Page 107 You can back up and restore User Name Mapping data at any time. Because the database is backed up to a file, you can use that file to copy the mapping database to another server. This provides redundancy for the sake of fault tolerance. NOTE: If you obtain information from multiple NIS domains, it is assumed that each domain has unique users and user identifiers (UIDs).
-
Page 108: Microsoft Services For Nfs Troubleshooting
Microsoft Services for NFS troubleshooting The following information on how to troubleshoot issues with Microsoft Services for NFS is available using the online help: • General issues • Troubleshooting Server for NFS • Troubleshooting User Name Mapping For further details, see the online help for Microsoft Services for Network File System. Microsoft Services for NFS command-line tools Table 22 provides a listing of Windows command-line administration tools. - Page 109 comply with Request for Comments (RFC) 1179. The combination of the LPR and LPD are included in print services for UNIX. Print services for UNIX is not preinstalled on the print server. To install print services for UNIX: Log on as administrator or as a member of the Administrators group. Select Start >...
- Page 110 Microsoft Services for Network File System (MSNFS)
-
Page 111: Other Network File And Print Services
7 Other network file and print services This chapter discusses file and print services for NetWare and Macintosh. File and Print Services for NetWare (FPNW) File and Print Services for NetWare (FPNW) is one part of the Microsoft software package called Services for NetWare. -
Page 112: Managing File And Print Services For Netware
Click Install. The Select Network Component Type dialog box is displayed. Click Service, and then click Add. Click the Have Disk icon, and then navigate to the location of Services for NetWare. Services for NetWare is located in the path: c:\hpnas\components\SFN5.02\fpnw\netsfn.inf. -
Page 113: Creating And Managing Netware Users
Select FPNW, and then click Properties. Figure 33 File and Print Services for NetWare dialog box Enter an FPNW Server Name and Description. This server name must be different from the server name used by Windows or LAN Manager-based clients. If changing an existing name, the new name is not effective until stopping and restarting FPNW. -
Page 114: Adding Local Netware Users
Adding local NetWare users From the storage server desktop, click the Management Console icon, click Core Operating System, and then click Local Users and Groups. Right-click the Users folder, and then click New User. Figure 34 New User dialog box Enter the user information, including the user's User name, Full name, Description, and Password. -
Page 115: Managing Ncp Volumes (Shares)
Click the NetWare Services tab. Figure 35 NetWare Services tab Select Maintain NetWare compatible login. Set other NetWare options for the user, and then click OK. NOTE: The installation of File and Print Services for NetWare also creates a supervisor account, which is used to manage FPNW. -
Page 116: Creating A New Ncp Share
Creating a new NCP share To create a new file share: From the storage server desktop, select Start > Settings > Control Panel > Administrative Tools > Server Manager. Select File and Print Service for NetWare> Shared Volumes. Click Create Volume. Specify the volume name and path. -
Page 117: Additional Resources
Millennium clients, these non–Windows clients do not receive driver updates from the print server after a driver is initially downloaded. The same connection methods are available: drag and drop, the Add Printer Wizard, referencing a UNC path, or double-clicking the shared printer icon. Additional resources For more information about using and configuring File and Print Services for NetWare, see the online help. -
Page 118: Print Services For Macintosh
CAUTION: AppleTalk shares should not be created on clustered resources because data loss can occur due to local memory use. • To set up AppleTalk shares • To configure AppleTalk sharing properties • To allow client permission to an AppleTalk share If AppleTalk is enabled for your server configuration, specify which AppleTalk clients are granted access to each share. -
Page 119: Enterprise Storage Servers
8 Enterprise storage servers Some HP ProLiant Storage Servers use the Microsoft® Windows® Unified Data Storage Server 2003 operating system. This operating system provides unified storage server management capabilities, simplified setup and management of storage and shared folders, and support for Microsoft iSCSI Software Target. -
Page 120: Microsoft Iscsi Software Target
Type the network name or the network IP address of the storage server followed by /admin (for example, http://myStorageServer/admin). In Remote Administration Desktop, provide the appropriate credentials. NOTE: Administrative credentials are not required to establish a browser-based connection, but are required to manage the storage server. -
Page 121: Wizards
Wizards To support creation and management of iSCSI targets, virtual disks, and snapshots, the iSCSI Software Target snap-in provides several wizards. Create iSCSI Target Wizard This section describes how to create an iSCSI Target using the Create iSCSI Target Wizard. Log on to the storage server using an account with administrative privileges. -
Page 122: Create Virtual Disk Wizard
Figure 37 Advanced Identifiers page Figure 38 Add/Edit Identifier page Click Next. Click Finish to complete the wizard and create the iSCSI Target. Create Virtual Disk Wizard This section describes how to create an iSCSI Virtual Disk using the Create Virtual Disk Wizard. NOTE: In order to create iSCSI Virtual Disks, it is required that physical disks are formatted as NTFS. -
Page 123: Import Virtual Disk Wizard
Enter a description for the iSCSI virtual disk (optional) and click Next. On the Access page, click Add to assign the iSCSI virtual disk to an iSCSI Target. On the Add Targets dialog box, select a Target and click OK. Click Finish to complete the wizard and create the iSCSI virtual disk. -
Page 124: Hardware Provider
Click Finish to complete the wizard and schedule snapshots. Hardware provider To support advanced management of iSCSI virtual disks and snapshots, you can use the Microsoft iSCSI Software Target Virtual Disk Service Hardware Provider, which comes preinstalled on the HP ProLiant Storage Server. -
Page 125: Cluster Administration
9 Cluster administration NOTE: Not all HP ProLiant Storage Servers can be clustered. See the HP ProLiant Storage Server QuickSpecs to determine if your storage server can be clustered. Windows Storage Server 2003 Release 2 clusters can include up to eight nodes. One important feature of the HP ProLiant Storage Server clusterable models is that they can operate as a single node or as a cluster. -
Page 126: Cluster Terms And Components
Cluster Node A Cluster Node B Private Network Node A HBA 2 Node A Node B HBA 1 HBA 1 +++++++++++++++++++++++++++++++++++++++++++++++++++ Node B HBA 2 SAN Switch SAN Switch Storage Area Network Cluster Quorum Mirrorset LUN 1 Data RAID set Node B Data RAID set LUN 3... -
Page 127: Cluster Groups
• CIFS file share resources • NFS file share resources • FTP file share resources • iSCSI resources Cluster groups Cluster resources are placed together in cluster groups. Groups are the basic unit of failover between nodes. Resources do not fail over individually; they fail over with the group in which they are contained. Virtual servers A virtual server is a cluster group that consists of a static IP Address resource and a Network Name resource. -
Page 128: Cluster Concepts
• Storing the most current version of the cluster database • Guaranteeing that only one set of active communicating nodes is allowed to operate as a cluster Cluster concepts Figure 40 illustrates a typical cluster configuration with the corresponding storage elements. The diagram progresses from the physical disks to the file shares, showing the relationship between both the cluster elements and the physical devices underlying them. -
Page 129: Hierarchy Of Cluster Resource Components
Physical Disk resources are created for each basic disk inside Cluster Administrator. Directories and folders are created on assigned drives. Cluster components (virtual servers, file shares) are created, organized in groups, and placed within the folders using Cluster Administrator exclusively. Hierarchy of cluster resource components Figure 40 depicts the cluster resource hierarchy as follows:... -
Page 130: Storage Planning
• Storage planning • Network planning • Protocol planning Storage planning For clustering, a basic disk must be designated for the cluster and configured as the Quorum disk. Additional basic disks are presented to each cluster node for data storage as physical disk resources. The physical disk resources are required for the basic disks to successfully work in a cluster environment, protecting it from simultaneous access from each node. -
Page 131: Protocol Planning
Virtual names and addresses are the only identification used by clients on the network. Because the names and addresses are virtual, their ownership can transition from one node to the other during a failover, preserving access to the resources in the cluster group. A cluster uses at least two network connections on each node: •... -
Page 132: Preparing For Cluster Installation
NOTE: AppleTalk is not supported on clustered disk resources. AppleTalk requires local memory for volume indexing. On failover events, the memory map is lost and data corruption can occur. Preparing for cluster installation This section provides the steps necessary to cluster HP ProLiant Storage Servers. Before beginning installation Confirm that the following specifications have been met before proceeding: The procedures in the HP ProLiant Storage Server SAN Connection and Management white paper... -
Page 133: Checklists For Cluster Server Installation
On the left side of the window, select Add/Remove Windows Components. The Windows Components Wizard appears. Select Other Network File and Print Services and click the Details button. The Other Network File and Print Services window is displayed. Uncheck the Microsoft Services for NFS subcomponent. Click OK, then Next, followed by Finish. -
Page 134: Shared Disk Requirements
• A domain user account for Cluster service (all nodes must be members of the same domain) • Each node should have at least two network adapters—one for connection to the public network and the other for the node-to-node private cluster network. If only one network adapter is used for both connections, the configuration is unsupported. -
Page 135: Setting Up Networks
Additional Step Node 1 Storage Comments Nodes Power on the next node after the first Configuring node is successfully configured. Presented additional nodes Complete this process for all cluster nodes. At this point all cluster nodes should be Post-installation Presented To configure the Cluster service on the storage server, an account must have administrative permissions on each node. -
Page 136: Verifying Domain Membership
Verifying domain membership All nodes in the cluster must be members of the same domain and able to access a domain controller and a DNS Server. Setting up a cluster account The Cluster service requires a domain user account under which the Cluster service can run. This user account must be created before installing Cluster service, because setup requires a user name and password. -
Page 137: Using Cluster Administrator
Using Cluster Administrator Cluster Administrator shows information about the groups and resources on all of your clusters and specific information about the clusters themselves. A copy of Cluster Administrator is automatically installed on a cluster node when the Cluster service is installed. Using Cluster Administrator remotely For remote administration, copies of Cluster Administrator can be installed on other computers on your network. -
Page 138: Geographically Dispersed Clusters
Geographically dispersed clusters Cluster nodes can be geographically dispersed to provide an additional layer of fault tolerance. Geographically dispersed clusters are also referred to as stretched clusters. The following rules must be followed with geographically dispersed clusters: • A network connection with latency of 500 milliseconds or less ensures that cluster consistency can be maintained. -
Page 139: Load Balancing
Load balancing The creation of separate cluster groups for each virtual server provides more flexibility in balancing the processing load on the cluster between the two nodes. Each cluster group can be assigned to a cluster node with the preferred owner parameter. For example, if there are two cluster groups, the cluster could be set up to have the first cluster group owned by Node A and the second cluster group owned by Node B. -
Page 140: Nfs Cluster-Specific Issues
NFS cluster-specific issues For convenience, all suggestions are listed below: • Back up user and group mappings. To avoid loss of complex advanced mappings in the case of a system failure, back up the mappings whenever the mappings have been edited or new mappings have been added. •... -
Page 141: Creating Physical Disk Resources
The tasks described below are used to add storage to a cluster. See the online help for clustering for additional details. Creating physical disk resources A physical disk resource must reside within a cluster group. An existing cluster group can be used or a new cluster group must be created. -
Page 142: Extend A Lun In A Cluster
Extend a LUN in a cluster To extend a LUN on a storage array in a cluster, review the requirements and procedures from the storage array hardware provider for expanding or extending storage. For additional information associated with extending a LUN in a cluster, see the following Microsoft Knowledge Base articles: •... -
Page 143: Print Services In A Cluster
Print services in a cluster The Windows Server 2003 Cluster service implementation increases availability of critical print servers. A print spooler service on a clustered print server may be hosted on any of the nodes in the cluster. As with all cluster resources, clients should access the print server by its virtual network name or virtual IP address. -
Page 144: Advanced Cluster Administration Procedures
Advanced cluster administration procedures Failing over and failing back As previously mentioned, when a node goes offline, all resources dependent on that node are automatically failed over to another node. Processing continues, but in a reduced manner, because all operations must be processed on the remaining node(s). In clusters containing more than two nodes, additional fail over rules can be applied. -
Page 145: Powering Down The Cluster
Shutting down a cluster node causes all cluster resources served by that node to fail over to the other node(s). This causes any currently executing client read and write operations to fail until the cluster failover process completes. The other node(s) are placed under a heavier load by the extra work until the second node is powered up and rejoins the cluster. -
Page 146: Additional Information And References For Cluster Services
Additional information and references for cluster services The following web sites provide detailed information for clustered environments for Windows Server 2003, which also applies to Windows Storager Server 2003: • Cluster services http://www.microsoft.com/windowsserver2003/technologies/clustering/default.mspx • How to: Set up a clustered print server http://support.microsoft.com/default.aspx?scid=kb;en-us;278455 •... -
Page 147: Troubleshooting, Servicing, And Maintenance
10 Troubleshooting, servicing, and maintenance Troubleshooting the storage server The “Support and troubleshooting” task at the HP Support & Drivers web site (http://www.hp.com/ go/support) can be used to troubleshoot problems with the storage server. After entering the storage server name and designation (for example, ML110 G5 storage server) or component information (for example, Array Configuration Utility), use the following links for troubleshooting information: •... -
Page 148: Webes (Web Based Enterprise Services)
Known issues and workarounds for the storage server products and the service release are addressed in release notes. To view the latest release notes, go to http://www.hp.com/support/manuals. Under the storage section, click NAS and then select your product. WEBES (Web Based Enterprise Services) WEBES is a tool suite aimed at preventing or reducing your system's down time. -
Page 149: Certificate Of Authenticity
Lights-Out Edition (RILOE), Remote Insight Lights-Out Edition II (RILOE II) and Integrated Lights-Out options that have firmware that can be updated. It is important to update the firmware (also called “flashing the ROM”) as part of regular server maintenance. In addition, checking for specific firmware updates in between regular updates helps to keep the server performing optimally. - Page 150 Troubleshooting, servicing, and maintenance...
-
Page 151: 11 System Recovery
11 System recovery This chapter describes how to use the System Recovery DVD that is provided with your storage server. The System Recovery DVD The HP ProLiant Storage Server System Recovery DVD that is provided with your storage server allows you to install an image or recover from a catastrophic failure. - Page 152 System recovery...
-
Page 153: A Configuring Storage Server For Web Access (Optional)
A Configuring storage server for Web access (optional) Setting up an Internet connection Before running Windows 2003 R2 operating system updates, you must set up an Internet connection for the storage server. There are two methods for configuring an Internet connection: •... -
Page 154: Proxy Server Settings
Figure 42 Proxy server settings In the Address box, type the network name or IP address of the proxy server. In the Port box, type the port number that is used by the proxy server for client connections (for example, 8080). Click the Bypass proxy server for local addresses check box if you do not want the proxy server computer to be used when you connect to a computer on the local network. -
Page 155: B Regulatory Compliance And Safety
B Regulatory compliance and safety Federal Communications Commission notice Part 15 of the Federal Communications Commission (FCC) Rules and Regulations has established Radio Frequency (RF) emission limits to provide an interference-free radio frequency spectrum. Many electronic devices, including computers, generate RF energy incidental to their intended function and are, therefore, covered by these rules. -
Page 156: Declaration Of Conformity For Products Marked With The Fcc Logo, United States Only
To identify this product, see the Part, Series, or Model number found on the product. Modifications The FCC requires the user to be notified that any changes or modifications made to this device that are not expressly approved by Hewlett-Packard Company may void the user's authority to operate the equipment. Cables Connections to this device must be made with shielded cables with metallic RFI/EMI connector hoods in order to maintain compliance with FCC Rules and Regulations. -
Page 157: International Notices And Statements
WARNING! Use of controls or adjustments or performance of procedures other than those specified herein or in the installation guide of the laser product may result in hazardous radiation exposure. To reduce the risk of exposure to hazardous radiation: • Do not try to open the module enclosure. -
Page 158: Bsmi Notice
BSMI notice Japanese notice Korean notice A&B Class A equipment Class B equipment Regulatory compliance and safety... -
Page 159: Safety
Safety Battery replacement notice WARNING! The computer contains an internal lithium manganese dioxide, a vanadium pentoxide, or an alkaline battery pack. A risk of fire and burns exists if the battery pack is not properly handled. To reduce the risk of personal injury: •... -
Page 160: Japanese Power Cord Notice
Japanese power cord notice Electrostatic discharge To prevent damage to the system, be aware of the precautions you need to follow when setting up the system or handling parts. A discharge of static electricity from a finger or other conductor may damage system boards or other static-sensitive devices. -
Page 161: Danish Notice
Tento symbol na produktu nebo balení ozna uje výrobek, který nesmí být vyhozen spolu s ostatním domácím odpadem. Povinností uživatele je p edat takto ozna ený odpad na p edem ur ené sb rné místo pro recyklaci elektrických a elektronických za ízení. Okamžité t íd ní a recyklace odpadu pom že uchovat p írodní... -
Page 162: Estonian Notice
Estonian notice Seadmete jäätmete kõrvaldamine eramajapidamistes Euroopa Liidus See tootel või selle pakendil olev sümbol näitab, et kõnealust toodet ei tohi koos teiste majapidamisjäätmetega kõrvaldada. Teie kohus on oma seadmete jäätmed kõrvaldada, viies need elektri- ja elektroonikaseadmete jäätmete ringlussevõtmiseks selleks ettenähtud kogumispunkti. Seadmete jäätmete eraldi kogumine ja ringlussevõtmine kõrvaldamise ajal aitab kaitsta loodusvarasid ning tagada, et ringlussevõtmine toimub viisil, mis kaitseb inimeste tervist ning keskkonda. -
Page 163: Greek Notice
garantiert eine Wiederverwertung, die die Gesundheit des Menschen und die Umwelt schützt. Informationen dazu, wo Sie Rücknahmestellen für Ihre Altgeräte finden, erhalten Sie bei Ihrer Stadtverwaltung, den örtlichen Müllentsorgungsbetrieben oder im Geschäft, in dem Sie das Gerät erworben haben. Greek notice Hungarian notice Készülékek magánháztartásban történ selejtezése az Európai Unió... -
Page 164: Lithuanian Notice
Š ds simbols uz izstr d juma vai uz t iesai ojuma nor da, ka šo izstr d jumu nedr kst izmest kop ar citiem sadz ves atkritumiem. J s atbildat par to, lai nolietot s iek rtas tiktu nodotas speci li iek rtotos punktos, kas paredz ti izmantoto elektrisko un elektronisko iek rtu sav kšanai otrreiz jai p rstr dei. -
Page 165: Slovakian Notice
Slovakian notice Likvidácia vyradených zariadení v domácnostiach v Európskej únii Symbol na výrobku alebo jeho balení ozna uje, že daný výrobok sa nesmie likvidova s domovým odpadom. Povinnos ou spotrebite a je odovzda vyradené zariadenie v zbernom mieste, ktoré je ur ené... - Page 166 och gör att avfallet återvinns på ett sätt som skyddar människors hälsa och miljön. Kontakta ditt lokala kommunkontor, din närmsta återvinningsstation för hushållsavfall eller affären där du köpte produkten för att få mer information om var du kan lämna ditt avfall för återvinning. Regulatory compliance and safety...
-
Page 167: Index
Index cluster adding new storage, 140 access rights, managing, 139 analysis, 137 accessing concepts, 128 HP Storage Server Management console, 22 concepts, diagram, 128 ACL, defining, 88 diagram, 126 Active Directory Lookup, 99 dual data paths, 132 ActiveX geographically dispersed, 138 enabling, 23 group, 138 AppleTalk, 57... - Page 168 folders auditing access, 84 data blocks, 53 managing, 81 data striping, 53 FPNW default login, 23 accessing, 112 DHCP, 30 described, 111 disk access, verifying, 136 installing, 111 Disk Management extending volumes, 66 document conventions, 13 grounding methods, 160 related documentation, 13 group, cluster, 129...
- Page 169 kernel-mode drivers partitions check for, 96 extended, 55 kernel-mode drivers primary, 55 installation blocked, 96 permissions contents, 20 file level, 81 list adding users and groups, 82 removing users and groups, 82 LAN icons, renaming, 135 modifying, 83 laser compliance, 156 resetting, 83 Lights-Out 100, described, 27...
- Page 170 remote browser method shadow copies, 56 connecting to network, 24 backups, 80 Remote Desktop method cache file, 71 connecting to network, 25 defragmentation, 69 Remote management, 27 described, 67 resources, cluster, 126 disabling, 74 file or folder recovery, 78 managing, 70 on NFS shares, 77 safety, 159...
- Page 171 user account, setting up, 136 user-mode drivers, 96 users adding to permission list, 82 NetWare adding, 114 enabling, 114 verifying connectivity, 135 disk access, 136 domain membership, 136 name resolution, 135 virtual server, defined, 127 Volume Shadow Copy Service, 67 volumes creating Novell, 111...
- Page 172 Index...