Cisco CIVS-IPC-2500W - Video Surveillance IP Camera Network User Manual
Video surveillance ip camera
Hide thumbs
Also See for CIVS-IPC-2500W - Video Surveillance IP Camera Network:
- User manual (92 pages)
Table of Contents
Quick Links
Table of Contents
Troubleshooting

Related Manuals for Cisco CIVS-IPC-2500W - Video Surveillance IP Camera Network


Summary of Contents for Cisco CIVS-IPC-2500W - Video Surveillance IP Camera Network
- Page 1 Cisco Video Surveillance IP Camera User Guide Models CIVS-IPC-2500 and CIVS-IPC-2500W Americas Headquarters Cisco Systems, Inc. 170 West Tasman Drive San Jose, CA 95134-1706 http://www.cisco.com Tel: 408 526-4000 800 553-NETS (6387) Fax: 408 527-0883 Text Part Number: OL-14220-02...
- Page 2 OR LIMITED WARRANTY, CONTACT YOUR CISCO REPRESENTATIVE FOR A COPY. The Cisco implementation of TCP header compression is an adaptation of a program developed by the University of California, Berkeley (UCB) as part of UCB’s public domain version of the UNIX operating system. All rights reserved. Copyright © 1981, Regents of the University of California.
-
Page 3: Table Of Contents
Configuration Overview Navigating the Configuration Windows Setup Windows Basic Setup Window Wireless Setup Window Advanced Setup Window 3-10 IP Filter Window 3-12 Administration Windows 3-13 Users Window 3-13 Maintenance Window 3-15 Cisco Video Surveillance System IP Camera User Guide OL-14220-02... - Page 4 A P P E N D I X Obtaining the Required Driver Pack Guidelines for Using the IP Camera with VSM Troubleshooting the IP Camera when used with VSM N D E X Cisco Video Surveillance System IP Camera User Guide OL-14220-02...
-
Page 5: Preface
Obtaining Documentation, Obtaining Support, and Security Guidelines For information about obtaining documentation, submitting a service request, and gathering additional information, see the monthly What’s New in Cisco Product Documentation, which also lists all new and revised Cisco technical documentation, at: http://www.cisco.com/en/US/docs/general/whatsnew/whatsnew.html... - Page 6 Obtaining Documentation, Obtaining Support, and Security Guidelines Subscribe to the What’s New in Cisco Product Documentation as a Really Simple Syndication (RSS) feed and set content to be delivered directly to your desktop using a reader application. The RSS feeds are a free service and Cisco currently supports RSS version 2.0.
-
Page 7: Chapter 1 Overview
• Note If you use the IP camera with Cisco Video Surveillance Manager (VSM), not all IP camera features are currently supported. These features are noted throughout this manual. For more detailed information, including usage guidelines and troubleshooting tips, see Appendix A, “Using the IP Camera with Cisco... -
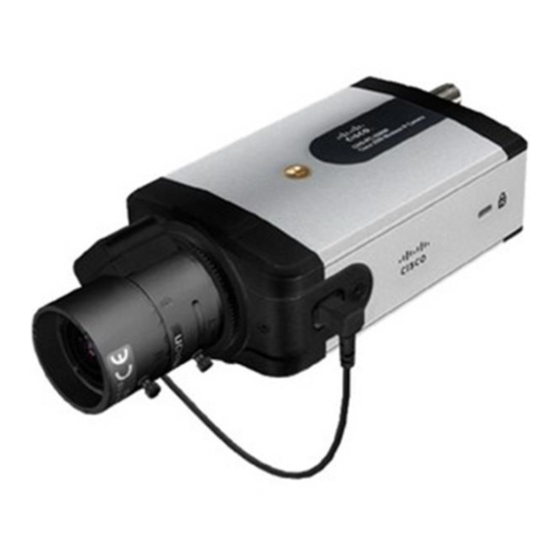
Page 8: Ip Camera Physical Details
Figure 1-1 and the table that follows describe the items on the front of the IP camera. Cisco Video Surveillance System IP Camera User Guide OL-14220-02... - Page 9 Lens opening The IP camera supports a variety of C and CS mount lenses, which attach here. For best performance, Cisco recommends that you use a DC auto iris lens. Focus ring Allows you to adjust the back focus of the IP camera.
- Page 10 Connect or disconnect the LAN cable only when the IP camera is powered off. Doing so while the IP camera is powered on does not switch the interface between wired and wireless. Cisco Video Surveillance System IP Camera User Guide OL-14220-02...
- Page 11 10 Power input Provides for the connection of an optional 12 V, 1 amp DC power adapter. Use only the Cisco specified power supply adapter. Caution Figure 1-3 and the table that follows describe the items on the side of the IP camera.
-
Page 12: Dc Auto Iris Lens Connector Pinouts
DC Auto Iris Lens Connector Pinouts Function Damp – Damp + Drive + Drive – Package Contents The the Cisco Video Surveillance IP Camera package includes these items: Camera • Lens opening dust cap • Mounting hole protector • Antennas (wireless model only) •... -
Page 13: Installing The Ip Camera
If you are using the wireless IP camera model or using the wired IP camera model on a network • connection that does not provide PoE, you must use the Cisco 12 V power adapter (Cisco part number CIVS-PWRPAC-12V). You can order the power adapter from Cisco. -
Page 14: Chapter 2 Getting Started
The plug-socket combination must be accessible at all times, because it serves as the main Warning disconnecting device. Statement 1019 Inline power circuits provide current through the communication cable. Use the Cisco provided cable or Caution a minimum 24AWG communication cable... - Page 15 IP camera: DHCP enabled, SSID = cisco, and all security disabled. Cisco Video Surveillance System IP Camera User Guide...
- Page 16 (On the Cisco power adapter, the positive wire has a white stripe and the negative wire has no stripe.)
-
Page 17: Performing The Initial Setup Of The Ip Camera
In the HTTP area, click the HTTP radio button if you want to allow both HTTP and HTTPS connections to the IP camera. The default setting is HTTPS, which allows only HTTPS (secure) connections to the IP camera. Step 5 Click Apply. The IP camera reboots. Cisco Video Surveillance System IP Camera User Guide OL-14220-02... -
Page 18: Accessing The Ip Camera Windows
“Advanced Setup Window” section on page 3-10. Your user name and password for the IP camera. The IP camera administrator configures user names • and passwords as described in the “Users Window” section on page 3-13. Cisco Video Surveillance System IP Camera User Guide OL-14220-02... -
Page 19: Accessing The Ip Camera Windows
Click the Home link to view and control live video from the camera. For detailed information about these actions, see Chapter 4, “Viewing and Live Video.” • Click the Logout button to exit the window. Cisco Video Surveillance System IP Camera User Guide OL-14220-02... -
Page 20: Adjusting Back Focus On The Ip Camera
1-4). There are various reset types, as described in Table 2-2. You also can perform some reset operations from the Maintenance window as described in the “Maintenance Window” section on page 3-15. Cisco Video Surveillance System IP Camera User Guide OL-14220-02... -
Page 21: Converting A Wireless Camera Between Wired And Wireless Modes
IP camera. Next, connect a network cable to the LAN port on the back of the camera and to a 10/100BaseT hub, router, or switch. Then, reconnect the power adapter. Cisco Video Surveillance System IP Camera User Guide OL-14220-02... - Page 22 Chapter 2 Getting Started Converting a Wireless Camera between Wired and Wireless Modes Cisco Video Surveillance System IP Camera User Guide 2-10 OL-14220-02...
-
Page 23: Configuration Overview
C H A P T E R Configuring and Managing the IP Camera The Cisco Video Surveillance IP Camera provides configuration windows that you use to configure and manage the IP camera. This chapter explains how to access the configuration windows, describes each window, and provides detailed information about the options that are available in each window. - Page 24 Required if you use the internal See the “Audio Window” section streams that are received or sent or an external microphone, or an on page 3-20. by the IP camera. external speaker. Cisco Video Surveillance System IP Camera User Guide OL-14220-02...
- Page 25 Syslog server. Video log options Let you manage the IP camera Recommended. See the “Video Log Window” video log. section on page 3-43. Cisco Video Surveillance System IP Camera User Guide OL-14220-02...
-
Page 26: Navigating The Configuration Windows
• Video – Audio – Security • Product Process – Initialization – – Complexity • Applications Mail & FTP – Motion Detection – Event – SNMP – Alarm I/O Ports – Cisco Video Surveillance System IP Camera User Guide OL-14220-02... -
Page 27: Setup Windows
3-43.) The camera name can include any combination of up to 15 letters and numbers. Cisco recommends that you give each IP camera a unique name so that you can identify it easily. Cisco Video Surveillance System IP Camera User Guide... - Page 28 IP address of the NTP server. NTP Port If you configured the IP camera to obtain its time from an NTP server, enter the NTP server port number. The default value is 123. Cisco Video Surveillance System IP Camera User Guide OL-14220-02...
-
Page 29: Wireless Setup Window
Cancel before clicking Save. These buttons appear at the bottom of the window. You may need to scroll down to see them. Table 3-2 describes the options in the Wireless Setup window. Cisco Video Surveillance System IP Camera User Guide OL-14220-02... - Page 30 The SSID can be any combination of up to 32 of alpha, numeric, and special characters. It is case sensitive. The default value is cisco (all lower case). For increased security, change this value to an SSID of your choice.
- Page 31 PC to the IP camera. Password—IP camera client log in password for the RADIUS – server. Region Display only. Displays the region that is configured for the IP camera. Cisco Video Surveillance System IP Camera User Guide OL-14220-02...
-
Page 32: Advanced Setup Window
Advanced Setup Window Options Option Description This feature is not currently supported if you use the IP camera with Cisco VSM. Note Enable CDP (Cisco Check this check box if CDP is enabled in your network and you want the IP Discovery Protocol) camera to send CDP discovery messages. - Page 33 Multicast enables multiple devices to receive the video signal from the IP camera simultaneously. This feature is not currently supported if you use the IP camera with Note Cisco VSM. Cisco Video Surveillance System IP Camera User Guide 3-11 OL-14220-02...
-
Page 34: Ip Filter Window
Valid values are 1 through 255. The default value is 16. This feature is not currently supported if you use the IP camera with Cisco VSM. Note Enable QoS Mode... -
Page 35: Administration Windows
Table 3-5 describes the options in the IP Filter window. These features are not currently supported if you use the IP camera with Cisco VSM. Note Table 3-5 IP Filter Window Options... - Page 36 ! " # $ % & ' ( ) * + , - . : ; < = > ? @ [ \ ] ^ _ ` { | } ~. Confirm Password Re-enter the password for the user. Cisco Video Surveillance System IP Camera User Guide 3-14 OL-14220-02...
-
Page 37: Maintenance Window
IP camera for at least 10 seconds. After you perform this procedure, follow the steps in the “Performing the Initial Setup of the IP Camera” section on page 2-5. Cisco Video Surveillance System IP Camera User Guide 3-15 OL-14220-02... -
Page 38: Firmware Window
To display the Firmware window, access the configuration windows as described in the “Performing the Initial Setup of the IP Camera” section on page 2-5, click Administration, then click Firmware. Table 3-8 describes the options in the Firmware window. Cisco Video Surveillance System IP Camera User Guide 3-16 OL-14220-02... -
Page 39: Audio/Video Windows
For the wired IP camera, the default resolution is 720 x 480 for NTSC or 720 x 576 for PAL. For the wireless IP camera, the default resolution is 4CIF. Cisco Video Surveillance System IP Camera User Guide 3-17 OL-14220-02... - Page 40 Very High to Very Low. The bit rate may vary to maintain this quality. The default fixed quality is Normal. A higher fixed quality provides better video quality but consumes more bandwidth. Cisco Video Surveillance System IP Camera User Guide 3-18 OL-14220-02...
- Page 41 High saturation provides a vivid, intense color for a video image. With less saturation, the video image appears more muted and gray. The default value is Normal, which is suitable for most conditions. Cisco Video Surveillance System IP Camera User Guide 3-19 OL-14220-02...
-
Page 42: Audio Window
The default value is 6. Audio Window The Audio window provides options for enabling and configuring audio that is transmitted to and from the IP camera. You can configure audio for these devices: Cisco Video Surveillance System IP Camera User Guide 3-20 OL-14220-02... -
Page 43: Audio/Video Windows
Cancel before clicking Save. These buttons appear at the bottom of the window. You may need to scroll down to see them. Table 3-10 describes the options in the Audio window. These features are not currently supported if you use the IP camera with Cisco VSM. Note Table 3-10 Audio Window Options... -
Page 44: Product Process Window
To make sure that the Product Process window shows the most current information, click the Refresh button. Table 3-11 describes the options in the Product Process window. All options are for display only. Cisco Video Surveillance System IP Camera User Guide 3-22 OL-14220-02... -
Page 45: Initialization Window
SSH connection. Complexity Window The Complexity window provides options for configuring requirements for the IP camera administrator and user passwords. Table 3-13 describes the options in the Complexity window. Cisco Video Surveillance System IP Camera User Guide 3-23 OL-14220-02... -
Page 46: Applications Windows
By including the video file as an attachment that recipients can view using a standard media player. • The file name is Camera_name-Event_Name-yymmdd-hhmmss.xxx, where: Camera_name is the name of the IP camera, as configured in the Camera Name field in the – Basic Setup window. Cisco Video Surveillance System IP Camera User Guide 3-24 OL-14220-02... - Page 47 You may need to scroll down to see them. Table 3-14 describes the options in the Mail & FTP window. These features are not currently supported if you use the IP camera with Cisco VSM. Note Table 3-14 Mail & FTP Window Options...
- Page 48 Enter the IP address of the secondary FTP server. Port Enter the port number of the secondary FTP server. Login name Enter the log in name of the secondary FTP Server. Cisco Video Surveillance System IP Camera User Guide 3-26 OL-14220-02...
-
Page 49: Motion Detection Window
IP camera itself. Table 3-15 describes the options in the Motion Detection window. Note These features are not currently supported if you use the IP camera with Cisco VSM. Table 3-15 Motion Detection Window Options Option... -
Page 50: Event Window
These buttons appear at the bottom of the window. You may need to scroll down to see them. Table 3-16 describes the options in the Event window. These features are not currently supported if you use the IP camera with Cisco VSM. Note Cisco Video Surveillance System IP Camera User Guide... - Page 51 Trigger Events When option in the Alarm I/O Ports window. • Motion Detection—Event is triggered when the camera detects motion, as described in the “Motion Detection Window” section on page 3-27. Cisco Video Surveillance System IP Camera User Guide 3-29 OL-14220-02...
-
Page 52: Snmp Window
The SNMP window allows you to configure Simple Network Management Protocol (SNMP) settings for the IP camera. These settings can help you manage complex networks by sending messages to different devices on the network. Cisco Video Surveillance System IP Camera User Guide 3-30 OL-14220-02... -
Page 53: Alarm I/O Ports Window
Cancel before clicking Save. These buttons appear at the bottom of the window. You may need to scroll down to see them. Table 3-17 describes the options in the SNMP window. These features are not currently supported if you use the IP camera with Cisco VSM. Note Table 3-17 SNMP Window Options... -
Page 54: Ptz (Rs-485) Window
To display the PTZ (RS-485) window, access the configuration windows as described in the “Performing the Initial Setup of the IP Camera” section on page 2-5, click Applications, then click PTZ (RS-485). Cisco Video Surveillance System IP Camera User Guide 3-32 OL-14220-02... - Page 55 You may need to scroll down to see them. Table 3-19 describes the options in the PTZ (RS-485) window. These features are not currently supported if you use the IP camera with Cisco VSM. Note Table 3-19 PTZ (RS-485) Window Options...
-
Page 56: Preset Positions Window
Preset Positions window. Table 3-20 Preset Positions Options Option Description Zoom In button Use these buttons to control optical zooming for the IP camera. Zoom Out button Cisco Video Surveillance System IP Camera User Guide 3-34 OL-14220-02... -
Page 57: Status Windows
Syslog & Log Window, page 3-38 • • Video Log Window, page 3-43 The status windows are not currently supported if you use the IP camera with Cisco VSM. Note Cisco Video Surveillance System IP Camera User Guide 3-35 OL-14220-02... -
Page 58: System Window
To make sure that the System window shows the most current information, click the Refresh button. Table 3-21 describes the options in the System window. All options are for display only. This window is not currently supported if you use the IP camera with Cisco VSM. Note Table 3-21... -
Page 59: Network Window
Configuring and Managing the IP Camera Status Windows Table 3-22 describes the options in the Audio/Video window. All options are for display only. This window is not currently supported if you use the IP camera with Cisco VSM. Note Table 3-22 Audio/Video Window Options... -
Page 60: Syslog & Log Window
2-5, click Status, then click Syslog & Log. Table 3-24 describes the options in the Syslog & Log window. These features are not currently supported if you use the IP camera with Cisco VSM. Note Cisco Video Surveillance System IP Camera User Guide... - Page 61 Note Alert: Detected motion Alert generated by the IP camera detecting motion in a configured video field. Alert: Input Port Port_Number triggered. Alert generated by the indicated port changing state. Cisco Video Surveillance System IP Camera User Guide 3-39 OL-14220-02...
- Page 62 Provides information when you configure the IP NTP server. camera to obtains its time from an NTP server. NTP: No NTP server specified. NTP: Synchronization OK. NTP: The NTP server cannot be reached. Cisco Video Surveillance System IP Camera User Guide 3-40 OL-14220-02...
- Page 63 A user with administrator privileges logged in to the IP camera. successful view only user login. A user with viewer privileges or monitor privileges logged in to the IP camera. Cisco Video Surveillance System IP Camera User Guide 3-41 OL-14220-02...
- Page 64 Address is the IP address of the FTP server. FTP: File uploaded successfully. [host: Address] FTP: Login failed. [host: Address] FTP: No such remote path. [host: Address] FTP: Unknown FTP server. [host: Address] Cisco Video Surveillance System IP Camera User Guide 3-42 OL-14220-02...
-
Page 65: Video Log Window
2-5, click Status, then click View Video Log. Table 3-26 describes the option in the View Video Log window. Note These features are not currently supported if you use the IP camera with Cisco VSM. Cisco Video Surveillance System IP Camera User Guide 3-43 OL-14220-02... - Page 66 PC. You can then open the saved file in a media player. Delete button Deletes the corresponding video file. Delete All button Deletes all video files in the Video Log window. Cisco Video Surveillance System IP Camera User Guide 3-44 OL-14220-02...
-
Page 67: Chapter 4 Viewing And Live Video
C H A P T E R Viewing and Live Video After you install and set up the Cisco Video Surveillance IP Camera as described in Chapter 2, “Getting Started,” users can connect to the IP camera through Internet Explorer and access the Home window to view live video from the IP camera. -
Page 68: Home Window Overview
Number of users who are accessing the camera through web browsers. Video from the IP camera. IP camera controls. For detailed information, see the “Home Window Controls” section on page 4-3. Cisco Video Surveillance System IP Camera User Guide OL-14220-02... -
Page 69: Home Window Controls
Pelco D protocol and that PTZ functions are enabled. For more information, see the “PTZ (RS-485) Window” Zoom In button section on page 3-32. Cisco Video Surveillance System IP Camera User Guide OL-14220-02... - Page 70 4X) appears in the upper left corner of the video display. To return the video image to normal size, click the Digital Zoom button twice when in 2-times zoom mode or click it once when in 4-times zoom mode. Cisco Video Surveillance System IP Camera User Guide OL-14220-02...
- Page 71 IP camera. Use this slider to adjust the gain of the PC microphone (that is, how sensitive it is to the audio that it picks up and that is sent to the IP camera). Cisco Video Surveillance System IP Camera User Guide OL-14220-02...
-
Page 72: Viewing Video Through Third-Party Devices Or Software
IP camera password, replace ip_address with the IP address of the IP camera, and replace code with the Access Code that you configured for the secondary stream in the Video window. rtsp//username:password@ip_address/code Cisco Video Surveillance System IP Camera User Guide OL-14220-02... - Page 73 Access Code that you configured for the secondary stream in the Video window. After you enter the command, enter your IP camera user name and password when prompted. rtsp//ip_address/code Cisco Video Surveillance System IP Camera User Guide OL-14220-02...
- Page 74 Chapter 4 Viewing and Live Video Viewing Video through Third-Party Devices or Software Cisco Video Surveillance System IP Camera User Guide OL-14220-02...
-
Page 75: Chapter 5 Troubleshooting
2-8, then reconfigure the IP camera. If you take these actions, do not use the Upload option in the Maintenance window to reload a saved configuration file because that process restores the password that you forgot. Cisco Video Surveillance System IP Camera User Guide OL-14220-02... - Page 76 Clean the lens on the IP camera. Adjust the back focus as described in the Recommended Action “Adjusting Back Focus on the IP Camera” section on page 2-8. Configure options for video as described in the “Video Window” section on page 3-17. Cisco Video Surveillance System IP Camera User Guide OL-14220-02...
-
Page 77: Appendix
A P P E N D I X Using the IP Camera with Cisco VSM Cisco Video Surveillance Manager (VSM) is a suite of powerful and flexible video surveillance applications that interoperate with a wide range of devices and cameras to provide a complete, standards-based video surveillance solution. -
Page 78: Obtaining The Required Driver Pack
• A user with administrator privileges cannot be logged in to the IP camera and use VSM at the same time Cisco recommends that you configure video resolution (NTSC or PAL) from the IP camera • configuration windows. For instructions, see the “Video Window”... -
Page 79: Troubleshooting The Ip Camera When Used With Vsm
If you experience difficulty when using the IP camera with VSM, refer to these troubleshooting guidelines: If you are using the Cisco Video Surveillance Operations Manager, it may take a few attempts to • bring up video the first time that a camera is selected Verify that VSM is installed properly •... - Page 80 Appendix A Using the IP Camera with Cisco VSM Troubleshooting the IP Camera when used with VSM Cisco Video Surveillance System IP Camera User Guide OL-14220-02...
-
Page 81: I N D E X
3-22 camera with enabling 3-21 C mount lens 1-3, 2-2 full duplex 3-21 codec, for audio 3-22 half duplex 3-21 Complexity window overview 3-21 options 3-24 simplex 3-21 overview 3-23 Cisco Video Surveillance System IP Camera User Guide IN-1 OL-14220-02... - Page 82 DHCP, obtaining IP address through 2-5, 2-9, 3-7 Product Process window 3-22 DNS server PTZ (RS-485) window 3-32 primary 3-7, 3-38 Security windows 3-22 secondary 3-7, 3-38 Setup windows DSCP, for QoS 3-12 Cisco Video Surveillance System IP Camera User Guide IN-2 OL-14220-02...
- Page 83 Home window factory default configurations, restoring accessing 3-15 factory reset controls in firmware figure upgrading overview 3-17 version in IP camera 3-16, 3-36 HTTP accessing camera through Cisco Video Surveillance System IP Camera User Guide IN-3 OL-14220-02...
- Page 84 DCHP server troubleshooting obtaining from DHCP server Unique Device Identifier (UDI) 3-36 obtaining through DHCP 2-9, 3-7 user types 3-13 of IP camera 3-7, 3-37 windows Cisco Video Surveillance System IP Camera User Guide IN-4 OL-14220-02...
- Page 85 Home window on camera through home window through third-party device or software 4-1, 4-6 sensitivity of PC See also video mixed mode lockdown, IP camera mobile device, viewing video through Cisco Video Surveillance System IP Camera User Guide IN-5 OL-14220-02...
- Page 86 Network window root 3-23 options 3-37 patrol sequence overview 3-37 See sequence Night button pinouts, for DC auto iris lens connector night mode 3-20 PoE LED port number power indication Cisco Video Surveillance System IP Camera User Guide IN-6 OL-14220-02...
- Page 87 3-35 for wireless IP camera PTZ (RS-485) window mixed mode options 3-33 mode for wireless IP camera overview 3-32 password hardening 3-23 protocol type shared key stopping processes 3-22 Cisco Video Surveillance System IP Camera User Guide IN-7 OL-14220-02...
- Page 88 3-31 TX key overview 3-30 speaker enabling 3-22 external 1-5, 3-21 Unique Device Identifier (UDI) 3-36 installing upgrading firmware 3-17 SSH, allowing access through 3-23 Status windows 3-35 Cisco Video Surveillance System IP Camera User Guide IN-8 OL-14220-02...
- Page 89 PC microphone saturation 3-19 of PC speaker secondary stream 3-17, 3-18, 4-6 sharpness 3-19 stream 1 settings 3-17 stream 2 settings 3-18 text overlay 3-20 time stamp on encryption 3-20 Cisco Video Surveillance System IP Camera User Guide IN-9 OL-14220-02...
- Page 90 IP camera channel 3-38 region 3-10 security 3-38 SSID 2-4, 3-8, 3-38 wired mode wireless mode wireless mode Wireless Setup window options overview zoom digital optical 3-34, 4-3 Cisco Video Surveillance System IP Camera User Guide IN-10 OL-14220-02...