Available languages
Available languages
Quick Links
Instruction
Manual
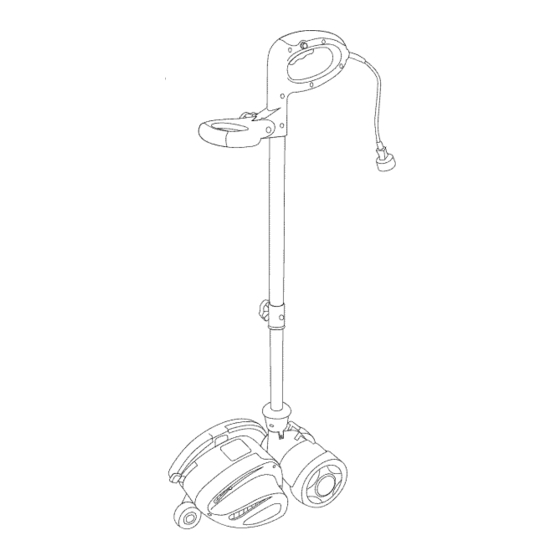
for Electric
Edger
EZ.Edge.n.Store
Model No. 71.79653
BEFORE RETURNING THIS PRODUCT
FOR ANY REASON PLEASE FIRST CALL
(800) 539-6455
IN MOST CASES A CRAFTSMAN
REPRESENATIVE
WILL BE ABLE TO
HELP YOU SOLVE YOUR ISSUE OVER
THE PHONE.
iMPORTANT OPERATING
HINTS:
•
When starting
unit, first push in the
safety switch
and then squeeze the
main trigger. It is NOT necessary
to keep the safety
switch
pushed in
during use.
•
Stay to the left and behind the edger
when in use. The edger will push
clippings and other debris forward,
away from the user.
I
•
This is a powerful
cutting
tool. Be
AWARE of your surroundings.
CAUTION:
Before
using this product,
read this manual
and follow
all its Safety Rules and Operating
Instructions.
Sears, Roebuck and Co., Hoffman Estates, IL 60179 U.S.A.
www.sears.com/craftsman

Related Manuals for Craftsman 79653 - 12 Amp Edger


Summary of Contents for Craftsman 79653 - 12 Amp Edger
- Page 1 Electric Edger EZ.Edge.n.Store Model No. 71.79653 BEFORE RETURNING THIS PRODUCT FOR ANY REASON PLEASE FIRST CALL (800) 539-6455 IN MOST CASES A CRAFTSMAN REPRESENATIVE WILL BE ABLE TO HELP YOU SOLVE YOUR ISSUE OVER THE PHONE. iMPORTANT OPERATING HINTS: •...
- Page 2 WARNING: Some dust created by using power tools contains chemicals known to the state of California to cause cancer and birth defects or other reproductive harm.
- Page 3 If this Craftsman product fails due to a defect in material or workmanship within one year from the date of purchase, return it to your nearest Sears store or Craftsman outlet in the United States, and it wilt be replaced free of charge.
- Page 4 SAVE THIS MANUAL FOR FUTURE round-jacketed extension cords REFERENCE approved for outdoor use. * To reduce risk of electric shock, this WARNING: When using this tool, unit has a polarized plug (one blade basic safety precautions should is wider than the other). This unit always be followed to reduce the risk will fit with a polarized plug only one of fire, electric shock, and personal...
- Page 5 * AVOID HITTING CURBS, TREES, extra measure of safety. * CORD SETS: Make sure the cord WALLS, ROCKS, SIDEWALKS on the unit and the extension AND OTHER SOLID OBJECTS WITH EDGER WHILE USING. cord are in good condition. The extension cord should be heavy * DANGER: KEEP HANDS, FEET AND ALL BODY PARTS AWAY...
- Page 6 properly repaired orreplaced byan SAVE THESE authorized service c enter. INSTRUCTIONS * STAY ALERT - Pay attention to what y ouaredoing and theposition oftheunit's blade. Usecommon sense. Donotoperate t hetool w hen Remove the Edger and all its youaretired. parts from the packaging. "...
- Page 7 the spring in the shaft are firmly depths and 1 transportation mode. seated into shaft housing. Do not To adjust the depth of the cut, move attempt to insert shaft into shaft the front adjustment lever up or down housing without fully extending to the desired depth setting.
- Page 8 adjusted toanupright storage p osition bylifting uptheredlockatthebase oftheshaft a ndmoving t heshaft forward, intotheupright position. The redlockring will s nap firmly intoplace intheupright position. SeeFigure 7 . TURNING THE EZ=Edge=n=Store Once the unit is plugged in and you Fi=_ure-7 are ready to start edging, simply push EDGING INSTRUCTIONS the unit's safety trigger in with your thumb while pulling up on the trigger...
- Page 9 Clearing Jams tightening in a clockwise direction. After the blade has completely CLEANING OF PLASTIC PARTS stopped, carefully remove the obstruction - Use only a dry brush or a cloth with warm water and mild soap to CAUTION: To prevent injury, keep clean plastic parts.
-
Page 10: Need More Help
Solution: Make sure that all of the connections are properly made between the unit, the extension cord, and the recepacle. If the recepacle has Ground Fault Circuit Interrupter (GFCl) protection, make sure that it is working properly and is in the "on" position. - Page 11 POR CUALQUIER MOTIVO, PRIMERO LLAME AL (800) 839=6458 (800) 539-6455 EN LA MAYORiA DE LOS CASOS, UN REPRESENTANTE DE CRAFTSMAN LO PODRA AYUDAR A RESOLVER SU PROBLEMA POR TELE_FONO. RECOMENDACIONES IMPORTANTES SOBRE EL USO DE LA HERRAMIENTA: • AI arrancar...
- Page 12 Si este producto Craftsman falla debido a un defecto en los materiales o mano de obra dentro det aSo de ta fecha de compra, devuetvalo a ta tienda Sears o al centro de ventas de Craftsman mas cercano a usted en los Estados Unidos, y se 1o reemplazaran sin cargo.
- Page 13 Cuando use la bordeadora, siempre las que fue disefiada. use guantes y anteojos de seguridad y mascaras contra et polvo, que estan INFORMACI6N disefiados para filtrar materiales ADVERTENCIAS microsc6picos. SEGURIDAD SOBRE ELECTRICIDAD = Cuando te haga el mantenimiento GUARDE ESTE MANUAL PARA s61o use partes de repuesto que CONSULTARLO EN EL FUTURO...
- Page 14 riesgo dedescarga debe usar, utitice et calibre de linea e lectrica, use la unidad s61o con un det siguiente tamafio mas pesado. Cuanto menor es et nQmero det cord6n prolongador para uso en exteriores, como por ejemplo, calibre, mas pesado es et cord6n. NO MALTRATE AL CORDON: los cordones tipo SW-A, STW-A, STOW-A, SJW-A, SJOW-A,...
- Page 15 OBJETOS SOLIDOS CON LA ponga en marcha inadvertidamente. BORDEADORA MIENTRAS ESTA AsegQrese de que el interruptor este EN FUNCIONAMIENTO. en la posici6n de apagado cuando enchufe la unidad. • PELIGRO: MANTENGA LOS PIES, LAS MANOS Y EL RESTO DEL CONTROLE QUE NO HAYA PIEZAS DA_IADAS: Si ta CUERPO ALEJADOS...
- Page 16 * CONSERVE Extension de la vara cromada: INSTRUCCIONES Tire hacia fuera la vara de CONSOLTELAS diametro mas pequefio para FRECUENCIA. Sipresta ta extender ta vara a su maxima herramienta aotrapersona, longitud. Vea la Figura 1. El tambien p restete lasinstrucciones cord6n se alimentara a traves de para que entienda c6mo usar esta...
-
Page 17: Profundidad De Corte
MODO DE TRANSPORTE La bordeadora se puede levantar para su transporte y almacenamiento. Para ajustar et modo de transporte, baje la palanca hasta la posici6n "Roll" (Arrollar) de abajo. La posici6n "Roll" (Arrollar) levanta la guia de la bordeadora de manera que no golpee FE_ura-3 et piso mientras se la transporta. - Page 18 ENCENDIDO de la bordeadora POSICl6N EZ=Edge=n=Store ALMACENAMIENTO Una vez que la unidad esta conectada La vara de la bordeadora Edge-n- y usted esta preparado para comenzar Store Edger se puede ajustar en a cortar, simplemente presione et posici6n vertical de atmacenamiento, gatitto levantando et cerrojo rojo en la base de la vara y moviendo esta hacia...
- Page 19 detras de la bordeadora. Si corta cambiar la hoja. o da_a et cord6n, desenchQfeto de inmediato. DESPUES de LIMPIEZA DE LA HOJA: Despues desenchufar el cord6n, reviselo de que haya terminado de cortaq para vet los da_os y reparelo o puede descubrir queen la hoja se reemplaceto si fuera necesario.
- Page 20 se cay6 la unidad, antes de volver a de que la protecci6n de la hoja este usarla, revisela con cuidado para vet bien posicionada en su lugar. si se produjeron dafios. Problema: Parece que el motor funciona lento • PREVENIR LA CORROSION: Soluci6n: Puede necesitar usar un Los fertilizantes...
-
Page 21: Conseils Importants
RAISON OUELCONOUE, APPELER D'ABORD ou autres problemes pour la (800) 839-6488 reproduction. DANS LA PLUPART DES CAS UN REPR#SENTANT DE CRAFTSMAN SERA EN MESURE D'AIDER A RESOUDRE LES PROBLEMES PAR TEL#PHONE. CONSEILS D'UTILISATION IMPORTANTS • Pour mettre I'appareil... - Page 22 Maintenance .................... Remisage ....................Reparations ..................... Depannage ....................Espafiot ....................Fran(_ais ....................Garantie totale d'un an sur les produits Craftsman Si ce produit Craftsman a un defaut de materiau ou de fabrication dans I'annee qui suit la date d'achat, I'amener...
- Page 23 APPROPRII:!: = I1ne faut utitiser produits. Pendant t'utilisation d'un coupe-bordure, il faut toujours porter l'outit que pour les t&ches pour des tunettes et des gants de securit6, lesquettes it a et6 construit. ainsi qu'un masque antipoussieres congu pour filtrer les particules AVERTISSEMENT microscopiques.
- Page 24 chaleur, l'huite et les bords et coins tetle que les rallonges de type SW-A, STW-A, STOW-A, SJW-A, aigus. INSPECTION R¢GULII_RE SJOW-A, SJTW-A ou SJTOW-A. CORDON = It faut inspecter TAILLE MINIMUM DES FILS regulierement le cordon et la POUR LES RALLONGES rallonge.
- Page 25 bordure et attendre l'arr6t complet correctement et ne sont pas de la tame avant de mettre les deform6es, qu'aucune piece n'est mains ou tes pieds pres de ta lame. fracturee et que le coupe-bordure " PORTER DES VETEMENTS est en bon etat de fonctionnement. ADAPTI_S = ne pas porter des Une piece endommagee dolt 6tre...
- Page 26 ouavant dechanger d'accessoires (lames, etc.). * MAINTENIR LES PROTECTIONS enplace etenbonetat. GARDER LES LAMES BIEN AFFOT_:ES. * GARDER LES MAINS ET LES PIEDS a l'ecart de la zone de Fjjg.ure-2 coupe. GARDER Connexion du manche le coupe=bordure = Inserer iNSTRUCTiONS l'extremit6 du manche dans la douitte darts le carter du manche, Consulter ta figure 2, Pivoter...
-
Page 27: Profondeur De Coupe
GUIDE DE BORDURE BRANCHEMENT DE LA RALLONGE L'EZ-Edge-n-Store est equip6 d'un Pour attacher fermement la rallonge, guide de bordure fixe qui permet de faire un noeud avec le cordon, comme suivre facitement la bordure ou le montre a la figure 4. trottoir. - Page 28 de l'Edge-n-Store Edger en position de rangement verticale en levant te verrou rouge a ta base de l'arbre et en deplagant l'axe vers l'avant, en position verticale. Le verrou rouge s'enctenche fermement en position verticale. Consulter la figure 7. MISE EN MARCHE DE L'EZ= Edge=n=Store...
- Page 29 b&ton ou un objet etranger, ret_cher ta qu'it est possible d'inverser pour, detente immediatement. Si te coupe- essentietlement, doubler la longevite bordure n'est pas arr6t6 quand il se de la tame. Pour remplacer ou coince peut causer un dommage inverser ta tame, deposer le carter de excessif du moteur.
- Page 30 coupante et peut 6tre dangereuse, m_me quand te coupe-bordure n'est pas branche. • S'il existe une situation qui peut affecter te bon fonctionnement en cas de questions, contacter le service apres-vente 1-800-539-6455. Probleme = II est trop difficile d'appuyer avec le pouce sur le contact de securite pendant rutilisation.
- Page 31 NEED MORE ° Findthis and aU yourotherproduct manuatsonline. • Get answers from our t eam ofhome e×perts. • Get apersonatized maintenance pta_ foryour h ome. • Find information and tools to help with home projects.
- Page 32 Sears, Roebuck and Co., Hoffman Estates, IL 60179 U.S.A. www.sears.com/craftsman...