
Related Manuals for D-Link DKVM-IP1


Summary of Contents for D-Link DKVM-IP1
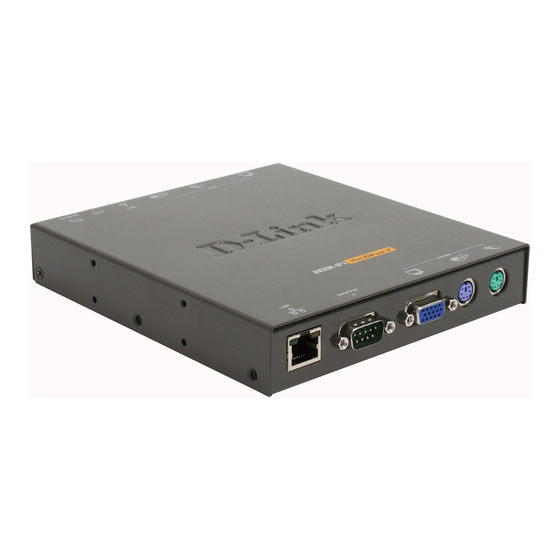
- Page 1 D-Link DKVM-IP1 1 Port KVM Switch Over IP Manual Version 1.00...
-
Page 2: Table Of Contents
4.1.3.5 Single and Double Mouse Mode 4.1.3.6 Recommended Mouse Settings 4.1.3.7 Video Modes 5 USAGE 5.1 Prerequisites 5.2 Login into the DKVM-IP1 switch and logout 5.2.1 Login into the DKVM-IP1 switch 5.2.2 Logout from the DKVM-IP1 switch 5.3 The Remote Console 5.4 Main Window 5.4.1 Remote Console Control Bar... - Page 3 6 MENU OPTIONS 6.1 Remote 6.1.1 KVM Console 6.1.2 Telnet Console 6.2 Mapping 6.2.1 Floppy Disk 6.2.2 CD ROM 6.2.3 Drive redirection 6.2.4 Options 6.3 User 6.3.1 Change Password 6.3.2 Users 6.4 Setting 6.4.1 User Console 6.4.2 Keyboard/Mouse 6.4.3 Video 6.5 Network 6.5.1 Network 6.5.2 Dynamic DNS...
-
Page 4: The Quick Installation Guide
If done so, DKVM-IP1 switch may not be able to detect these. You are on the safe side with all standard VESA video modes. Please refer to Appendix C for a list of all known modes. - Page 5 After confirming, DKVM-IP1 switch performs a reset. 2. Use a crossover Ethernet cable to connect DKVM-IP1 switch to a subnet where a DHCP server is available. After the DHCP server has assigned an IP address to DKVM-IP1 switch you can use the web interface to configure the device.
- Page 6 Video Settings in Options Menu This opens a new window with elements to control the DKVM-IP1 switch Video Settings. You can change some values, for instance the brightness and contrast of the picture displayed, which may improve the video quality.
-
Page 7: Introduction
60 Hz. 2.1. When the server is up and running DKVM-IP1 switch gives you a full control over the remote server. The Management Console allows you to access the remote server’s graphics, keyboard and mouse and to send special commands to the server. -
Page 8: Features
Automatically senses video resolution for best possible screen capture High-performance mouse tracking and synchronization Port to connect a user console for direct analogous access to KVM switch Local Mouse suppression (only when using SUN’s Java Virtual Machine) Can be used with any standard KVM Remote mass storage control. -
Page 9: Technical Specifications
Computer side One PC or Server or the console port of KVM switch unit DKVM-IP1 1port KVM Switch Over IP PS/2 Keyboard Mini Din 6 pin PS/2 Mouse Mini Din 6 pin VGA HDDB 15 pin USB Type B receptacle... -
Page 10: Cable Diagrams
2.7. Cable diagrams PS/2 Cable: Mini Din 6 pin Male to Male VGA Cable: HDB15 pin Male to Male USB 2.0 Cable: USB A-B cable CAT5/5E/6 Straight Through UTP/STP Cable: 8P8C 2.8. LED Indicators: LED Indicator Color Green Link/speed Orange Status Description Properly connected to the network... -
Page 11: Hardware Installation
3. Hardware installation 3.1 Operation Overview Figure 3-1 shows the connections of DKVM-IP1 switch to its host, to peripheral devices, to the power source and to the local area network. Administrator DKVM-IP1 IP Network Administrator DKVM-IP1 switch redirects local keyboard, mouse, and video data to a remote administration console. - Page 12 Step 2 Connect the monitor to the DKVM-IP1 switch console side. Step 3 Connect the keyboard to the DKVM-IP1 switch console side. Step 4 Connect the mouse to the DKVM-IP1 switch console side. Step 5 Connect a VGA cable (15-pin HDDB Male / Male) with the Male side to both of the PC and the host of the DKVM-IP1 switch.
- Page 13 Modem 3.2.1 Ethernet connection The rear side of DKVM-IP1 switch provides a RJ-45 connector for Ethernet. The connector is used either for a 100 Mbps 100BASE-TX connection or for a 10 Mbps 10BASE-T connection. The adapter can sense the connection speed and will adjust to the appropriate operation mode automatically.
- Page 14 Make sure that the cable is wired appropriately for a standard 100BASE-TX adapter. Align the RJ-45 plug with the notch on the adapter’s connector and insert it into the adapter’s connector. 3.3 Scenario of connecting DKVM-IP1 switch to the Multi-port KVM Switch system...
-
Page 15: Configuration
4.1.1 Initial configuration via DHCP server By default, the DKVM-IP1 switch will try to contact a DHCP server in the subnet to which it is physically connected. If a DHCP server is found, it may provide a valid IP address, gateway address and net mask. -
Page 16: Initial Configuration Via Serial Console
On the upper left corner, the MAC address of the DKVM-IP1 switch is displayed. To detect the MAC address, manually, press the button “Refresh Devices”. The displayed MAC address is the same MAC address printed on the white sticker placed on the back of the DKVM-IP1 switch. -
Page 17: Keyboard, Mouse And Video Configuration
IP auto configuration is disabled and subsequently you will be asked for the following network settings. IP address The IP address the DKVM-IP1 switch uses. This option is only available if IP auto configuration is disabled. Net mask The net mask of the connected IP subnet. -
Page 18: Remote Mouse Settings
The following limitations do not apply in case of USB and Mouse Type “MS Windows 2000 and newer”. While the DKVM-IP1 switch works with accelerated mice and is able to synchronize the local with the remote mouse pointer, there are the following limitations, which may prevent this... -
Page 19: Single And Double Mouse Mode
X11 on the host system, please do not use any custom mode lines with special video modes. If you do, the DKVM-IP1 switch may not be able to detect them. We recommend using any of the standard VESA video modes, instead. -
Page 20: Usage
Full access is provided by the embedded web server. The DKVM-IP1 switch environment can be entirely managed using a standard web browser. You can access the DKVM-IP1 switch using the insecure HTTP protocol, or using the encrypted HTTPS protocol. Whenever possible, use HTTPS. -
Page 21: Login Into The Dkvm-Ip1 Switch And Logout
The address used might be a plain IP address or a host and domain name, in the case where you have given your DKVM-IP1 switch a symbolic name in the DNS. For instance, type the following in the address line of your browser when establishing an unsecured connection: http://... - Page 22 The user “ super ” is not allowed to login via the serial interface of the DKVM-IP1 switch. Please make sure to change the super user password immediately after you have installed and accessed your DKVM-IP1 switch for the first time. Not changing the...
-
Page 23: Logout From The Dkvm-Ip1 Switch
If there is no activity for half an hour, the DKVM-IP1 switch will log you out, automatically. A click on one of the links will bring you back to the login screen. 5.2.2 Logout from the DKVM-IP1 switch This link logs out the current user and presents a new login screen. Please note that an automatic logout will be performed in case there is no activity for half an hour. -
Page 24: Main Window
The delay depends on the bandwidth of the line which you use to connect to the DKVM-IP1 switch. With respect to the keyboard, the very exact remote representation might lead to some confusion as your local keyboard changes its keyboard layout according to the remote host system. - Page 25 Auto Adjust button If the video display is of bad quality or distorted in some way, press this button and wait a few seconds while the DKVM-IP1 switch tries to adjust itself for the best possible video quality. Sync mouse Activates the mouse synchronization process.
- Page 26 If a user has the appropriate permission, he can force the Remote Consoles of all other users to close. No one can open the Remote Console at the same time again until this user disables the exclusive access, or logs off. A change in the access mode is also visible in the status line (see Figure 5-7).
- Page 27 Video Settings through the HTML-Frontend To enable local video port, select this option. This option decides if the local video output of DKVM-IP1 switch is active and passing through the incoming signal from the host system. The option Noise Filter defines how DKVM-IP1 switch reacts to small changes in the video input signal.
- Page 28 Brightness Controls the brightness of the picture Contrast Controls the contrast of the picture Clock Defines the horizontal frequency for a video line and depends on the video mode. Different video card types may require different values here. The default settings in conjuction with the auto adjustment procedure should be adequate for all common configurations.
- Page 29 • Local Keyboard Used to change the language mapping of your browser machine running the Remote Console Applet. Normally, the applet determines the correct value automatically. However, depending on your particular JVM and your browser settings this is not always possible. A typical example is a German localized system that uses an US-English keyboard mapping.
-
Page 30: Remote Console Status Line
Allows to adjust both compression rate and the colour depth individually. Depending on the selected compression rate the data stream between the DKVM-IP1 switch and the Remote Console will be compressed in order to save bandwidth. Since high compression rates are very time consuming, they should not be used while several users are accessing the DKVM-IP1 switch simultaneously. - Page 31 Furthermore, both the incoming (“In:”) and the outgoing (“Out:”) network traffic are visible (in kb/s). If compressed encoding is enabled, a value in brackets displays the compressed transfer rate. Figure 5-17. Status line transfer rate For more information about Exclusive Access settings, see the according sections...
-
Page 32: Menu Options
DKVM-IP1 switch host machine is using a text mode screen resolution. Connecting to the DKVM-IP1 switch is done as usual and as required by the Telnet client, for instance in a UNIX shell: Figure 6-1. - Page 33 Replace the IP address by the one that is actually assigned to the DKVM-IP1 switch. This will prompt for username and password in order to log into the device. The credentials that need to be entered for authentication are identical to those of the web interface. That means, the user management of the Telnet interface is entirely controlled with the according functions of the web interface.
-
Page 34: Mapping
• Second, click on the button “Upload” to initiate the transfer of the chosen image file into the DKVM-IP1 switch s onboard memory. This image file is kept in the onboard memory of the DKVM-IP1 switch until the end of the current session, until you logged out, or initiated a reboot of the DKVM-IP1 switch. - Page 35 The specified image file is supposed to be accessible from the DKVM-IP1 switch. The information above has to be given from the point of view of the DKVM-IP1 switch. It is important to specify correct IP addresses, and device names. Otherwise, DKVM-IP1 switch may not be able to access the referenced image file.
- Page 36 either login as a system administrator (or as “ root ” on UNIX systems), or ask your system administrator for help to complete this task. Windows 2000/XP Open the Explorer, navigate to the directory (or share), and press the right mouse button to open the context menu.
- Page 37 MS Windows You can use the tool “RawWrite for Windows”. It is included on the CD ROM shipped with DKVM-IP1 switch. Figure 6-10. RawWrite for Windows selection dialog From the menu, select the tab “Read”. Enter (or choose) the name of the file in which you would like to save the floppy content.
- Page 38 To create a CDROM image file, copy the contents of the CDROM to a file. You can use the following command: dd [ if=/dev/cdrom ] [ of=/tmp/cdrom.image ] dd reads the entire disc from the device /dev/cdrom, and saves the output in the specified output file /tmp/cdrom.image.
-
Page 39: Drive Redirection
6.2.3 Drive redirection Figure 6-12. Selecting Drive Redirection 6.2.3.1 Driver Installation Please follow the KVM Vision Viewer Setup Wizard step by step to install the driver from the attached CD ROM. - Page 40 Figure 5-17. KVM Vision Viewer Setup step...
- Page 41 Click on “Device” and select “New Device” to create a new device Figure 5-17. Device Configuration dialog Device Name: Enter a name to your device. Network Address: Enter an IP address the DKVM-IP1 switch uses. Authentication Port: This is a fixed number “443”. Username: The factory default Username is “admin”...
- Page 42 Click Ok, the new device will be added as below, 6.2.3.3 Drive Redirection Settings Move the cursor to the new device that has been created. Click on “Device” then select “Drive Redirection” and “Redirect local drive”. Figure 5-19. Drive Redirection Setting select Drive to redirect Select the local drive you want to share with the remote computer, which could be Floppy disc, CD-ROMs, USB-Sticks and hard drives.
-
Page 43: Options
3. While connecting to a legacy KVM switch, please select PS/2 mouse for Keyboard/Mouse setting from webpage. Otherwise you will be not be able to use Hot-key. -
Page 44: User
The account super has all possible rights to configure the device and to use all functions DKVM-IP1 switch offers. The account “user” has only the permission to open and use the Remote Console. Even his user name and password can only be changed by the super account. -
Page 45: Setting
While the “user” account never sees the following options, the user “super” account can change the name and password for both accounts. Existing users Select an existing user for modification. Once a user has been selected, click the lookup button to see the user information. New User name The new user name for the selected account. - Page 46 Manually Allows to adjust both compression rate and the colour depth individually. Depending on the selected compression rate the data stream between the DKVM-IP1 switch and the Remote Console will be compressed in order to save bandwidth. Since high compression rates are very time consuming, they should not be used while several users are accessing the DKVM-IP1 switch simultaneously.
- Page 47 Sets the initial value for the monitor mode. By default the monitor mode is off. In case you switch it on, the Remote Console window will be started in a read only mode. Figure 6-15. User Console Settings (Part 2)
-
Page 48: Keyboard/Mouse
Start in Exclusive Access Mode Enables the exclusive access mode immediately at Remote Console startup. This forces the Remote Consoles of all other users to close. No one can open the Remote Console at the same time again until this user disables the exclusive access or logs off. - Page 49 • Auto mouse speed Use this option if the mouse settings on host use an additional acceleration setting. The DKVM-IP1 switch tries to detect the acceleration and speed of the mouse during the mouse sync process. • Fixed mouse speed Use a direct translation of mouse movements between the local and the remote pointer.
-
Page 50: Video
Miscellaneous Video Settings • Noise filter This option defines how the DKVM-IP1 switch reacts to small changes in the video input signal. A large filter setting needs less network traffic and leads to a faster video display, but small changes in some display regions may not be recognized immediately. - Page 51 DKVM-IP1 switch. IP auto configuration With this option you can control if the DKVM-IP1 switch should fetch its network settings from a DHCP or BOOTP server. For DHCP, select “dhcp” , and for BOOTP select “bootp”...
- Page 52 Port number at which the DKVM-IP1 switch's Remote Console server and HTTPS server are listening. If left empty the default value will be used. HTTP port Port number at which the DKVM-IP1 switch's HTTP server is listening. If left empty the default value will be used. Telnet port Port number at which the DKVM-IP1 switch's Telnet server is listening.
-
Page 53: Dynamic Dns
(see Figure 6-21): Figure 6-21. Dynamic DNS Scenario The DKVM-IP1 switch is reachable via the IP address of the DSL router, which is dynamically assigned by the provider. Since the administrator does not know the IP address assigned by the provider, the DKVM-IP1 switch connects to a special dynamic DNS server in regular intervals and registers its IP address there. - Page 54 Currently, this is a fixed setting since only dyndns.org is supported for now. Hostname This is the hostname of the DKVM-IP1 switch that is provided by the Dynamic DNS Server. (use the whole name including the domain, e.g. testserver.dyndns.org , not just the actual hostname).
-
Page 55: Security
The DKVM-IP1 switch will not listen on the HTTP port for incoming connections. In case you want to create your own SSL certificate that is used to identify the DKVM-IP1 switch refer to the Section called Certificate. KVM encryption This option controls the encryption of the RFB protocol. -
Page 56: Certificate
However, it is possible to generate and install a new certificate that is unique for a particular DKVM-IP1 switch card. In order to do that, the DKVM-IP1 switch is able to generate a new cryptographic key and the associated Certificate Signing Request (CSR) that needs to be certified by a certification authority (CA). - Page 57 If you destroy the CSR on the DKVM-IP1 switch there is no way to get it back! In case you deleted it by mistake, you have to repeat the three steps as described above.
-
Page 58: Serial Port
Confirm Challenge Password Confirmation of the Challenge Password Email The email address of a contact person that is responsible for the DKVM-IP1 switch and its security. Key length This is the length of the generated key in bits. 1024 Bits are supposed to be sufficient for most cases. - Page 59 PPP. The Modem Settings panel allows you to configure the remote access to the DKVM-IP1 switch using a modem. The meaning of each parameter will be described below. The modem settings are part of the serial settings panel.
-
Page 60: Date And Time
6.5.6 Date And Time This link refers to a page, where the internal real-time clock of the DKVM-IP1 switch can be set up (see Figure 6-27). You have the possibility to adjust the clock manually, or to use a NTP timeserver. Without a timeserver, your time setting will not be persistent, so you have to adjust it again, after DKVM-IP1 switch loses power for more than a few minutes. - Page 61 (see Figure 6-29). Each of those events belongs to an event group, which can be activated separately. The common way to log events is to use the internal log list of the DKVM-IP1 switch. To show the log list, click on “Event Log” on the “Maintenance” page. In the Event Log Settings you can choose how many log entries are shown on each page.
- Page 62 Login failed. Login succeed. In contrast to the internal log file on the DKVM-IP1 switch, the size of the NFS log file is not limited. Every log event will be appended to the end of the file so it grows continuously and you may have to delete it or move it away from time to time.
-
Page 63: Tools
You may have a look at Figure 6-31 for an example. The Data file for support allows you to download the DKVM-IP1 data file with specific support information. This is an XML file with certain customized support information like the serial number etc. -
Page 64: Event Log
(e.g. video engine) will take some seconds only and do not result in closing connections. 6.6.2 Even log Figure 6-33 displays the log list including the events that are logged by the DKVM-IP1 switch. 6.6.3 Update Firmware The DKVM-IP1 switch is a complete standalone computer. The software it runs is called the firmware. - Page 65 Updating the firmware is a three-stage process: • Firstly, the new firmware file is uploaded onto the DKVM-IP1 switch. In order to do that you need to select the file on your local system using the button “Browse” of the Upload Firmware panel.
-
Page 66: Unit Reset
This section allows you to reset specific parts of the device. This involves the both keyboard and mouse, the video engine and the DKVM-IP1 itself. Resetting the card itself is mainly needed to activate a newly updated firmware. It will close all current connections to the administration console and to the Remote Console. -
Page 67: Troubleshooting
If not, check network hardware. Is DKVM-IP1 switch powered on? Check whether the IP address of DKVM-IP1 switch and all other IP related settings are correct! Also verify that all the IP infrastructure of your LAN, like routers etc., is correctly configured. Without a ping functioning, DKVM-IP1 switch can’t work either. -
Page 68: Certificates
be disabled. Certificates This equipment has been tested and found to comply with Part 15 of the FCC Rules. Operation is subject to the following two conditions: (1) This device may not cause harmful interference (2) This device must accept any interference received. Including interference that may cause undesired operation. -
Page 69: Pin Assignments
A. Pin Assignments A.1 VGA HD-15 A.2 RJ 45 Connector Ethernet A.3 RJ 45 Connector ISDN... -
Page 70: Key Codes
A.4 Serial SUB-D 9 Connector 1 A.5 KVM 15 pin connector B. Key Codes Table C.1 shows the key codes used to defines keystrokes or hotkeys for several functions. Please note that these key codes do not represent necessarily key characters that are used on international keyboards. - Page 71 Key (and aliases) 0 - 9 A - Z , TILDE -, MINUS =, EQUALS ’ <, LESS /, SLASH BACK SPACE ENTER CAPS LOCK \, BACK SLASH LSHIFT, SHIFT RCTRL RSHIFT LCTRL, CTRL LALT, ALT SPACE ALTGR ESCAPE, ESC PRINTSCREEN SCROLL LOCK BREAK...
-
Page 72: Video Modes
C. Video Modes Table B.1 lists the video modes DKVM-IP1 switch supports. Please don’t use other custom video settings besides of these. If done so, DKVM-IP1 switch may not be able to detect them. Resolution (x, y) 640 x 350... -
Page 73: Rack Mount Kit Installation Diagram
D. Rack mount kit installation diagram...