Table of Contents
Available languages
Available languages
Owner's Manual
IMPORTANT SAFETY
INSTRUCTIONS
READ AND SAVE THESE
SAFETY INSTRUCTIONS
BEFORE USING THIS FAN
When using electrical appliances,
basic precautions should always be
followed to reduce the risk of fire,
electric shock, and injury to
persons, including the following:
1.
Use this fan only as described in this
manual. Other use not recommended
as it may cause fire, electric shock or
injury to persons.
2.
This product is intended for
household use ONLY and not for
commercial, industrial or outdoor use.
3.
To protect against electric shock, do
not place fan in window, immerse
unit, plug or cord in water or spray
with liquids.
4.
This appliance has a polarized plug
(one blade is wider than the other). To
reduce the risk of shock, this plug is
intended to fit only one way in a
polarized outlet. If the plug does not
fit fully in the outlet, reverse the plug.
If it still does not fit, contact a
qualified electrician. DO NOT attempt
to defeat this safety feature.
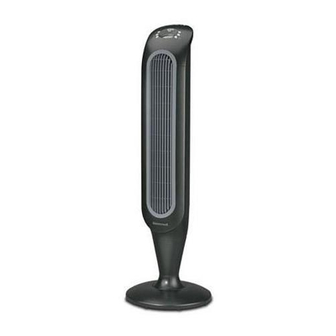
TOWER FAN
EFY-041 Series, EFY-045 Series
EFY-047 Series, HY-041 Series
HY-047 Series, HY-048 Series
5.
Close supervision is necessary when
any appliance is used by or near
children.
6.
Turn the fan OFF and unplug the fan
from the outlet when not in use, when
moving the fan from one location to
another and before cleaning.
7.
To disconnect the fan, first turn the
unit OFF, grip the plug and pull it
from the wall outlet. Never pull the
plug by the cord.
8.
Do not operate the fan in the presence
of explosive and/or flammable fumes.
9.
Do not place the fan or any parts near
an open flame, cooking or other
heating appliance.
10. Do not operate the fan with a
damaged cord or plug or if the
product malfunctions, is dropped or
damaged in any manner (see
warranty).
11. Avoid contact with moving fan parts.
12. The use of attachments not
recommended by the manufacturer
may be hazardous.
13. Place the fan on a dry level surface.
14. Do not hang or mount fan on a wall or
ceiling.
15. Do not operate if the fan housing is
damaged.
16. A loose fit between the AC outlet
(receptacle) and plug may cause
overheating and a distortion of the
plug. Contact a qualified electrician to
replace loose or worn outlet.
WARNING: To Reduce The Risk of
Fire or Electric Shock, Do Not Use
This Fan With Any Solid-State
Speed Control Device.
Table of Contents

Related Manuals for Honeywell HY-047B - Fresh Breeze Tower Fan


Summary of Contents for Honeywell HY-047B - Fresh Breeze Tower Fan
-
Page 1: Important Safety Instructions
13. Place the fan on a dry level surface. injury to persons. 14. Do not hang or mount fan on a wall or This product is intended for ceiling. household use ONLY and not for 15. -
Page 2: Assembly For Low/Tall Fan Height Option
4 round extrusions (Fig. 1, Item A) into the adjacent circles of the connecting piece. (Fig. 1, Item B) • Place the power cord through the center of the 2 halves of the base assembly. Base Assembly B. - Page 3 (Fig. 11) E. Securing the Cord to the Base • With the fan still on its side, locate the cord holding bracket on the bottom of the base. • Gently pull any slack out of the power cord, place the power cord securely in the holding bracket and secure the power cord bracket over the power cord.
-
Page 4: Battery Installation/Replacement
BATTERY INSTALLATION/REPLACEMENT INSTRUCTIONS A. Separate the front and rear housing by inserting a small coin into the two recessed slots located on the bottom of the remote (Fig 14). Twist the coin until the housings separate. Pull the remote open, separating the halves (Fig. 15). This will automatically force the lens cover to dislodge. -
Page 5: Fan Operation (Hy-041)
Press the Oscillation button again to turn the Oscillation feature off. Timer The Timer can be set in two hour increments. Choose from 2, 4, 6, or 8 hour settings by performing the following function: • 2 hours: Press the Timer button ( ) once. -
Page 6: Remote Control Operation (Efy/Hy-041)
Note: When the fan is turned off and restarted using the Power button, it will operate in the same speed setting that it was last set to. If unplugged, the fan will reset to start on High speed when turned on again. -
Page 7: Fan Operation (Efy-045/047 And Hy-047/048)
Note: The temperature set mode will automatically disengage once the Timer Mode is activated. The LCD screen will display a default timer setting of 10 hours. To set the timer, use the Up and Down buttons to set the timer off function between 1 and 12 hours in 1 hour increments. - Page 8 Mode. In this mode your fan will operate based on the temperature and timer settings set previously in A and B. If you have not set one of your modes, you may press the Temp/Timer Mode button a fourth time to start over and follow instructions A and B.
-
Page 9: Remote Control Operation (Efy-045/047/048)
• Low Fan Speed: Breeze Mode will alternate between low and off setting B. Press the Breeze Mode button a second time to operate the fan in high Breeze setting ( ). This will operate the fan in a random high/medium/low pattern regardless of the speed setting. -
Page 10: Cleaning (Efy-045/047/Hy-047/048)
• Once filter has been cleaned let it dry completely before placing back in fan. Do not wring, bend or pull on the filter as this may cause damage. • Once the filter is completely dry, replace the filter and firmly snap rear grille cover back in place. - Page 11 CLEANING AND STORAGE EFY-045 SERIES • Be sure the fan is turned off and the power cord is unplugged from the outlet. • Use only a soft, damp cloth to gently wipe the outer surfaces of the fan clean. • To clean between the grilles, we recommend using a pipe cleaner, flexible dustwand, vacuum cleaner or compressed air to gently remove the dust.
- Page 12 Or visit our website at: www.kaz.com NOTE: IF YOU EXPERIENCE A PROBLEM, PLEASE CONTACT CONSUMER RELATIONS FIRST OR SEE YOUR WARRANTY. DO NOT RETURN TO THE ORIGINAL PLACE OF PURCHASE. DO NOT ATTEMPT TO OPEN THE MOTOR HOUSING YOURSELF, DOING SO MAY VOID YOUR WARRANTY AND CAUSE DAMAGE TO THE FAN OR PERSONAL INJURY.
- Page 13 Régler le ventilateur à la position OFF et le débrancher quand il ne sert pas ou avant de le déplacer ou de le nettoyer. Pour débrancher le ventilateur, régler d'abord la IMPORTANTES commande à...
- Page 14 REMARQUE : L’appareil est plus stable lorsqu’on n’utilise pas la rallonge. A. Assemblage du socle • Place the power cord through the center of the 2 halves of the pedestal assembly. • Line up the left and right pedestal assembly and firmly snap together.
- Page 15 (Fig. 8) • En procédant avec soin, tourner le ventilateur sur son flanc. • Fixer solidement l’assemblage de la base au socle en insérant les 3 vis à oreilles sous la base et en les serrant (Fig. 9).
- Page 16 INSTRUCTIONS D’INSTALLATION ET DE REMPLACEMENT DES PILES A. Séparer la partie avant de la partie arrière de la télécommande en insérant une petite pièce de monnaie dans les deux fentes encastrées situées au bas de la télécommande (Fig. 14). Tourner la pièce de monnaie jusqu'à ce que les deux parties du boîtier se séparent. Ouvrir la télécommande en séparant les deux moitiés (Fig.
- Page 17 ). Le ventilateur fonctionnera selon un cycle d’intensité aléatoire élevée/moyenne/basse, indépendamment du réglage de la vitesse. C. Appuyer une troisième fois sur le bouton du mode « Brise » pour désactiver le mode « Brise ». Oscillation Pour mettre en marche la fonction d’oscillation, appuyer une fois sur le bouton d’oscillation ( Appuyer de nouveau sur ce bouton pour arrêter la fonction d’oscillation.
- Page 18 « Brise » à intensité élevée. Le ventilateur fonctionnera selon un cycle d’intensité aléatoire élevée/moyenne/basse, indépendamment du réglage de la vitesse. C. Appuyer une troisième fois sur le bouton du mode « Brise » pour désactiver le mode « Brise ». Oscillation Pour mettre en marche la fonction d’oscillation, appuyer une fois sur le bouton d’oscillation (...
- Page 19 à cristaux liquides, et la température ambiante désirée s’affiche. Le réglage de la température par défaut est de 23°C (74 °F). Pour changer le réglage de la température, appuyer sur les boutons marqués d’une flèche pointant vers le haut ou vers le bas ( ).
- Page 20 « Brise » à intensité élevée. Le ventilateur fonctionnera selon un cycle d’intensité aléatoire élevée/moyenne/basse, indépendamment du réglage de la vitesse. C. Appuyer une troisième fois sur le bouton du mode « Brise » pour désactiver le mode « Brise ». Changement de l’affichage, de °F à °C Il suffit de presser simultanément et de tenir pendant 2 secondes les boutons marqués des...
- Page 21 « Brise » à intensité élevée. Le ventilateur fonctionnera selon un cycle d’intensité aléatoire élevée/moyenne/basse, indépendamment du réglage de la vitesse. C. Appuyer une troisième fois sur le bouton du mode « Brise » pour désactiver le mode « Brise ».
- Page 22 Éviter de tordre le filtre, de le plier ou de l’étirer, cela pourrait l’endommager. • Une fois que le filtre est complètement sec, le replacer dans le ventilateur et bien insérer en place la grille arrière.
- Page 23 • Pour nettoyer entre les grilles, utiliser un cure-pipe, un plumeau flexible, un aspirateur ou de l’air comprimé pour enlever délicatement la poussière. • ÉVITER de plonger le ventilateur dans l’eau ou de laisser de l’eau s’infiltrer dans le boîtier du moteur.
- Page 24 REMARQUE : EN CAS DE PROBLÈME, CONTACT LA SERVICE À LA CLIENTÈLE PREMIÈREMENT OU CONSULTER LA GARANTIE. NE PAS RETOURNER L'APPAREIL À L'ENDROIT OÙ IL A ÉTÉ ACHETÉ. NE PAS TENTER D’OUVRIR LE BOÎTIER DU MOTEUR SOI-MÊME; CE QUI POURRAIT ANNULER LA GARANTIE ET RISQUERAIT D’OCCASIONNER DES DOMMAGES AU VENTILATEUR AINSI QUE DES...
- Page 25 LEA ESTAS INSTRUCCIONES ANTES de calefacción 10. No use el ventilador si el enchufe o el cable de DE USAR SU VENTILADOR Y alimentación están dañados. Tampoco debe usar el aparato si muestra señales de mal CONSÉRVELAS...
- Page 26 • Alinee la pieza derecha e izquierda del pedestal y encájelas firmemente la una en la otra (Fig. 6). B. Ensamblaje de la base Fig. 6 • Coloque el cable de alimentación en el centro de las 2 mitades de la base. Ensamblaje del pedestal...
- Page 27 . Sostenga Fig. 9 la base firmemente y gire el pedestal en el sentido de las agujas de un reloj para bloquear el ventilador en su sitio (Fig. 10). • Pour fixer solidement le socle au ventilateur vertical, insérer une vis à...
- Page 28 14). Gire la moneda hasta que ambas partes se separen. Abra el mando a distancia, separando ambas mitades (Fig. 15), el comparimiento para pilas se saldrá. B. Coloque dos pilas AAA en el mando a distancia guiándose por las guías de las ranuras incrustadas (Fig. 16).
- Page 29 • Si el ventilador está a velocidad baja, el modo Brisa alternará entre la velocidad baja y parada. B. Pulse por segunda vez el botón del modo Brisa para que el ventilador funcione en modo Brisa a intensidad elevada ( ).
- Page 30 • Si el ventilador está a velocidad baja, el modo Brisa alternará entre la velocidad baja y parada. B. Pulse por segunda vez el botón del modo Brisa para que el ventilador funcione en modo Brisa a intensidad elevada. El ventilador funcionará siguiendo un ciclo de intensidad aleatoria elevada / media / baja, sea cual sea la velocidad seleccionada.
- Page 31 La segunda lámpara es del transmisor del mando a distancia. Para guardar el mando a distancia: Cuando no lo use, guarde el mando a distancia en la sección empotrada detrás del panel de mandos. FUNCIONAMIENTO DEL MANDO A DISTANCIA - SERIES EFY-045, EFY-047, HY-047 Y HY-048 Puesta en marcha y control de velocidad A.
- Page 32 Al pulsar este botón, el ventilador funcionará según los ajustes de temperatura y temporizador que haya realizado previamente como se indica en las etapas A y B. Si no ha ajustado uno de estos modos, pulse por cuarta vez el botón Modo para volver a empezar siguiendo las instrucciones A y B.
- Page 33 • Si el ventilador está a velocidad elevada, el modo Brisa alternará entre la velocidad elevada y media. • Si el ventilador está a velocidad media, el modo Brisa alternará entre la velocidad media y baja. • Si el ventilador está a velocidad baja, el modo Brisa alternará entre la velocidad baja y parada B.
- Page 34 • NO sumerja el ventilador en el agua, ni deje que se infiltre agua en el cajetín del motor. • NO use gasolina, disolvente para pintura ni ningún otro producto químico para limpiar el ventilador.
- Page 35 • NO sumerja el ventilador en el agua, ni deje que se infiltre agua en el cajetín del motor. • NO use gasolina, disolvente para pintura ni ningún otro producto químico para limpiar el ventilador.
- Page 36 SERVICIO A LA CLIENTELA Envíe sus preguntas comentarios a: Kaz, Incorporated • Consumer Relations Dept. • 250 Turnpike Road, Southborough, MA 01772 USA Por favor, especifique el número de modelo. Llámenos sin costo alguno al 1 800 332-1110 Correo electrónico : [email protected] O visite nuestro sitio Web: www.kaz.com...