Table of Contents
Quick Links
Table of Contents

Related Manuals for Simrad HALO 5000


Summary of Contents for Simrad HALO 5000
- Page 1 HALO 5000 ® Service manual English www.navico-commercial.com Scan for more info...
- Page 3 ®Reg. U.S. Pat. & Tm. Off, and ™ common law marks. Visit www.navico.com/intellectual-property to review the global trademark rights and accreditations for Navico Group and other entities. • Navico is a trademark of Navico Group. ® • Simrad is a trademark of Kongsberg Maritime AS, licensed to Navico Group. ® • HALO is a registered trademark of Navico Group.
- Page 4 Persons authorized to operate, maintain, and troubleshoot the system are instructed and trained by Simrad. Persons operating or servicing systems must be familiar with the general safety regulations and specific safety systems, and they must have passed all the required training.
-
Page 5: Table Of Contents
CONTENTS 6 Component overview 6 HALO 5000 pedestal 7 Preventive maintenance 7 External radar pedestal inspection 7 Internal radar pedestal inspection 9 Diagnostics 9 R5000 PSU LED indicator lights 10 RI-50 LED indicator lights 14 Troubleshooting 17 Azimuth wiring 17 Optical sensor 18 Transceiver module power LEDs 18 Ethernet LEDs 18 Heat pipe 19 Performance monitor module wiring 19 Performance monitor antenna wiring... -
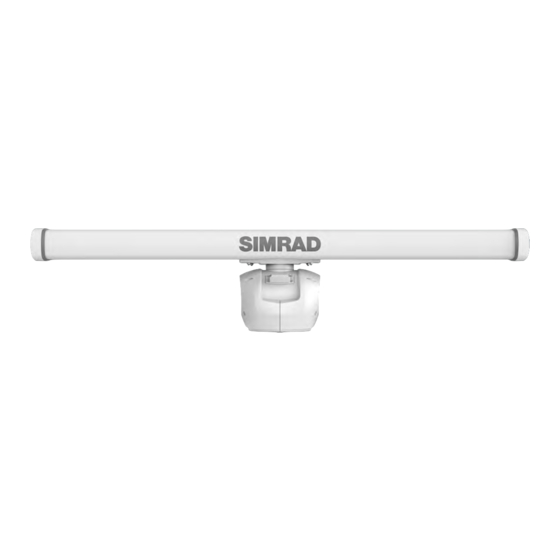
Page 6: Component Overview
COMPONENT OVERVIEW HALO 5000 pedestal G H I Description Antenna platform Performance monitor antenna Transceiver module Performance monitor module Main gear Motor and gearbox assembly Ethernet plug Safety switch Power plug PAGE | 6... -
Page 7: Preventive Maintenance
PREVENTIVE MAINTENANCE Follow the procedures that are described in this chapter to ensure the radar system operates at its optimum. Note: All work performed on the radar must be recorded in the unit log book. ¼ External radar pedestal inspection The operation is performed twice a year. - Page 8 General cleaning Internal cleaning is only necessary when there is visible buildup of dirt. • Use isopropyl alcohol if necessary. • Use a soft cloth to dry damp surfaces. Final steps 1 Grease the fastening screws to prevent corrosion and ease future removal. 2 Apply a small amount of silicone grease to the O-ring to refresh the water sealing.
-
Page 9: Diagnostics
DIAGNOSTICS R5000 PSU LED indicator lights LED lights on the front of the R5000 PSU communicate its operating status. 52 V DC 24 V DC (1) 24 V DC (2) 52V DC 24V DC (1) 24V DC (2) Status Possible cause Action Red main switch Normal... -
Page 10: Ri-50 Led Indicator Lights
RI-50 LED indicator lights LED lights on the front of the RI-50 communicate its operating status. Color Indication Possible cause Action Power Green Power is applied Normal operation Not applicable steady No supply voltage Supply voltage (24 V DC) missing •... - Page 11 Color Indication Possible cause Action Fault Over temperature The internal temperature > than • Ensure air is able to 90° C (194° F). flow freely around ⚠ the RI-50. WARNING: The heat sink case • Switch off RI-50, may be too hot to touch. allow to cool, and check again.
- Page 12 Color Indication Possible cause Action Fault The RI-50 detected voltage on Replace the RI-50. Warning (flashing) its output before turning on. If the radar was only off for a short time, residual voltage is normal. However, it can also indicate a faulty RI-50 output switch.
- Page 13 Color Indication Possible cause Action Status Green Normal operation Output voltage > 45 V. The radar will operate regardless of any fault or warning indication. Green/ Wrong or no radar connected Output voltage 16 V to 45 V Check output voltage. orange fast flashing...
-
Page 14: Troubleshooting
TROUBLESHOOTING Error Description Recommendation Action 1 Action 2 Code 0x00001 Persistence Radar will revert defaults. Re-enter your Yes Replace the corrupt settings including installation settings. Does transceiver the alarm continue? module. Finished 0x10001 Zero bearing fault The azimuth reference is missing. Open Yes Replace the Contact service. - Page 15 Error Description Recommendation Action 1 Action 2 Code 0x1000D PA soft over heat The power amplifier temperature is too Yes Check the heat Replace the high. Restart the pedestal, wait 5 minutes pipe connection transceiver and let the pedestal work for at least 1 hour. Refer to “Heat module.
- Page 16 Error Description Recommendation Action 1 Action 2 Code 0x10021 Performance The performance monitor unit does not Yes Replace the Replace the monitor system communicate with the transceiver module. performance transceiver failure Check digital data wiring, is it intact? Refer monitor module. module.
-
Page 17: Azimuth Wiring
Azimuth wiring The azimuth and performance monitor module cables are tied together and routed under the pedestal thermal flange. The cables are held in place with cable tie screws. Optical sensor The optical sensor is on the right side of the main shaft, between the tray and the drive gear accessible via the port side of the radar pedestal. -
Page 18: Transceiver Module Power Leds
Transceiver module power LEDs On the port side of the radar, the green and red LEDs within the left side of the transceiver module are illuminated to indicate the module is powered. Ethernet LEDs Green LEDs on the R5000 processor Ethernet port indicate data communication. Heat pipe The heat pipe is preassembled and attached to the transceiver module. -
Page 19: Performance Monitor Module Wiring
Performance monitor module wiring The azimuth and performance monitor module cables are tied together and routed under the pedestal thermal flange. The cables are held in place with cable ties screw posts. Performance monitor antenna wiring The performance monitor antenna and cable are one assembly. Do not disassemble. The RF cable is disconnected from via the SMA connector on the transceiver module. -
Page 20: Fault Repair
FAULT REPAIR Note: Maintenance must only be carried out after the equipment has been switched off. Before commencing with repair ¼ work, ensure the spare part is available and verified in good condition. ⚠ The replacement operations must be carried out exclusively by skilled personnel with appropriate WARNING: equipment training. -
Page 21: Transceiver Module Replacement
14 Reconnect the motor wiring to the transceiver module, and ensure that all cables are properly fixed with cable ties. 15 Check that O-ring is correctly seated in the end cap before closing the pedestal. 16 Use the 5 mm Allen key to tighten the four captive screws in the endcap. -
Page 22: Performance Monitor Module Replacement
10 Carefully extract the transceiver module. 11 Remove the 2 screws (B) with a 90° 2.5 mm Allen key. ® 12 Loosen the 2 internal screws (C) with a 90° 2.5 mm Allen key. ® 13 Remove the performance monitor module. Install new transceiver module 14 Slide performance monitor module under 2 screws (C) and tighten with 90º... -
Page 23: Performance Monitor Antenna Replacement
Procedure 1 On the electric switchboard, switch OFF the radar main breaker, and attach a card stating: “WORK IN PROGRESS - DO NOT SWITCH ON”. 2 On the R5000 PSU, switch the power switch to the OFF position, and attach a card stating: “WORK IN PROGRESS - DO NOT SWITCH ON”. - Page 24 Procedure 1 On the electric switchboard, switch OFF the radar main breaker, and attach a card stating: “WORK IN PROGRESS - DO NOT SWITCH ON”. 2 On the R5000 PSU, switch the power switch to the OFF position, and attach a card stating: “WORK IN PROGRESS - DO NOT SWITCH ON”.
-
Page 25: Spare Parts
6 ft antenna 6.69 ft / 2039 mm / 80.28” 000-11465-001 4 ft antenna 4.70 ft / 1432 mm / 56.38” 000-16090-001 Spare HALO 5000 brick 000-16091-001 Spare HALO 5000 performance monitor antenna 000-16092-001 Spare HALO 5000 performance monitor module 000-16092-001 Spare HALO 5000 motor spare PAGE | 25... -
Page 26: System Diagram
SYSTEM DIAGRAM Transceiver internal interconnection diagram PAGE | 26... - Page 28 © 2023 Navico Group. All Rights Reserved. Navico Group is a division of Brunswick Corporation. ®Reg. U.S. Pat. & Tm. Off, and ™ common law marks. Visit http://www.navico.com/intellectual-property to review the global trademark rights and accreditations for Navico www.navico-commercial.com Group and other entities.