Table of Contents
Quick Links
Table of Contents

Related Manuals for HP f920 Series


Summary of Contents for HP f920 Series
- Page 1 f920x Kit Car Camcorder User Manual...
-
Page 2: Table Of Contents
Contents About this Guide..................3 Regulatory notices ..................3 Prohibition of co-location ................3 WEEE Notice ....................3 CE Regulatory Notice .................. 3 Notes on Installation ................... 4 Caution ......................4 Introduction ................7 Features ..................7 Package Contents ................7 Product Overview ................ - Page 3 Emergency Recording ..............21 Picture in Video ................21 Driving Safety ................22 3.4.1 Speed Cam Alert ..............22 3.4.2 Add Speed Point ..............23 3.4.3 Speed Limit Alert ............... 23 3.4.4 Driver Fatigue Alert ............24 3.4.5 LDWS ................. 24 3.4.6 FCWS .................
-
Page 4: About This Guide
About this Guide The content in this document is for information purpose and is subject to change without prior notice. We have made every effort to ensure that this User Guide is accurate and complete. However, no liability is assumed for any errors or omissions that may have occurred. -
Page 5: Notes On Installation
EU Health Protection: This equipment should be installed and operated with minimum distance 20cm between the radiator & your body. Notes on Installation 1. Please measure the front windshield viewing area, make sure not to block driver's front view, install the camcorder below the rearview mirror (the central, higher right position of the front windshield). - Page 6 signals cannot pass through solid materials (except glass). Tinted window will also affect the performance of the GPS satellite reception. GPS reception performance on each camcorder may differ. The camcorder cannot determine the accuracy of the positioning results from different hardware. The values displayed in this camcorder, such as speed and position, ...
- Page 7 Explosion Area or in a zone with a “Switch Off 2-way Radios” sign by switching off camcorders that may interfere with the radio frequency. HP Inc. is NOT responsible for the loss of any data/content during operation.
-
Page 8: Introduction
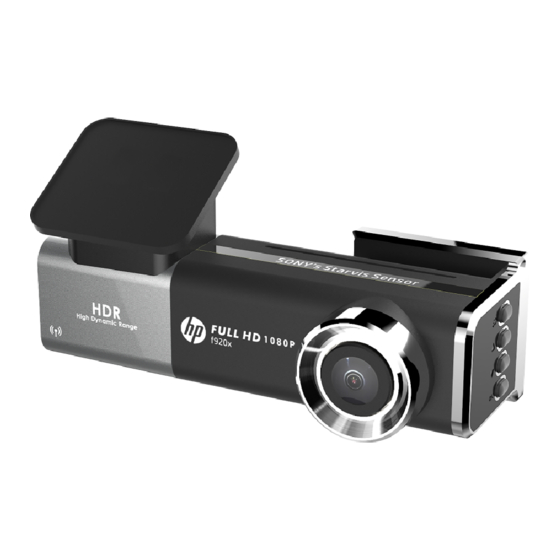
1 Introduction Thank you for purchasing this advanced Car Camcorder. This product is specifically designed for real time video recording when driving. 1.1 Features Front Cam: f920x • Full HD 1920*1080P • 1.3" TFT-LCD color screen • Wide angle lens •... -
Page 9: Product Overview
1.3 Product Overview Front Cam: f920x Item Item LED Indicator Microphone LCD Panel Wide Angle Lens Menu / Back Button Power button Add Speed Cam / Up Button ( Memory Card Slot Snapshot / Down Button Power Connector Emergency Recording / Confirm Button Rear Camera Connector Port Main Unit Mount... - Page 10 Rear Cam: RC5 Item Item Wide Angle Lens Camera Rotation Shaft Base Rear/ Front Image Switch Micro USB Connector Port LED Indicator...
-
Page 11: Getting Start
2 Getting Start 2.1 Storage Media 2.1.1 Insert the Memory Card Insert memory card with the golden pins facing forward and the screen of the camcorder facing down, see the picture as below: 2.1.2 Remove the Memory Card If the camcorder is power on, please power off first and wait for the procedure of switching off the camcorder completed before removing the memory card. -
Page 12: Install Front Cam
2.2 Install Front Cam Put the electrostatic sticker onto the suggested area on the windshield. Before putting the sticker, please wipe and clean the windshield. During the installation, please make sure the bubbles in between the sticker and the window are all gone. 1. -
Page 13: Exchange Front Cam's Mount
2.3 Exchange Front Cam’s Mount Push down the Adhesive Pad and take it out. Without Adhesive Pad, you can see 2 holes and 1 up-pointing arrow mark on the case. Make sure the up-pointing arrow mark on the T-buckle Mount is up. Flip over the T-buckle Mount, and put 2 hooks of the T-buckle Mount onto 2 holes of the case, and push it up until “click”... -
Page 14: Install Rear Cam
2.4 Install Rear Cam Adjust rear camera position as the picture shown. Please check the preview image is in right position (not upside down) before installation. If the preview image is upside down, please rotate the base 180∘to make it correct, or make sure switch is REAR or FRONT position. Rear view recording In-car recording Connect the USB cable with front cam and rear cam, power on front cam... -
Page 15: Connect Front And Rear Cam
2.5 Connect Front and Rear Cam Use only the USB cable in package to connect with front camera and rear camera. Plug phone jack into front camera’s 2CH port. (Front camera is power-off.) Plug the other end of USB cable (micro USB connector) to rear camera’s USB port. -
Page 16: Connecting To Power
2.6 Connecting to Power Use only the attached power adapter to activate the camcorder. Connect one end of power adapter to power connector port on the front cam. USB port input: DC 5V / 2A. Plug the other end of the power adapter to the cigarette lighter socket of your vehicle. -
Page 17: Powering The Camcorder On / Off
2.8 Powering the Camcorder On / Off 2.8.1 Auto Power On/Off If the camcorder is connected to the vehicle power supply, once start the car engine, the camcorder will automatically power on and start recording. Once the vehicle engine shuts down, the camcorder automatically saves the recording and turns off the power. -
Page 18: Set Time Zone
2.9.1 Set Time zone To set the time zone, do the following: Press the button to enter the OSD menu. Press the button to select Set Time zone, and then press the button for entering function menu. Press the button to set the current time zone, and then press button to complete setting. -
Page 19: Using The Car Camcorder
3 Using the Car Camcorder 3.1 Automatic Record Start the car engine, wait a few seconds to charge the camcorder, and then screen will light up and the camcorder will automatically power on and start recording. Recording will automatically stop when the engine is switched off. Note: 1. -
Page 20: The Recording Screen
3.1.1 The Recording Screen Icon Item Description Recording 00:10 Indicates the video current duration. Duration Indicates the current recording date Date / Time and time. During video recording, press the Menu Button button to enter the Menu. During video recording, press the Add Speed Point button to add a speed cam Button... - Page 21 Voice Record Indicates voice recording sets as off, the sound will not be recorded. icon Indicates the strength of satellite Satellite positioning. If the icon shows in red Positioning on screen, it indicates that the camcorder cannot complete the icon satellite positioning.
-
Page 22: Emergency Recording
3.2 Emergency Recording To Start the Emergency Recording, do the following: During Video Recording, press the button to enter emergency recording mode, the “Emergency” message will be shown immediately on the upper left corner of the screen, and the recorded file will be protected. -
Page 23: Driving Safety
3.4 Driving Safety The following driving safety function is for reference only. Drivers are advised to exercise discretion based on actual road conditions. Note: 1. The Driving Safety function is limited to triggering no more than two alarms at the same time. If a voice and alert message have been triggered, any other alarm will be ignored until either of the two is settled. -
Page 24: Add Speed Point
3.4.2 Add Speed Point You may customize speed cam positions in this product. When the GPS positioning is completed , press to add speed camera point manually. This product features a capacity of 50 speed cam positions. In case you are trying to add more than that the system prompts with message "Speed Position is full". -
Page 25: Driver Fatigue Alert
3.4.4 Driver Fatigue Alert If the Driver Fatigue Alert function is enabled, this product produces audible alert and screen message one hour after it has begun recording and repeats the alerts every half hour afterwards. To enable the Driver Fatigue Alert, do the following: Press the button to enter the OSD menu. - Page 26 Press the button to return to recording screen. After enabling LDWS, the screen will display traffic lane align icon , please adjust the camcorder so that the horizontal line and the eye level are overlapped and the slash lines are centered in the driving lane.
-
Page 27: Fcws
3.4.6 FCWS Once your car’s location is determined by GPS and the FCWS function is enabled, this camcorder produces audible alert and screen message when you drive at speeds over 60 km/h (37 mph) and are less than 20m away from the car in front of you. -
Page 28: Parking Mode
3.5 Parking Mode To monitor the vehicle when it is parked, you can activate Park Recording, or Motion and Collision Detection, or Timelapse. Before you activate Parking Mode, please install ACC cable through professional car service shop. Follow the steps below to change the settings for Parking Mode: Press the button to enter the OSD menu. -
Page 29: Motion And Collision Detection
3.5.2 Motion and Collision Detection - In normal loop recording mode, press and hold POWER key for 3 seconds, the screen will show message “Press OK to power off or enter Motion and Collision Detection after 10 sec.” Please wait for 10 seconds and the camcorder will enter Motion and Collision Detection automatically. -
Page 30: Collision Detection
3.6 Collision Detection If the Collision Detection function is enabled, this camcorder begins emergency recording once it detects any collision. Sensitivity of the Collision Detection function is set to Normal by default, if user wants to change the settings of Collision Detection, do the following: Press the button to enter the OSD menu. -
Page 31: Playback Screen
3.8 Playback Screen Icon Item Description File Number / Total Indicates of the total number of files. 1 / 30 File Press the button to return preview screen of video or picture. Return Button Press the button repetitively to return recording screen. Previous File Press button to view previous... -
Page 32: Deleting Files
3.9 Deleting Files To delete file(s), perform the following steps: Press the button to stop recording and enter the main Menu. Press the button to select File Deletion and press the button to confirm. Press the button to select folder and press the button to confirm. -
Page 33: Initial Set Up Go Dashcam Application
4 Initial set up Go Dashcam application 4.1 Download and install The camcorder allows you to connect to the mobile devices via the App. When using for the first time, install the [Go Dashcam !] App for your mobile device. Download Go Dashcam ! App from Google Play or App Store. -
Page 34: Wi-Fi Connecting
4.2 Wi-Fi connecting Press the Power button to switch on the camcorder. Enter Menu and go to Wi-Fi option; choose “ON” to activate the wireless network. The camcorder’s screen will display Wi-Fi Device ID and Password. Using the Wi-Fi function of your mobile device, search for the camcorder ID “hp_f920x_123456”... -
Page 35: Using The Go Dashcam Application
5 Using the Go Dashcam application Touch [Go Dashcam !] icon to activate the application. The main screen will pop up. Follow the below instruction to operate this application. -
Page 36: Camera Preview, Record, Snapshot
5.1 Camera preview, record, snapshot You can use this feature to preview, record or take snapshot. 1. The mobile device will display camcorder’s preview screen. The camcorder will lose control and screen will show ”Network Streaming”. Please use Go Dashcam ! app to operate the camcorder. icon Description Start/stop recording... -
Page 37: Playback, Delete, Download
5.2 Playback, delete, download You can use this feature to playback or delete the file saved in camcorder, or to download the file from camcorder to your mobile device. Touch the icon [Video playback] or [Picture playback]. The files saved in the camcorder will be displayed on your mobile device. Camcorder will stop recording for a few seconds until your mobile device finishes reading the saved files from camcorder, and screen will show ”Network Playback”. - Page 38 Icon Description Switch front and rear camcorder Download the file from camcorder to your mobile device Delete Exit Note: 1. If you find the video playback without audio, please check if you turn on Voice Record on the menu. If you do turn it on, it means the mobile device itself doesn’t support the video decoding.
-
Page 39: Local Album
5.3 Local album You can use this feature to playback or delete the file that you download to your mobile device. Touch icon [Local Album]。 Pick up the file that you want to playback. The downloaded videos or pictures will be saved in the album of your mobile device, at the mean time it will create a new folder “Go Dashcam !”. -
Page 40: Camera Setting
5.4 Camera Setting You can use this feature to set up your car camcorder. Touch icon [Camera Setting]. Refer to the below table for details of menu items and available menu options. Menu option Description Available option 1080p 30fps HDR 1080p 27.5fps HDR Set the desired video Resolution... -
Page 41: Adjusting The Settings
6 Adjusting the Settings 6.1 Using the Menu You can customize the general settings via the on-screen display (OSD) menus. Press the button to enter the OSD menu. Press the button to select menu item, and then press the button for entering function menu. Press the button to select or adjust the value, and then press button to confirm setting. - Page 42 Menu option Description Available option Add Speed Point: The satellite positioning will manually add speed camera location. You can add up to 50 speed camera Speed Position locations to the built-in Add Speed Point / Delete Last Management system. Position / Delete All Position Delete Last Position: Delete the last speed camera point.
- Page 43 Menu option Description Available option Set LCD off time. Camcorder screen will be off after a set time if no operation is detected On/ Turn off after 7 sec / Turn LCD Setting during the standby or record off after 1min/ Turn off after mode.
- Page 44 Menu option Description Available option Once your car’s location is determined by GPS and the LDWS function is enabled, this camcorder produces audible LDWS On / Off alert and screen message when you drive off of or change lanes at speeds over 70 km/h (43 mph).
-
Page 45: Supercar 2.0
7 SuperCar 2.0 Please visit this link https://ftp.digilife.com.tw/SuperCar_2.0/SuperCar_2.0.zip to download video/GPS player, SuperCar 2.0. Item Item Front Camera Playback Playback Duration Browse File G-sensor Value Snapshot Rear Camera Playback Fast Rewind Software Version Play / Pause Map (driving route) Fast Forward File list Volume Change Language/Map... -
Page 46: Specifications
8 Specifications Front Cam: f920x Item Description Image Sensor 1/2.8” Sony’s Starvis CMOS sensor 1920 (H) x 1080 (V) Effective Pixels Storage Media Support microSD class 10 and 16GB micro SD card (up to 128GB) LCD Display 1.3" TFT LCD color screen Lens Wide Angle Fixed Focus lens F1.8 Focus Range... - Page 47 Item Description Best Working 0° ~ 45° C Temperature Operating Humidity 20 ~ 70% RH Storage Temperature -20° ~ 70° C Dimensions 93.8 x 48.9 x 40 mm Weight Approx. 76g (without memory card) Built-in IEEE 802.11g/n(HT20) Wi-Fi chip: RTL8188FTV Frequency range 2412~2462MHz Wi-Fi Channel...