
Related Manuals for GE FPO CG400


Summary of Contents for GE FPO CG400
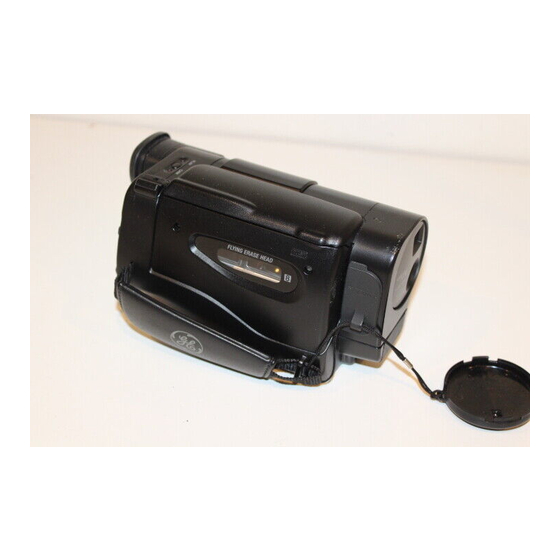
- Page 1 All manuals and user guides at all-guides.com CG400 Camcorder User’s Guide We bring good things to life.
-
Page 2: Safety Precautions
INSIDE. IF YOU SPILL LIQUID ON THE CAMCORDER OR ADAPTER/CHARGER, DISCONNECT THE AC ADAPTER/CHARGER’S POWER CORD TO PREVENT POSSIBLE FIRE OR SHOCK HAZARD AND CONSULT AUTHORIZED SERVICE PERSONNEL. MOISTURE CAN DAMAGE INTERNAL PARTS. REFER ALL SERVICE TO AUTHORIZED GE CAMCORDER SERVICENTER PERSONNEL ONLY. - Page 3 All manuals and user guides at all-guides.com CAUTION: READ “IMPORTANT SAFETY INSTRUCTIONS FOR AC ADAPTER/CHARGER” ON THE NEXT PAGE BEFORE USING THE AC ADAPTER/CHARGER. CAUTION: MAINTAIN ELECTRICAL SAFETY. POWERLINE-OPERATED EQUIPMENT OR ACCESSORIES CONNECTED TO THIS UNIT SHOULD BEAR THE UL LISTING MARK OR, IF PURCHASED AND USED IN CANADA, THE C-UL OR CSA CERTIFICATION MARK ON THE ACCESSORIES THEMSELVES AND SHOULD NOT HAVE BEEN MODIFIED SO AS TO DEFEAT THE SAFETY FEATURES.
- Page 4 Do not disassemble charger. Take it to rather than the cord when disconnecting an Authorized GE Camcorder the adapter/charger from the wall outlet. Servicenter when service or repair is Make sure the cord is located so that it required.
-
Page 5: Table Of Contents
All manuals and user guides at all-guides.com Table of Contents Product Registration......i Recording • Video Cassettes......18 • Recording Operation......19 Safety Precautions ......i-iii • PLAY/CAM Mode ......20 • Zooming.........20 • Viewfinder ........20 Recording and Traveling Tips ...2 • Flying Erase Head......20 •... -
Page 6: Recording And Traveling Tips
All manuals and user guides at all-guides.com Recording and Traveling Tips Recording Tips • In case of fire or theft, make a video • Be aware of video and audio recording of your home and contents to backgrounds. Background details store in a safe place. -
Page 7: Optional Accessories
All manuals and user guides at all-guides.com Optional Accessories We invite you to take a look at some great ideas for sparking creativity and adding to the fun of using your camcorder. The following pages have a selection of accessories to help make the process of recording and watching your videos more enjoyable. - Page 8 All manuals and user guides at all-guides.com Audio/Video Cables Optional AC088 Tripod AH069G 3-ft / Mounting the camcorder on a tripod, AH070G 5-ft such as AC088, will keep the camcorder These cables are steady. This tripod’s fluid-effect head shielded for connecting AUDIO and provides smooth camera pan and tilt.
-
Page 9: Accessory Order Form
All manuals and user guides at all-guides.com Order Form for Camcorder Model CG400 Description Part No. Price Qty. Total Soft Camcorder Case AC025A $ 59.95 Super Lightweight Tripod AC088 $ 39.95 75-300 Ohm Cable Transformer AH011 $ 1.90 RF Coaxial Cable (6-ft.) AH065G $ 6.99 RF Coaxial Cable (10-ft.) - Page 10 All manuals and user guides at all-guides.com Charge your order on your VISA or MasterCard by filling in below USE YOUR CREDIT CARD ® IMPORTANT: Copy complete account number from your VISA card My card expires: IMPORTANT: Copy complete account number from your MasterCard Copy Number My card...
- Page 11 All manuals and user guides at all-guides.com To order accessories, contact your local dealer. If a dealer is not nearby, you can also follow the directions below to order by telephone or direct-by-mail. United States and Canada Orders To place your order by phone, have your Visa or MasterCard ready and call the toll-free number listed below between 8AM and 8PM Eastern Standard Time.
-
Page 12: First-Time Operation
All manuals and user guides at all-guides.com First-Time Operation This section describes only the basic steps necessary to set up your camcorder to record. Refer to the other sections for detailed operation and feature options. Unpack the Camcorder and Accessories The items shown below are packed with your camcorder. -
Page 13: Use An Adapter/Charger Or Battery To Supply Power
All manuals and user guides at all-guides.com Use an Adapter/Charger or Battery to Supply Power Attaching the Adapter/Charger 1. Slide the OPEN-BATT button to open the battery compartment. Carefully open the compartment fully. 2. Insert the DC connecting cord from the DC output terminal on the AC adapter/charger to the DC input terminal on the camcorder. -
Page 14: Insert A Cassette
All manuals and user guides at all-guides.com Insert a Cassette 1. Press the EJECT button to open the EJECT cassette compartment. 2. Insert the cassette so the safety tab is at the top; the flap is at the bottom; and the tape window faces out. 3. -
Page 15: Review The Camcorder Controls
All manuals and user guides at all-guides.com Review the Camcorder Controls Viewfinder Lens BLANK Button Camera Lens EJECT Button AUDIO, VIDEO Playback Controls (located and DC OUT jacks under control door) OPEN-BATT Button Battery Compartment Handstrap Microphone Shoulder Strap Attachment Zoom Slide Control “W”... -
Page 16: Review Lcd Window Displays
Flashes when: Flashes when the video head is • Tape is at end clogged or dirty. Contact an • Moisture in the camcorder or Authorized GE Camcorder cassette Servicenter. • No cassette in camcorder • You try to record on a 4. -
Page 17: Powering Your Camcorder
All manuals and user guides at all-guides.com Powering Your Camcorder This section describes three ways to supply power to your camcorder: AC Adapter/Charger Battery Car Cord Adapter (Optional) Using the Adapter/Charger The adapter/charger lets you power your camcorder directly from standard household power. -
Page 18: Using The Battery
All manuals and user guides at all-guides.com Using the Battery The supplied battery pack is not charged and must be charged as described below before it can be used the first time. Tips: Conserve battery power by turning the camcorder off during short recording breaks. Use the small marker switch on the top of the battery to help you remember to recharge the battery. - Page 19 All manuals and user guides at all-guides.com Installing the Battery Battery Safety Precautions: • Do not short the battery’s terminals. • Do not attempt to disassemble or modify the battery. There are no user-serviceable parts inside. • Do not throw the battery into a fire or expose it to excessive heat–over 149ºF (65ºC).
- Page 20 All manuals and user guides at all-guides.com Battery Care and Storage Do not store a battery pack where it The operating time of the battery may can reach high temperatures. be shorter than normal even after a full charge: Remove the battery from the camcorder when it is not in use to •...
-
Page 21: Using The Optional Car Cord Adapter/Charger
All manuals and user guides at all-guides.com Using the Optional Car Cord Adapter/Charger This adapter/charger lets you power your camcorder from the cigarette lighter socket of a car, truck, or RV. It converts 24- or 12-volts to a 6.5-volt output. It can also charge the battery that came with your camcorder. -
Page 22: Recording
All manuals and user guides at all-guides.com Recording Video Cassettes We recommend that our cassettes be used with your camcorder. Use of poor quality or damaged tapes can contaminate the video heads. Head cleaning is not covered under warranty and is considered normal maintenance. Inserting or Removing Cassettes Caution: Insert the cassette so... -
Page 23: Recording Operation
All manuals and user guides at all-guides.com Recording Operation Only the basic steps were discussed in the “First Time Operation” section to set up your camcorder. This section explains in detail how to make a recording. Viewfinder Record-Pause Indicator (Red) Warning Indicator (Yellow) To Make a Recording:... -
Page 24: Play/Cam Mode
All manuals and user guides at all-guides.com Recording Features This section explains the features available to enhance your recordings. Zoom Slide Control T = Telephoto W = Wide Angle PLAY PLAY (Playback)/CAM (Recording) Viewfinder Mode The viewfinder enables you to see what This camcorder can be used for recording you are recording. -
Page 25: Blank Search
All manuals and user guides at all-guides.com STOP PAUSE BLANK BLANK PLAY F.FWD EJECT Blank Search Time Counter With the press of a button, the camcorder The time counter appears in the LCD advances through the tape for a blank window and shows the actual time section. -
Page 26: Playback
All manuals and user guides at all-guides.com Playback The basic playback features are described in this section of the manual. Before you can use these features, you must attach your camcorder to a TV (or VCR) to view the playback. Check order form on page 5 for optional accessories. Playback on TV (or VCR) with AUDIO/VIDEO IN Jacks To connect your camcorder to a TV monitor (or VCR) with AUDIO/VIDEO IN jacks,... -
Page 27: Playback On A Tv Using The Antenna Connector
All manuals and user guides at all-guides.com Playback on a TV Using the Antenna Connector To connect your camcorder to a TV without audio/video inputs, additional accessories are required for this connection. Back of TV STOP PAUSE BLANK FROM RF Coaxial Cable* PLAY F.FWD EJECT... -
Page 28: Playback Features
All manuals and user guides at all-guides.com Playback Features The playback features described below are used when you connect your camcorder to a TV with or without AUDIO/VIDEO jacks as described on pages 22 and 23. The buttons are located under the control panel on top of the camcorder. STOP PAUSE BLANK... -
Page 29: Care And Maintenance
• Do not use an adapter/charger or Authorized GE Camcorder Servicenter. batteries other than the ones specified for the camcorder. Use of the wrong • Do not aim your camcorder at the sun accessories may cause damage to the or other bright objects. -
Page 30: Trouble Checks
Before you call or take your camcorder to an Authorized GE Camcorder Servicenter, look below for the type of trouble you are experiencing. Then perform the simple checks and adjustments listed for that trouble. -
Page 31: Information To User
• Camcorder must be connected to a TV (or VCR) to see during playback video during playback. • The camcorder’s video head is clogged or dirty. Contact ) indicator an Authorized GE Camcorder Servicenter. flashing in LCD window Information to User This device complies with Part 15 of the FCC television reception, which can be determined Rules. -
Page 32: Specifications
All manuals and user guides at all-guides.com Specifications Camcorder Television system: NTSC, EIA Video Recording system: Rotating 2-head, helical-scan system Audio recording system: Rotating head, FM system Cassette type: 8 mm video cassette tape Tape speed: SP mode - Approx. 14.345 mm/sec. Maximum recording time: 120 minutes (P6-120 cassette) Image Sensor:... -
Page 33: Limited Warranty
All manuals and user guides at all-guides.com Limited Warranty What your warranty covers: • Ship the camcorder to an Authorized GE • Any defect in material or workmanship. Camcorder Servicenter. • Pay any charges billed to you by the For how long after your purchase: Servicenter for service not covered by the •... -
Page 34: Index (Alphabetical)
All manuals and user guides at all-guides.com Index Cassette Safety Tab ....18 Cassettes, Inserting/Removing . . . 10,18 AC Adapter/Charger Charging the Battery ... . . 14 Attaching the . - Page 35 All manuals and user guides at all-guides.com Index Shoulder Strap Attachment Rings . . . 11 Solving Problems ... . . 26-27 PAUSE Button ....24 Specifications .
- Page 36 All manuals and user guides at all-guides.com For your nearest GE Dealer or Authorized Servicenter call toll-free in the U.S.A. 1-800-447-1700 Canadian Consumers – Your toll-free numbers are: English: 1-800-522-0338 French: 1-800-522-0445 If your camcorder needs service, please contact your dealer or the nearest Servicenter from the yellow pages.